Love this? Save it for later!
Share the inspiration with your friends
I’m not supposed to play favorites with recipes, but let’s be honest—we all have that one dish that makes us feel like a kitchen rockstar without breaking a sweat. For me, it’s these Crowd-Pleasing Mummy Pigs in a Blanket with Mustard Dip. The first time I made them, I was scrambling to put together a last-minute Halloween spread for my book club. I had exactly one roll of crescent dough, a pack of mini hot dogs, and about twenty minutes before people showed up. I remember standing there, staring at the fridge, thinking, “This is either going to be brilliant or a total disaster.”
Honestly, I’d always thought of pigs in a blanket as a kids’ party thing—cute, sure, but not exactly dinner-party material. But that night, I wrapped each little sausage in a strip of dough, gave them tiny mustard-dot eyes, and popped them in the oven. When my friend Sarah walked in and shrieked, “Oh my gosh, they’re mummies!”, I knew I’d stumbled onto something special. They disappeared in minutes, and everyone asked for the recipe before they even took off their coats.
These mummy pigs in a blanket have become my go-to for every gathering since—Super Bowl parties, Thanksgiving appetizers, even my cousin’s engagement party. There’s something about the combination of flaky, golden dough wrapped around a juicy little sausage that just works. And that mustard dip? It’s the perfect tangy counterpoint that makes grown-ups go back for thirds. You know that feeling when a dish just clicks—when it’s simple enough to throw together but impressive enough to steal the show? That’s exactly what we’re making today. Maybe you’ve been there, staring at a party platter thinking, “I need something fun but not fussy.” Well, friend, this is it.
Why You’ll Love This Recipe
Let me tell you why these little mummies have earned a permanent spot in my entertaining rotation. After testing this recipe about a dozen times (my neighbors have become very willing taste-testers), I’ve dialed in every detail so you get perfect results every single time.
- Quick & Easy : From fridge to table in under 25 minutes. Seriously. When guests are on their way and you need something impressive fast, these are your lifeline.
- Simple Ingredients : You probably have everything already—crescent rolls, mini hot dogs, mustard, and an egg for the wash. No specialty grocery runs required.
- Perfect for Parties : Whether it’s Halloween, game day, or just a Tuesday night gathering, these little guys steal the spotlight. They’re fun without being fussy.
- Crowd-Pleaser : I’ve served these to kids, grandparents, picky eaters, and foodie friends. Every single person reaches for seconds. They’re universally loved.
- Unbelievably Delicious : That combination of flaky, buttery dough with the smoky, salty sausage, dipped in tangy mustard—it’s simple perfection. The texture contrast alone is worth the five minutes of prep.
What makes this version different from every other pigs-in-a-blanket recipe out there? It’s the little details. I’ve tested different dough brands, different wrapping techniques, and different baking times to find the sweet spot where the dough is golden and flaky but the sausage stays juicy. Plus, that mustard dip isn’t just an afterthought—it’s been adjusted and tweaked until it had just the right balance of tang and creaminess. This isn’t just another appetizer recipe; it’s the one that’ll have people asking, “Can you bring those mummy things to every party?”
And honestly? There’s something deeply satisfying about making something that looks like you spent way more time on it than you actually did. The mummy wrapping looks intricate, but it’s actually the easiest thing in the world. You get to look like a party-planning genius while barely breaking a sweat. That’s my favorite kind of recipe.
What Ingredients You Will Need
This recipe uses simple, everyday ingredients to create something that feels special. Most of these are pantry staples, which is exactly what you want when you’re hosting and time is tight.
For the Mummy Pigs in a Blanket
- 1 can (8 oz) refrigerated crescent roll dough — I prefer Pillsbury for consistent results, but any brand works. The key is getting the sheet-style dough if you can find it (it saves you from pressing the perforations together).
- 16 mini hot dogs or cocktail sausages — Look for the little ones, about 1.5 inches long. I’ve used Hebrew National and Oscar Mayer with great results. For a fancier option, try mini smoked sausages or even little andouille links.
- 1 large egg — For the egg wash that gives them that gorgeous golden-brown color. Room temperature works best, but cold is fine in a pinch.
- 1 tablespoon water — To thin out the egg wash so it brushes on smoothly.
- Mustard (yellow or Dijon) — For the mummy eyes. Yellow mustard gives that classic Halloween look, but Dijon adds a more sophisticated flavor. You’ll need just a tiny bit—maybe a teaspoon total.
For the Mustard Dip
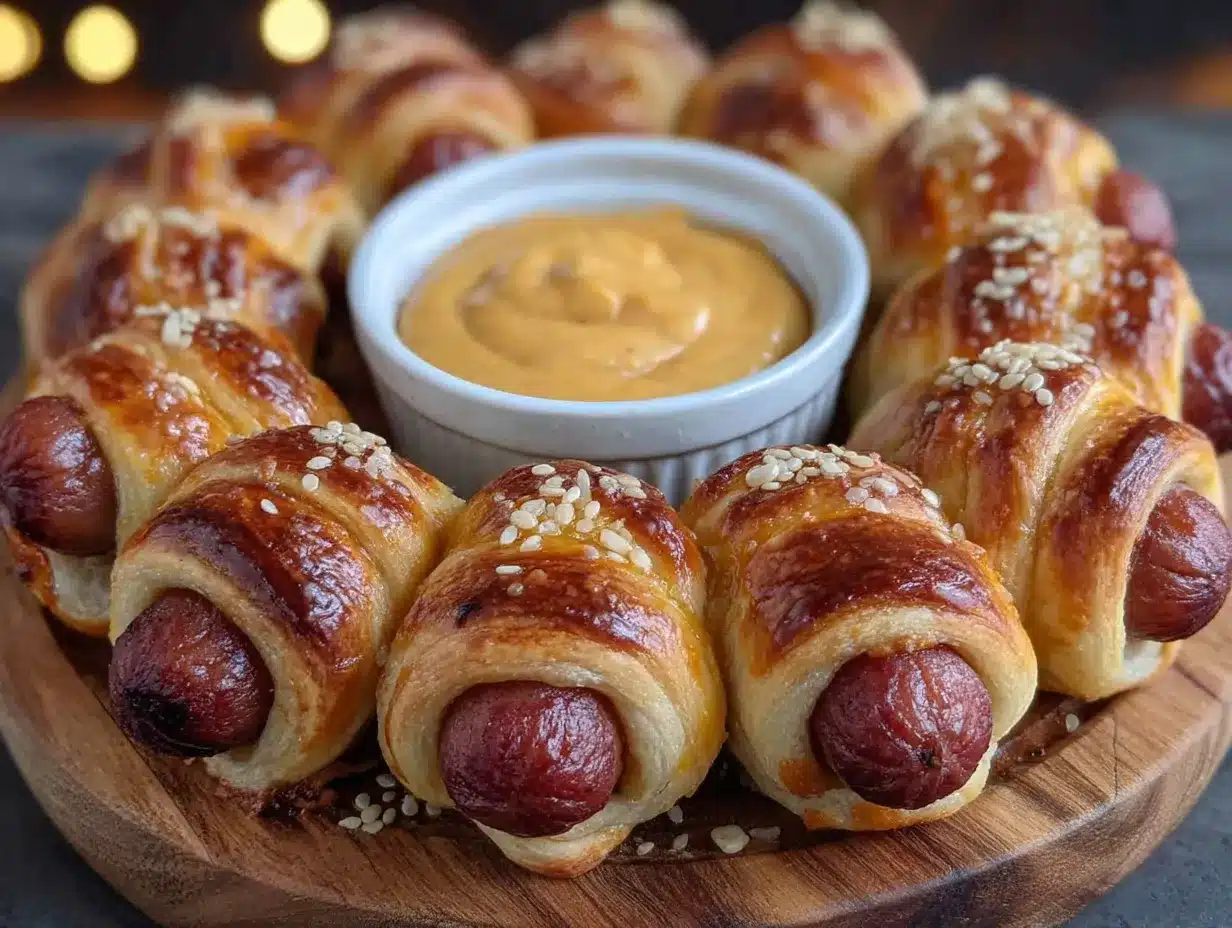
- 1/2 cup sour cream — Full-fat gives the creamiest texture, but light sour cream works too. (Adds richness and balances the tang)
- 1/4 cup mayonnaise — I recommend Hellmann’s or Duke’s for best flavor. This gives the dip its silky consistency.
- 2 tablespoons yellow mustard — The star of the show. Feel free to experiment with whole grain or spicy brown for different flavor profiles.
- 1 tablespoon Dijon mustard — Adds depth and a little sophistication. Don’t skip this—it makes the dip more complex.
- 1 teaspoon honey — Just a touch of sweetness to round out the tanginess. You can substitute maple syrup if that’s what you have.
- 1/2 teaspoon garlic powder — Optional, but I love the subtle savory note it adds.
- Pinch of salt and black pepper — To taste. Don’t oversalt—the sausages are already salty.
Ingredient Selection Tips: When choosing your mini hot dogs, look for ones that are uniform in size so they cook evenly. If you’re using cocktail sausages, pat them dry with a paper towel before wrapping—this helps the dough stick better. For the crescent dough, check the expiration date; fresher dough puffs up better. And here’s a little secret: if you can find the seamless crescent dough sheets (not the perforated triangles), your life will be so much easier. No pressing seams together!
Substitution Guidance: Vegetarian? Use plant-based cocktail sausages—they work beautifully. Want to go gluten-free? There are gluten-free crescent dough options available now, or you can use gluten-free puff pastry sheets. Dairy-free? Swap the sour cream for a plant-based version and use vegan butter for brushing instead of egg wash. The dip can be made with vegan mayo and dairy-free sour cream too.
Equipment Needed
One of the best things about this recipe is how little equipment it requires. You probably already have everything you need.
- Baking sheet — A standard half-sheet pan works perfectly. Line it with parchment paper or a silicone baking mat for easy cleanup.
- Sharp knife or pizza cutter — For cutting the crescent dough into strips. A pizza cutter makes this super quick, but a sharp chef’s knife works great too.
- Pastry brush — For applying the egg wash. If you don’t have one, a silicone basting brush works, or you can use a folded paper towel in a pinch.
- Small bowl — For whisking the egg wash.
- Toothpicks — For dotting on the mustard eyes. A toothpick gives you perfect control for tiny dots.
- Mixing bowl — For combining the dip ingredients.
- Whisk or fork — For mixing the dip until smooth.
Budget-Friendly Options: If you don’t have a pastry brush, honestly, just use your fingers to spread the egg wash—it works fine. No pizza cutter? A butter knife will do the job. I’ve made these in a friend’s kitchen with nothing but a butter knife and a fork, and they turned out perfect. Don’t let missing equipment stop you.
Personal Experience: I’ve tried making these on a dark non-stick baking sheet and on a light-colored one. The light-colored sheet gives you a better view of the browning, which helps prevent over-baking. Also, I learned the hard way that skipping the parchment paper means scrubbing baked-on egg wash—trust me, just use the parchment.
Preparation Method
Alright, let’s get these little mummies wrapped up and into the oven. The whole process takes about 15 minutes of active work, then 10-12 minutes of baking. Here’s exactly how to do it.
- Preheat your oven to 375°F (190°C). Line a baking sheet with parchment paper or a silicone baking mat. Getting the oven hot before you start is key—you want that dough to start puffing immediately.
- Prepare your egg wash. In a small bowl, crack the egg and add 1 tablespoon of water. Whisk until completely combined and slightly frothy. Set this aside near your work station.
- Open the crescent dough. Unroll the dough onto a clean cutting board. If you’re using the perforated triangle sheets, press the seams together gently with your fingers to create one solid sheet of dough. If you have the seamless sheet, you’re already ahead of the game.
- Cut the dough into strips. Using a sharp knife or pizza cutter, slice the dough lengthwise into 8 even strips, each about 1/2 inch wide. Then cut each strip in half crosswise, giving you 16 strips total—one for each sausage. Don’t worry if they’re not perfectly even; rustic is part of the charm.
- Wrap the mummies. Take one mini hot dog and place it at one end of a dough strip. Wrap the strip around the sausage, slightly overlapping as you go, leaving a small gap near the top for the “face.” The dough should look like bandages wrapped around a mummy. Don’t wrap too tightly—leave a tiny bit of space so the dough can expand as it bakes. Repeat with all 16 sausages.
- Arrange on the baking sheet. Place the wrapped mummies on the prepared baking sheet, spacing them about 1 inch apart. Make sure the seam side is facing down so they don’t unravel during baking.
- Apply the egg wash. Using your pastry brush, gently brush each mummy with the egg wash. Be thorough but not heavy-handed—you want a thin, even coating. This is what gives them that beautiful golden-brown color. (I missed this step once, and they came out pale and sad. Don’t skip it!)
- Bake. Place the baking sheet in the preheated oven and bake for 10-12 minutes, or until the dough is golden brown and puffed. The sausages should be heated through. Keep an eye on them after the 10-minute mark—ovens vary, and you want them golden, not burnt.
- Add the eyes. While the mummies are still warm (but not hot enough to burn your fingers), use a toothpick to dab a tiny dot of mustard in the gap you left for the face. Two dots per mummy, just like eyes. This is where they transform from wrapped sausages into adorable little mummies. My niece loves this part and insists on doing it herself.
- Make the dip. While the mummies bake, combine all the dip ingredients in a small mixing bowl: sour cream, mayonnaise, yellow mustard, Dijon mustard, honey, garlic powder, salt, and pepper. Whisk until smooth and well-combined. Taste and adjust seasoning—maybe a little more honey if you like it sweeter, or extra mustard if you want more tang.
- Serve immediately. Arrange the mummy pigs in a blanket on a platter with the mustard dip in a small bowl in the center. They’re best served warm, when the dough is still flaky and the sausages are juicy. Watch them disappear!
Sensory Cues: When the mummies are done, the dough should be a deep golden brown and feel firm to the touch. You’ll smell that amazing buttery, toasty aroma filling your kitchen. The sausages should be plump and hot—if you cut one open, steam should rise. The dip should be thick enough to coat a mummy without dripping, with a smooth, creamy texture.
Cooking Tips & Techniques
After making these mummy pigs in a blanket more times than I can count, I’ve picked up a few tricks that make the process smoother and the results better. Let me share what I’ve learned—including some mistakes I’ve made so you don’t have to.
The Dough Temperature Trap: Cold dough is your friend here. If the dough gets too warm and sticky, it’ll be harder to cut clean strips and they might tear when you wrap them. Work quickly, and if the dough starts feeling soft, pop it in the fridge for 5 minutes. I once tried to rush through this on a hot summer day, and the dough turned into a sticky mess. Lesson learned.
Wrapping Technique: Don’t stretch the dough as you wrap—just lay it around the sausage gently. If you pull it tight, the dough will shrink as it bakes and might split or look uneven. You want a relaxed wrap that leaves room for the dough to puff up. Think of it like wrapping a gift: snug but not tight.
Even Baking: Arrange the mummies with a little space between them—about an inch apart. If they’re too close together, they’ll steam instead of bake, and you won’t get that beautiful golden color. If you’re making a double batch, use two baking sheets and rotate them halfway through baking.
The Egg Wash Secret: Add a pinch of salt to your egg wash. It helps break down the egg and makes it easier to brush on evenly. Also, don’t skip the water—undiluted egg wash can be too thick and might leave splotchy brown spots. I learned this after a particularly ugly batch that looked like it had a sunburn.
Make-Ahead Strategy: You can assemble the mummies up to 24 hours in advance. Just arrange them on the baking sheet, cover tightly with plastic wrap, and refrigerate. Brush with egg wash right before baking. This is a lifesaver when you’re hosting—do the work the night before, then just pop them in the oven when guests arrive.
Timing and Multitasking: While the mummies are baking, make the dip and set out your serving platter. This way, everything comes together at the same time. If you’re serving other appetizers, these can sit at room temperature for about 30 minutes, but they’re really best within the first 15 minutes out of the oven.
Variations & Adaptations
One of the things I love about this recipe is how versatile it is. You can change it up based on what you have, who you’re serving, or what mood you’re in. Here are some variations I’ve tried and loved.
Spicy Southwest Mummies
Swap the mini hot dogs for mini chorizo links or spicy andouille sausages. Add a pinch of cayenne pepper to the dip and use chipotle mustard instead of yellow. The smoky heat is incredible, and it pairs perfectly with a cold beer. I made these for a game day party, and they were gone before the first quarter ended.
Vegetarian Mummies
Use plant-based cocktail sausages or even cheese sticks (cut into 2-inch pieces) for the filling. The cheese version is especially fun—the cheese gets melty inside the flaky dough. For the dip, try a vegan sour cream and mayo combo. My vegetarian friend couldn’t stop eating these, and she said they were better than the original.
Sweet & Savory Mummies
Brush the baked mummies with a little honey or maple syrup right when they come out of the oven. The sweet glaze combined with the salty sausage is absolutely addictive. For the dip, try a honey mustard version by doubling the honey and using all Dijon mustard. This variation is dangerous—you’ll eat way more than you planned.
Breakfast Mummies
Use breakfast sausage links instead of hot dogs. Serve with a maple syrup dip (just mix maple syrup with a little Dijon mustard) or even a cheese sauce. These are perfect for brunch parties or holiday mornings. I made them for Christmas brunch last year, and they were a huge hit with both kids and adults.
Air Fryer Adaptation
You can absolutely make these in an air fryer. Preheat to 350°F (175°C), arrange the mummies in a single layer in the basket (don’t overcrowd), and cook for 6-8 minutes, flipping halfway through. They come out extra crispy and flaky. The cooking time is shorter, so keep an eye on them. This is my go-to method when I’m only making a small batch.
Serving & Storage Suggestions
These mummy pigs in a blanket are designed to be the star of your appetizer spread, but they play well with others too. Here’s how to serve them like a pro.
Serving Temperature: Serve these warm, right out of the oven. The dough is at its flakiest and the sausages are at their juiciest when they’ve just finished baking. If you need to keep them warm for a party, arrange them on a platter and pop them in a 200°F (93°C) oven for up to 30 minutes. Just don’t cover them with foil—that’ll make the dough soggy.
Presentation Tips: Arrange the mummies on a large wooden board or a festive platter. Place the mustard dip in a small bowl in the center, surrounded by the mummies. For a Halloween party, scatter some candy corn or small pumpkins around the board for decoration. If you’re serving these for a non-Halloween gathering, they’re still adorable—just skip the spooky decorations and let the mummy shape speak for itself.
What to Serve Alongside: These pair beautifully with other finger foods. Try them with a cheese board, veggie sticks with ranch dip, or a simple salad. For drinks, they’re perfect with beer, cider, or even a crisp white wine like Sauvignon Blanc. If you’re serving a crowd, make a double batch—trust me, they go fast.
Storage Instructions: Leftover mummies (if you have any!) can be stored in an airtight container in the refrigerator for up to 3 days. The dough will lose some of its crispness, but they’re still delicious. To reheat, pop them in a 350°F (175°C) oven for 5-7 minutes, or in the air fryer at 350°F for 3-4 minutes. I don’t recommend microwaving—the dough gets rubbery and sad.
Freezer Instructions: You can freeze unbaked mummies for up to 2 months. Assemble them on a baking sheet and freeze until solid, then transfer to a freezer bag. When you’re ready to bake, place them on a lined baking sheet (no need to thaw), brush with egg wash, and add 2-3 minutes to the baking time. This is perfect for last-minute entertaining—just pull them out and bake.
Flavor Development: The mustard dip actually gets better after a day in the fridge. The flavors meld together and become more complex. Make it a day ahead of time for the best results. Just give it a good stir before serving.
Nutritional Information & Benefits
Let’s be real—these are a treat, not a health food. But knowing what’s in them helps you enjoy them mindfully. Here’s the breakdown for one mummy pig in a blanket (without dip).
| Nutrient | Amount per serving (1 mummy) |
|---|---|
| Calories | 85 |
| Total Fat | 5g |
| Saturated Fat | 2g |
| Cholesterol | 15mg |
| Sodium | 240mg |
| Total Carbohydrates | 7g |
| Protein | 3g |
Health Benefits: While this isn’t a health-conscious recipe, there are some redeeming qualities. The mini hot dogs provide a small amount of protein, and the mustard contains turmeric, which has anti-inflammatory properties. The sour cream in the dip offers calcium and probiotics. But honestly, the biggest benefit here is the joy of sharing good food with people you care about—that’s good for the soul.
Dietary Considerations: This recipe contains gluten (from the crescent dough), dairy (from the butter in the dough and the sour cream in the dip), and eggs. For gluten-free, use gluten-free crescent dough. For dairy-free, use vegan crescent dough and dairy-free sour cream. The sausages are typically gluten-free, but always check the label if that’s a concern. The dip can be made with vegan alternatives.
My Perspective: I believe in balance. These mummy pigs in a blanket are a celebration food—they’re for parties, holidays, and special occasions. Enjoy them without guilt, load up on veggies at your next meal, and savor every bite. Food is meant to bring joy, and these little guys deliver.
Conclusion
These Crowd-Pleasing Mummy Pigs in a Blanket with Mustard Dip are more than just an appetizer—they’re a conversation starter, a crowd-pleaser, and proof that you don’t need complicated techniques to create something memorable. Whether you’re hosting a Halloween party, a game day gathering, or just want to surprise your family with something fun, these little mummies deliver every single time.
I love this recipe because it’s flexible. You can make it your own—spicy, sweet, vegetarian, or classic. You can prep it ahead, bake it in an air fryer, or double it for a crowd. And that moment when you set the platter down and watch everyone’s faces light up? That’s pure magic. Honestly, that’s why I keep coming back to this recipe.
So go ahead—give these mummy pigs in a blanket a try. Customize them however you like, make them your own, and don’t forget that mustard dip. When you do, come back and let me know how they turned out. Did you add a twist? Did the kids help with the eyes? I’d love to hear your stories. Share your photos, leave a comment, and spread the mummy love. Happy hosting, friend!
Frequently Asked Questions
Can I make these mummy pigs in a blanket ahead of time?
Absolutely! You can assemble them up to 24 hours in advance. Just arrange them on the baking sheet, cover tightly with plastic wrap, and refrigerate. Brush with egg wash right before baking. This is a huge time-saver when you’re hosting a party.
Can I use puff pastry instead of crescent dough?
Yes, puff pastry works beautifully! Thaw it according to package directions, then cut it into thin strips. The texture will be even flakier and more buttery. Just note that puff pastry takes a couple minutes longer to bake—keep an eye on it.
How do I prevent the dough from unraveling during baking?
Make sure the seam side is facing down on the baking sheet, and don’t wrap the dough too tightly. A relaxed wrap with the seam on the bottom should stay put. If you’re worried, you can press the end of the dough strip gently to seal it.
What’s the best way to reheat leftovers?
The oven or air fryer is your best bet. Reheat in a 350°F (175°C) oven for 5-7 minutes, or in the air fryer at 350°F for 3-4 minutes. The microwave will make the dough soggy, so I don’t recommend it unless you’re in a real hurry.
Can I make the mustard dip spicier?
Definitely! Add a teaspoon of horseradish, a pinch of cayenne pepper, or use spicy brown mustard instead of yellow. You can also stir in some hot sauce to taste. Start with a little and adjust until it’s just right for you.
Pin This Recipe!
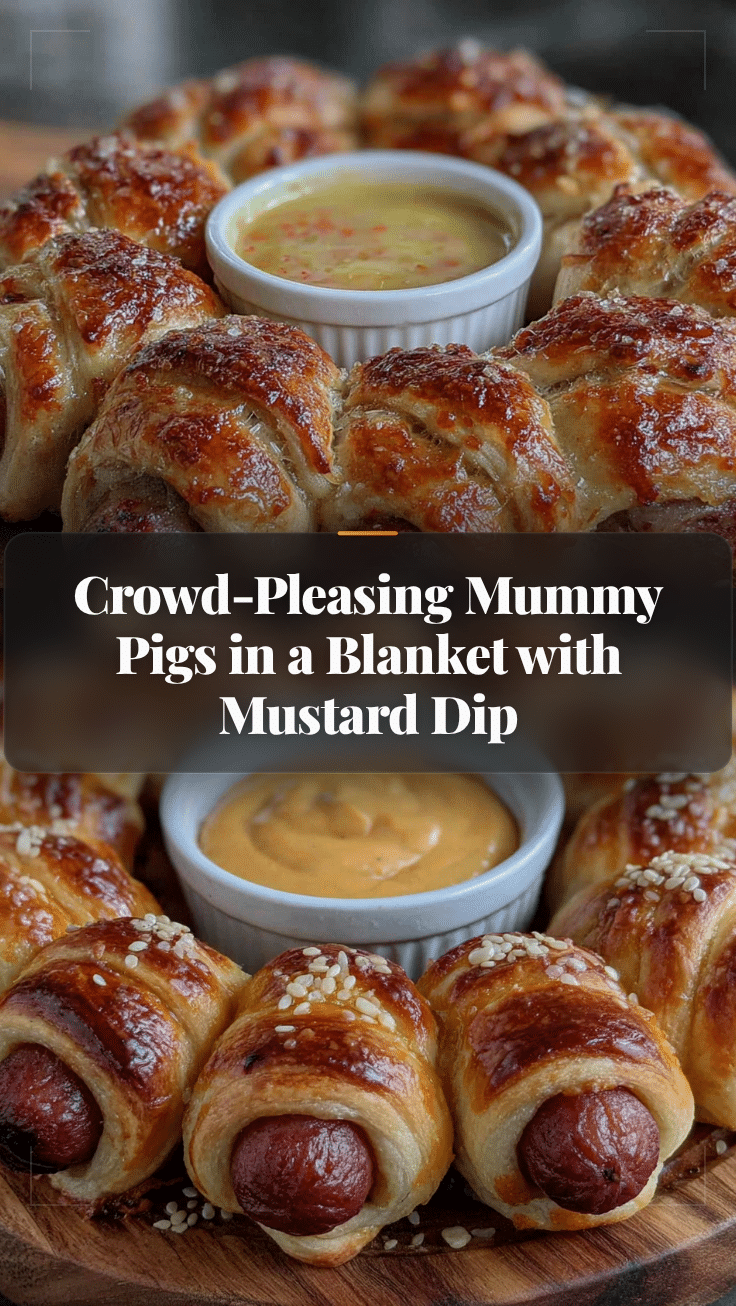
Crowd-Pleasing Mummy Pigs in a Blanket with Mustard Dip

These adorable mummy pigs in a blanket are wrapped in flaky crescent dough and served with a tangy mustard dip. Perfect for Halloween, game day, or any party, they come together in under 25 minutes and are always a hit.
- Prep Time: 15 minutes
- Cook Time: 12 minutes
- Total Time: 27 minutes
- Yield: 16 servings 1x
- Category: Appetizer
- Cuisine: American
Ingredients
- 1 can (8 oz) refrigerated crescent roll dough
- 16 mini hot dogs or cocktail sausages
- 1 large egg
- 1 tablespoon water
- Mustard (yellow or Dijon) for eyes
- 1/2 cup sour cream
- 1/4 cup mayonnaise
- 2 tablespoons yellow mustard
- 1 tablespoon Dijon mustard
- 1 teaspoon honey
- 1/2 teaspoon garlic powder
- Pinch of salt and black pepper
Instructions
- Preheat oven to 375°F (190°C). Line a baking sheet with parchment paper.
- In a small bowl, whisk together egg and water to make egg wash.
- Unroll crescent dough onto a cutting board. If using perforated sheets, press seams together to form a solid sheet.
- Cut dough lengthwise into 8 strips (about 1/2 inch wide), then cut each strip in half crosswise to make 16 strips total.
- Place a mini hot dog at one end of a dough strip and wrap the strip around it, leaving a small gap near the top for the face. Repeat with all sausages.
- Arrange wrapped mummies on the baking sheet, seam side down, about 1 inch apart.
- Brush each mummy with egg wash.
- Bake for 10-12 minutes, until golden brown and puffed.
- While still warm, use a toothpick to dab two small mustard dots on each mummy for eyes.
- In a small bowl, combine sour cream, mayonnaise, yellow mustard, Dijon mustard, honey, garlic powder, salt, and pepper. Whisk until smooth.
- Serve mummies warm with mustard dip.
Notes
For best results, use cold dough and work quickly. If dough becomes sticky, refrigerate for 5 minutes. Assemble up to 24 hours ahead and refrigerate; brush with egg wash just before baking. Leftovers can be stored in an airtight container in the refrigerator for up to 3 days. Reheat in a 350°F oven for 5-7 minutes or in an air fryer at 350°F for 3-4 minutes.
Nutrition
- Serving Size: 1 mummy
- Calories: 85
- Sugar: 1
- Sodium: 240
- Fat: 5
- Saturated Fat: 2
- Carbohydrates: 7
- Protein: 3
Keywords: mummy pigs in a blanket, Halloween appetizer, pigs in a blanket, crescent roll appetizer, party food, game day snack, mustard dip



