Love this? Save it for later!
Share the inspiration with your friends
The woman at the farmers market stall watched me sniffing her basket of tiny cinnamon sticks—the ones that looked like rolled-up bark, which they were—and didn’t say anything at first. Then she reached under the table, pulled out a mason jar filled with what looked like liquid caramel, and unscrewed the lid. She held it out. “Smell this,” she said. So I did. And honestly, I almost bought a ticket to wherever that smell was from.
It was pumpkin spice, yes, but not the kind you get from a sad plastic bottle at the grocery store. This was warm and deep, with actual vanilla bean specks floating in cream so thick it left a ring on the jar when she tilted it. She told me she made it every October for her daughter, who lived four states away and missed “real” fall. She’d mail it in jars wrapped in newspaper. I told her that was the most beautiful thing I’d ever heard, and she laughed and said, “It’s just creamer, honey.” But it wasn’t, and she knew it.
I went home that day with a handful of cinnamon sticks and a mission. I wanted that feeling—the one where you pour something into your coffee and it changes everything. Not just the flavor, but the moment. That first sip where the world slows down for a second. Maybe you’ve been there, standing in your kitchen on a chilly morning, holding a warm mug, thinking, Okay, this is good. That’s what this creamer is for.
It took me a few tries to get it right, I’m not gonna lie. The first batch was too sweet, like liquid candy. The second batch had a weird separation thing happen, and I spent twenty minutes staring at a jar of curdled-looking milk. But the third time? That was the one. It was creamy, not too sweet, with a warm spice kick that lingers just enough. I’ve been making it ever since, and I keep a jar in my fridge from October straight through February. It’s my little morning ritual, and honestly, it makes the whole day feel cozier.
Why You’ll Love This Recipe
Let me tell you why this homemade pumpkin spice coffee creamer is about to become your new favorite thing. I’ve tested this recipe more times than I care to count, tweaking the spice ratios and the sweetness level until it was just right. It’s one of those recipes that looks simple on paper but feels special every single time you use it.
- Quick & Easy : This comes together in under 10 minutes, seriously. You just whisk everything together on the stove, let it cool, and pour it into a jar. No complicated steps, no special equipment, and no stress.
- Simple Ingredients : You probably already have most of these in your pantry. Heavy cream, milk, brown sugar, pumpkin puree, and basic spices. No weird additives or preservatives, just real food.
- Perfect for Cozy Mornings : This is the kind of creamer that makes you want to sit down and actually enjoy your coffee instead of chugging it on the way out the door. It’s for slow mornings, cold weather, and days when you need a little extra comfort.
- Crowd-Pleaser : Every time I bring this to a gathering or gift it in a jar, people lose their minds. It’s one of those things that feels fancy but is secretly super simple to make.
- Unbelievably Delicious : The texture is silky and smooth, and the flavor is warm without being overpowering. It’s that perfect balance between pumpkin, spice, and cream that makes you close your eyes after the first sip.
What makes this recipe different from the store-bought stuff? First, you control the sweetness. Most commercial creamers are loaded with sugar and artificial flavors. This one uses real pumpkin puree and actual spices, so it tastes like something you’d get at a cozy café, not a lab. Second, it’s incredibly versatile. You can make it dairy-free, sugar-free, or extra spicy depending on your mood. It’s not just another recipe—it’s your best version, tailored exactly to what you love.
This creamer isn’t just good—it’s the kind that makes you look forward to waking up. It’s comfort food reimagined, faster and fresher, but with the same soul-soothing satisfaction. Perfect for impressing houseguests without any stress, or turning a simple Tuesday morning into something memorable.
What Ingredients You Will Need
This recipe uses simple, wholesome ingredients to deliver that rich, cozy flavor without any fuss. Most of these are pantry staples, especially if you’re a fall baking enthusiast like me.
- 1 cup heavy cream (use full-fat for the richest texture; I recommend Organic Valley or Horizon for consistent quality)
- 1 cup whole milk (or 2% if that’s what you have; avoid skim for best creaminess)
- 3 tablespoons packed brown sugar (light or dark both work; dark gives a deeper molasses flavor)
- 2 tablespoons pure maple syrup (use Grade A for a milder taste or Grade B for a stronger maple kick)
- 3 tablespoons pumpkin puree (not pumpkin pie filling—make sure it’s 100% pumpkin; Libby’s is my go-to)
- 1 teaspoon vanilla extract (pure, not imitation, if you can swing it)
- 1/2 teaspoon ground cinnamon (plus a little extra for garnish if you’re feeling fancy)
- 1/4 teaspoon ground nutmeg (freshly grated is amazing, but pre-ground works fine)
- 1/4 teaspoon ground ginger (this adds that warm kick that makes pumpkin spice so addictive)
- 1/8 teaspoon ground cloves (a little goes a long way; trust me on this)
- Pinch of salt (just a tiny pinch—it balances the sweetness and brings out the spices)
For substitutions, you can swap the heavy cream and milk with canned coconut milk (full-fat) for a dairy-free version. I’ve tried it with oat milk too, and it works, but the texture is thinner. If you’re watching your sugar, use a sugar-free brown sugar substitute or just skip the maple syrup and add a few drops of stevia. The pumpkin puree is non-negotiable for that authentic flavor, but in a pinch, you can use pumpkin pie spice mix instead of the individual spices—just use 1 teaspoon total.
One thing I learned the hard way: don’t skip the pinch of salt. It sounds weird, but it makes the flavors pop. Without it, the creamer tastes flat and one-dimensional. Also, if you can find vanilla bean paste instead of extract, it adds those beautiful little specks that make it look homemade in the best way.
Equipment Needed
You don’t need a fancy kitchen to make this creamer. Here’s what you’ll need:
- Small saucepan (1.5 to 2 quarts works perfectly; anything too large and the liquid spreads out too thin)
- Whisk (a silicone or stainless steel whisk—avoid wooden ones because they absorb flavors and smells)
- Fine-mesh strainer (optional but recommended for straining out any pumpkin bits or spice clumps)
- Glass jar or bottle (a 16-ounce mason jar with a tight-fitting lid is ideal; I use a Weck jar because it looks pretty in the fridge)
- Measuring cups and spoons (standard set; nothing fancy)
- Funnel (makes pouring into the jar way less messy; if you don’t have one, a steady hand and a paper towel work too)
If you don’t have a fine-mesh strainer, you can skip it—just whisk really well and make sure the pumpkin puree is fully incorporated. I’ve definitely made this without straining, and it’s still delicious, just with a few tiny pumpkin flecks floating around. Some people actually like that rustic look. As for the jar, any airtight container works. I’ve used a repurposed salad dressing bottle in a pinch, and it did the job just fine.
Preparation Method
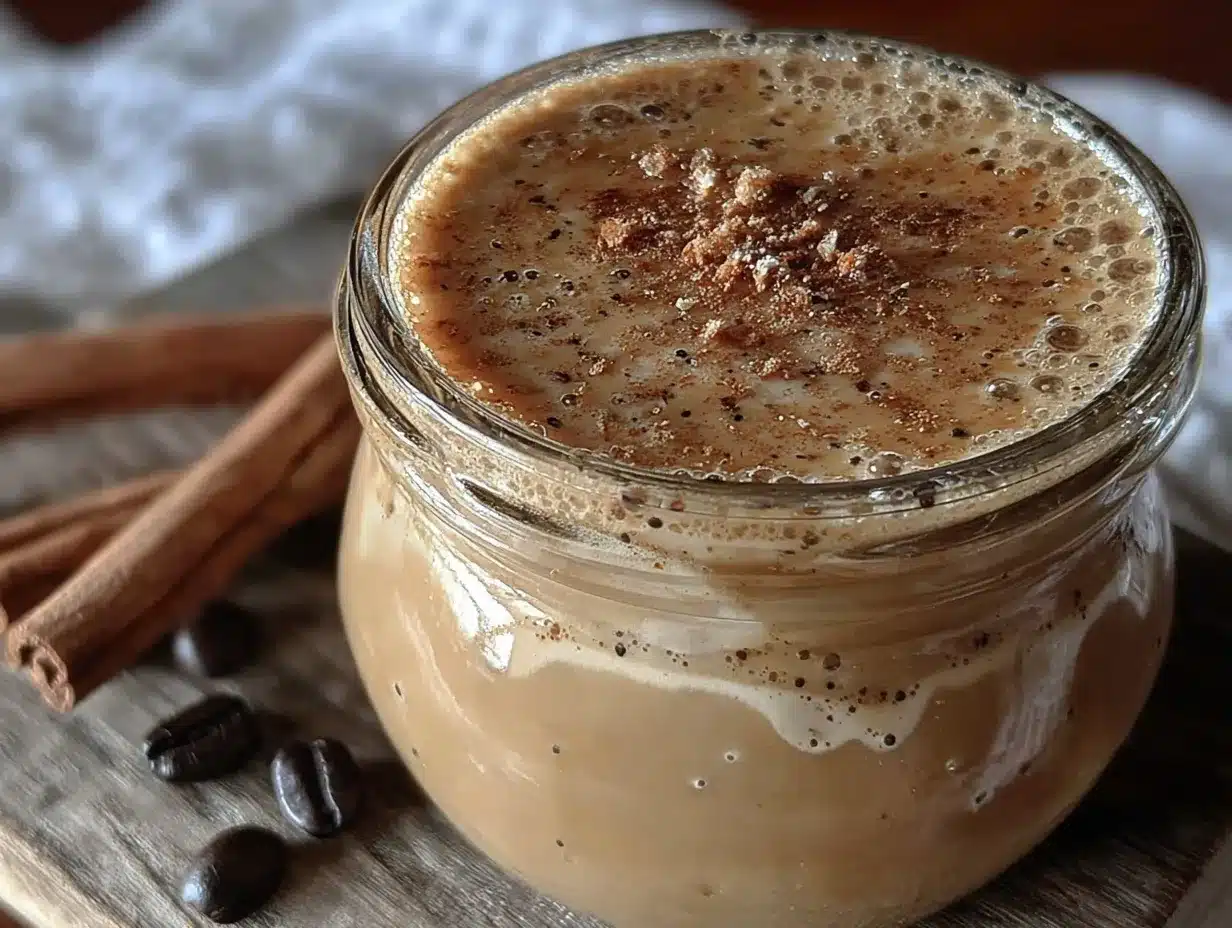
Alright, let’s make some creamer. This is straightforward, but I’ll walk you through every step so you get it perfect the first time.
- Combine the base ingredients. In your small saucepan, add the heavy cream, whole milk, brown sugar, and maple syrup. Whisk them together gently over medium heat. Don’t crank the heat up high—you want to warm everything slowly so the sugar dissolves without scorching the milk. This takes about 2-3 minutes. You’ll see tiny bubbles forming around the edges of the pan when it’s ready.
- Add the pumpkin and spices. Once the base is warm and the sugar has dissolved, whisk in the pumpkin puree, vanilla extract, cinnamon, nutmeg, ginger, cloves, and that pinch of salt. Keep whisking until the pumpkin is fully incorporated. You don’t want any orange streaks—it should be a uniform, pale caramel color. This takes another minute or so. The smell at this point is absolutely incredible. I mean, your whole kitchen will smell like fall.
- Heat gently (do not boil). Continue heating the mixture over medium-low heat for about 3-4 minutes, stirring occasionally. You want it hot, but not boiling. If you see bubbles getting big and aggressive, turn the heat down. Boiling can cause the cream to separate or form a skin on top. The ideal temperature is when steam rises steadily and tiny bubbles appear at the edges. If you have a thermometer, aim for 170°F to 180°F.
- Strain (optional but recommended). Place your fine-mesh strainer over a heat-safe bowl or directly over your jar if you’re feeling brave. Pour the creamer through the strainer slowly. This catches any undissolved pumpkin bits or spice clumps. I honestly skip this step sometimes when I’m in a hurry, but when I do strain it, the texture is noticeably silkier. Your call.
- Cool and store. Let the creamer cool at room temperature for about 20-30 minutes. Don’t put it in the fridge while it’s still hot—that can cause condensation inside the jar and water down your creamer. Once it’s cool to the touch, put the lid on and refrigerate. It will thicken slightly as it chills, which is exactly what you want.
- Shake before using. This is important. The spices can settle at the bottom of the jar, so give it a good shake or stir before pouring it into your coffee. I learned this the hard way when my first cup was perfectly spiced and my second cup was basically sweet milk.
One more thing: if you want a sweeter creamer, add another tablespoon of brown sugar. If you want it less sweet, reduce the maple syrup. Taste it before you pour it into the jar—it should be slightly sweeter than you want your coffee to be, because it’ll dilute when you add it to your mug.
Cooking Tips & Techniques
I’ve made this creamer probably thirty times by now, and I’ve picked up a few tricks along the way. Let me share them so you don’t make the same mistakes I did.
Low and slow is your friend. I know I said this already, but it bears repeating. High heat is the enemy of creamy dairy. It can cause the proteins to curdle and the fats to separate. Keep the heat at medium or medium-low, and be patient. The creamer will warm up just fine in 5-7 minutes. Rushing it will leave you with a grainy texture, and nobody wants that.
Watch out for the “pumpkin blob.” Pumpkin puree has a tendency to clump up when you add it to liquid. The trick is to whisk it in slowly while stirring constantly. I like to mash it against the side of the pan with the whisk to break up any stubborn lumps. If you still see little orange blobs after a minute of whisking, that’s when you know you’ll want to strain the mixture.
My biggest failure? The time I tried to double the recipe and used a pan that was too small. The creamer bubbled up and overflowed all over my stovetop, and I spent the next twenty minutes scrubbing burnt sugar off the burner. So, uh, learn from me. Use a pan that’s big enough for the amount you’re making, and don’t fill it more than halfway.
For consistent results, measure carefully. Spices are potent, and a little extra clove can turn your cozy creamer into something that tastes like Christmas potpourri. I use level measuring spoons and scrape them off with a knife. It sounds fussy, but it makes a difference.
Multitasking tip: While the creamer is cooling, brew your coffee and get your mug ready. That way, by the time the creamer is cool enough to refrigerate, you can pour yourself a cup and enjoy the fruits of your labor immediately. Because let’s be honest, you’re going to want to taste it right away.
Variations & Adaptations
One of the best things about this recipe is how easy it is to tweak. Here are some of my favorite variations.
Dairy-Free Version: Swap the heavy cream and whole milk for full-fat canned coconut milk. The texture will be slightly thinner, but it’s still incredibly creamy. I’ve also used oat milk, and it works, but it’s not as rich. If you go dairy-free, add an extra tablespoon of coconut oil or refined coconut butter to boost the creaminess.
Sugar-Free Version: Use a brown sugar substitute like Swerve or Lakanto, and skip the maple syrup. Add a few drops of liquid stevia or monk fruit sweetener to taste. The flavor will be a little different—less caramel-like—but it’s still delicious and perfect for low-carb or keto diets.
Extra Spicy Version: Double the cinnamon and add a pinch of cayenne pepper or a tiny dash of white pepper. This gives it a warm, almost chai-like kick that’s amazing on cold mornings. I made this version for a friend who loves spicy food, and she said it was the best creamer she’d ever had.
Chocolate Pumpkin Spice: Add 1 tablespoon of unsweetened cocoa powder along with the spices. Whisk it in well, and you get a mocha-pumpkin hybrid that’s absolutely divine. This is my go-to when I need a little extra indulgence.
Vanilla Bean Version: Instead of vanilla extract, scrape the seeds from half a vanilla bean into the creamer while it heats. The little black specks look beautiful and the flavor is more complex. It’s a bit more expensive, but worth it for special occasions.
I once tried a version with cardamom instead of ginger, and it was surprisingly good—kind of like a pumpkin chai. Don’t be afraid to experiment. The base recipe is forgiving, and you can really make it your own.
Serving & Storage Suggestions
This creamer is best served cold, straight from the fridge, poured into a hot cup of coffee. The temperature contrast is part of the magic. I like to use about 2 tablespoons per 8-ounce cup, but you can adjust based on how creamy you like your coffee. Some people go wild and use a quarter cup—I won’t judge.
For presentation, if you’re serving guests, pour the creamer into a small pitcher or a pretty bottle. It looks lovely on a breakfast table next to a carafe of coffee. You can also sprinkle a tiny bit of cinnamon on top of each mug for that café-style finish.
Storage: Keep the creamer in an airtight jar in the refrigerator. It will stay fresh for up to 7 days. I usually make a batch on Sunday and use it all week. The flavors actually meld together and deepen after a day or two, so it might taste even better on Wednesday than it did on Monday.
Freezer instructions: You can freeze this creamer in ice cube trays! Pop out the cubes and store them in a freezer bag. Then you can drop a cube or two directly into hot coffee—it melts and creams it up at the same time. This is a game-changer for busy mornings. Just note that the texture might be slightly different after thawing, so give it a good stir.
Reheating: Don’t microwave the whole jar! If you want warm creamer (which is lovely in cold brew), just heat the amount you need in a small saucepan or microwave-safe cup for 15-20 seconds. The creamer will separate if you overheat it, so go slow.
One more thing: the creamer will thicken as it sits in the fridge. If it gets too thick, just give it a vigorous shake or stir in a teaspoon of milk to thin it out. This is normal—the fats in the cream are just doing their thing.
Nutritional Information & Benefits
Here’s the estimated nutrition for a 2-tablespoon serving of this creamer (based on the standard recipe with whole milk and heavy cream):
| Nutrient | Amount |
|---|---|
| Calories | 45 |
| Total Fat | 3.5g |
| Saturated Fat | 2g |
| Carbohydrates | 4g |
| Sugar | 3.5g |
| Protein | 0.5g |
| Calcium | 15mg |
| Vitamin A | 4% DV |
The health benefits here come from the real ingredients. Pumpkin is packed with vitamin A and fiber, and the spices—cinnamon, ginger, nutmeg, cloves—are all anti-inflammatory and rich in antioxidants. You’re getting more nutrition from this than from any store-bought creamer filled with artificial flavors and hydrogenated oils.
This recipe is naturally gluten-free and can be made dairy-free and low-carb with simple substitutions. The only potential allergen is dairy, so if you’re lactose intolerant, go for the coconut milk version. It’s also lower in sugar than most commercial creamers, which can have 5-7 grams of sugar per tablespoon. Here, you’re in control.
From a wellness perspective, I love that this creamer lets me enjoy a cozy, indulgent morning without the guilt. It’s a small way to start the day with intention and real food, and that feels good.
Conclusion
This homemade pumpkin spice coffee creamer is the kind of recipe that makes your morning feel like a hug. It’s warm, cozy, and simple to make, but it turns an ordinary cup of coffee into something you actually look forward to. Whether you’re sipping it on a chilly October morning or gifting it in a jar to someone who needs a little comfort, this creamer delivers.
I love that this recipe lets you take control—adjust the sweetness, play with the spices, make it dairy-free or extra indulgent. It’s your creamer, your way. And honestly, that’s what homemade cooking is all about. It’s not about following rules; it’s about making something that feels good to you.
So go ahead, give it a try. Brew your favorite coffee, pour in a splash of this creamy, spiced goodness, and take a moment to just breathe. You deserve it. And when you make it, I’d love to hear how it turned out. Drop a comment below and let me know your favorite variation, or share a photo of your cozy morning cup. Happy sipping, friends!
Frequently Asked Questions
Can I use pumpkin pie spice instead of individual spices?
Absolutely! Use 1 teaspoon of pumpkin pie spice in place of the cinnamon, nutmeg, ginger, and cloves. The flavor will be slightly different—pumpkin pie spice often has a bit more allspice—but it’s still delicious and convenient.
Why did my creamer curdle?
Curdling usually happens when the heat is too high or when you add an acidic ingredient to hot dairy. Make sure you’re heating the creamer gently and not boiling it. Also, if you’re using a dairy-free milk, some brands are more prone to separation—try a barista-style oat milk for better stability.
Can I make this without a stove?
Yes! You can make this in the microwave. Combine all ingredients in a microwave-safe bowl and heat in 30-second intervals, whisking between each, until everything is warm and well-combined. It’s a bit more hands-on, but it works in a pinch.
How long does this creamer last?
Stored in an airtight jar in the refrigerator, it will stay fresh for up to 7 days. Always give it a good shake before using, as the spices and pumpkin can settle at the bottom.
Can I use this creamer in iced coffee?
Definitely! It’s actually perfect for iced coffee because it’s already cold. Just pour it over ice with your brewed coffee and stir. You can also freeze it into cubes for an extra-creamy iced coffee experience that doesn’t get watered down.
Pin This Recipe!
Best Homemade Pumpkin Spice Coffee Creamer Recipe (Easy & Cozy)

This homemade pumpkin spice coffee creamer is warm, cozy, and simple to make, turning an ordinary cup of coffee into something special. Made with real pumpkin puree and spices, it’s creamy, not too sweet, and perfect for chilly mornings.
- Prep Time: 5 minutes
- Cook Time: 10 minutes
- Total Time: 15 minutes
- Yield: 16 servings 1x
- Category: Beverage
- Cuisine: American
Ingredients
- 1 cup heavy cream
- 1 cup whole milk
- 3 tablespoons packed brown sugar
- 2 tablespoons pure maple syrup
- 3 tablespoons pumpkin puree
- 1 teaspoon vanilla extract
- 1/2 teaspoon ground cinnamon
- 1/4 teaspoon ground nutmeg
- 1/4 teaspoon ground ginger
- 1/8 teaspoon ground cloves
- Pinch of salt
Instructions
- Combine the base ingredients. In a small saucepan, add the heavy cream, whole milk, brown sugar, and maple syrup. Whisk together gently over medium heat for 2-3 minutes until warm and sugar dissolves.
- Add the pumpkin and spices. Whisk in the pumpkin puree, vanilla extract, cinnamon, nutmeg, ginger, cloves, and salt until fully incorporated and uniform in color.
- Heat gently (do not boil). Continue heating over medium-low heat for 3-4 minutes, stirring occasionally, until steam rises steadily and tiny bubbles appear at edges (170°F to 180°F).
- Strain (optional but recommended). Place a fine-mesh strainer over a heat-safe bowl or jar and pour the creamer through to catch any undissolved bits.
- Cool and store. Let the creamer cool at room temperature for 20-30 minutes, then cover and refrigerate.
- Shake before using. Give the jar a good shake or stir before pouring into coffee, as spices can settle.
Notes
For dairy-free version, use full-fat canned coconut milk. For sugar-free, use brown sugar substitute and skip maple syrup, adding stevia to taste. The creamer will thicken as it chills; shake or stir in a teaspoon of milk if needed. Store in refrigerator for up to 7 days. Can be frozen in ice cube trays for easy use.
Nutrition
- Serving Size: 2 tablespoons
- Calories: 45
- Sugar: 3.5
- Sodium: 15
- Fat: 3.5
- Saturated Fat: 2
- Carbohydrates: 4
- Protein: 0.5
Keywords: pumpkin spice, coffee creamer, homemade, fall, pumpkin, easy, cozy, dairy-free option, sugar-free option



