Love this? Save it for later!
Share the inspiration with your friends
It was 11:47 PM on a random Thursday in late October, and I was hit with the weirdest craving for stuffing. Not just any stuffing—the kind my grandmother used to make, loaded with sage and onion, the kind that soaks up every drop of gravy like a delicious sponge. The problem? I didn’t have a loaf of bread to dry out, and I definitely didn’t have the energy for a grocery run. But I had a bag of my favorite gluten-free bread, a bunch of fresh herbs that were about to go sad in the fridge, and this crazy idea that maybe—just maybe—I could make a stuffing my kids would actually eat without complaining.
Honestly, I was skeptical. Gluten-free stuffing has a reputation for being dry, crumbly, and frankly, a little sad. But something about the late hour made me brave. I started chopping onions and celery, the familiar rhythm calming my tired mind. I remember burning my finger on the pan—classic midnight cooking move—and muttering under my breath as I rummaged for a band-aid. But when that first spoonful hit my mouth around 12:30 AM, I almost cried. It was savory, herbaceous, and had that perfect balance of soft and slightly crispy edges. My kids devoured it the next day at dinner, and my husband asked for seconds.
Maybe you’ve been there—standing in your kitchen at an ungodly hour, convinced you’re about to ruin dinner, only to stumble onto something brilliant. That’s how this kid-approved gluten-free Thanksgiving stuffing was born. It’s not fancy, and it doesn’t try to be. It’s just honest, delicious comfort food that happens to be gluten-free. And honestly? It’s the stuffing I look forward to all year now.
Why You’ll Love This Recipe
Let me tell you why this gluten-free Thanksgiving stuffing has earned a permanent spot on our holiday table. It’s not just another recipe—it’s the one that solved my biggest Thanksgiving headache.
- Kid-Approved: My kids are picky eaters, and they gobble this up. The texture is spot-on—not too dry, not too mushy—which is a win for little mouths.
- Simple Ingredients: You probably have most of these in your pantry. No weird flours or hard-to-find specialty items. Just real food.
- Perfect for Thanksgiving: This stuffing holds its own against any traditional version. It’s the dish that gets passed around twice.
- Crowd-Pleaser: I’ve brought this to three different Friendsgivings, and every time, someone asks for the recipe. Even the gluten-eaters love it.
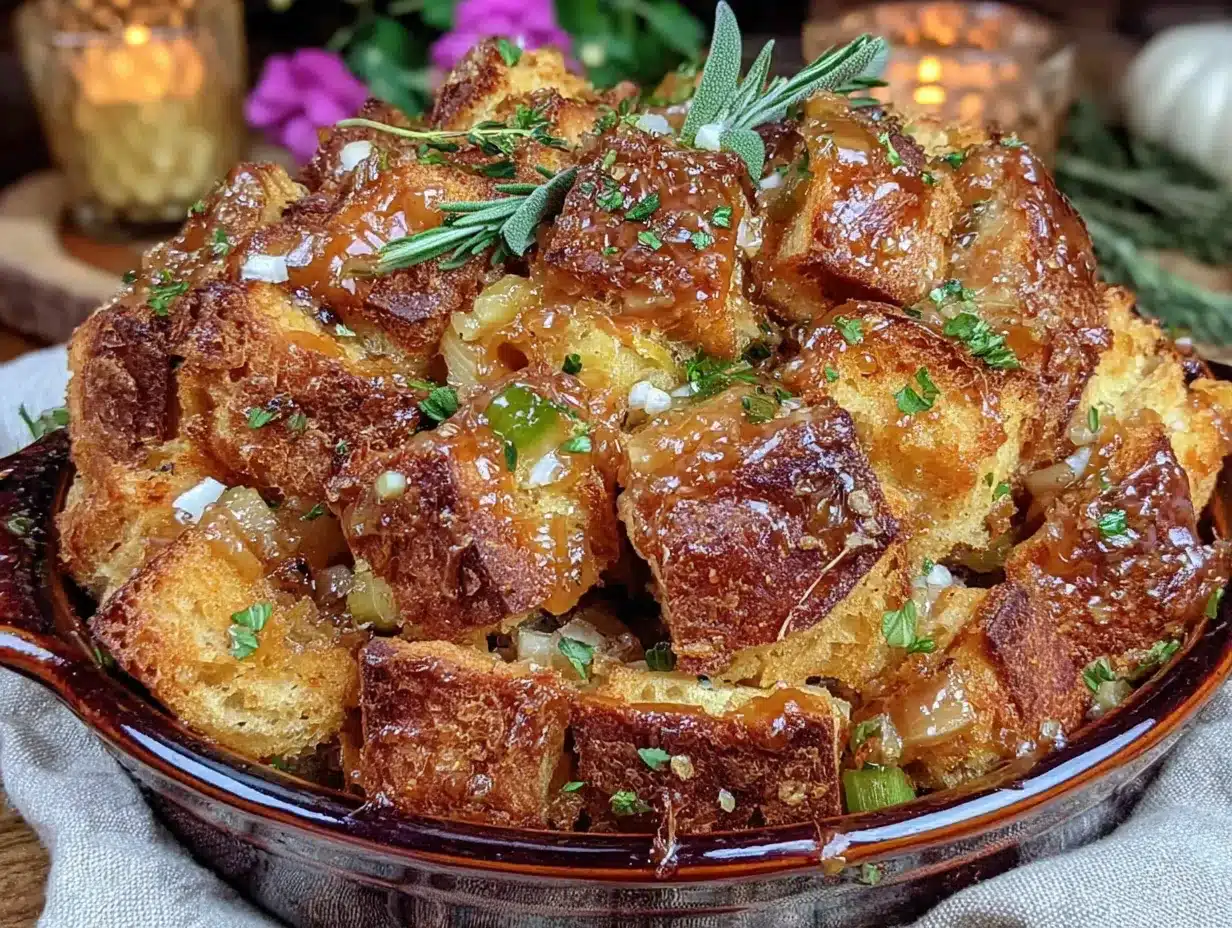
- Unbelievably Delicious: The secret is toasting the bread cubes before baking. It gives them this incredible crunch that stands up to all that savory broth and butter.
What makes this stuffing different from every other gluten-free version out there? It’s the technique, honestly. Most gluten-free stuffings turn into a soggy mess because the bread absorbs liquid too quickly. But by toasting the cubes first and using a specific ratio of broth to bread, you get that perfect texture every time. It’s comfort food reimagined—healthier, faster, and with the same soul-soothing satisfaction that makes you close your eyes after the first bite.
What Ingredients You Will Need
This gluten-free Thanksgiving stuffing uses simple, wholesome ingredients to deliver bold flavor and satisfying texture without the fuss. Most of these are pantry staples, which makes it perfect for busy holiday prep.
For the Bread Base
- 1 loaf (about 16 oz) day-old gluten-free bread, cut into ½-inch cubes (I prefer Canyon Bakehouse or Udi’s for best texture)
- 4 tablespoons unsalted butter, cubed (adds richness)
For the Savory Mix
- 2 tablespoons olive oil
- 1 large yellow onion, finely diced (about 1½ cups)
- 3 celery stalks, diced (about 1 cup)
- 3 cloves garlic, minced
- 1 teaspoon salt
- ½ teaspoon black pepper
For the Herb Blend
- 2 tablespoons fresh sage, chopped (or 2 teaspoons dried)
- 1 tablespoon fresh thyme leaves (or 1 teaspoon dried)
- 1 tablespoon fresh rosemary, finely chopped (or 1 teaspoon dried)
- 2 tablespoons fresh parsley, chopped (optional, for brightness)
For the Liquid
- 1½ cups low-sodium chicken or turkey broth (use vegetable broth for vegetarian version)
- 1 large egg, lightly beaten (helps bind the stuffing)
Ingredient Tips: Look for a sturdy gluten-free bread—something with structure, not the super soft sandwich kind. I’ve tried this with Three Bakers brand too, and it works great. If your bread isn’t day-old, just spread the cubes on a baking sheet and let them sit out for a few hours, or pop them in a 300°F oven for 10 minutes to dry them out. For a dairy-free version, swap the butter for vegan butter or additional olive oil. Trust me on the fresh herbs—they make a world of difference, but dried work in a pinch if that’s what you have.
Equipment Needed
You don’t need a fancy kitchen to pull off this gluten-free Thanksgiving stuffing. Here’s what you’ll need:
- Large baking sheet: For toasting the bread cubes. A rimmed one works best to prevent spills.
- Large skillet or sauté pan: For cooking the vegetables. A 12-inch pan gives you plenty of room.
- 9×13-inch baking dish: The perfect size for this recipe. A 2-quart casserole dish also works.
- Large mixing bowl: For combining everything without making a mess.
- Sharp knife and cutting board: For dicing vegetables and herbs.
- Wooden spoon or spatula: For stirring the vegetable mixture.
Budget-Friendly Options: If you don’t have a 9×13 dish, use a cast-iron skillet or even a disposable aluminum pan—they work just fine. I’ve used my grandmother’s old Pyrex dish for years, and it’s never let me down. Just make sure whatever you use is oven-safe up to 375°F.
Preparation Method
Let’s make this kid-approved gluten-free Thanksgiving stuffing. The steps are simple, but I’ve added some notes from my own trial-and-error so you can nail it on the first try.
- Preheat your oven to 375°F (190°C). This is important—you want it fully hot before the bread goes in.
- Toast the bread cubes: Spread the gluten-free bread cubes in a single layer on your large baking sheet. Bake for 10-12 minutes, stirring halfway through, until they’re lightly golden and feel dry to the touch. Don’t skip this step—it’s the secret to stuffing that doesn’t turn into paste. Your kitchen will smell amazing already.
- Sauté the vegetables: While the bread toasts, heat the olive oil and 2 tablespoons of butter in your large skillet over medium heat. Add the diced onion and celery, and cook for 6-8 minutes, stirring occasionally, until they’re soft and translucent. Add the minced garlic, salt, and pepper, and cook for another minute until fragrant. You should hear a gentle sizzle—if it’s silent, turn up the heat slightly.
- Add the herbs: Stir in the fresh sage, thyme, and rosemary. Cook for 1 minute more, letting the herbs release their oils. This step makes the whole house smell like Thanksgiving.
- Combine everything: Transfer the toasted bread cubes to your large mixing bowl. Pour the vegetable-herb mixture over the top and toss gently to combine. Be careful not to break up the bread too much.
- Prepare the liquid mixture: In a small bowl or measuring cup, whisk together the chicken broth and the beaten egg. Pour this over the bread mixture slowly, tossing as you go. You want every cube to get a little moisture, but not be swimming in liquid. The stuffing should look moist but not soupy—think damp sand, not wet mud.
- Transfer to baking dish: Grease your 9×13-inch baking dish with the remaining 2 tablespoons of butter (or spray with cooking spray). Spread the stuffing evenly in the dish. Don’t pack it down—you want some air pockets for crispy bits.
- Bake to perfection: Cover the dish with foil and bake for 25 minutes. Then remove the foil and bake for another 15-20 minutes, until the top is golden brown and crispy. The edges should be slightly crunchy while the center stays soft and tender.
- Rest before serving: Let the stuffing sit for 5-10 minutes after it comes out of the oven. This helps it set and makes serving easier. Plus, it gives you time to finish the gravy!
Pro tip from my kitchen: If you’re making this ahead of time, stop after step 7, cover, and refrigerate. When you’re ready to bake, add an extra 10 minutes to the covered baking time. I’ve done this the night before Thanksgiving, and it works like a charm.
Cooking Tips & Techniques
After making this gluten-free Thanksgiving stuffing more times than I can count (including one memorable disaster where I forgot the egg entirely—it was crumbly, but still got eaten), here are my best tips for success.
Don’t over-moisten the bread. Gluten-free bread is more porous than regular bread, so it absorbs liquid faster. Add the broth mixture gradually, tossing as you go. You can always add more, but you can’t take it out. I learned this the hard way when my first attempt turned into stuffing soup.
Use day-old bread. Fresh gluten-free bread is too soft and will turn mushy. If you only have fresh bread, cube it and leave it on the counter overnight, or toast it a little longer in the oven. The goal is dry, crunchy cubes that can soak up flavor without falling apart.
Toast in batches if needed. If your baking sheet is crowded, the bread will steam instead of toast. Work in batches if you have to—it’s worth the extra few minutes for that perfect texture.
Let it rest. I know it’s tempting to dig in right away, but letting the stuffing rest for 5-10 minutes allows the flavors to meld and the texture to set. Plus, it gives you time to warm the gravy and set the table.
Make extra for leftovers. This stuffing reheats beautifully. Spread leftovers on a baking sheet and reheat at 350°F for 10 minutes to revive the crispy edges. Or just eat it cold from the fridge like I do—no judgment here.
Variations & Adaptations
One of the things I love about this gluten-free Thanksgiving stuffing is how flexible it is. Here are some ways to make it your own.
Vegetarian Version: Swap the chicken broth for vegetable broth, and use vegan butter or olive oil instead of regular butter. It’s just as delicious and perfect for plant-based guests.
Add Some Crunch: Stir in ½ cup of toasted pecans or walnuts along with the herbs. The nutty crunch adds another layer of texture that adults and kids both love. I tried this last year, and my husband declared it “the best stuffing ever.”
Dairy-Free Adaptation: Use olive oil or vegan butter in place of regular butter. I’ve used Miyoko’s vegan butter with great results—it browns nicely and adds richness without the dairy.
Sausage Stuffing: Brown ½ pound of gluten-free Italian sausage (casings removed) in the skillet before cooking the vegetables. Crumble it up and mix it in with the bread cubes. This version is a hit with meat lovers and makes the stuffing more of a main dish.
Extra Veggie Boost: Add 1 cup of diced mushrooms or ½ cup of dried cranberries along with the herbs. The mushrooms add umami, while the cranberries bring a touch of sweetness that kids seem to love. My daughter picks out the cranberries first—every single time.
Serving & Storage Suggestions
This gluten-free Thanksgiving stuffing is best served warm, straight from the oven. The contrast between the crispy top and the soft, savory interior is pure magic. Spoon it into a beautiful serving dish and garnish with a few fresh herb sprigs for a pop of color.
What to Serve With It: This stuffing pairs beautifully with roasted turkey or chicken, mashed potatoes, and a generous drizzle of gravy. For a complete Thanksgiving plate, add some green bean casserole and cranberry sauce. My family loves it alongside a simple roasted chicken on regular weeknights too.
Storage Instructions: Leftover stuffing keeps in an airtight container in the refrigerator for up to 4 days. The flavors actually deepen overnight, so it might taste even better the next day. To reheat, place it in a 350°F oven for 10-15 minutes, or microwave individual portions for 1-2 minutes. For crispy edges, the oven method is best.
Freezer-Friendly: This stuffing freezes beautifully. Let it cool completely, then transfer to a freezer-safe container or zip-top bag. It will keep for up to 3 months. Thaw overnight in the refrigerator, then reheat in a 350°F oven until warmed through. I always make a double batch and freeze one for a rainy day—or a random Tuesday when I’m craving Thanksgiving.
Flavor Development: If you’re making this ahead, the flavors meld and deepen overnight in the fridge. Some of my family members actually prefer day-two stuffing. The texture softens slightly, but the herb flavors become more pronounced.
Nutritional Information & Benefits
While I wouldn’t call stuffing a health food, this version is lighter than traditional recipes without sacrificing flavor. Here’s the approximate nutritional breakdown per serving (based on 8 servings):
| Nutrient | Amount per Serving |
|---|---|
| Calories | 245 |
| Total Fat | 12g |
| Saturated Fat | 5g |
| Carbohydrates | 28g |
| Fiber | 3g |
| Protein | 6g |
| Sodium | 480mg |
Health Benefits: This stuffing is gluten-free by design, making it safe for those with celiac disease or gluten sensitivity. The fresh herbs—sage, thyme, and rosemary—are packed with antioxidants and anti-inflammatory compounds. Celery and onions provide fiber and essential vitamins. By using low-sodium broth, you can control the salt content, which is a win for heart health. I love that my kids are getting a serving of vegetables and herbs in every bite, even if they don’t realize it.
Dietary Considerations: This recipe is naturally nut-free (unless you add nuts) and can be made dairy-free and vegetarian with simple swaps. It contains eggs, so it’s not suitable for those with egg allergies. Always check your gluten-free bread label for potential cross-contamination if you’re cooking for someone with celiac disease.
Conclusion
This kid-approved gluten-free Thanksgiving stuffing has become more than just a recipe in my house—it’s a tradition. It’s the dish that proves gluten-free doesn’t mean flavor-free, and that comfort food is for everyone. Whether you’re hosting a big Thanksgiving dinner or just craving a taste of fall on a random Tuesday, this stuffing delivers.
I’d love for you to try it and make it your own. Add your favorite herbs, toss in some nuts or cranberries, or keep it classic—there’s no wrong way to enjoy it. When you do, come back and let me know how it turned out. Did your kids ask for seconds? Did your gluten-eating relatives go back for more? Drop a comment below—I read every single one and love hearing your stories.
Here’s to happy tables, full bellies, and the magic of a recipe that brings everyone together. Happy cooking, friend!
Frequently Asked Questions
Can I make this gluten-free stuffing ahead of time?
Absolutely! Assemble the stuffing completely (through step 7), cover, and refrigerate for up to 24 hours. When ready to bake, add 10 minutes to the covered baking time. It’s a lifesaver for busy Thanksgiving mornings.
What’s the best gluten-free bread for stuffing?
I’ve had the best results with sturdy, crusty gluten-free breads like Canyon Bakehouse or Udi’s whole grain loaves. Avoid soft sandwich breads, as they tend to turn mushy. Day-old bread works best because it’s drier and absorbs liquid more evenly.
Can I use dried herbs instead of fresh?
Yes, you can substitute dried herbs in a pinch. Use 1 teaspoon of dried herbs for every tablespoon of fresh. Just keep in mind that dried herbs are more concentrated, so adjust to taste. Fresh herbs really do make a difference in flavor, though!
How do I prevent my stuffing from being too dry or too soggy?
The key is toasting the bread cubes until they’re dry and crunchy, and adding the broth mixture gradually. Start with 1¼ cups of broth, toss, and add more if needed. The stuffing should look moist but not wet. If it’s too dry after baking, drizzle a little warm broth over it before serving.
Can I freeze leftover stuffing?
Yes! Let the stuffing cool completely, then transfer to a freezer-safe container or zip-top bag. It will keep for up to 3 months. Thaw overnight in the refrigerator and reheat in a 350°F oven until warmed through. The texture might be slightly softer, but the flavor is still fantastic.
Pin This Recipe!
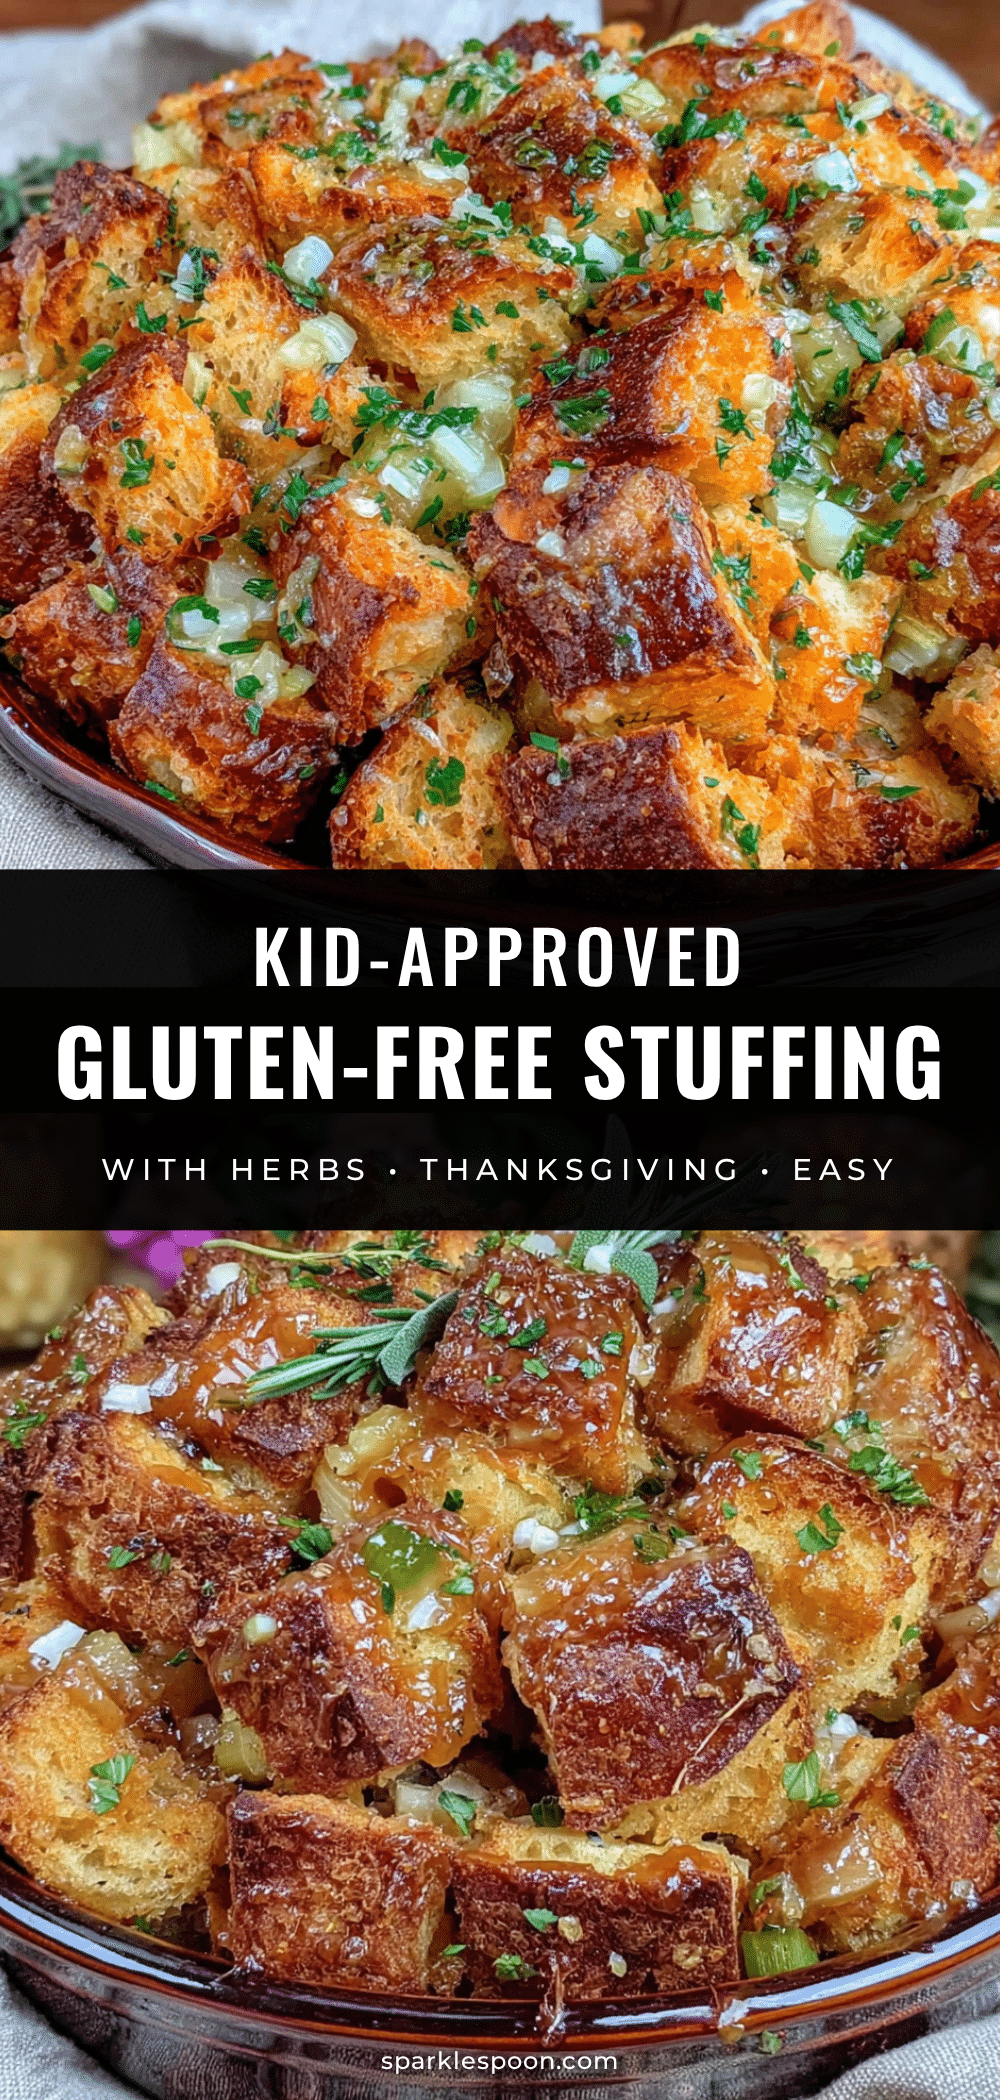
Best Easy Gluten-Free Thanksgiving Stuffing Kids Love

This kid-approved gluten-free Thanksgiving stuffing is savory, herbaceous, and has the perfect balance of soft and crispy edges. It’s honest, delicious comfort food that happens to be gluten-free, and it’s the stuffing you’ll look forward to all year.
- Prep Time: 20 minutes
- Cook Time: 50 minutes
- Total Time: 1 hour 10 minutes
- Yield: 8 servings 1x
- Category: Side Dish
- Cuisine: American
Ingredients
- 1 loaf (about 16 oz) day-old gluten-free bread, cut into ½-inch cubes
- 4 tablespoons unsalted butter, cubed
- 2 tablespoons olive oil
- 1 large yellow onion, finely diced (about 1½ cups)
- 3 celery stalks, diced (about 1 cup)
- 3 cloves garlic, minced
- 1 teaspoon salt
- ½ teaspoon black pepper
- 2 tablespoons fresh sage, chopped (or 2 teaspoons dried)
- 1 tablespoon fresh thyme leaves (or 1 teaspoon dried)
- 1 tablespoon fresh rosemary, finely chopped (or 1 teaspoon dried)
- 2 tablespoons fresh parsley, chopped (optional)
- 1½ cups low-sodium chicken or turkey broth (use vegetable broth for vegetarian version)
- 1 large egg, lightly beaten
Instructions
- Preheat your oven to 375°F (190°C).
- Toast the bread cubes: Spread the gluten-free bread cubes in a single layer on your large baking sheet. Bake for 10-12 minutes, stirring halfway through, until they’re lightly golden and feel dry to the touch.
- Sauté the vegetables: While the bread toasts, heat the olive oil and 2 tablespoons of butter in your large skillet over medium heat. Add the diced onion and celery, and cook for 6-8 minutes, stirring occasionally, until they’re soft and translucent. Add the minced garlic, salt, and pepper, and cook for another minute until fragrant.
- Add the herbs: Stir in the fresh sage, thyme, and rosemary. Cook for 1 minute more, letting the herbs release their oils.
- Combine everything: Transfer the toasted bread cubes to your large mixing bowl. Pour the vegetable-herb mixture over the top and toss gently to combine.
- Prepare the liquid mixture: In a small bowl or measuring cup, whisk together the chicken broth and the beaten egg. Pour this over the bread mixture slowly, tossing as you go. The stuffing should look moist but not soupy.
- Transfer to baking dish: Grease your 9×13-inch baking dish with the remaining 2 tablespoons of butter (or spray with cooking spray). Spread the stuffing evenly in the dish. Don’t pack it down.
- Bake to perfection: Cover the dish with foil and bake for 25 minutes. Then remove the foil and bake for another 15-20 minutes, until the top is golden brown and crispy.
- Rest before serving: Let the stuffing sit for 5-10 minutes after it comes out of the oven.
Notes
Toast the bread cubes before baking to prevent sogginess. Add broth gradually to avoid over-moistening. For make-ahead, assemble through step 7, cover, and refrigerate; add 10 minutes to covered baking time. Leftovers keep in the refrigerator for up to 4 days or freeze for up to 3 months.
Nutrition
- Serving Size: 1 serving
- Calories: 245
- Sugar: 3
- Sodium: 480
- Fat: 12
- Saturated Fat: 5
- Carbohydrates: 28
- Fiber: 3
- Protein: 6
Keywords: gluten-free stuffing, Thanksgiving stuffing, kid-friendly stuffing, gluten-free Thanksgiving, easy stuffing recipe



