Love this? Save it for later!
Share the inspiration with your friends
The neighborhood Halloween party was in six hours and I’d completely forgotten. Everyone else would be bringing those elaborate, bakery-style cupcakes with piped buttercream ghosts, or those Rice Krispie treat graveyards with actual crushed Oreo dirt. I had a stick of butter, some flour, and a bag of whole almonds I’d bought for snacking. And honestly? I almost just grabbed a bag of candy from the gas station. But then I remembered these creepy little things my aunt used to make when I was a kid—the ones that looked like actual severed fingers.
I mean, talk about a panic-bake. I was digging through my pantry, getting flour on my jeans, muttering to myself about how this was going to be a disaster. The dough came together in a lumpy, buttery mess, and I remember thinking, “There’s no way these are going to look like anything other than sad, blobby cookies.” I shaped them into uneven fingers, my own hands shaking a little from the caffeine-and-panic combo I was running on. I pressed an almond onto the tip for the nail, used a knife to make little knuckle creases, and shoved them in the oven, fully expecting a flop.
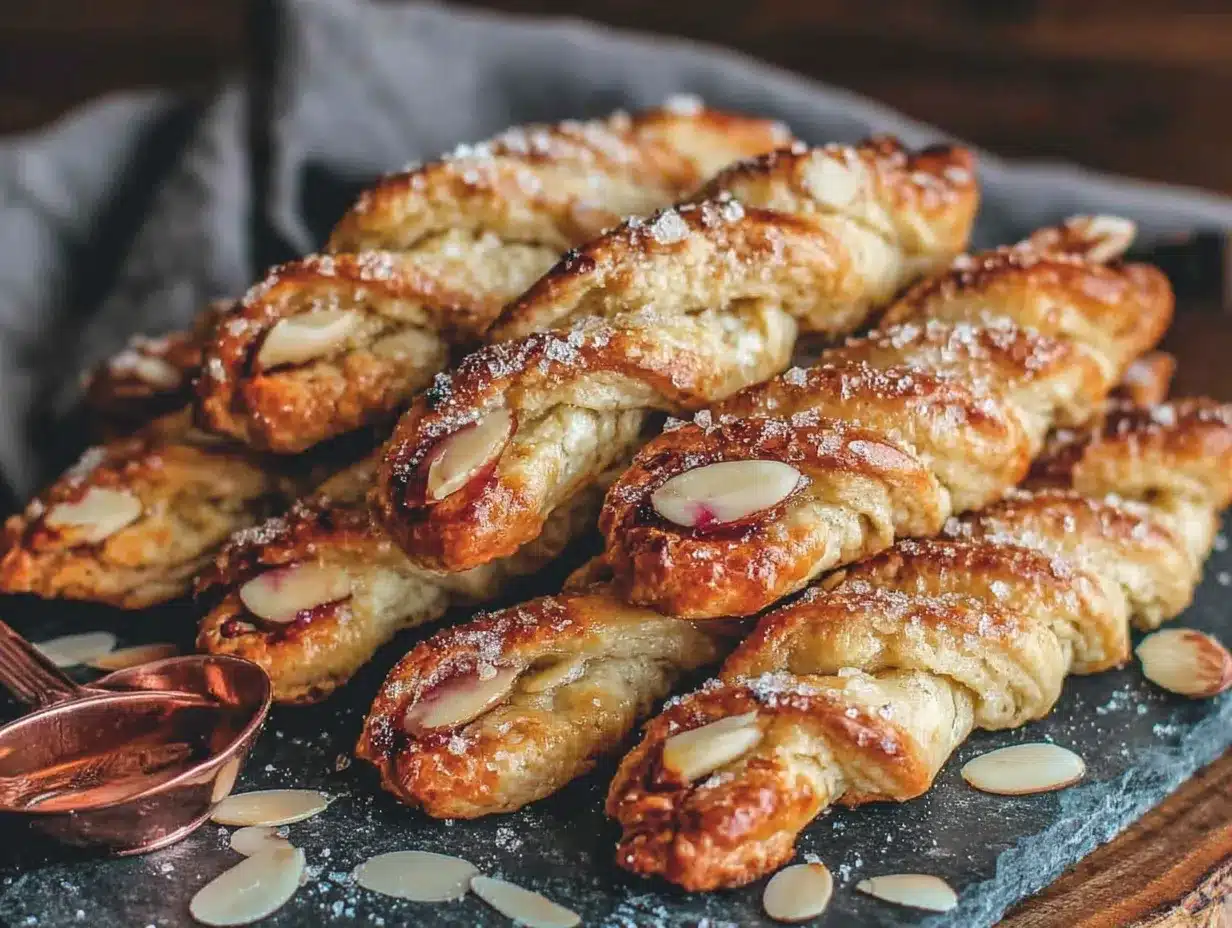
When I pulled them out, I actually laughed. They looked grotesque. Perfectly, wonderfully, Halloween-y grotesque. The almond nails had toasted to a pale, creepy shade, and the knuckle lines had deepened into realistic wrinkles. I walked into that party with a platter of witch finger cookies, feeling like I was bringing a plate of body parts. They were the first thing to disappear. People were taking photos, posting them, actually squealing. One guy asked if they were real. So, maybe you’ve been there—the scramble, the panic, the low expectations. These cookies are proof that sometimes the best things come from a total, last-minute kitchen meltdown. They’re the reason I now keep a bag of almonds in my pantry all year round.
Why You’ll Love This Recipe
Let’s be real for a second. Halloween baking can be a whole production. You need special molds, food coloring gels, piping bags, and about four hours of patience you just don’t have. These spooky witch finger cookies are the glorious exception. They look ridiculously impressive—like you spent all day crafting edible horror—but they’re secretly one of the easiest things you’ll ever bake.
- Quick & Easy: From start to finish, you’re looking at about 45 minutes. The dough comes together in one bowl, no electric mixer required if you’re feeling strong-armed.
- Simple Ingredients: You probably have everything already. Butter, sugar, flour, an egg, vanilla, and almonds. No weird gelatin or specialty candy melts.
- Perfect for Halloween: These are the undisputed stars of any spooky spread. They work for adult parties, school events, or just a fun night in with a scary movie.
- Crowd-Pleaser: Kids think they’re hilarious. Adults think they’re brilliant. Everyone eats them. They’re the kind of cookie that gets talked about for weeks.
- Unbelievably Delicious: Here’s the thing—they’re not just a gimmick. They’re genuinely good shortbread cookies. Buttery, crumbly, with that perfect little crunch from the almond “nail.”
What makes these different from every other spooky cookie recipe out there? It’s the texture. I spent a few batches getting the dough just right—not too soft, not too dry. You want a dough that holds its shape when you roll it into those finger shapes, but still bakes up tender and melt-in-your-mouth. The almond isn’t just for show, either. It adds this subtle nutty flavor that makes the shortbread taste almost fancy. This isn’t just another Halloween cookie. It’s the one that makes people do a double-take, then reach for a second.
What Ingredients You Will Need
This recipe relies on classic shortbread ingredients to deliver that perfect buttery crumb and realistic texture. Nothing fancy here—just smart choices that make these witch finger cookies work.
- 1 cup (226g) unsalted butter, softened – Make sure it’s at room temperature. Cold butter won’t cream properly, and melted butter will make the cookies spread into blobs. I leave mine out for about an hour before starting.
- 1 cup (200g) granulated sugar – Regular white sugar gives these cookies the right structure. You could use caster sugar if you have it, but standard granulated works perfectly.
- 1 large egg – This binds the dough. Make sure it’s at room temperature so it incorporates smoothly. If you forgot to take it out, pop it in a bowl of warm water for five minutes.
- 1 teaspoon vanilla extract – Pure vanilla makes a difference here. The imitation stuff has a chemical aftertaste that you’ll notice in a simple shortbread. I use Nielsen-Massey, but any pure extract works.
- 1/2 teaspoon almond extract – This is the secret ingredient. It reinforces the almond flavor from the nails and gives the cookies a subtly spooky, marzipan-like undertone. Don’t skip it.
- 2 1/2 cups (312g) all-purpose flour – Spoon and level your flour. Scooping directly from the bag packs it down and gives you too much, making the cookies dry and crumbly.
- 1/2 teaspoon salt – Balances the sweetness and enhances the buttery flavor. I use fine sea salt.
- 1/2 teaspoon baking powder – Just a touch. It gives the cookies a slight lift without making them puffy. You want them dense but not hockey-puck dense.
- Whole almonds (about 48-60, one per cookie) – Look for raw, whole almonds with the skin on. The brown skin makes them look more like real fingernails. Blanched almonds are too pale and obvious.
- Red food coloring or raspberry jam (optional, for “blood”) – Totally optional, but a tiny dab at the “cuticle” base or the “broken” end of a finger adds that next-level gross factor.
For the best results, I really recommend using a good quality butter like Kerrygold or Plugrà. The higher butterfat content makes the cookies richer and the texture more tender. And please, please use whole almonds, not slivers or chopped. You need that full almond shape to convincingly look like a fingernail.
Equipment Needed
You don’t need a professional bakery setup for these spooky witch finger cookies, which is part of their charm. Here’s what you’ll want to have on hand:
- Large mixing bowl – Any bowl works, but a wide, shallow one makes creaming the butter and sugar easier.
- Hand mixer or stand mixer – A hand mixer is perfectly fine. If you’re using a stand mixer, use the paddle attachment. You can also do this by hand with a wooden spoon, but your arm will get a workout.
- Baking sheets – Two standard half-sheet pans. Line them with parchment paper for easy cleanup.
- Parchment paper – Non-negotiable. These cookies have a lot of butter, and they’ll stick to an unlined pan.
- Sharp knife or bench scraper – For scoring the knuckle lines. A dull knife will drag and tear the dough.
- Cooling rack – Wire racks let the cookies cool evenly so they stay crisp.
- Small offset spatula – Not required, but it makes transferring the delicate unbaked cookies to the baking sheet much easier without smushing them.
- Plastic wrap – For chilling the dough. You can also use a reusable beeswax wrap if you’re trying to cut down on waste.
I’ve made these with a cheap hand mixer from the grocery store and a fancy KitchenAid, and honestly, the results were the same. The only thing I’d spring for is good parchment paper. The thin, waxy stuff burns and sticks. Get the unbleached, heavy-duty kind.
Preparation Method
- Cream the butter and sugar. In your large mixing bowl, beat the softened butter and granulated sugar together until light and fluffy. This takes about 2-3 minutes with a hand mixer on medium speed, or about 4 minutes by hand. You’re looking for a pale, airy mixture that looks almost like whipped frosting. Scrape down the sides of the bowl once halfway through.
- Add the wet ingredients. Crack in the egg, then add the vanilla extract and the almond extract. Beat on low speed until just combined. Don’t overmix here—you don’t want to incorporate too much air. The mixture might look slightly curdled at this point, and that’s totally fine. It will come together when you add the flour.
- Mix the dry ingredients. In a separate medium bowl, whisk together the all-purpose flour, salt, and baking powder. This ensures the baking powder and salt are evenly distributed so you don’t get a pocket of salt in one cookie.
- Combine wet and dry. Gradually add the flour mixture to the wet ingredients, mixing on low speed. Add it in three additions, mixing just until the flour disappears after each one. The dough will be soft and slightly sticky, but it should hold together when you pinch it. If it feels too sticky to handle, add another tablespoon of flour. If it’s too dry and crumbly, add a teaspoon of milk.
- Chill the dough. This step is crucial. Wrap the dough in plastic wrap and flatten it into a disc. Refrigerate for at least 30 minutes, or up to 2 days. Chilling firms up the butter, which prevents the cookies from spreading into flat discs instead of staying in their finger shapes. I’ve skipped this step before out of impatience, and I ended up with cookies that looked more like stubby little sausages than witch fingers.
- Preheat the oven. Set your oven to 350°F (175°C). Line your baking sheets with parchment paper.
- Shape the fingers. Take the chilled dough out of the fridge. Pinch off a piece about the size of a walnut, roughly 1 tablespoon. Roll it between your palms into a log shape. Then, taper one end slightly to look like a fingertip, and make the other end a bit jagged or slightly torn-looking to mimic a broken finger. The fingers should be about 3-4 inches long and about 3/4 inch thick. Place them on the prepared baking sheet, spacing them about 2 inches apart.
- Create the knuckles. Using the back of a butter knife or a bench scraper, gently press three lines into each finger to create the knuckle joints. Don’t press all the way through—just deep enough to leave an indentation. Angle the cuts slightly, because real knuckles aren’t perfectly straight lines.
- Add the almond nails. Take a whole almond and press it firmly onto the tapered end of the finger. Press it in so the pointed end of the almond is facing outward, like a fingernail growing from the fingertip. Make sure it’s secure, or it will fall off during baking. You can also press a tiny dent into the base of the almond to mimic a cuticle if you’re feeling extra detailed.
- Bake. Place the baking sheets in the preheated oven. Bake for 12-15 minutes, or until the cookies are just set and the edges are starting to turn a very light golden brown. The bottoms should be golden. Don’t overbake—they’ll continue to firm up as they cool on the pan.
- Cool. Let the cookies rest on the baking sheet for 5 minutes. This allows them to set up so they don’t crumble when you move them. Then, transfer them to a wire cooling rack to cool completely.
- Optional “blood” effect. Once the cookies are completely cool, you can add a dab of red food coloring gel or a tiny smear of raspberry jam at the base of the almond nail or on the “broken” end of the finger. It gives them that freshly-harvested look that’s perfect for Halloween.
Cooking Tips & Techniques
I’ve made these spooky witch finger cookies probably a dozen times now, and I’ve learned a few things the hard way. Let me save you some trouble.
The dough temperature is everything. I cannot stress this enough. If your dough is warm and soft, the fingers will spread in the oven and lose their shape. They’ll look more like fat little slugs than witch fingers. If you find the dough getting too soft while you’re shaping, just pop it back in the fridge for 10 minutes. I keep a small bowl of ice water nearby to cool my hands down if they’re warming the dough too much.
Don’t overwork the dough. When you’re rolling the fingers, handle the dough as little as possible. The heat from your hands melts the butter, and if you keep kneading and rerolling, the cookies will turn out tough instead of tender. If a piece of dough cracks while you’re rolling it, just press it back together gently and move on.
The knuckle lines need to be deep enough. This was my biggest mistake the first time. I made these wimpy little scratches on the dough, and they baked right out. You couldn’t see a single knuckle. Press firmly with the knife—you want a deep, clean indent. The dough will puff up slightly during baking, so you need the lines to be bold.
Almond placement matters. Press the almond on at a slight angle, not straight on. Real fingernails grow at an angle. Also, make sure the almond is pointing in the right direction—the pointed end of the almond should be facing away from the “hand,” like a nail tip. I’ve had friends accidentally put them on backwards, and it just looks weird.
Bake one test cookie first. If you’re nervous about the shape or the baking time, just shape one cookie and bake it. See how it spreads, how the knuckle lines look, and how the almond behaves. Then adjust the rest of the batch accordingly. This is a pro baker trick that saves entire batches of cookies.
Multitasking strategy: While the dough is chilling, get your baking sheets lined and your almonds counted out. That way, when the dough is ready, you can shape and bake without stopping. The whole process goes much faster if you’re not hunting for equipment mid-way.
Variations & Adaptations
One of the best things about this recipe is how flexible it is. You can adapt these witch finger cookies for different dietary needs or just for fun.
Gluten-Free Version: Swap the all-purpose flour for a 1:1 gluten-free baking flour blend. I’ve used Bob’s Red Mill and Cup4Cup with great results. The texture will be slightly more crumbly, so handle the dough gently. You might need to chill it for an extra 15 minutes to make it easier to shape.
Vegan Witch Fingers: Use vegan butter (I like Miyoko’s or Earth Balance) and replace the egg with a flax egg (1 tablespoon ground flaxseed mixed with 3 tablespoons water, let it sit for 5 minutes until gelled). The cookies will be a bit less rich, but they still look and taste great. Make sure your sugar is vegan-friendly, too—some granulated sugars are processed with bone char.
Chocolate Witch Fingers: Replace 1/4 cup of the flour with 1/4 cup of unsweetened cocoa powder. You get a dark, chocolatey cookie that looks even more sinister. The almond nails stand out beautifully against the dark dough. These are my personal favorite version.
Different “Nails”: If you don’t have whole almonds, you can use pecan halves, walnut pieces, or even candy corn for a sweeter, less realistic look. For a truly terrifying effect, use blanched slivered almonds for long, sharp, vampire-like nails.
Spiced Version: Add 1 teaspoon of pumpkin pie spice or cinnamon to the dry ingredients. It gives the cookies a warm, autumnal flavor that’s perfect for Halloween. The spices don’t affect the appearance at all, so you get the same spooky look with a cozy taste.
I tried a version once where I added a drop of green food coloring to the dough to make the fingers look like they belonged to a swamp witch. They turned out a weird, unappetizing gray-green color. So, maybe stick to the natural buttery color unless you’re using a high-quality gel food coloring.
Serving & Storage Suggestions
These cookies are best served at room temperature, arranged on a platter in a way that maximizes the creep factor. I like to scatter them around casually, like someone just dropped a handful of severed digits. For extra drama, place them next to a bowl of “blood” (raspberry jam or strawberry syrup) for dipping.
What to serve with them: These pair perfectly with a glass of cold milk, a hot apple cider, or a pumpkin spice latte. For adult gatherings, they’re fantastic with a dark stout beer or a glass of bourbon. The buttery shortbread balances the bitterness of the alcohol beautifully.
Storage: Store the cooled cookies in an airtight container at room temperature. They’ll stay fresh for up to 5 days. Do not refrigerate them—the fridge dries out the cookies and makes them hard. If you need to store them longer, freeze them.
Freezing instructions: You can freeze the unbaked shaped cookies on a baking sheet until solid, then transfer them to a freezer bag. Bake directly from frozen, adding 2-3 minutes to the baking time. Or, freeze the baked, cooled cookies in a single layer in a freezer-safe container for up to 3 months. Thaw at room temperature for about 30 minutes before serving.
Reheating: These are meant to be eaten at room temperature, but if you want that just-baked warmth, pop them in a 300°F (150°C) oven for 3-4 minutes. Don’t microwave them—they’ll get soggy and lose their texture.
Flavor development: Honestly, these cookies taste even better the next day. The flavors meld together, and the almond extract mellows out. If you can resist eating them all on day one, you’re in for a treat on day two.
Nutritional Information & Benefits
Let’s be honest—these are cookies. They’re a treat, not a health food. But here’s the breakdown so you know what you’re working with. Per cookie (based on 48 cookies):
- Calories: 95
- Fat: 6g
- Saturated Fat: 3.5g
- Carbohydrates: 10g
- Sugar: 5g
- Protein: 1.5g
- Fiber: 0.5g
The good news: Almonds are a great source of vitamin E, magnesium, and healthy monounsaturated fats. So at least the “nails” are doing something good for you. The butter provides a small amount of vitamin A, and the egg adds a bit of protein. But really, these are about fun and flavor, not nutrition.
Dietary considerations: These cookies contain gluten, dairy, and eggs. They are not suitable for those with celiac disease or dairy allergies unless you use the substitutions mentioned above. They are vegetarian-friendly.
My personal take? I don’t worry about the nutritional profile of a Halloween cookie. Life is about balance. I eat my vegetables during the week, and I eat witch fingers on Halloween. It’s all about moderation and joy.
FAQs
Why did my cookies spread into flat blobs?
This is almost always because the dough wasn’t chilled enough. The butter needs to be cold when it hits the oven. If your kitchen is warm, chill the shaped cookies on the baking sheet for 10 minutes before baking. Also, make sure your butter was softened, not melted, when you started.
Can I make the dough ahead of time?
Absolutely. You can make the dough up to 2 days in advance and keep it wrapped in the fridge. You can also freeze the dough for up to 3 months. Just thaw it overnight in the fridge before shaping and baking.
My almond nails keep falling off during baking. What do I do?
Press the almond in more firmly. You really need to embed it into the dough. Also, make sure the dough isn’t too dry. If it’s crumbly, it won’t hold the almond. You can also brush a tiny bit of water or egg wash on the dough before pressing the almond on to help it stick.
How do I get the knuckle lines to stay visible after baking?
Press deeper than you think you need to. The dough rises slightly in the oven, so shallow lines will disappear. Use a sharp knife and press firmly, almost halfway through the cookie. You can also gently re-score the lines with the knife as soon as the cookies come out of the oven, while they’re still warm and soft.
Can I use almond flour instead of all-purpose flour?
I don’t recommend it. Almond flour doesn’t have the gluten structure needed to hold these cookies together in their finger shape. They’ll spread and crumble. Stick to the all-purpose flour or a 1:1 gluten-free baking blend.
Conclusion
These spooky witch finger cookies are more than just a Halloween gimmick—they’re a genuine crowd-pleaser that delivers on both looks and taste. They’re the recipe you’ll pull out year after year, the one your friends will ask about every October, the one that makes people say, “Wait, you made these?”
I love them because they remind me that you don’t need to be a professional baker to create something memorable. You just need a little imagination, a bag of almonds, and a willingness to laugh at your own mistakes. The first batch I made looked like arthritic sausages. The second batch looked like legit witch fingers. It’s a learning curve, but it’s a delicious one.
So go ahead—get your hands dirty, shape some fingers, and have fun with it. Make them as gruesome or as cute as you want. Add blood, don’t add blood. Use chocolate dough or spice it up. This is your kitchen, your Halloween, your witch finger legacy. I’d love to hear how yours turn out—drop a comment below and tell me about your spooky creations. And if you’re looking for more Halloween baking inspiration, check out our crispy garlic chicken for a savory spooky dinner idea, or our pumpkin spice muffins for a fall breakfast treat. Happy Halloween, and happy baking!
Pin This Recipe!

Spooky Witch Finger Cookies with Almond Nails: Easy Recipe

These spooky witch finger cookies look like actual severed fingers but are secretly one of the easiest Halloween treats you’ll ever bake. Made with simple shortbread ingredients and whole almond nails, they’re buttery, crumbly, and perfect for any spooky gathering.
- Prep Time: 15 minutes
- Cook Time: 15 minutes
- Total Time: 45 minutes
- Yield: 48 cookies 1x
- Category: Dessert
- Cuisine: American
Ingredients
- 1 cup (226g) unsalted butter, softened
- 1 cup (200g) granulated sugar
- 1 large egg
- 1 teaspoon vanilla extract
- 1/2 teaspoon almond extract
- 2 1/2 cups (312g) all-purpose flour
- 1/2 teaspoon salt
- 1/2 teaspoon baking powder
- Whole almonds (about 48-60, one per cookie)
- Red food coloring or raspberry jam (optional, for “blood”)
Instructions
- Cream the butter and sugar together until light and fluffy, about 2-3 minutes with a hand mixer on medium speed.
- Add the egg, vanilla extract, and almond extract. Beat on low speed until just combined.
- In a separate bowl, whisk together the flour, salt, and baking powder.
- Gradually add the flour mixture to the wet ingredients in three additions, mixing on low speed until just combined. The dough should be soft and slightly sticky.
- Wrap the dough in plastic wrap, flatten into a disc, and refrigerate for at least 30 minutes (or up to 2 days).
- Preheat the oven to 350°F (175°C). Line baking sheets with parchment paper.
- Pinch off walnut-sized pieces of dough (about 1 tablespoon) and roll into logs about 3-4 inches long. Taper one end to look like a fingertip and make the other end jagged.
- Using the back of a butter knife, press three deep lines into each finger to create knuckle joints.
- Press a whole almond firmly onto the tapered end of each finger, pointed end outward, to create the nail.
- Bake for 12-15 minutes, until the edges are just starting to turn light golden brown.
- Let the cookies rest on the baking sheet for 5 minutes, then transfer to a wire rack to cool completely.
- Optional: Add a dab of red food coloring or raspberry jam at the base of the almond or on the broken end for a “blood” effect.
Notes
Chill the dough thoroughly to prevent spreading. Press knuckle lines deeply so they remain visible after baking. Press almonds firmly to prevent them from falling off. For best results, use raw whole almonds with skin on.
Nutrition
- Serving Size: 1 cookie
- Calories: 95
- Sugar: 5
- Sodium: 45
- Fat: 6
- Saturated Fat: 3.5
- Carbohydrates: 10
- Fiber: 0.5
- Protein: 1.5
Keywords: witch finger cookies, Halloween cookies, shortbread cookies, spooky cookies, almond cookies, easy Halloween recipe



