Love this? Save it for later!
Share the inspiration with your friends
The power went out halfway through the setup, which was ironic given that I was trying to create a spooky Halloween atmosphere. It was October 31st, 2018, and I had spent three hours arranging a charcuterie board that was supposed to be the centerpiece of my neighborhood party. The lights flickered and died just as the first guests were pulling into the driveway. I stood there in the dark, holding a tray of ghost-shaped marshmallows, feeling the panic rise. My neighbor, Sarah, knocked on the door with a flashlight beam cutting through the darkness. She didn’t even ask what was wrong. She just walked in, grabbed a handful of the cheese cubes, and said, “Well, it’s definitely atmospheric now.”
We ended up serving the entire board by candlelight. The shadows made everything look more dramatic, more mysterious. The white chocolate ghosts looked like they were floating in the dark. The red pepper jelly “blood” dripped in a way that felt genuinely eerie. People loved it. They thought it was intentional. I realized then that imperfection can be part of the charm, especially when you are aiming for spooky. That night, I learned that you don’t need perfect lighting to make a Spooky Sweet Halloween Charcuterie Board unforgettable. You just need creativity and a willingness to embrace the chaos.
I tried to recreate that magic the next year, but with more planning and better lighting. I wanted to capture that same sense of wonder without the stress of a power outage. I spent weeks testing different combinations of sweets and savory items. I wanted to make sure the board was not just a pile of snacks, but a visual experience. The goal was to create something that looked terrifying but tasted delightful. I wanted guests to hesitate before picking up a treat, only to be pleasantly surprised by the flavor. This recipe is the result of those long nights of testing and tweaking.
It’s a balance of sweet and salty, with a heavy dose of Halloween spirit. You know that feeling when you walk into a house and the food looks so good you’re afraid to touch it? That’s what I was going for. I mean, honestly, who doesn’t love a snack that looks like it belongs in a haunted house? This board is perfect for anyone who wants to impress their friends without spending hours in the kitchen. It’s easy to assemble, but it looks like you hired a professional. Let me tell you, once you try this combination, you’ll never go back to plain cheese plates.
The memory of that dark party stays with me because it taught me that the best memories are often the unplanned ones. But this board? This one is planned to perfection. It’s reliable. It’s delicious. And it’s always a hit. I keep making it because it brings people together, even in the dark. Maybe you’ve been there, standing in front of a fridge wondering what to bring to a party. This is your answer. It’s simple, it’s spooky, and it’s sweet.
Why You’ll Love This Recipe
I’ve made this Spooky Sweet Halloween Charcuterie Board at least a dozen times now, and it never gets old. The first time I made it, I was nervous. I thought people might think it was too childish. But the feedback was overwhelming. Everyone loved it. The kids went crazy for the candy, and the adults appreciated the fancy cheeses and crackers. It’s the kind of dish that bridges the gap between playful and sophisticated. Here is why you are going to love making this:
- Quick & Easy: This comes together in under 20 minutes. You don’t need to cook anything. Just arrange, arrange, and arrange again. It’s perfect for busy weeknights or last-minute Halloween parties when you realize you forgot to buy a gift.
- Simple Ingredients: No fancy grocery trips needed. You likely already have most of these items in your kitchen. Cheese, crackers, fruit, and candy are staples. This makes it accessible for anyone, regardless of their cooking skills.
- Perfect for Parties: Great for Halloween gatherings, autumn brunches, or cozy dinner parties. It’s a crowd-pleaser that always gets rave reviews from kids and adults alike. It’s a conversation starter.
- Unbelievably Delicious: The texture and flavor combo is next-level comfort food. The crunch of the crackers, the creaminess of the cheese, and the sweetness of the candy create a perfect balance. It’s satisfying in every bite.
- Visually Stunning: This recipe isn’t just good—it is the kind that makes you close your eyes after the first bite. It’s comfort food reimagined with a spooky twist. It’s perfect for impressing guests without stress, or turning a simple meal into something memorable.
What makes this recipe different from the rest is the specific attention to color and shape. Most charcuterie boards are just a random assortment of items. This one is curated. I use black licorice for contrast, white chocolate for ghosts, and red jelly for blood. It’s a deliberate design choice. Whether it is the special technique of drizzling chocolate or the creative twist of using spider-shaped cookies, make it clear this isn’t just another version—it’s your best version. It’s designed to be photographed and shared, but more importantly, it’s designed to be eaten and enjoyed.
What Ingredients You Will Need
This recipe uses simple, wholesome ingredients to deliver bold flavor and satisfying texture without the fuss. The key to a great board is variety. You want different textures, colors, and flavors to keep things interesting. Here is what you will need to create your spooky masterpiece:
For the Cheese & Savory Base
- Sharp Cheddar Cheese: Cut into cubes or strips. (Adds a bold, tangy flavor that pairs well with sweet items)
- Brie or Camembert: Whole wheel or sliced. (Provides a creamy, soft contrast to the harder cheeses)
- Salami or Pepperoni: Rolled up slices. (Adds a salty, cured meat element)
- Crackers: Assorted shapes, including square and round varieties. (I recommend Back to Nature for a natural, crisp bite)
- Pretzel Rods: Broken into pieces. (Adds a nice crunch and height to the board)
- Mustard: Whole grain or Dijon. (For dipping and adding a zesty kick)
For the Sweet & Spooky Elements
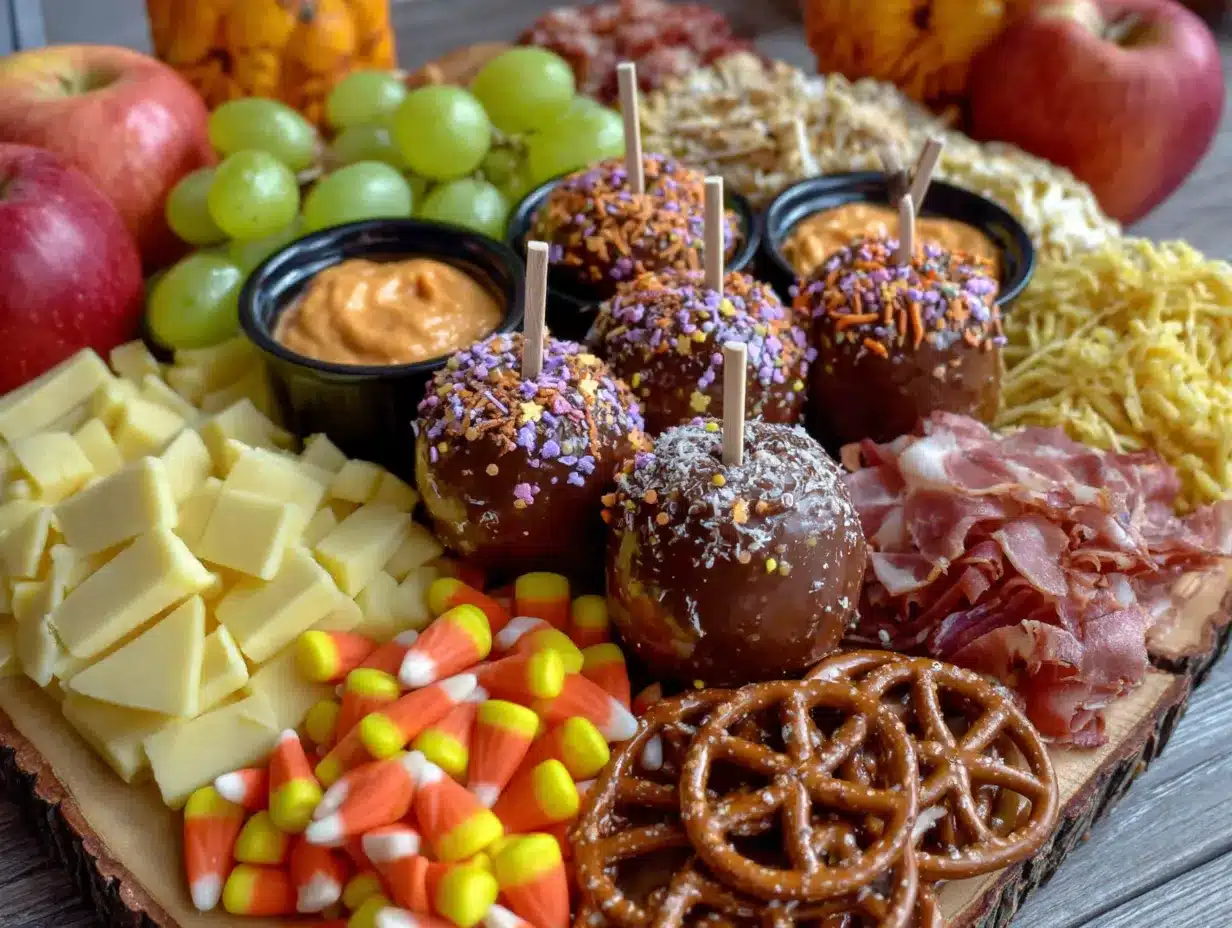
- White Chocolate: Melted for dipping or drizzling. (Use high-quality baking chocolate for smooth results)
- Marshmallows: Large white marshmallows. (Perfect for making ghosts)
- Gummy Worms: Assorted colors. (Essential for the creepy factor)
- Black Licorice: Twists or ropes. (Adds a dark color contrast and unique flavor)
- Red Jelly or Jam: Strawberry or raspberry. (Used to create “blood” drips)
- Chocolate Covered Raisins: (Adds a chewy texture and hidden surprise)
For the Fresh & Seasonal Touch
- Grapes: Red or green. (Look for firm, small clusters for best presentation)
- Apple Slices: Honeycrisp or Fuji. (Toss with lemon juice to prevent browning)
- Pears: Sliced thinly. (Adds a delicate, sweet element)
- Walnuts: Halves or pieces. (Adds a nutty crunch and visual interest)
You can substitute ingredients based on your preferences. For example, use almond flour crackers for a gluten-free option. Swap Greek yogurt with dairy-free coconut yogurt if needed, though that’s more for dips. For seasonal variations, in summer, swap in fresh berries instead of frozen fruits. If you are allergic to nuts, you can omit the walnuts and add more seeds or dried fruit. The beauty of this board is its flexibility. You can make it as healthy or as indulgent as you like. Just remember to keep the color palette in mind. The contrast between the white chocolate and the black licorice is what makes it pop.
Equipment Needed
You don’t need much to pull this off. A large wooden board or platter is essential. I prefer a large rectangular wooden board because it gives you plenty of space to arrange the items. If you don’t have one, a large cutting board or even a clean slate tile works well. You will also need small bowls or ramekins for the dips and jellies. These help break up the flat surface and add height. A knife for cutting cheese and fruit is a must. I recommend a cheese knife with a forked tip for easy serving. If you are melting chocolate, a microwave-safe bowl and a spatula are necessary. I’ve tried using a double boiler, but the microwave is faster and less messy. Just heat in short intervals to avoid burning. Budget-friendly options include using small glass jars for dips or repurposing old picture frames as rustic platters. Maintenance tip: Wooden boards should be hand-washed and dried immediately to prevent warping. Oil them occasionally with mineral oil to keep them looking new.
Preparation Method
Let’s get started. This process is straightforward, but it requires a bit of artistic vision. Here is how to assemble your Spooky Sweet Halloween Charcuterie Board:
- Prep the Cheese: Cut your cheddar into cubes or sticks. If using Brie, you can leave it whole or slice it into wedges. Place the cheese on one side of the board. (Time: 5 minutes)
- Add the Crackers: Arrange the crackers in clusters or fanned out patterns. Place them near the cheese but leave some space for other items. (Time: 3 minutes)
- Place the Meats: Roll up the salami or pepperoni slices. Scatter them around the board. You want them to look casual, not perfect. (Time: 2 minutes)
- Create the “Blood”: Spoon some red jelly into small bowls. Place these bowls strategically around the board. You can also drizzle a little jelly directly onto the board for a spooky effect. (Time: 2 minutes)
- Add the Fruit: Toss apple slices with lemon juice. Arrange grapes and pear slices in clusters. Place them in the empty spaces to fill gaps. (Time: 5 minutes)
- Make the Ghosts: Dip marshmallows into melted white chocolate. Place them on parchment paper to set. Once set, add candy eyes. Arrange the ghosts on the board. (Time: 10 minutes, plus cooling time)
- Scatter the Candy: Add gummy worms, black licorice, and chocolate-covered raisins. Tuck them into corners and around the edges. (Time: 3 minutes)
- Final Touches: Add pretzel rods and walnuts. Step back and look at the board. Adjust items as needed. Add more jelly if it looks too sparse. (Time: 2 minutes)
Keep in mind that the board should look full but not cluttered. You want each item to be visible. If you are making this ahead of time, keep the fruit and cheese covered until serving to prevent drying out. The marshmallows can be made a day in advance. Just store them in an airtight container. This recipe is forgiving, so don’t stress if it’s not perfect. It’s supposed to look rustic and spooky.
Cooking Tips & Techniques
I’ve learned a few things along the way that can save you time and trouble. First, room temperature cheese tastes better. Take your cheese out of the fridge about 30 minutes before serving. Cold cheese can be hard and less flavorful. Second, use a variety of heights. Don’t lay everything flat. Use bowls for dips, stack crackers, and lean pretzel rods against other items. This creates visual interest. Third, don’t overfill the board. It’s better to have empty spaces than a cluttered mess. The eye needs room to rest. I once made a board so full that people couldn’t reach the items in the middle. Lesson learned. Fourth, balance the colors. If you have a lot of white items, add something dark like black licorice or dark chocolate. This contrast makes the board pop. Finally, taste as you go. Make sure you like the combinations. If a flavor combo doesn’t work for you, it probably won’t work for others. These tips are born from my own failures and successes. I hope they help you create a board that is both beautiful and delicious.
Variations & Adaptations
One of the best things about this board is how easy it is to customize. You can adapt it to fit different dietary needs or flavor preferences. Here are a few ideas:
- Dietary Variations: For a gluten-free board, use gluten-free crackers and ensure your candy is certified gluten-free. For a dairy-free option, use dairy-free cheese alternatives and omit the Brie. You can replace cheese with hummus or guacamole for a savory element.
- Seasonal Swaps: In autumn, add persimmons or pomegranate seeds for a pop of color. In winter, swap the fresh fruit for dried apricots and figs. These add a chewy texture that complements the nuts and crackers.
- Flavor Twists: If you like spicy flavors, add some jalapeño slices or spicy mustard. If you prefer sweet, add more chocolate and candy. You can also add a drizzle of honey or caramel sauce for extra sweetness.
- Allergen Substitutions: For nut allergies, omit the walnuts and add sunflower seeds or pumpkin seeds. These add crunch without the risk of nuts. For soy allergies, check your crackers and candy labels carefully.
I once made a version with peanut butter and jelly slices instead of cheese. It was a huge hit with kids. It’s amazing how simple changes can transform the board. Don’t be afraid to experiment. The goal is to have fun and create something that reflects your personality. Maybe you want to add some edible flowers for a touch of elegance. Or maybe you want to go all out with Halloween-themed cookies. The possibilities are endless.
Serving & Storage Suggestions
Serve this board at room temperature. It allows the flavors to shine and the textures to be at their best. Present it on a dark tablecloth to make the colors pop. Pair it with a glass of red wine or a spooky cocktail. For storage, keep any leftover items in separate containers. Cheese should be wrapped in wax paper and stored in the fridge. Crackers should be kept in an airtight container to maintain crispness. Fruit can be stored in the fridge for a day or two. Reheat dips if necessary, but generally, cold dips are fine. The flavors of the board develop over time as the items interact. The crackers may soften slightly, but the taste remains good. I usually finish the leftovers the next day. It’s a great breakfast or lunch snack. Just remember to keep it away from pets, especially the chocolate and grapes, which are toxic to them.
Nutritional Information & Benefits
This Spooky Sweet Halloween Charcuterie Board offers a balance of nutrients, though it is primarily a treat. The cheese provides protein and calcium. The nuts offer healthy fats and fiber. The fruit adds vitamins and antioxidants. However, it is also high in sugar and sodium due to the candy and cured meats. Enjoy it in moderation. It’s perfect for occasional indulgence. For a healthier version, increase the fruit and nut portions and reduce the candy. This way, you can satisfy your sweet tooth while still getting some nutrition. I always try to include at least one healthy option on the board, like the apples or grapes. It helps balance out the indulgence. Remember, food is meant to be enjoyed, not just consumed. This board is a celebration of flavors and textures. It’s a way to bring people together and create memories. Whether you are hosting a party or having a quiet night in, this board is a great choice. It’s versatile, delicious, and fun.
Conclusion
This Spooky Sweet Halloween Charcuterie Board is more than just a snack. It’s a creative outlet, a way to express your personality, and a means to connect with others. I love making it because it allows me to be playful with food. It’s a chance to experiment with colors and shapes. I encourage you to customize it based on your preferences. Add your favorite candies, try new cheese combinations, or experiment with different fruits. Make it your own. I hope you enjoy making this board as much as I do. Please share your creations with me. I’d love to see how you interpret this recipe. Leave a comment below with your favorite additions. Let’s inspire each other. Happy Halloween, and happy snacking!
FAQs
Can I make this board ahead of time?
Yes, you can prep most of the ingredients ahead of time. Cut the cheese and fruit a day in advance and store them in the fridge. Assemble the board an hour before serving to prevent the fruit from browning and the crackers from getting soggy. The marshmallows can be made days in advance.
What cheese is best for a charcuterie board?
A mix of hard and soft cheeses works best. Sharp cheddar adds flavor, while Brie adds creaminess. Goat cheese is also a great option for a tangy twist. Choose cheeses that complement each other and offer different textures.
How do I keep the fruit from browning?
Toss apple and pear slices with a little lemon juice or pineapple juice. This acid helps prevent oxidation. You can also keep the fruit submerged in the juice until you are ready to arrange it on the board.
Can I use this board for non-Halloween parties?
Absolutely. You can remove the spooky elements like gummy worms and black licorice. Use regular crackers and fruit, and add some herbs for decoration. It’s a versatile concept that can be adapted for any occasion.
What drinks pair well with this board?
Red wine, sparkling cider, or a spooky cocktail like a “blood” punch work well. The sweetness of the candy pairs nicely with dry wines, while the salty cheese complements bold flavors. Choose drinks that balance the sweet and savory elements of the board.
Pin This Recipe!
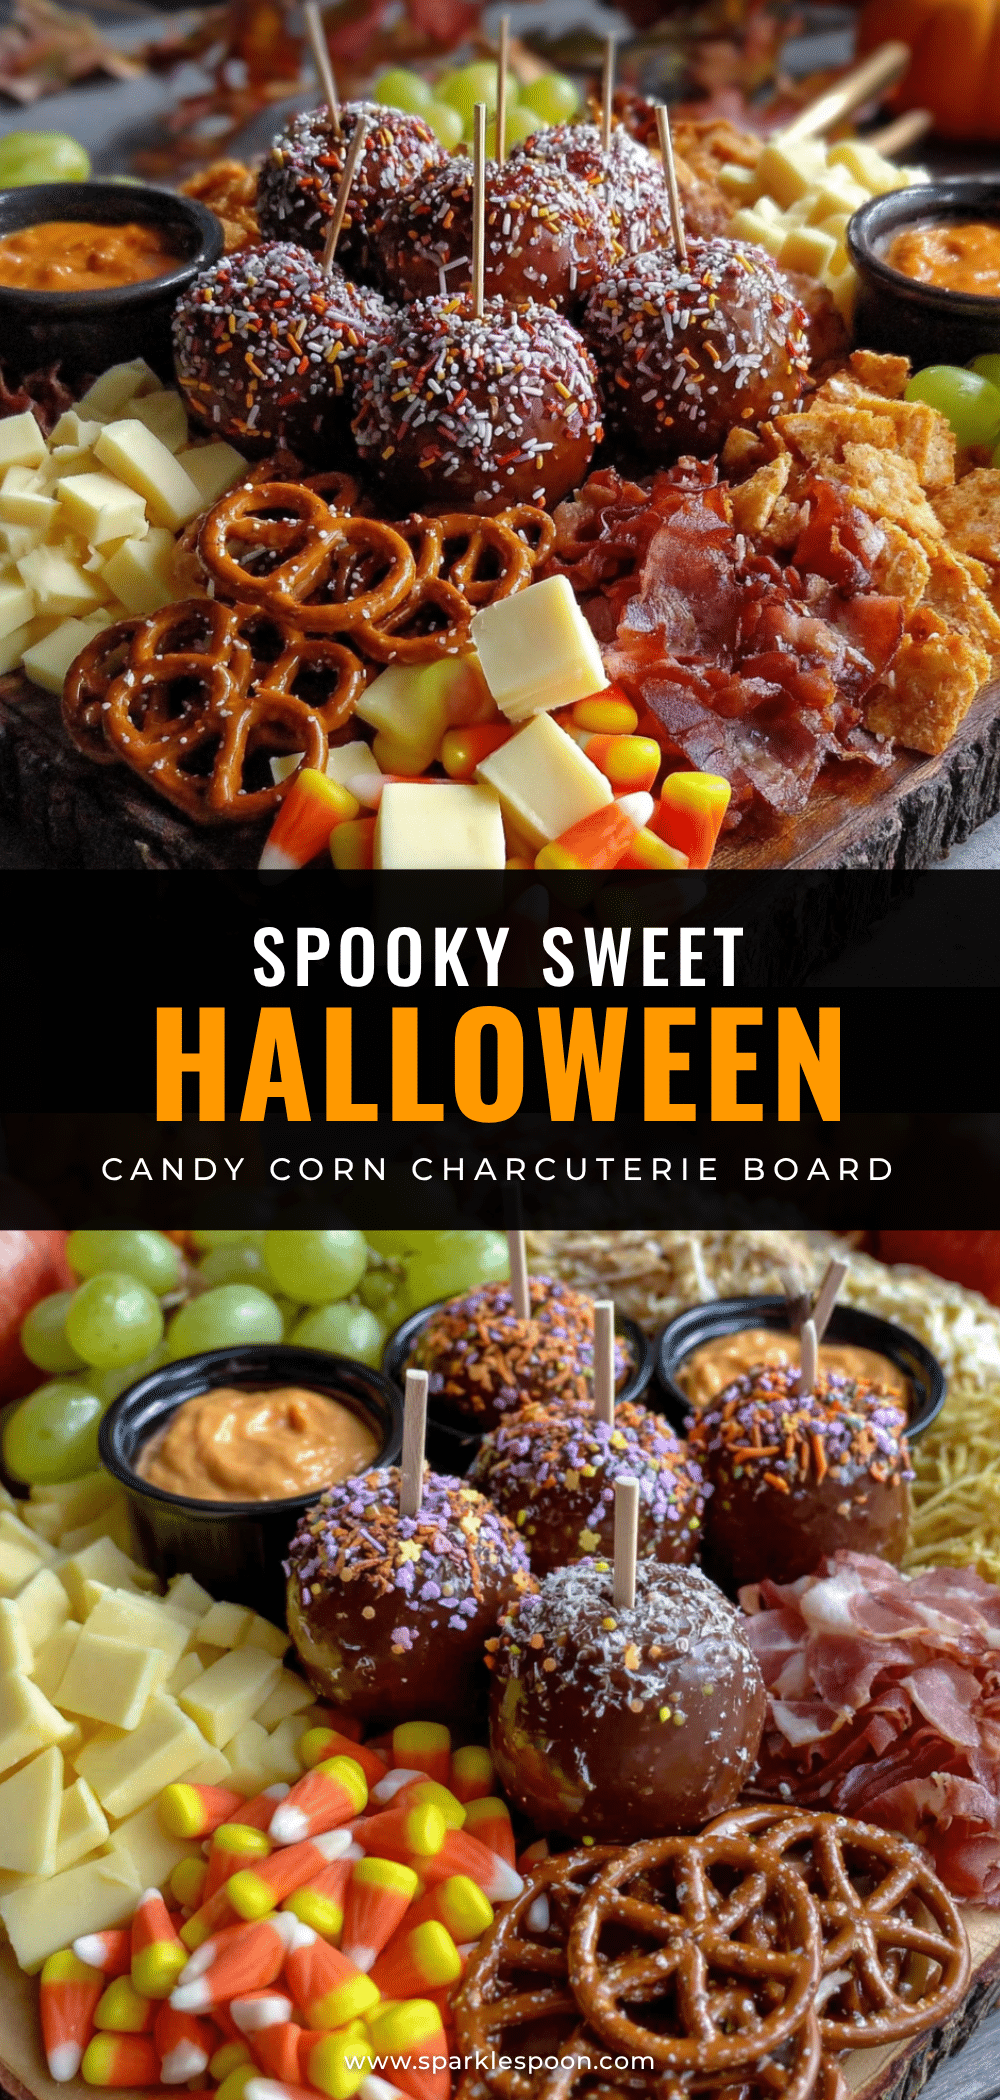
Spooky Sweet Halloween Charcuterie Board
A visually stunning and easy-to-assemble charcuterie board featuring a balance of sweet and savory items, designed with a spooky Halloween theme using white chocolate ghosts, red jelly ‘blood’, and assorted cheeses and crackers.
- Prep Time: 30 minutes
- Cook Time: 0 minutes
- Total Time: 30 minutes
- Yield: 8-10 servings
- Category: Appetizer
- Cuisine: American
Ingredients
- Sharp Cheddar Cheese, cut into cubes or strips
- Brie or Camembert, whole wheel or sliced
- Salami or Pepperoni, rolled up slices
- Assorted Crackers (e.g., Back to Nature)
- Pretzel Rods, broken into pieces
- Whole grain or Dijon Mustard
- White Chocolate, melted
- Large White Marshmallows
- Assorted Gummy Worms
- Black Licorice, twists or ropes
- Red Jelly or Jam (Strawberry or Raspberry)
- Chocolate Covered Raisins
- Grapes (Red or Green)
- Apple Slices (Honeycrisp or Fuji)
- Pears, sliced thinly
- Walnuts, halves or pieces
- Lemon Juice (for tossing fruit)
Instructions
- Prep the Cheese: Cut cheddar into cubes or sticks. Leave Brie whole or slice into wedges. Place cheese on one side of the board.
- Add the Crackers: Arrange crackers in clusters or fanned out patterns near the cheese, leaving space for other items.
- Place the Meats: Roll up salami or pepperoni slices and scatter them casually around the board.
- Create the ‘Blood’: Spoon red jelly into small bowls placed strategically around the board, or drizzle directly onto the board for a spooky effect.
- Add the Fruit: Toss apple slices with lemon juice to prevent browning. Arrange grapes and pear slices in clusters to fill empty spaces.
- Make the Ghosts: Dip marshmallows into melted white chocolate, place on parchment paper to set, add candy eyes, and arrange on the board.
- Scatter the Candy: Add gummy worms, black licorice, and chocolate-covered raisins, tucking them into corners and around edges.
- Final Touches: Add pretzel rods and walnuts. Step back to adjust items for a full but not cluttered look.
Notes
[‘Serve at room temperature for best flavor.’, ‘Take cheese out of the fridge 30 minutes before serving.’, ‘Marshmallows can be made a day in advance and stored in an airtight container.’, ‘Keep fruit and cheese covered until serving to prevent drying out.’, ‘Ensure the board looks full but not cluttered; leave empty spaces for visual interest.’, ‘Keep away from pets as chocolate and grapes are toxic to them.’]
Nutrition
- Serving Size: Varied assortment of
- Calories: 450
- Sugar: 22
- Sodium: 650
- Fat: 28
- Saturated Fat: 12
- Carbohydrates: 35
- Fiber: 3
- Protein: 12
Keywords: Halloween, charcuterie board, party snacks, easy appetizer, spooky food, fall party ideas, sweet and savory, cheese board



