Love this? Save it for later!
Share the inspiration with your friends
This was supposed to be a batch of my classic, go-to chocolate chip cookies for a Halloween party. I had everything measured out, the butter was perfectly softened, and I was feeling smug about being ahead of schedule for once. Then my phone rang—my sister, in a full-blown panic about her kid’s costume—and I grabbed the wrong bag from the pantry. Instead of granulated sugar, I grabbed powdered sugar. I didn’t even realize it until the dough was mixed and looked… weirdly pale and a little too soft. I was already late, the kitchen was a mess, and I was this close to just dumping the whole thing and starting over. But I had no more butter. So, I took a breath, scraped the dough into the fridge to firm up, and figured I’d deal with it later. What came out of the oven was nothing like the plan—and better. The cookies baked up thicker, with a crackly, slightly crisp top and a chewy center that was almost fudgy. And then, staring at them, I had this ridiculous idea to drizzle them with a little melted white chocolate. The way it settled into the cracks made it look like a spider web. Honestly, I almost cried with relief. That happy little disaster turned into my most-requested Halloween recipe, and I’ve never gone back to the original for this time of year. Maybe you’ve been there—a kitchen fail that somehow saves the day?
These Spooky Spider Web Chocolate Chip Cookies are the kind of thing you make when you want to impress without the stress. They start with a simple, foolproof cookie base that gets a creepy-cute makeover with a drizzle of white chocolate “webs.” The best part? The “spiders” are just mini chocolate sandwich cookies with pretzel legs. It’s so easy, but it looks like you spent hours. Let me tell you, seeing the look on people’s faces when they bite into one and get that perfect combo of chewy cookie, melty chocolate, and crunchy pretzel is pure magic. It’s the reason I keep making these every single October.
Why You’ll Love This Recipe
I’ve tested a lot of Halloween cookie recipes over the years, and this one wins every single time. It’s not just about the look—though, let’s be honest, the spider webs are adorable. It’s about the texture and the taste. Here’s why this recipe is a keeper:
- Quick & Easy: The dough comes together in about 15 minutes. The chilling time is short (just 30 minutes), so you can have cookies ready for a party or a school event without a huge time commitment.
- Simple Ingredients: You probably have everything for the cookie dough in your pantry right now. The only special items are the white chocolate melts and the cookies for the spiders, which are easy to find at any grocery store.
- Perfect for Halloween: This is the ultimate treat for classroom parties, spooky movie nights, or Halloween bake sales. They are a guaranteed crowd-pleaser.
- Crowd-Pleaser: Kids love the spider design, and adults love the classic cookie flavor. They disappear in minutes.
- Unbelievably Delicious: The base cookie is my favorite—crispy on the edges, chewy in the middle, and packed with semi-sweet chocolate chips. The white chocolate web adds a touch of sweetness, and the pretzel legs give a salty crunch that makes it next-level.
What makes this recipe different from the rest is the texture. Using powdered sugar instead of granulated gives the cookies a unique, melt-in-your-mouth quality that you don’t get with a standard recipe. It’s a small swap that makes a huge difference. This isn’t just another decorated cookie—it’s your best version of a Halloween classic. It’s the kind of cookie that makes you close your eyes after the first bite. It’s comfort food reimagined for the spookiest season—faster to make than a pumpkin pie, but with the same soul-soothing satisfaction. Perfect for impressing guests without any stress.
What Ingredients You Will Need
This recipe uses simple, wholesome ingredients to deliver bold flavor and satisfying texture without the fuss. Everything is a pantry staple, making it easy to whip up on a whim.
- For the Cookie Dough:
- 2 ¼ cups (280g) all-purpose flour (spooned and leveled for best results)
- 1 teaspoon baking soda
- 1 teaspoon salt (I use fine sea salt)
- 1 cup (226g) unsalted butter, softened (I always use Kerrygold for the best flavor)
- ¾ cup (150g) granulated sugar
- ¾ cup (90g) powdered sugar (This is the secret ingredient for the perfect texture!)
- 1 large egg, room temperature
- 1 teaspoon vanilla extract
- 2 cups (340g) semi-sweet chocolate chips (I prefer Ghirardelli for their rich flavor and shape)
- For the Spider Webs & Spiders:
- 1 cup (170g) white chocolate melting wafers (or white chocolate chips with 1 teaspoon coconut oil)
- 12-15 chocolate sandwich cookies (like Oreos, for the spider bodies)
- 60-75 thin pretzel sticks (for the spider legs, broken in half)
- Candy eyes (optional, but highly recommended for maximum spookiness)
Ingredient Tips: For the powdered sugar, don’t skip it—it’s what gives these cookies that crackly top and soft center. If you only have salted butter, reduce the added salt to ½ teaspoon. For a dairy-free version, use plant-based butter and dairy-free chocolate chips. The white chocolate melts are easier to work with than chips, as they don’t seize up as easily. Look for them in the baking aisle near the chocolate chips.
Equipment Needed
You don’t need any fancy tools for this recipe, which is part of its charm. Here’s what you’ll need:
- Electric Mixer: A stand mixer or a hand mixer works perfectly. A whisk and a strong arm can also get the job done, but it’s a workout!
- Large Mixing Bowls: One for dry ingredients, one for wet.
- Baking Sheets: Two large, rimmed baking sheets are ideal. Line them with parchment paper for easy cleanup.
- Cookie Scoop: A 2-tablespoon cookie scoop ensures all your cookies are the same size, so they bake evenly.
- Piping Bag or Ziploc Bag: For drizzling the white chocolate. A small piping bag with a tiny round tip is best, but a Ziploc bag with a tiny corner snipped off works perfectly.
- Cooling Rack: Essential for letting the cookies cool completely before you add the spider webs.
Budget-Friendly Tip: If you don’t have a cookie scoop, just use two spoons to portion the dough. A Ziploc bag is a perfect, cheap alternative to a piping bag. Don’t overthink the equipment!
Preparation Method
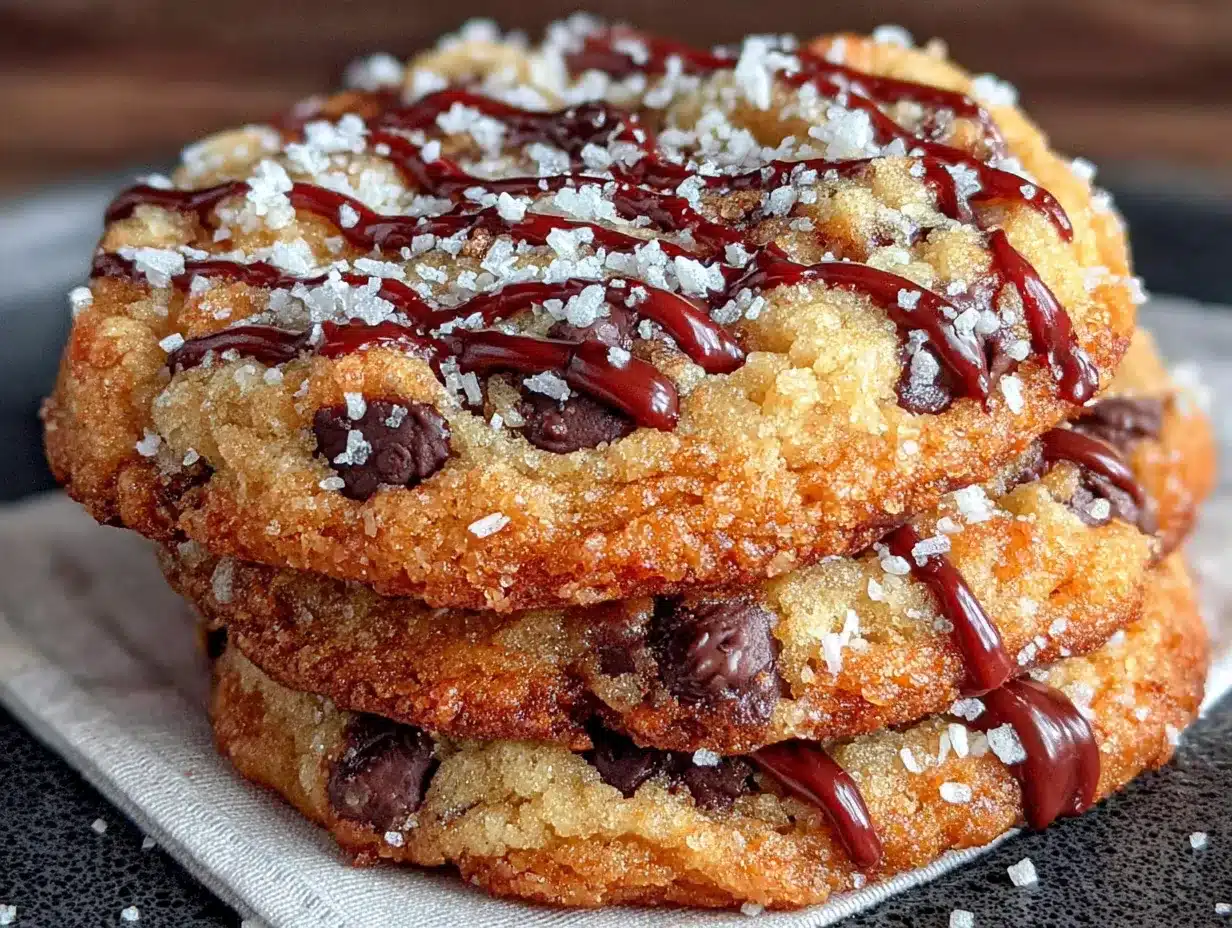
- Preheat and Prep: Preheat your oven to 350°F (175°C). Line two large baking sheets with parchment paper. This is non-negotiable for perfect cookies—no sticking, easy cleanup.
- Whisk Dry Ingredients: In a medium bowl, whisk together the flour, baking soda, and salt. Set this aside. This ensures the leavening agents are evenly distributed.
- Cream Butter and Sugars: In a large bowl, beat the softened butter, granulated sugar, and powdered sugar together with an electric mixer on medium speed until light and fluffy. This takes about 2-3 minutes. Scrape down the sides of the bowl once during mixing. The mixture should look pale and feel airy.
- Add Egg and Vanilla: Add the egg and vanilla extract to the butter mixture. Beat on low speed until just combined. Don’t overmix here, or your cookies will be tough.
- Combine Wet and Dry: Gradually add the dry ingredients to the wet ingredients, mixing on low speed until just a few streaks of flour remain. Overmixing at this stage develops gluten, making cookies tough.
- Fold in Chocolate Chips: Gently fold in the semi-sweet chocolate chips with a rubber spatula until they are evenly distributed throughout the dough.
- Chill the Dough: Cover the bowl with plastic wrap and refrigerate the dough for at least 30 minutes. This step is crucial—it prevents the cookies from spreading too much in the oven and helps develop that perfect chewy texture. I’ve skipped this before, and the cookies turned into flat, sad disks. Trust me on this one.
- Scoop and Bake: Use a 2-tablespoon cookie scoop to portion the dough. Place the dough balls about 2 inches apart on the prepared baking sheets. Bake for 10-12 minutes, or until the edges are golden brown and the centers look slightly underdone. They will continue to set on the baking sheet. The top should look a little crackly.
- Cool Completely: Let the cookies cool on the baking sheet for 5 minutes, then transfer them to a wire rack to cool completely. It’s important they are 100% cool before you add the chocolate webs, or the chocolate will just melt and slide off.
- Make the Spider Webs: While the cookies cool, prepare the white chocolate. Place the white chocolate melting wafers in a microwave-safe bowl. Microwave in 30-second intervals, stirring after each, until completely smooth. If using white chocolate chips, add 1 teaspoon of coconut oil to help them melt smoothly.
- Drizzle the Webs: Transfer the melted white chocolate to a small piping bag or a Ziploc bag. Snip off a tiny corner. Starting from the center of each cookie, pipe a small circle. Then, pipe concentric circles around it, getting larger each time. Immediately, use a toothpick to drag lines from the center outwards through the circles, creating the web effect. Work quickly before the chocolate sets.
- Assemble the Spiders: For each spider, take one chocolate sandwich cookie. Gently insert 4 pretzel stick halves into each side of the cream filling to create the legs. Place the spider gently onto the wet white chocolate web. Add two candy eyes to the top of the cookie body. Let the chocolate set completely before serving.
Cooking Tips & Techniques
I’ve made this recipe more times than I can count, and I’ve learned a few things the hard way. Here are my best tips for perfect spider web cookies every time:
- Don’t Skip the Chill: I know it’s tempting to skip the chilling step when you’re in a hurry, but please don’t. That 30 minutes in the fridge is what gives these cookies their thick, chewy texture. Without it, the powdered sugar in the dough makes them spread like crazy.
- The Toothpick Trick: When making the spider web, the angle of your toothpick matters. Drag it straight from the center to the outer edge. If you go in a circle, you’ll just smear the chocolate. A clean, straight pull is what creates those perfect web lines.
- Work in Batches: Don’t try to decorate all the cookies at once. The white chocolate will start to set. I like to work in batches of 4-5 cookies at a time. Drizzle the webs, place the spiders, and then move on to the next batch.
- Pretzel Troubleshooting: The pretzel legs can be a little fragile. If they break, just use a dab of melted white chocolate to glue them back onto the cookie body. No one will know.
- My Biggest Failure: One year, I tried to melt the white chocolate in a double boiler and got distracted. It seized up into a grainy, lumpy mess. Now, I only use the microwave method, and I watch it like a hawk. Patience is key.
Variations & Adaptations
This recipe is incredibly versatile. Here are a few ways to make it your own:
- Dietary Adaptation (Gluten-Free): Substitute the all-purpose flour with a 1:1 gluten-free baking flour blend. I’ve used King Arthur Measure for Measure with great success. The texture will be slightly more tender, but they still taste amazing.
- Flavor Variation (Peanut Butter): For a Reese’s-inspired version, add ½ cup of creamy peanut butter to the butter and sugars in step 3. Replace the semi-sweet chips with milk chocolate chips. The peanut butter adds a savory note that pairs perfectly with the sweet white chocolate web.
- Seasonal Adaptation (Christmas): Swap the Halloween spiders for a different design. Instead of spiders, use red and green M&Ms to look like ornaments. Drizzle the web with white chocolate and add a tiny red cinnamon candy for the ornament hook.
- Method Adaptation (No-Bake): If you want to skip the oven entirely, use a firm store-bought sugar cookie or shortbread cookie as your base. Just top them with the white chocolate web and a candy spider. It’s a fantastic shortcut for a classroom party.
Serving & Storage Suggestions
These cookies are best served at room temperature. The white chocolate web should be set and snappy, not sticky. They are the star of any Halloween dessert table. Arrange them on a platter with some extra candy eyes scattered around for a spooky effect. They pair perfectly with a tall glass of cold milk or a warm mug of spiced apple cider.
Storage: Store the cookies in an airtight container at room temperature for up to 5 days. Place a sheet of parchment paper between layers to prevent the spiders from getting squished. Do not refrigerate them, as the condensation can make the white chocolate web sticky.
Freezing: You can freeze the undecorated baked cookies for up to 3 months. Thaw them at room temperature, then decorate them with the white chocolate web and spiders fresh. The cookies freeze beautifully, and the texture is just as good after thawing. The flavor actually gets better after a day or two in the container—the cookies get even softer and more flavorful.
Nutritional Information & Benefits
Let’s be honest: these are a treat, not a health food. But here’s a rough estimate per cookie (assuming 24 cookies):
- Calories: ~280
- Fat: 14g
- Carbohydrates: 38g
- Protein: 3g
- Sugar: 24g
Health Benefits: The semi-sweet chocolate chips contain antioxidants called flavonoids, which can be good for heart health. The pretzels provide a small amount of sodium, which can be helpful after a workout. The white chocolate, while mostly sugar and fat, does contain a small amount of calcium. I like to think of these cookies as a way to celebrate the season and make memories with loved ones. Everything in moderation, right?
Dietary Considerations: This recipe contains gluten, dairy, and eggs. It is not suitable for vegans or those with celiac disease without the substitutions mentioned above. Be mindful of potential allergens when serving at a party.
Conclusion
These Spooky Spider Web Chocolate Chip Cookies are more than just a Halloween treat—they are the perfect example of a happy accident turning into a family tradition. They are proof that you don’t need to be a professional baker to create something that looks incredible and tastes even better. I love this recipe because it’s forgiving, it’s fun, and it always gets a reaction. The combination of the chewy cookie, the sweet white chocolate web, and the salty, crunchy pretzel legs is just unbeatable.
I encourage you to make this recipe your own. Use different colored chocolate for the web, swap the spiders for ghosts, or add a sprinkle of orange sugar on top. The possibilities are endless. When you make them, I want to hear about it! Leave a comment below and tell me how your spider webs turned out. Did your kids help with the pretzel legs? Did you use a different type of cookie for the spider body? Share your photos and tag me on social media—I can’t wait to see your spooky creations!
Frequently Asked Questions
Can I use a different type of chocolate for the web?
Absolutely! Dark chocolate or milk chocolate melts work perfectly. For a colored web, use candy melts in orange, green, or purple. Just follow the same melting instructions.
Can I make the dough ahead of time?
Yes! You can make the cookie dough and refrigerate it for up to 3 days. Let it sit at room temperature for about 10 minutes before scooping and baking, as it will be very firm. You can also freeze the dough balls for up to 3 months.
How do I keep the pretzel legs from getting soggy?
The key is to store the cookies in an airtight container at room temperature. The pretzels will stay crunchy for 2-3 days. If they start to soften, you can always add fresh pretzel legs to the existing spiders.
What can I use instead of Oreos for the spider bodies?
Any round, chocolate cookie will work. Try chocolate wafer cookies, chocolate sandwich cookies from a generic brand, or even large chocolate-covered marshmallows for a different texture.
My white chocolate seized up. What do I do?
If your white chocolate gets grainy, you’ve likely overheated it. Try adding a teaspoon of vegetable oil or coconut oil and stirring vigorously. If it doesn’t smooth out, it’s best to start over. Always melt white chocolate in short, 30-second bursts to prevent this.
Pin This Recipe!

Spooky Spider Web Chocolate Chip Cookies: Easy Halloween Recipe

These Spooky Spider Web Chocolate Chip Cookies are a happy accident turned family tradition. They start with a simple, foolproof cookie base that gets a creepy-cute makeover with a drizzle of white chocolate “webs” and pretzel-legged spider decorations.
- Prep Time: 15 minutes
- Cook Time: 12 minutes
- Total Time: 57 minutes
- Yield: 24 servings 1x
- Category: Dessert
- Cuisine: American
Ingredients
- 2 ¼ cups (280g) all-purpose flour (spooned and leveled)
- 1 teaspoon baking soda
- 1 teaspoon salt (fine sea salt)
- 1 cup (226g) unsalted butter, softened
- ¾ cup (150g) granulated sugar
- ¾ cup (90g) powdered sugar
- 1 large egg, room temperature
- 1 teaspoon vanilla extract
- 2 cups (340g) semi-sweet chocolate chips
- 1 cup (170g) white chocolate melting wafers (or white chocolate chips with 1 teaspoon coconut oil)
- 12–15 chocolate sandwich cookies (like Oreos)
- 60–75 thin pretzel sticks (broken in half)
- Candy eyes (optional)
Instructions
- Preheat oven to 350°F (175°C). Line two large baking sheets with parchment paper.
- In a medium bowl, whisk together flour, baking soda, and salt. Set aside.
- In a large bowl, beat softened butter, granulated sugar, and powdered sugar with an electric mixer on medium speed until light and fluffy (2-3 minutes). Scrape down sides once.
- Add egg and vanilla extract to butter mixture. Beat on low speed until just combined.
- Gradually add dry ingredients to wet ingredients, mixing on low speed until just a few streaks of flour remain.
- Gently fold in semi-sweet chocolate chips with a rubber spatula until evenly distributed.
- Cover bowl with plastic wrap and refrigerate dough for at least 30 minutes.
- Use a 2-tablespoon cookie scoop to portion dough. Place dough balls about 2 inches apart on prepared baking sheets.
- Bake for 10-12 minutes, until edges are golden brown and centers look slightly underdone.
- Let cookies cool on baking sheet for 5 minutes, then transfer to a wire rack to cool completely.
- While cookies cool, microwave white chocolate melting wafers in 30-second intervals, stirring after each, until completely smooth.
- Transfer melted white chocolate to a small piping bag or Ziploc bag. Snip off a tiny corner.
- Starting from center of each cookie, pipe a small circle. Pipe concentric circles around it, getting larger each time.
- Immediately use a toothpick to drag lines from center outwards through circles to create web effect.
- For each spider, take one chocolate sandwich cookie. Gently insert 4 pretzel stick halves into each side of cream filling to create legs.
- Place spider gently onto wet white chocolate web. Add two candy eyes to top of cookie body.
- Let chocolate set completely before serving.
Notes
Don’t skip chilling the dough for 30 minutes—it prevents spreading and ensures chewy texture. Use the microwave method for melting white chocolate to avoid seizing. Work in batches of 4-5 cookies when decorating to prevent chocolate from setting. For best results, ensure cookies are completely cool before adding white chocolate webs.
Nutrition
- Serving Size: 1 cookie
- Calories: 280
- Sugar: 24
- Sodium: 180
- Fat: 14
- Saturated Fat: 8
- Carbohydrates: 38
- Fiber: 2
- Protein: 3
Keywords: Halloween cookies, spider web cookies, chocolate chip cookies, easy Halloween recipe, spooky cookies, white chocolate web, pretzel spiders



