Love this? Save it for later!
Share the inspiration with your friends
Three Halloweens ago, I stopped by my neighbor’s house on a completely mundane errand. I was just dropping off a box of spare batteries because my own motion-sensor lights had started flashing randomly, and honestly, I wasn’t expecting much. I’d stopped by to drop off the batteries, and then this smell hit me before I even got inside the front door. It was sweet, salty, and carried this distinct, yeasty warmth that instantly pulled me toward the kitchen like a moth to a flame.
My neighbor, Sarah, wasn’t trying to impress anyone with her holiday decor. She was wearing oversized sweatpants and had flour dusted across her nose like war paint. I walked into the kitchen and saw her rolling out dough on a floured surface, looking entirely unbothered by the fact that she was crafting something that looked like it had just crawled out of a grave. The smell of baked pretzel and sharp cheddar was so strong it made my stomach growl loudly. I mean, I was trying to be polite about the battery exchange, but my eyes were glued to the tray on the counter.
She didn’t even look up when I entered. “Oh, hey,” she said, completely casual about the fact that she was shaping dough into long, bony fingers with almond slivers for nails. “Want one? They’re almost done.” I stood there, holding my box of batteries, feeling a little envious of her effortlessness. She treated this spooky, intricate-looking treat like it was just Tuesday snack time. The casualness was the whole point. This wasn’t a performance for a party; it was just her way of making something fun for the kids next door.
Those Spooky Crispy Witch Finger Pretzel Rods were golden brown and glistening with egg wash when they came out of the oven. I took one while she was busy washing her hands, and let me tell you, the crunch was deafening in the quiet house. The texture was perfect—crisp on the outside, soft on the inside, with that sharp cheddar flavor that keeps you coming back for more. I forgot to even finish asking about the batteries. I just stood there eating a witch finger and smiling like an idiot.
That recipe stayed with me because it proved that you don’t need complicated techniques to make something memorable. You just need good ingredients and a little bit of imagination. I’ve made these Spooky Crispy Witch Finger Pretzel Rods every year since, trying to recreate that moment of pure, unpretentious joy. Maybe you’ve been there, standing in someone’s kitchen, realizing that the best memories are often the ones where no one is trying to be perfect. This recipe is exactly that—simple, slightly creepy, and incredibly delicious.
Why You’ll Love This Recipe
I’ve tested this recipe dozens of times, from my first messy attempts where the “fingers” looked more like sausages to the current version that’s foolproof. The secret isn’t just in the dough; it’s in the technique of shaping. When you get the pinch right for the knuckle and the almond placement just so, it transforms a simple pretzel into a showstopper. I use a specific brand of sharp cheddar because the fat content helps with browning, and I always let the dough rest long enough to be pliable but firm enough to hold its shape.
- Quick & Easy: These come together in under 45 minutes from start to finish, which is perfect for busy weeknights or last-minute Halloween cravings. You don’t need to wait for a long rise if you use instant yeast, making it a breeze to whip up on a Saturday afternoon.
- Simple Ingredients: No fancy grocery trips needed. You likely already have flour, yeast, butter, and cheddar in your kitchen. This recipe relies on pantry staples that you probably already own, so you can start baking immediately without a special trip to the store.
- Perfect for Parties: Great for Halloween gatherings, school parties, or cozy dinners. They are finger food, which means no utensils required. This makes them ideal for handing out to guests or keeping the kids entertained while adults mingle.
- Crowd-Pleaser: Always gets rave reviews from kids and adults alike. The spooky factor gets the kids excited, while the savory pretzel flavor appeals to the adults who might be wary of overly sweet Halloween treats.
- Unbelievably Delicious: The texture and flavor combo is next-level comfort food. The crunch of the pretzel paired with the salty, sharp cheese creates a savory profile that is far more interesting than typical sugary Halloween snacks.
What makes these Spooky Crispy Witch Finger Pretzel Rods different from the rest is the attention to detail in the shaping. Many recipes skip the step of pinching the knuckles, but that’s where the realism comes from. It’s not just another version of a pretzel bite; it’s your best version. It’s comfort food reimagined with a spooky twist. It’s healthier in the sense that it’s savory rather than candy, and faster than making bread from scratch because we use a quick-rise method. Perfect for impressing guests without stress, or turning a simple snack into something memorable.
What Ingredients You Will Need
This recipe uses simple, wholesome ingredients to deliver bold flavor and satisfying texture without the fuss. The beauty of pretzel dough is its versatility, but for these witch fingers, we need a dough that holds its shape well while remaining chewy. The cheddar adds a savory depth that balances the slight sweetness of the dough, and the egg wash ensures that golden, bakery-quality finish. You can easily substitute some items based on what you have on hand, but the core components are key to getting that authentic pretzel crunch.
- For the Dough:
- 3 ½ cups all-purpose flour (plus extra for dusting) – I recommend King Arthur Brand for its high protein content, which gives the pretzels that perfect chewy structure.
- 1 packet (2 ¼ tsp) instant yeast – Quick-rising yeast saves time, but active dry yeast works if you let it bloom first.
- 1 cup warm water (about 110°F/43°C) – Make sure it’s warm to the touch but not hot, or you’ll kill the yeast.
- 3 tbsp unsalted butter, melted – Adds richness and helps with browning.
- 2 tbsp granulated sugar – Just a little to feed the yeast and add a hint of sweetness.
- 1 tsp salt – Essential for flavor and dough strength.
- For the Filling & Flavor:
- 1 cup sharp cheddar cheese, finely grated – Finely grating ensures even distribution. Block cheese grates better than pre-shredded, which often has anti-caking agents.
- 1 tbsp dried parsley – Adds a touch of green color and herbal flavor.
- For the Topping:
- 1 large egg, beaten with 1 tbsp water (egg wash) – This is crucial for getting that dark, glossy pretzel look.
- Coarse sea salt or pretzel salt – Sprinkle this after the egg wash for that classic pretzel crunch.
- Almond slivers – These serve as the “nails.” You can use sliced almonds or even small pieces of cheese for a cheese-nail variation.
If you need to make this gluten-free, you can use a 1:1 gluten-free flour blend, though the texture will be slightly different. For a dairy-free option, swap the butter for coconut oil and use dairy-free cheddar, though the flavor profile will change. In summer, you might find that the dough rises faster due to heat, so keep an eye on it. The key is to look for firm, finely grated cheese for the best texture in the final rod.
Equipment Needed
You don’t need much fancy gear to make these Spooky Crispy Witch Finger Pretzel Rods. A large mixing bowl is essential for combining the dough, and a baking sheet lined with parchment paper is the best tool to prevent sticking. Parchment paper makes cleanup a breeze, which is always a win in my book. I’ve tried using silicone mats before, but they can sometimes prevent the bottom of the pretzel from getting that crisp texture we’re aiming for.
A rolling pin is needed to flatten the dough, though you can use a bottle if you’re in a pinch. A sharp knife or pizza cutter is necessary for slicing the dough into strips. I recommend a pizza cutter because it glides through the dough without squishing it, which helps maintain the even thickness of the rods. If you don’t have one, a sharp chef’s knife works fine, just be careful of your fingers.
A pastry brush is helpful for applying the egg wash evenly. You can use a silicone brush or a natural bristle brush, both work well. For the nails, you don’t need any special tools, just your fingers to press the almonds in. If you’re on a budget, most of these items are likely already in your kitchen. The only thing you might need to buy is the parchment paper, which is cheap and reusable if you’re careful.
Preparation Method
Start by preparing your dough. In a large bowl, combine the warm water, sugar, and yeast. Let it sit for about 5 minutes until it becomes foamy. This step activates the yeast, ensuring your pretzels rise properly. If you don’t see bubbles, your yeast might be old, so start over with fresh yeast. This is a common mistake I made early on, resulting in dense, brick-like pretzels.
Add the melted butter, salt, and flour to the yeast mixture. Stir until a shaggy dough forms. Turn the dough out onto a floured surface and knead for about 5-7 minutes. The dough should be smooth and elastic. If it’s too sticky, add a little more flour. If it’s too dry, add a splash of water. This kneading process develops the gluten, which gives the pretzels their chewy texture. Don’t rush this step; it’s worth the effort.
Once the dough is smooth, place it in a lightly oiled bowl and cover it with a damp towel. Let it rise in a warm place for about 30-45 minutes, or until it has doubled in size. This is the hands-off time, so use it to prepare your cheese and almonds. If you’re short on time, you can skip the rise, but the texture won’t be as light.
Preheat your oven to 400°F (200°C). Line a baking sheet with parchment paper. Punch down the risen dough and divide it into two equal parts. Roll each part into a long rectangle, about 12 inches by 6 inches. Sprinkle the grated cheddar cheese and dried parsley evenly over the dough, leaving a small border on one edge. This border helps seal the filling inside.
Starting from the long edge, roll the dough up tightly into a log. Pinch the seam to seal it. Then, cut the log into 6-8 equal pieces. This is where the shaping happens. Take one piece and roll it into a cylinder. Using a knife, pinch the top end to create a knuckle shape. This gives it the finger-like appearance. Press an almond sliver into the top end to create the nail. Repeat with all the pieces.
Place the shaped witch fingers on the prepared baking sheet, leaving space between them for expansion. Brush them generously with the egg wash. This step is crucial for getting that dark, glossy pretzel color. Sprinkle with coarse salt. Bake for 12-15 minutes, or until golden brown. The smell will fill your kitchen, so get ready for compliments. Let them cool on the baking sheet for 5 minutes before serving. The cheese will be hot, so be careful not to burn your mouth!
Cooking Tips & Techniques
One of the most common mistakes people make is overfilling the pretzels. If you put too much cheese, it will leak out during baking and burn on the pan, creating a smoky mess. Keep the cheese layer thin and even. Another tip is to ensure your egg wash is applied thickly. A thin layer won’t give you that deep, dark brown color. I like to apply two thin layers instead of one thick one for better coverage.
I once tried to skip the kneading step because I was in a hurry, and the result was a dense, bready texture that wasn’t chewy at all. Don’t skip the kneading. It’s the secret to that perfect pretzel bite. Also, make sure your oven is fully preheated. If you put the pretzels in a cold oven, they will spread out instead of rising up, losing their finger shape.
For consistent results, try to make all the witch fingers the same size. This ensures they bake evenly. If some are thicker than others, the thin ones will burn while the thick ones remain doughy. Use a ruler or just eyeball it carefully. Timing is everything. Check them at the 12-minute mark. If they’re not dark enough, give them another minute or two, but watch them closely so they don’t burn.
Multitasking is key here. While the dough is rising, you can prep your cheese and almonds. While they are baking, you can clean up your station. This makes the whole process feel much faster. If you’re making a large batch, you can bake them in two rounds. Keep the first batch warm in a low oven while you bake the second. This keeps them fresh and hot for serving.
Variations & Adaptations
While the classic cheddar version is my favorite, there are many ways to adapt these Spooky Crispy Witch Finger Pretzel Rods. For a spicy kick, add a pinch of cayenne pepper or paprika to the dough. This pairs well with the cheddar and adds a subtle heat that kids might not even notice but adults will appreciate. You can also use smoked paprika for a deeper, smoky flavor.
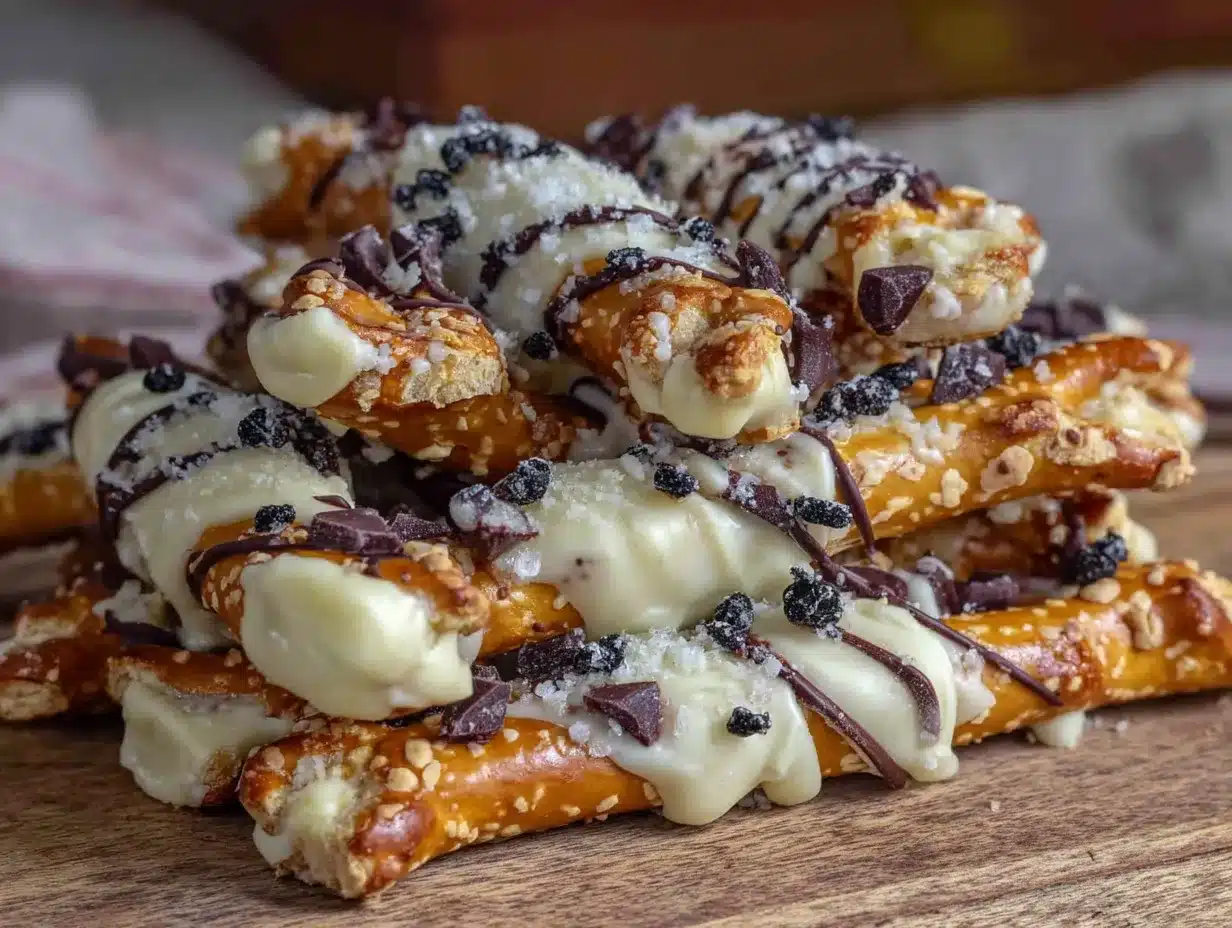
If you want a sweeter version, skip the cheese and sprinkle cinnamon sugar over the dough before rolling. This creates a dessert-style pretzel finger that’s perfect for a sweet tooth. You can also dip them in white chocolate after baking for a “ghost” effect. The almond nails can be replaced with white chocolate chips for a sweeter look.
For a vegetarian option, ensure your cheese is made with vegetarian rennet. Most block cheeses are, but it’s worth checking. If you have nut allergies, you can skip the almond nails entirely. You can use a small piece of cheese or a drop of mustard to simulate the nail, though it won’t look as realistic. The flavor will still be amazing without the nuts.
I once tried making these with whole wheat flour for a healthier option. The result was denser and nuttier, which some people loved, but purists might prefer the all-purpose flour version. You can also use sourdough discard in the dough for a tangy flavor, though you’ll need to adjust the liquid content. These variations allow you to customize the recipe to your taste and dietary needs.
Serving & Storage Suggestions
These Spooky Crispy Witch Finger Pretzel Rods are best served warm. The cheese is melty and the pretzel is soft, which is the ideal texture. You can serve them with a side of spicy mustard or beer cheese dip for an extra flavor boost. They pair well with a glass of cider or a cold soda. For a spooky presentation, serve them on a black platter with some fake cobwebs around the edges.
If you have leftovers, store them in an airtight container at room temperature for up to 2 days. They will lose some of their crispness over time, but they’re still delicious. For longer storage, you can freeze them. Let them cool completely, then place them in a freezer-safe bag. They will keep for up to 3 months. To reheat, place them in the oven at 350°F (175°C) for 5-10 minutes. This will restore their crispness.
Avoid storing them in the refrigerator, as the cold will make the dough stale and hard. If you need to reheat them in a microwave, do so for only 10-15 seconds. Longer than that will make them chewy and tough. The flavors develop over time, so they might taste even better the next day, though the texture won’t be as fresh.
Nutritional Information & Benefits
These pretzel rods are a savory snack, so they don’t have the high sugar content of typical Halloween treats. Each rod contains approximately 150-200 calories, depending on the size and cheese amount. They are a good source of carbohydrates for energy and provide some protein from the cheese and flour. The cheddar adds calcium and vitamin B12, which are beneficial for bone health.
However, they are also high in sodium due to the pretzel salt and cheese. If you’re watching your salt intake, you can reduce the amount of salt in the dough and skip the topping salt. They are not gluten-free unless you use gluten-free flour, and they contain dairy and nuts (almonds). Always check your ingredients if you have allergies.
From a wellness perspective, these are a fun way to get kids to eat a savory snack that isn’t just candy. The protein and fat from the cheese help keep you full longer than sugary snacks. I like to think of them as a “guilt-free” Halloween treat because they’re more substantial. Just enjoy them in moderation as part of a balanced diet.
Conclusion
Making Spooky Crispy Witch Finger Pretzel Rods is a fun and rewarding experience that brings a little Halloween magic to your kitchen. They are easy to make, delicious to eat, and sure to impress your guests. I love this recipe because it combines simplicity with creativity, allowing you to express your spooky side without spending hours in the kitchen. Whether you’re making them for a party or just for a family snack, they are a hit every time.
I encourage you to try these and customize them to your liking. Add your favorite cheese, change the spices, or try different toppings. The possibilities are endless. I’d love to hear how you make them your own. Please leave a comment below with your variations and photos of your creations. Sharing your results helps me and other readers get inspired.
Happy baking, and may your Halloween be spooky and delicious! Don’t forget to share these with your friends and family. They’re the perfect way to spread some Halloween cheer. Enjoy the process, and don’t worry if they’re not perfect. That’s part of the fun. Let’s make this Halloween memorable with these tasty treats.
FAQs
Can I make the dough ahead of time?
Yes, you can make the dough and let it rise in the fridge overnight. This actually develops a better flavor. Just let it come to room temperature before shaping and baking.
Can I use active dry yeast instead of instant yeast?
Absolutely. You’ll need to bloom it in the warm water with the sugar for 5-10 minutes until foamy before adding the other ingredients. The process is the same otherwise.
Why are my pretzels flat and not chewy?
This usually happens if you don’t knead the dough enough or if you skip the rise. Make sure you knead for a full 5-7 minutes and let the dough rise until it doubles in size.
Can I freeze the unbaked witch fingers?
Yes, you can freeze them on the baking sheet until solid, then transfer them to a freezer bag. Bake them directly from frozen, adding a few extra minutes to the baking time.
What can I use instead of almonds for the nails?
You can use sliced almonds, cheese squares, or even drops of mustard. If you have nut allergies, skip the nails entirely or use a small piece of cheese.
Pin This Recipe!

Spooky Crispy Witch Finger Pretzel Rods

These spooky yet delicious pretzel rods are shaped like witch fingers with almond nails, featuring a savory sharp cheddar filling and a crispy, golden-brown exterior. Perfect for Halloween parties or as a fun, savory snack.
- Prep Time: 30 minutes
- Cook Time: 15 minutes
- Total Time: 45 minutes
- Yield: 6-8 servings 1x
- Category: Snack
- Cuisine: American
Ingredients
- 3 ½ cups all-purpose flour (plus extra for dusting)
- 1 packet (2 ¼ tsp) instant yeast
- 1 cup warm water (about 110°F/43°C)
- 3 tbsp unsalted butter, melted
- 2 tbsp granulated sugar
- 1 tsp salt
- 1 cup sharp cheddar cheese, finely grated
- 1 tbsp dried parsley
- 1 large egg, beaten with 1 tbsp water (egg wash)
- Coarse sea salt or pretzel salt
- Almond slivers
Instructions
- In a large bowl, combine warm water, sugar, and yeast. Let sit for 5 minutes until foamy.
- Add melted butter, salt, and flour to the yeast mixture. Stir until a shaggy dough forms.
- Turn dough onto a floured surface and knead for 5-7 minutes until smooth and elastic.
- Place dough in a lightly oiled bowl, cover with a damp towel, and let rise in a warm place for 30-45 minutes until doubled.
- Preheat oven to 400°F (200°C) and line a baking sheet with parchment paper.
- Punch down risen dough and divide into two equal parts. Roll each into a 12×6 inch rectangle.
- Sprinkle grated cheddar cheese and dried parsley evenly over the dough, leaving a border on one edge.
- Roll dough tightly into a log from the long edge and pinch the seam to seal.
- Cut log into 6-8 equal pieces. Roll each into a cylinder.
- Pinch the top end of each cylinder to create a knuckle shape and press an almond sliver into the top for a nail.
- Place shaped fingers on the baking sheet, leaving space between them.
- Brush generously with egg wash and sprinkle with coarse salt.
- Bake for 12-15 minutes until golden brown.
- Let cool on the baking sheet for 5 minutes before serving.
Notes
Ensure the water is warm but not hot to avoid killing the yeast. Do not skip the kneading step for proper chewy texture. If using active dry yeast, bloom it in the warm water with sugar for 5-10 minutes first. For nut allergies, substitute almond nails with cheese squares or mustard drops.
Nutrition
- Serving Size: 1 pretzel rod
- Calories: 175
- Sugar: 3
- Sodium: 350
- Fat: 8
- Saturated Fat: 4
- Carbohydrates: 22
- Fiber: 1
- Protein: 6
Keywords: Halloween, pretzel rods, witch fingers, cheddar cheese, savory snack, easy recipe, party food



