Love this? Save it for later!
Share the inspiration with your friends
“I was mixing batter on a scorching July afternoon when my neighbor, Mrs. Lopez, watched me struggling to get the colors right for some festive treats and didn’t say anything at first. Then she casually handed me a small notebook filled with handwritten recipes, saying, ‘Try this one. It always brings the neighborhood kids running.’
That’s how the Perfect Patriotic Bomb Pop Cake Pops with red, white, and blue layers found their way into my kitchen. It wasn’t a formal lesson or a grand gesture—just a quiet sharing of a recipe born from community cookouts and Fourth of July celebrations. Honestly, I forgot to add the blue layer the first time, and the pops looked a little… off. But that slip-up made me appreciate how the layers come together to create that signature tri-color burst of fun and flavor.
Maybe you’ve been there too—wanting a dessert that’s festive but fuss-free, something that feels like a little party on a stick but won’t have you tangled up in complicated steps. These cake pops hit that sweet spot. They’re playful, eye-catching, and honestly, the kind of recipe that stays with you because it reminds you of summer afternoons, laughter, and sharing simple joys with neighbors and friends.
Why You’ll Love This Recipe
After several rounds of testing these Perfect Patriotic Bomb Pop Cake Pops, I can say they’re a winner for many reasons. I mean, who doesn’t want dessert that looks like a fireworks show but tastes like a hug?
- Quick & Easy: Ready in about an hour, including chilling time—perfect for last-minute celebrations or spontaneous sweet tooth moments.
- Simple Ingredients: Uses everyday pantry staples and basic food coloring—no hunting down specialty items.
- Perfect for Summer Parties: These pops are a hit at barbecues, picnics, or festive family gatherings.
- Crowd-Pleaser: Kids and adults alike love the fun layers and the moist cake inside. Bonus: they’re less messy than ice pops!
- Unbelievably Delicious: The moist cake layers combine with creamy frosting for a melt-in-your-mouth experience that’s nostalgic and fresh.
This recipe isn’t just another cake pop. It’s the one where you carefully layer red, white, and blue batter, creating that iconic bomb pop look, but with the soft, rich texture of cake instead of frozen ice. Plus, the secret to the perfect crumb and frosting ratio came after a few experiments with mixing techniques—trust me, it’s worth the extra stir.
Honestly, I keep coming back to these because they turn a simple dessert into something memorable without any stress. If you want a colorful, festive treat that feels homemade but looks like you spent hours, you’re in the right place.
What Ingredients You Will Need
This recipe uses simple, wholesome ingredients to deliver bold flavor and those vibrant red, white, and blue layers without any fuss. Most of these you probably have on hand, and a few tips below will help you get the best results.
- For the Cake Layers:
- All-purpose flour – 2 ½ cups (320g)
- Baking powder – 2 teaspoons
- Salt – ½ teaspoon
- Unsalted butter, softened – ¾ cup (170g) (I like Land O’Lakes for consistent creaminess)
- Granulated sugar – 1 ¾ cups (350g)
- Large eggs, room temperature – 4
- Whole milk – 1 cup (240ml) (you can swap for almond milk if dairy-free)
- Pure vanilla extract – 2 teaspoons
- Red and blue gel food coloring – about ¼ teaspoon each (gel colors give the best vivid hues without thinning the batter)
- For the Frosting:
- Cream cheese, softened – 8 oz (225g) (Philadelphia brand works well)
- Unsalted butter, softened – ½ cup (115g)
- Powdered sugar – 3 to 4 cups (360-480g), sifted
- Pure vanilla extract – 1 teaspoon
- For Assembly:
- White candy melts or white chocolate chips – 12 oz (340g)
- Red, white, and blue sprinkles or sanding sugar for decoration
- Wooden cake pop sticks
Feel free to swap the cream cheese frosting for a classic buttercream if you prefer, but cream cheese adds a nice tang that balances the sweetness.
Equipment Needed
- Mixing bowls – a few sizes for batter and frosting mixing
- Electric mixer or stand mixer – for creaming butter and sugar and whipping frosting
- Measuring cups and spoons – for accuracy
- 9×13 inch baking pans – two pans for baking the colored layers separately
- Cooling racks – to cool the cake layers completely before crumbling
- Large spoon or spatula – for mixing and folding batter
- Food processor or large bowl and fork – for crumbling cake to mix with frosting
- Microwave-safe bowl – for melting candy melts
- Cake pop stand or styrofoam block – to hold pops upright while drying
If you don’t have a cake pop stand, a block of styrofoam works just fine and is a budget-friendly option. For melting candy melts, I recommend heating in short bursts with stirring to avoid burning. I once scorched a batch by rushing this step—lesson learned the hard way!
Preparation Method
- Preheat your oven to 350°F (175°C). Grease and flour two 9×13 inch pans or line with parchment paper for easy removal.
- Prepare the dry ingredients: In a medium bowl, whisk together 2 ½ cups (320g) all-purpose flour, 2 teaspoons baking powder, and ½ teaspoon salt. Set aside.
- Cream butter and sugar: In a large bowl, beat ¾ cup (170g) softened unsalted butter with 1 ¾ cups (350g) granulated sugar until light and fluffy, about 3-4 minutes using a stand or hand mixer.
- Add eggs and vanilla: Beat in 4 large eggs, one at a time, ensuring each is fully incorporated before adding the next. Then mix in 2 teaspoons vanilla extract.
- Alternate adding dry ingredients and milk: Add the flour mixture in three additions, alternating with 1 cup (240ml) whole milk, beginning and ending with the flour. Mix gently after each addition until just combined. Avoid overmixing to keep the cake tender.
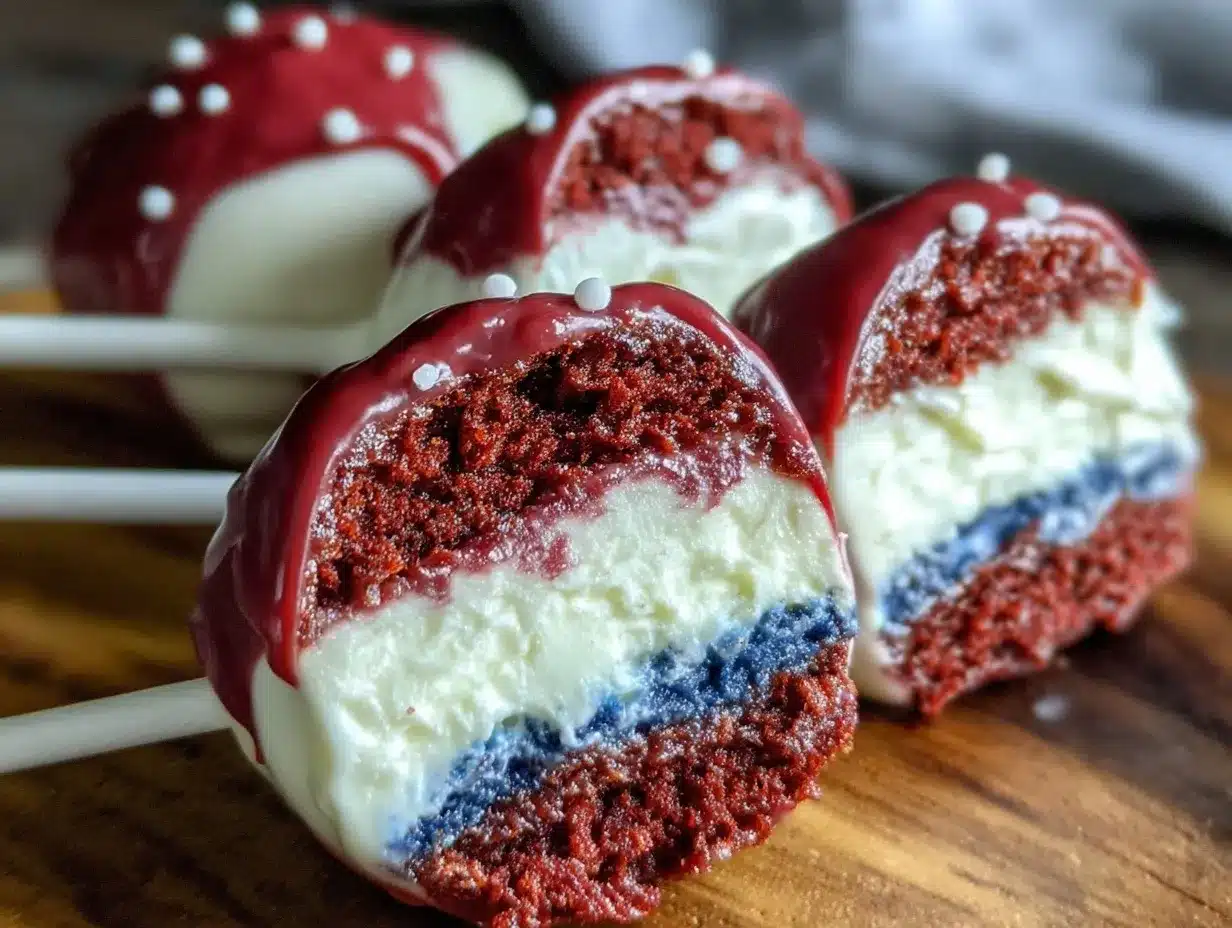
- Divide the batter: Pour about one-third of the batter into two separate bowls. Leave one portion plain (white layer), color one portion red with ¼ teaspoon red gel food coloring, and the other blue with ¼ teaspoon blue gel food coloring. Stir each gently until the color is evenly distributed.
- Bake the layers: Spread each colored batter evenly into the prepared pans (you can bake the red and blue layers in separate pans and the white layer in one pan or bake in batches). Bake for 25-30 minutes or until a toothpick inserted comes out clean. Let cool completely on racks.
- Make the frosting: Beat 8 oz (225g) softened cream cheese and ½ cup (115g) softened butter until smooth. Gradually add 3 to 4 cups (360-480g) powdered sugar and 1 teaspoon vanilla extract, beating until creamy and spreadable.
- Crumble the cake: Once cooled, crumble the red, white, and blue cakes into separate large bowls. Mix each with about ½ cup of frosting to get a dough-like consistency that holds shape but isn’t too wet.
- Form the cake pops: Starting with the red mixture, shape small balls (about 1 ½ inch/4 cm diameter). Place a small amount of white cake mixture on top, then finish with a layer of blue cake mixture on top, gently pressing layers together. Insert a cake pop stick into the center of each. Chill the pops in the fridge for at least 30 minutes to firm up.
- Melt the candy coating: Melt 12 oz (340g) white candy melts in a microwave-safe bowl in 30-second intervals, stirring between, until smooth.
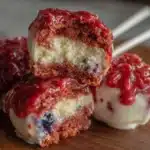
- Dip and decorate: Dip each chilled cake pop into the melted candy, tapping off excess. While still wet, sprinkle with red, white, and blue sanding sugar or sprinkles. Stand upright in a cake pop stand or styrofoam to dry completely.
Pro tip: If the candy melts are too thick, stir in a teaspoon of vegetable oil to thin. And if your pops are drooping, chilling them longer before dipping can save the day.
Cooking Tips & Techniques
Making these Perfect Patriotic Bomb Pop Cake Pops can be fun, but I’ve learned a few tricks along the way to keep things smooth.
- Layering Matters: When shaping the tri-color layers, don’t press too hard; you want the layers to stick but not lose their distinct colors. Patience here makes the difference.
- Frosting Balance: Too much frosting makes the cake balls soggy, too little and they crumble apart. I suggest starting with ½ cup per color bowl and adding more only if needed.
- Chilling is Key: Chill the cake balls until firm before dipping—otherwise, they might fall apart or the coating won’t set properly.
- Melting Candy Melts: Heat in short bursts and stir frequently. Burnt candy melts taste awful and ruin your coating.
- Stick Stability: Dip the stick end in candy melts before inserting into the cake ball for extra hold.
- Multitasking: While the cake layers bake, prepare the frosting and crumble the cooled cakes to save time.
I once had a batch where I skipped chilling, and the pops melted right off the sticks during decorating—lesson learned the hard way!
Variations & Adaptations
Patriotic vibes aside, you can easily switch things up to suit your preferences or dietary needs.
- Gluten-Free: Use a 1:1 gluten-free baking flour blend to make the cake layers safe for gluten-sensitive friends.
- Dairy-Free: Substitute dairy milk with almond or oat milk, and use dairy-free cream cheese and butter alternatives for frosting.
- Flavor Twists: Add lemon zest to the white layer for a fresh burst or swap vanilla for almond extract for a different aroma.
- Alternative Colors: For other holidays, swap the red and blue with green and yellow or pink and purple—same method, different party.
- Chocolate Lovers: Replace the white layer batter with chocolate cake mix for a richer pop.
One time, I tried adding crushed freeze-dried strawberries into the red batter to boost flavor and texture—it was a hit at our summer picnic!
Serving & Storage Suggestions
Serve these cake pops chilled or at room temperature for the best texture. They’re perfect on a platter with other festive treats or as handheld party snacks.
- Presentation: Arrange on a patriotic-themed platter or stick them upright in a decorative foam block for a playful centerpiece.
- Pairings: They go great with lemonade, iced tea, or a light sparkling drink for grown-up parties.
- Storage: Store in an airtight container in the refrigerator for up to 5 days. For longer storage, freeze them wrapped individually in plastic wrap and foil for up to 1 month.
- Reheating: Let frozen pops thaw in the fridge overnight and bring to room temperature before serving.
- Flavor Development: The frosting inside softens the cake even more after resting, making the pops even more luscious the next day.
Nutritional Information & Benefits
These cake pops offer a moderate treat option, with estimated values per pop (based on 12 pops): approximately 220 calories, 12g fat, 25g carbohydrates, and 2g protein.
The cream cheese adds a touch of calcium and protein, while the homemade approach lets you control sugar levels better than store-bought options. Using natural vanilla extract and gel food coloring avoids artificial additives.
For those watching carbs, you can swap flour for almond flour and sugar for a low-glycemic sweetener to make a lower-carb version.
Keep in mind, these pops contain dairy and gluten unless modified.
Conclusion
The Perfect Patriotic Bomb Pop Cake Pops are more than just a festive dessert—they’re a little celebration of community, color, and simple joy on a stick. Whether you’re marking a holiday or just craving a fun, colorful treat, this recipe welcomes customization and creativity.
I love making these because they bring people together—kids ooh and aah over the layers, and adults appreciate the nostalgic flavors with a fresh twist. Honestly, they remind me that sometimes the best recipes come from a neighbor’s quiet encouragement and a cracked notebook page.
Give these cake pops a try, play with the layers, and don’t be shy about sharing your results or tweaks. I’d love to hear how your Perfect Patriotic Bomb Pop Cake Pops turn out!
FAQs
Can I prepare the cake pops a day ahead?
Yes! You can make the cake pops a day ahead and store them in the refrigerator. Just cover them well to prevent drying out. Bring to room temperature before serving for the best taste.
What if I don’t have gel food coloring?
Gel food coloring works best for vibrant colors without altering batter consistency. If you only have liquid food coloring, use less to avoid thinning the batter and expect slightly lighter colors.
How do I fix cake pops that are too crumbly?
Add a little more frosting, a teaspoon at a time, and gently mix until the mixture holds together well but isn’t sticky. Avoid overmixing to keep texture light.
Can I use store-bought cake instead of baking from scratch?
Absolutely! Crumbled store-bought white or vanilla cake can be mixed with frosting for quicker preparation, but homemade batter often gives better flavor and color for layering.
How do I prevent the cake pops from falling off the sticks?
Dip the tip of each stick in melted candy coating before inserting it into the cake ball and chill the pops before dipping. This helps secure the stick firmly.
For more fun and festive recipes, you might enjoy the crispy garlic chicken or the bright, colorful summer berry pavlova—both perfect for your next gathering!
Pin This Recipe!
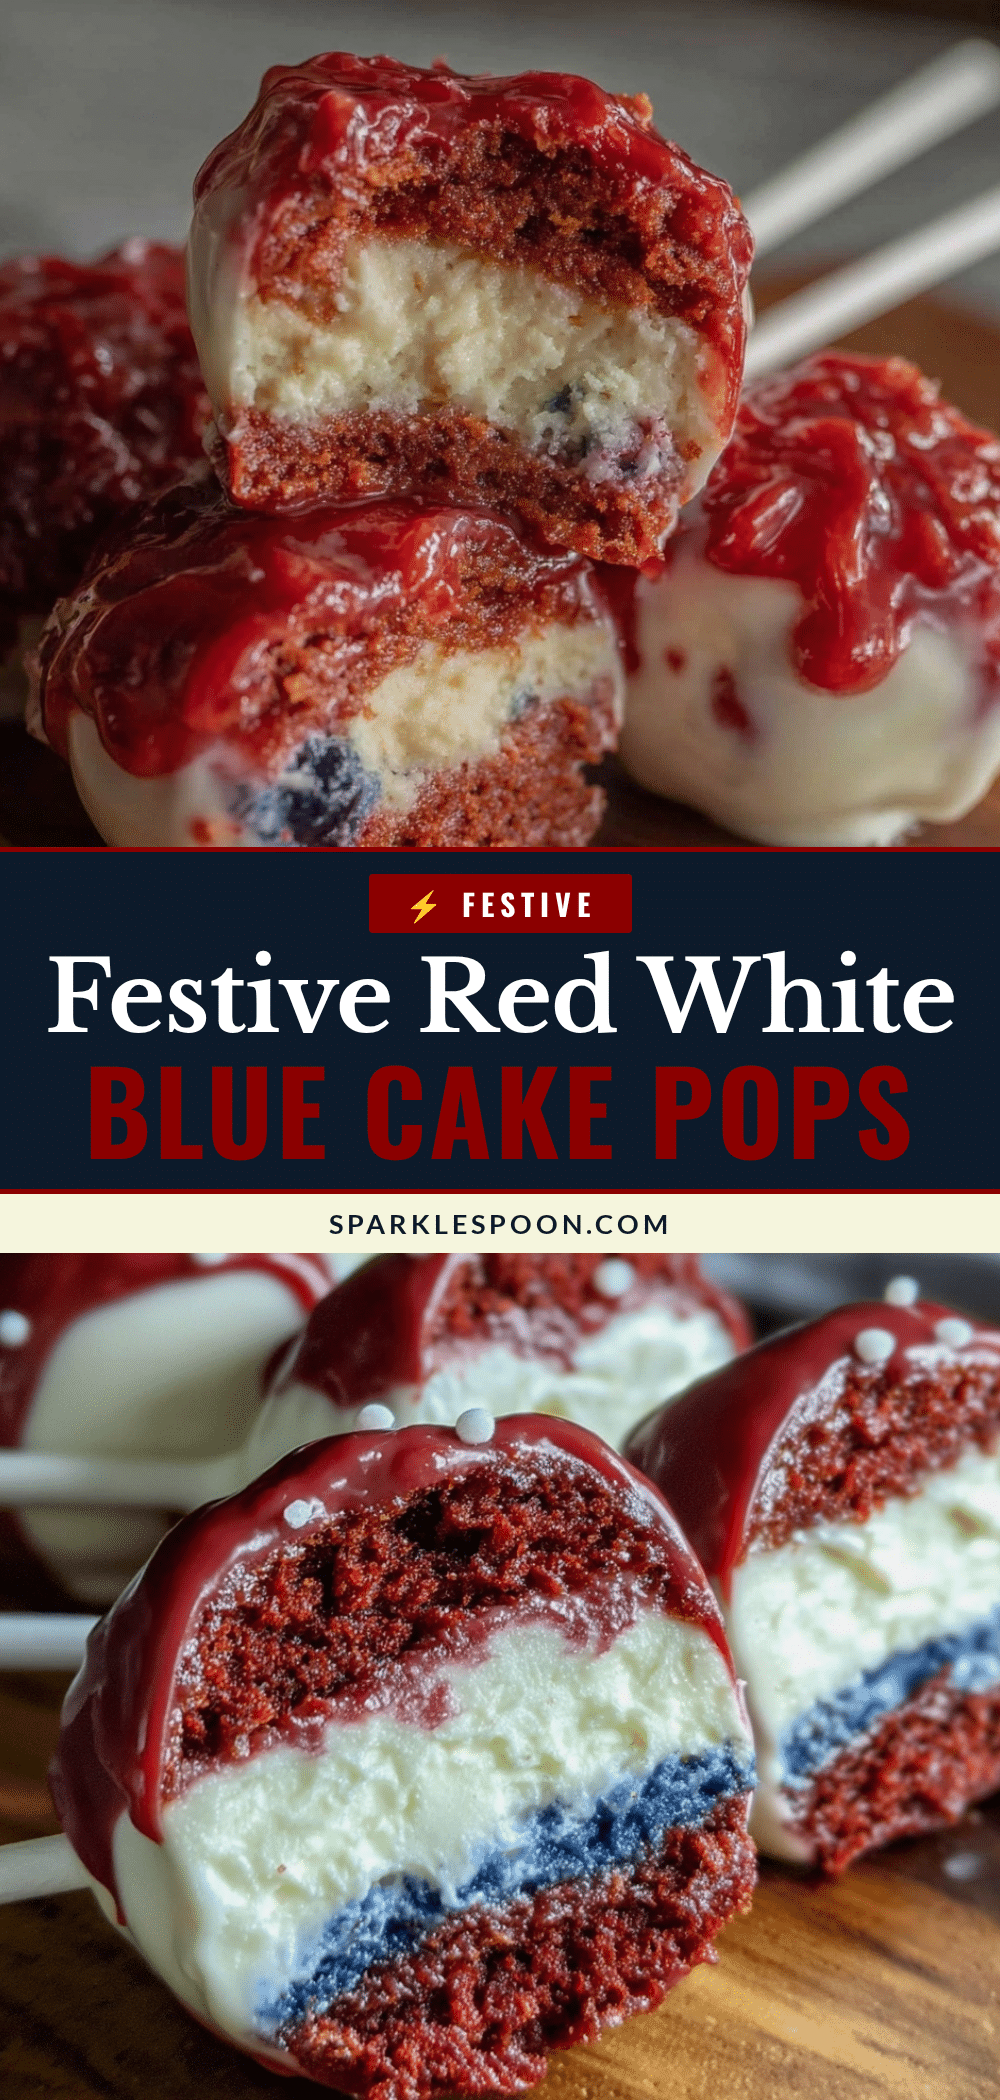
Perfect Patriotic Bomb Pop Cake Pops Recipe Easy Red White Blue Layers
Festive and easy-to-make cake pops with red, white, and blue layers that are perfect for summer parties and celebrations. These moist cake pops combine creamy frosting and vibrant colors for a fun, nostalgic treat.
- Prep Time: 20 minutes
- Cook Time: 30 minutes
- Total Time: 1 hour
- Yield: 12 servings 1x
- Category: Dessert
- Cuisine: American
Ingredients
- 2 ½ cups (320g) all-purpose flour
- 2 teaspoons baking powder
- ½ teaspoon salt
- ¾ cup (170g) unsalted butter, softened
- 1 ¾ cups (350g) granulated sugar
- 4 large eggs, room temperature
- 1 cup (240ml) whole milk (or almond milk for dairy-free)
- 2 teaspoons pure vanilla extract
- ¼ teaspoon red gel food coloring
- ¼ teaspoon blue gel food coloring
- 8 oz (225g) cream cheese, softened
- ½ cup (115g) unsalted butter, softened
- 3 to 4 cups (360-480g) powdered sugar, sifted
- 1 teaspoon pure vanilla extract
- 12 oz (340g) white candy melts or white chocolate chips
- Red, white, and blue sprinkles or sanding sugar
- Wooden cake pop sticks
Instructions
- Preheat oven to 350°F (175°C). Grease and flour two 9×13 inch pans or line with parchment paper.
- In a medium bowl, whisk together flour, baking powder, and salt. Set aside.
- In a large bowl, beat softened butter and granulated sugar until light and fluffy, about 3-4 minutes.
- Beat in eggs one at a time, then mix in vanilla extract.
- Add flour mixture in three additions alternating with milk, beginning and ending with flour. Mix gently until just combined.
- Divide batter into three portions: leave one plain (white), color one red with red gel food coloring, and one blue with blue gel food coloring. Stir gently.
- Spread each colored batter evenly into prepared pans. Bake 25-30 minutes or until a toothpick comes out clean. Cool completely on racks.
- Beat cream cheese and softened butter until smooth. Gradually add powdered sugar and vanilla extract, beating until creamy and spreadable.
- Crumble cooled cakes into separate bowls. Mix each with about ½ cup frosting to form dough-like consistency.
- Form cake pops by layering red mixture, then white mixture, then blue mixture into small balls (~1 ½ inch diameter). Insert sticks and chill at least 30 minutes.
- Melt white candy melts in microwave-safe bowl in 30-second intervals, stirring until smooth.
- Dip chilled cake pops into melted candy, tap off excess, and decorate with sprinkles. Stand upright to dry completely.
Notes
Use gel food coloring for best color without thinning batter. Chill cake pops well before dipping to prevent falling apart. Dip stick ends in candy melts before inserting for better hold. Melt candy melts in short bursts and stir frequently to avoid burning. Adjust frosting amount to avoid soggy or crumbly cake balls.
Nutrition
- Serving Size: 1 cake pop
- Calories: 220
- Fat: 12
- Carbohydrates: 25
- Protein: 2
Keywords: cake pops, patriotic dessert, red white blue, summer party, easy cake pops, festive treats, bomb pop cake pops