Love this? Save it for later!
Share the inspiration with your friends
It was 11:47 PM on a random Wednesday in October, and I was absolutely desperate for something that tasted like fall but didn’t require a trip to the store or, honestly, much effort at all. I had two overripe bananas on the counter, a can of pumpkin puree that had been hiding in the back of the pantry since last Thanksgiving, and this wild idea that maybe—just maybe—I could make a loaf of pumpkin bread that didn’t feel like a dry, boring afterthought. I didn’t have a mixer clean, and I definitely wasn’t going to wash one at that hour. So I grabbed a single bowl, a wooden spoon, and decided to see what would happen if I just threw everything in there and stirred until it looked right.
The kitchen was a mess by the time I was done—pumpkin splatters on the counter, a measuring cup full of maple syrup that I’d definitely over-poured, and the faint smell of cinnamon clinging to my sweatshirt. I slid the loaf into the oven at midnight, and honestly? I didn’t have high hopes. But when I pulled it out forty-five minutes later, the top was perfectly domed, the kitchen smelled like a bakery, and I knew I had stumbled onto something special. The cream cheese swirl with maple syrup was a last-minute impulse—I had half a block of cream cheese in the fridge and figured, why not? That swirl turned good pumpkin bread into something I’d actually crave at 1 AM.
Maybe you’ve been there—standing in your kitchen late at night, wanting something homemade but not wanting to work for it. This one-bowl pumpkin bread with maple cream cheese swirl is for those exact moments. It’s the kind of recipe that feels indulgent but comes together with almost no cleanup, and it’s been my go-to ever since that chaotic Wednesday night. I keep making it because it works every single time, and because that maple cream cheese swirl is honestly the best decision I’ve ever made in a kitchen after 10 PM.
Why You’ll Love This Recipe
Let me tell you why this pumpkin bread is different from every other recipe you’ve bookmarked. I’ve tested this loaf at least a dozen times—sometimes with friends who didn’t know they were taste-testers, sometimes just for myself on a quiet Sunday morning. Every single time, it delivers the same moist crumb, that perfect domed top, and a cream cheese swirl that actually stays put instead of sinking to the bottom.
- Quick & Easy: From bowl to oven in under 15 minutes. No mixer required, no sifting, no nonsense. Just one bowl and a spoon.
- Simple Ingredients: You probably have most of these in your pantry right now. Pumpkin puree, flour, sugar, eggs, butter—nothing fancy, nothing hard to find.
- Perfect for Fall Gatherings: Bring this to a Friendsgiving, a brunch, or a cozy weekend breakfast, and watch it disappear. It’s also incredible for holiday mornings when you want something special without waking up at dawn.
- Crowd-Pleaser: Kids love the sweetness, adults love the maple cream cheese swirl, and everyone loves that it’s not too dense or too dry. It’s the Goldilocks of pumpkin breads.
- Unbelievably Delicious: The texture is tender and moist, the pumpkin flavor is warm and cozy, and that maple cream cheese ribbon running through the middle? Pure magic. It’s the kind of bread that makes you close your eyes after the first bite.
What makes this recipe my best version is the technique—mixing the wet ingredients first, then gently folding in the dry ingredients to avoid over-mixing. And that maple cream cheese swirl? I learned the hard way that you have to dollop it on top of the batter, not mix it in, or you’ll lose that beautiful marbled effect. Trust me, I’ve made that mistake so you don’t have to.
This isn’t just good pumpkin bread. It’s the kind that makes you text your friends a photo at 9 AM and say, “You need to make this immediately.” It’s comfort food that feels like a hug in loaf form—faster than a pie, easier than a cake, and somehow more satisfying than both.
What Ingredients You Will Need
This recipe uses simple, wholesome ingredients that come together to create something truly special. Most of these are pantry staples, especially during fall, and the few extras are well worth tracking down.
For the Pumpkin Bread
- 1 ¾ cups all-purpose flour (220g) – Spoon and level for accuracy; too much flour makes dense bread.
- 1 teaspoon baking soda – Helps the loaf rise and gives it that soft, tender crumb.
- ½ teaspoon baking powder – Adds extra lift for a perfectly domed top.
- 1 ½ teaspoons ground cinnamon – The backbone of the warm fall flavor.
- ½ teaspoon ground nutmeg – Freshly grated if you have it; it makes a difference.
- ¼ teaspoon ground cloves – Just a pinch for depth. Don’t skip it.
- ½ teaspoon salt – Balances the sweetness and brings out the pumpkin flavor.
- 1 cup granulated sugar (200g) – Adds sweetness and helps create a tender crumb.
- ½ cup packed light brown sugar (100g) – Adds moisture and a hint of molasses flavor.
- 1 cup pumpkin puree (240g) – Not pumpkin pie filling! Make sure it’s 100% pure pumpkin. I prefer Libby’s for consistent results.
- ½ cup vegetable oil (120ml) – Keeps the bread incredibly moist. Canola or avocado oil work too.
- 2 large eggs, room temperature – Room temperature eggs emulsify better into the batter.
- 1 teaspoon vanilla extract – Enhances all the warm spices.
- ¼ cup milk (60ml) – Whole milk adds richness, but any milk works. (Use dairy-free milk if needed)
For the Maple Cream Cheese Swirl
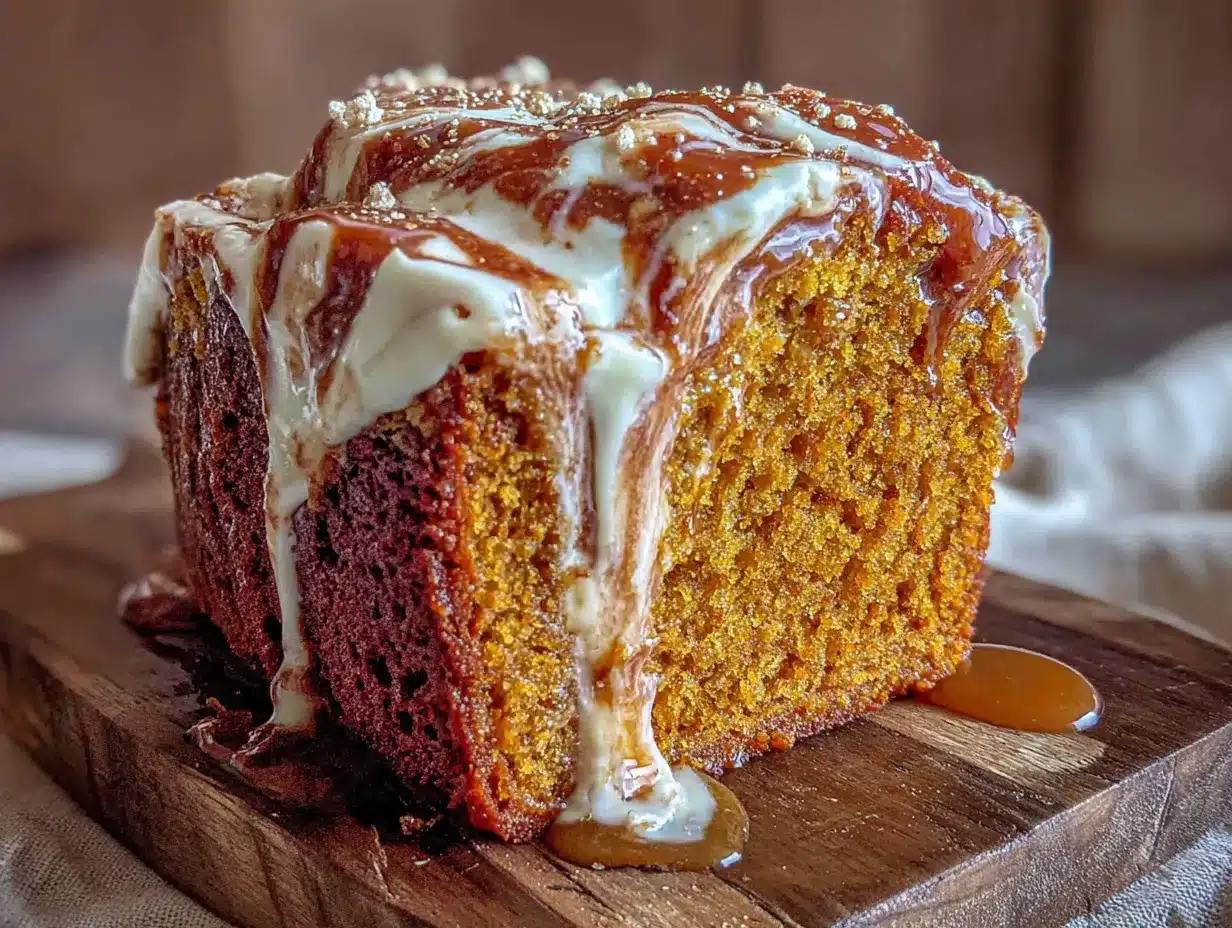
- 4 oz cream cheese (113g), softened – Full-fat is best for a creamy, luscious swirl. Let it sit out for 30 minutes before starting.
- 3 tablespoons pure maple syrup – Not pancake syrup! Use the real stuff for that deep, complex sweetness. I recommend Grade A Dark Amber for stronger flavor.
- 1 tablespoon all-purpose flour – This little trick prevents the cream cheese from sinking to the bottom of the loaf.
- ¼ teaspoon vanilla extract – Just a touch to round out the maple flavor.
Ingredient Selection Tips: Look for pumpkin puree that’s thick and dark orange, not watery. If your puree seems thin, blot it with a paper towel before using. For the cream cheese, avoid low-fat or whipped versions—they have too much air and water, which makes the swirl less stable. I’ve tried both, and full-fat block cream cheese is the only way to get that perfect ribbon effect.
Substitution Guidance: You can swap the all-purpose flour with a 1:1 gluten-free baking flour blend if needed. For a dairy-free version, use a plant-based cream cheese (like Kite Hill) and almond milk in the batter. The texture will be slightly different, but still delicious. If you don’t have maple syrup, honey works in a pinch—though the flavor will be less complex.
Equipment Needed
You don’t need a fancy kitchen to make this bread. Here’s what you’ll actually use:
- One large mixing bowl – That’s it. Just one. I use a standard 4-quart ceramic bowl, but any large bowl works.
- Wooden spoon or rubber spatula – For mixing everything together. A whisk works too, but a spoon is easier to clean.
- 9×5-inch loaf pan – The standard size for this recipe. If you use an 8×4-inch pan, you’ll need to bake it a few minutes longer. I love my USA Pan loaf pan for even baking and easy release.
- Parchment paper – Line the pan for easy removal. Trust me, this saves you from the heartbreak of a stuck loaf.
- Small bowl – For mixing the cream cheese swirl. You can use a separate bowl or just mix it in a measuring cup.
- Hand mixer or whisk – For beating the cream cheese until smooth. A fork works in a pinch, but a mixer gives you a silkier swirl.
- Measuring cups and spoons – For accuracy. I cannot stress this enough—baking is a science, and eyeballing it leads to sad results.
- Kitchen scale (optional but recommended) – Weighing your ingredients is the most reliable way to get consistent results. I use mine every single time.
- Cooling rack – For letting the bread cool completely before slicing. Patience is hard, but it’s worth it.
Budget-Friendly Options: Don’t have a hand mixer? Use a fork and some elbow grease to soften the cream cheese. No loaf pan? You can bake this in an 8×8-inch square pan and adjust the baking time to about 30-35 minutes. No parchment paper? Grease the pan well with butter and dust it with flour—it works, just be gentle when removing the loaf.
I learned the hard way that a dark non-stick pan will make the crust darker and cook faster, so if you’re using one, check the bread 5-10 minutes early. My first attempt with a dark pan came out with a beautiful top that was slightly overdone—still delicious, but not my prettiest loaf.
Preparation Method
Follow these steps carefully, and you’ll have the best pumpkin bread of your life. I’ve included all the little details that make the difference between good and great.
- Preheat and prep. Preheat your oven to 350°F (175°C). Line your 9×5-inch loaf pan with parchment paper, leaving some overhang on the long sides—this makes lifting the bread out so much easier. Lightly grease the parchment with cooking spray or butter.
- Mix the dry ingredients. In your one large bowl, whisk together the flour, baking soda, baking powder, cinnamon, nutmeg, cloves, and salt. Make sure everything is evenly distributed. I like to use a whisk for this to break up any clumps. Set the bowl aside for a moment.
- Mix the wet ingredients in a separate bowl. Yes, I know this is supposed to be one-bowl, but hear me out. In a medium bowl, whisk together the granulated sugar, brown sugar, pumpkin puree, vegetable oil, eggs, vanilla extract, and milk until smooth and well combined. The mixture should be glossy and smell amazing already. (If you really want to keep it truly one-bowl, you can push the dry ingredients to one side and mix the wet ingredients in the other half of the bowl—but I find it easier to use a second bowl for the wet ingredients to avoid over-mixing.)
- Combine wet and dry. Pour the wet ingredients into the bowl with the dry ingredients. Use a rubber spatula or wooden spoon to fold everything together gently. Stir just until no streaks of flour remain—about 10 to 15 strokes. A few small lumps are totally fine. Over-mixing will make the bread tough, so stop as soon as it comes together. The batter will be thick and slightly glossy.
- Make the cream cheese swirl. In a small bowl, beat the softened cream cheese with a hand mixer (or a fork) until smooth and creamy. Add the maple syrup, flour, and vanilla extract, and beat again until everything is fully combined and silky. The flour helps stabilize the cream cheese so it doesn’t sink to the bottom during baking. Set aside.
- Layer the batter and swirl. Pour half of the pumpkin batter into the prepared loaf pan and spread it into an even layer. Dollop half of the cream cheese mixture on top in small spoonfuls, spacing them out evenly. Pour the remaining pumpkin batter over the cream cheese layer and spread gently. Dollop the remaining cream cheese mixture on top. Here’s the important part: use a butter knife or skewer to gently swirl the cream cheese into the batter. Don’t over-swirl—just 4 to 5 figure-eight motions will create beautiful ribbons. Too much swirling and it all blends together into one uniform color.
- Bake. Place the pan in the preheated oven and bake for 50 to 60 minutes, or until a toothpick inserted into the center comes out clean or with a few moist crumbs. The top should be golden brown and spring back when lightly touched. If the top is browning too quickly (after about 30 minutes), tent the pan loosely with aluminum foil.
- Cool completely. Let the bread cool in the pan for 15 minutes. Then use the parchment paper to lift it out and transfer it to a wire rack to cool completely. This is the hardest part—waiting. But if you slice it while it’s still warm, it will crumble and fall apart. Trust me, I’ve done it. Let it cool for at least 1 hour before slicing.
Sensory Cues: When you mix the wet ingredients, the batter should smell like pumpkin pie—warm, spicy, and sweet. When you fold in the dry ingredients, the batter should be thick but not stiff, like a slightly thicker cake batter. When you swirl the cream cheese, you should see distinct ribbons of white and orange. When the bread is done, the kitchen will smell like fall in a bakery, and the top will be a deep golden brown with cracks that look absolutely gorgeous.
Pro Tip: If you want that picture-perfect crack down the middle of your loaf, let the batter sit in the pan for 10 minutes before baking. The slight rest allows the baking soda to start activating, which creates a more dramatic crack. I stumbled onto this by accident when I got distracted by a phone call, and now I do it every time.
Cooking Tips & Techniques
After making this recipe more times than I can count, I’ve collected a few tips that will save you from the mistakes I’ve made. Because honestly, I’ve made all of them so you don’t have to.
Don’t over-mix the batter. This is the number one mistake people make with quick breads. Mix just until the flour disappears. Over-mixing develops gluten, which makes the bread tough and dense instead of tender and moist. I speak from experience—my first attempt was a brick that could have doubled as a doorstop. The batter should look slightly lumpy, not perfectly smooth.
Room temperature ingredients matter. Cold eggs and cold cream cheese don’t emulsify well into the batter. Take them out of the fridge 30 minutes before you start. If you forget (which I do all the time), place the eggs in a bowl of warm water for 5 minutes, and microwave the cream cheese in 10-second bursts until softened but not melted. It works in a pinch.
Use a kitchen scale for accuracy. I know it’s an extra step, but weighing your flour and pumpkin puree ensures consistent results every time. Measuring cups can be wildly inaccurate—one person’s “cup of flour” can be 20% more than another’s. A scale eliminates that guesswork. My favorite baking scale cost $15 and has lasted years.
Let the cream cheese soften fully. Cold cream cheese won’t blend smoothly with the maple syrup, leaving you with lumpy swirls. I’ve made this mistake more than once when I was impatient. The result was still tasty, but the texture of the swirl was grainy instead of silky. Let it sit out for at least 30 minutes, or microwave it in 10-second increments until it’s soft to the touch.
Check for doneness at 50 minutes. Ovens vary wildly in temperature. Start checking your bread at the 50-minute mark. Insert a toothpick into the center—if it comes out clean or with a few moist crumbs, it’s done. If it comes out with wet batter, give it 5 more minutes and check again. My oven runs hot, so mine is usually done at 52 minutes.
Don’t skip the parchment paper. I know it seems wasteful, but parchment paper makes removing the bread so much easier. I’ve had loaves stick to greased pans before, and the frustration of trying to extract a perfectly good bread in pieces is not worth it. The parchment overhang gives you handles to lift the loaf out cleanly.
Let it cool completely. I cannot stress this enough. Warm pumpkin bread is fragile and will crumble if you try to slice it. The cream cheese swirl also needs time to set. Let the bread cool in the pan for 15 minutes, then transfer to a wire rack and wait at least 1 hour before slicing. I know it’s torture, but it’s worth it.
Variations & Adaptations
This recipe is wonderfully flexible. Here are some of my favorite variations that I’ve tested and loved.
Chocolate Chip Pumpkin Bread: Fold ¾ cup of semi-sweet chocolate chips into the batter before layering it in the pan. The chocolate adds a rich, melty contrast to the warm pumpkin spices. I did this on a whim one afternoon, and it was gone within hours. Dark chocolate chips work especially well—they’re not too sweet and they balance the maple cream cheese beautifully.
Gluten-Free Version: Substitute the all-purpose flour with a 1:1 gluten-free baking flour blend that contains xanthan gum. I’ve tested this with Bob’s Red Mill 1:1 Baking Flour, and the texture was remarkably close to the original. The bread might be slightly more tender, so handle it gently when removing from the pan. Everything else stays the same.
Vegan Adaptation: Replace the eggs with 2 flax eggs (2 tablespoons ground flaxseed mixed with 6 tablespoons water, let sit for 5 minutes). Use a plant-based cream cheese for the swirl and a dairy-free milk in the batter. I used Kite Hill cream cheese and oat milk, and the result was surprisingly good—the flax eggs add a nice nuttiness that complements the pumpkin. The texture was slightly denser but still moist and delicious.
Spiced-Up Version: Add ½ teaspoon of ground ginger and ¼ teaspoon of cardamom to the dry ingredients. The ginger adds a little warmth and the cardamom adds an exotic floral note that pairs beautifully with the maple. I tried this for a holiday brunch and everyone asked what the “secret ingredient” was.
Nutty Crunch: Fold ½ cup of toasted pecans or walnuts into the batter before baking. Toast them first in a dry pan over medium heat for 3-4 minutes until fragrant. The crunch adds a lovely texture contrast to the soft, tender crumb. I love pecans with pumpkin—they’re a classic combination for a reason.
Mini Loaves or Muffins: This batter works beautifully for mini loaves or muffins. For mini loaves, bake at 350°F for 30-35 minutes. For muffins, fill lined muffin tins ¾ full and bake for 18-22 minutes. The cream cheese swirl can be dolloped on top of each muffin before baking. These make great gifts or freezer-friendly snacks.
My personal favorite variation is the chocolate chip version with toasted pecans. It’s indulgent, yes, but the combination of pumpkin, chocolate, maple, and pecans is absolutely next-level. I made it for a fall potluck and came home with an empty plate and three recipe requests.
Serving & Storage Suggestions
This pumpkin bread is delicious in so many ways. Here’s how to serve it, store it, and enjoy it at its best.
Serving Temperature: Serve at room temperature for the best texture and flavor. The cream cheese swirl is soft and luscious, and the pumpkin crumb is tender and moist. If you want to warm it up, pop a slice in the microwave for 10-15 seconds or toast it lightly in a toaster oven. Warm pumpkin bread with a pat of butter is pure heaven.
Presentation Ideas: Slice the bread into thick pieces (about 1-inch thick) and arrange them on a wooden cutting board or a rustic plate. Dust with a little powdered sugar for a pretty finish. Drizzle extra maple syrup over the top for a decadent touch. A sprinkle of flaky sea salt on the cream cheese swirl adds a lovely sweet-salty contrast that I absolutely love.
Complementary Dishes and Beverages: This bread pairs beautifully with a hot cup of coffee, a chai latte, or a glass of cold milk. For a brunch spread, serve it alongside scrambled eggs, fresh fruit, and crispy bacon. It also makes a fantastic dessert with a scoop of vanilla ice cream or a dollop of whipped cream. Honestly, it’s good any time of day—I’ve had it for breakfast, dessert, and everything in between.
Storage Instructions: Store leftover pumpkin bread in an airtight container at room temperature for up to 3 days. The cream cheese swirl means you should not leave it out for more than 2 days if your kitchen is warm. For longer storage, wrap the bread tightly in plastic wrap and then in aluminum foil, and refrigerate for up to 5 days. The flavor actually deepens over time—day 2 is often even better than day 1.
Freezing Instructions: This bread freezes beautifully. Let it cool completely, then wrap it tightly in plastic wrap, followed by a layer of aluminum foil. Freeze for up to 3 months. To thaw, leave it at room temperature for a few hours or overnight in the refrigerator. You can also freeze individual slices for quick snacks—just wrap each slice separately and grab one when you need a treat.
Reheating Tips: For the best texture, reheat slices in a toaster oven at 350°F for 5-7 minutes. The outside gets slightly crisp while the inside stays soft. If you’re in a hurry, the microwave works too—just 15-20 seconds per slice. The cream cheese swirl will be warm and gooey, which is honestly the best way to eat it.
Flavor Development: The spices in this bread actually meld and deepen over time. Day-old pumpkin bread often tastes more flavorful than fresh-baked. The maple cream cheese swirl also sets up nicely after a day in the fridge, becoming firmer and more distinct. So don’t worry if you can’t finish it all at once—it only gets better.
Nutritional Information & Benefits
While this is definitely a treat, it does have some redeeming qualities. Here’s a rough nutritional breakdown per slice (based on 10 slices):
| Nutrient | Amount per Slice |
|---|---|
| Calories | 320 |
| Total Fat | 16g |
| Saturated Fat | 5g |
| Cholesterol | 55mg |
| Sodium | 280mg |
| Total Carbohydrates | 42g |
| Dietary Fiber | 2g |
| Sugars | 26g |
| Protein | 5g |
| Vitamin A | 80% DV |
| Iron | 8% DV |
Health Benefits: Pumpkin is packed with vitamin A (in the form of beta-carotene), which supports eye health and immune function. It’s also a good source of fiber, which aids digestion and helps you feel full. The cinnamon and nutmeg in this recipe have anti-inflammatory properties and can help regulate blood sugar. The eggs provide high-quality protein, and the cream cheese adds a small amount of calcium.
Dietary Considerations: This recipe is vegetarian. For a gluten-free version, use a 1:1 gluten-free flour blend. For a dairy-free version, use plant-based cream cheese and milk. For a lower-sugar version, you can reduce the granulated sugar to ¾ cup and the brown sugar to ⅓ cup—the bread will be slightly less sweet but still delicious.
Potential Allergens: This recipe contains wheat (gluten), dairy (cream cheese, milk), and eggs. If you have allergies, please check the substitution notes above. The bread is nut-free as written, but if you add nuts, be sure to label it clearly if serving to others.
Personal Wellness Perspective: I believe in balance. This pumpkin bread is a treat, and treats are a wonderful part of a healthy life. It’s made with real ingredients, and it brings joy—which is good for your mental health. I don’t stress about the sugar or fat content because I know that a slice of homemade bread made with love is infinitely better than anything processed or packaged. Enjoy it mindfully, share it with people you love, and don’t feel guilty about going back for seconds.
Conclusion
This one-bowl pumpkin bread with maple cream cheese swirl is the recipe I turn to again and again when I want something that feels special but doesn’t require a whole production. It’s the kind of bread that makes your kitchen smell like a fall bakery, that fills your home with warmth and comfort, and that makes everyone who tries it ask for the recipe. And honestly? That never gets old.
I love this recipe because it’s forgiving—you can over-stir it a little, use slightly cold eggs, or forget to tent the foil, and it still turns out beautifully. It’s the kind of recipe that builds confidence in the kitchen, especially if you’re new to baking. And that maple cream cheese swirl? It’s the little touch that makes this bread feel like a special occasion, even on a random Tuesday.
I encourage you to make this recipe your own. Add chocolate chips if that’s your thing. Swap in pecans. Double the cream cheese swirl (I won’t tell anyone). The beauty of a good base recipe is that it invites experimentation. So go ahead—make a mess, lick the spoon, and enjoy every single slice. And when you do, I’d love to hear about it. Leave a comment below and tell me how it turned out, what variations you tried, or just share a photo of your beautiful loaf. Your feedback and creativity inspire me, and I can’t wait to see what you create in your kitchen.
Happy baking, friends. May your loaf be tall, your swirl be perfect, and your kitchen smell like fall.
Frequently Asked Questions
Can I use pumpkin pie filling instead of pumpkin puree?
No, please don’t. Pumpkin pie filling is already sweetened and spiced, so it will throw off the balance of this recipe. The bread will be overly sweet and the texture will be different. Always use 100% pure pumpkin puree for the best results. I learned this the hard way when I grabbed the wrong can from the pantry—the bread was edible but way too sweet and the spices were overwhelming.
Why did my cream cheese swirl sink to the bottom?
This usually happens for one of three reasons: the cream cheese was too soft (almost melted), the batter was too thin, or you over-swirled. Make sure your cream cheese is softened but not liquid, and don’t over-mix the swirl. The tablespoon of flour in the cream cheese mixture also helps stabilize it. If your batter seems thin, you can add an extra 2 tablespoons of flour to the dry ingredients.
Can I make this recipe without the cream cheese swirl?
Absolutely! The pumpkin bread itself is delicious on its own. Simply omit the cream cheese ingredients and bake the bread as directed. You might want to add an extra ¼ cup of maple syrup to the batter for sweetness, or just enjoy the plain pumpkin bread. It’s still wonderfully moist and flavorful. I’ve made it both ways, and while I love the swirl, the plain version is perfect for those who prefer a simpler loaf.
How do I know when the bread is done baking?
Insert a toothpick or a thin knife into the center of the loaf. If it comes out clean or with a few moist crumbs (not wet batter), it’s done. The top should be golden brown and spring back when lightly pressed. If the top is browning too quickly but the center is still wet, tent the pan with aluminum foil and continue baking. Every oven is different, so start checking at the 50-minute mark.
Can I double this recipe?
Yes, you can easily double the recipe to make two loaves. Use two separate loaf pans and bake them at the same time, but rotate the pans halfway through baking for even results. You might need to add 5-10 minutes to the baking time if both loaves are in the oven together. I often double this recipe around the holidays—one to eat and one to gift. It’s the perfect homemade present.
Pin This Recipe!
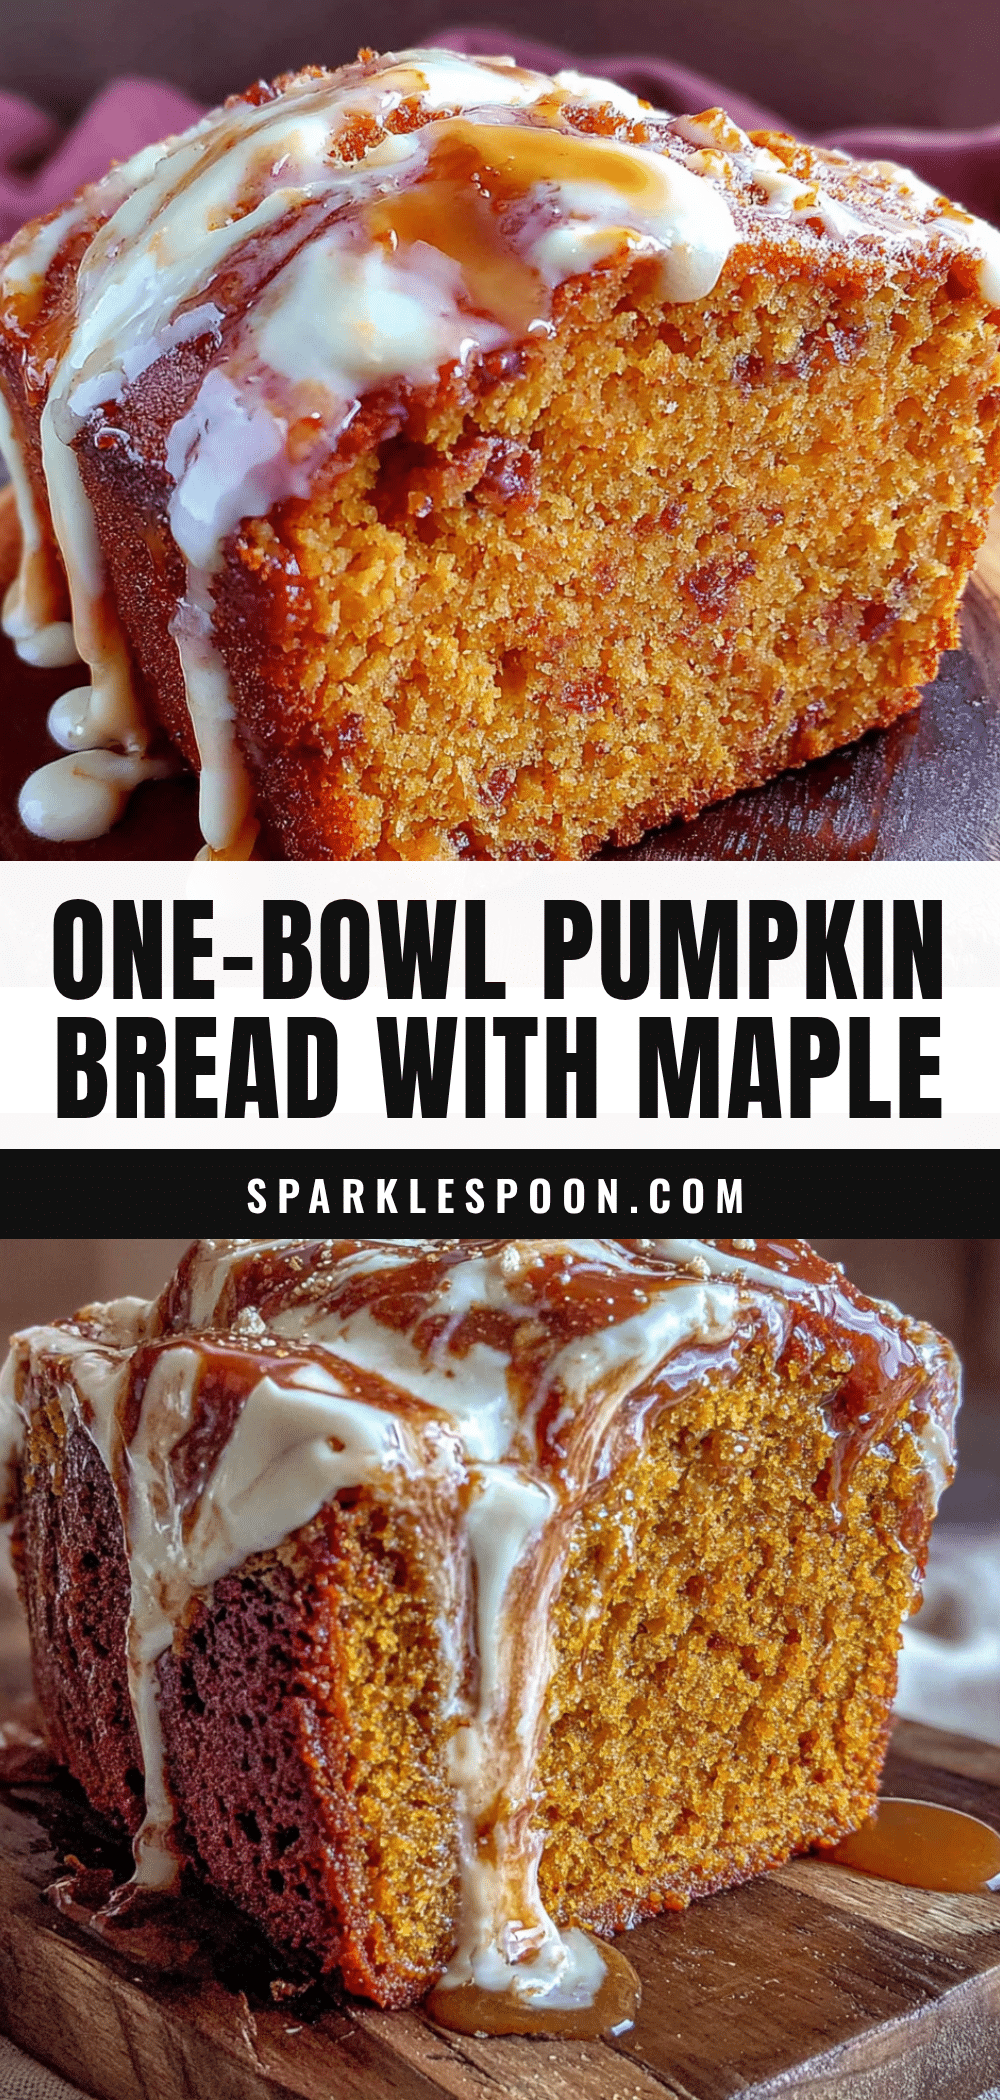
One-Bowl Pumpkin Bread with Maple Cream Cheese Swirl
This one-bowl pumpkin bread with maple cream cheese swirl is moist, tender, and packed with warm fall spices. It comes together in under 15 minutes with no mixer required, making it the perfect quick and easy treat for cozy mornings or holiday gatherings.
- Prep Time: 15 minutes
- Cook Time: 55 minutes
- Total Time: 1 hour 10 minutes
- Yield: 10 servings 1x
- Category: Dessert
- Cuisine: American
Ingredients
- 1 ¾ cups all-purpose flour (220g)
- 1 teaspoon baking soda
- ½ teaspoon baking powder
- 1 ½ teaspoons ground cinnamon
- ½ teaspoon ground nutmeg
- ¼ teaspoon ground cloves
- ½ teaspoon salt
- 1 cup granulated sugar (200g)
- ½ cup packed light brown sugar (100g)
- 1 cup pumpkin puree (240g)
- ½ cup vegetable oil (120ml)
- 2 large eggs, room temperature
- 1 teaspoon vanilla extract
- ¼ cup milk (60ml)
- 4 oz cream cheese (113g), softened
- 3 tablespoons pure maple syrup
- 1 tablespoon all-purpose flour
- ¼ teaspoon vanilla extract
Instructions
- Preheat your oven to 350°F (175°C). Line a 9×5-inch loaf pan with parchment paper, leaving overhang on the long sides. Lightly grease the parchment with cooking spray or butter.
- In a large bowl, whisk together the flour, baking soda, baking powder, cinnamon, nutmeg, cloves, and salt. Set aside.
- In a separate medium bowl, whisk together the granulated sugar, brown sugar, pumpkin puree, vegetable oil, eggs, vanilla extract, and milk until smooth and well combined.
- Pour the wet ingredients into the bowl with the dry ingredients. Fold gently with a rubber spatula or wooden spoon until just combined—about 10 to 15 strokes. A few lumps are fine; do not over-mix.
- In a small bowl, beat the softened cream cheese with a hand mixer or fork until smooth. Add the maple syrup, 1 tablespoon flour, and ¼ teaspoon vanilla extract, and beat until fully combined and silky.
- Pour half of the pumpkin batter into the prepared loaf pan and spread evenly. Dollop half of the cream cheese mixture on top in small spoonfuls. Pour the remaining pumpkin batter over the cream cheese layer and spread gently. Dollop the remaining cream cheese mixture on top. Use a butter knife or skewer to gently swirl the cream cheese into the batter with 4 to 5 figure-eight motions.
- Bake for 50 to 60 minutes, or until a toothpick inserted into the center comes out clean or with a few moist crumbs. If the top browns too quickly, tent loosely with aluminum foil after about 30 minutes.
- Let the bread cool in the pan for 15 minutes. Then use the parchment paper to lift it out and transfer to a wire rack to cool completely—at least 1 hour before slicing.
Notes
For a picture-perfect crack down the middle, let the batter sit in the pan for 10 minutes before baking. Use full-fat block cream cheese for the best swirl. If your pumpkin puree seems thin, blot it with a paper towel before using. Store leftovers in an airtight container at room temperature for up to 3 days, or refrigerate for up to 5 days. Freeze for up to 3 months.
Nutrition
- Serving Size: 1 slice
- Calories: 320
- Sugar: 26
- Sodium: 280
- Fat: 16
- Saturated Fat: 5
- Carbohydrates: 42
- Fiber: 2
- Protein: 5
Keywords: pumpkin bread, maple cream cheese swirl, one-bowl, fall recipe, quick bread, easy pumpkin bread



