Love this? Save it for later!
Share the inspiration with your friends
My neighbor wasn’t trying to impress anyone. I’d stopped by to borrow a ladder on a chilly Tuesday afternoon, and the smell hit me before I even knocked. Something sweet, but not cloying. Something warm, but not heavy. It was that kind of smell that makes you forget why you even walked over in the first place.
She opened the door with oven mitts on, completely unbothered by the fact that her kitchen smelled like heaven. “Oh, that’s just squash,” she said, waving her hand like it was nothing. Just squash. As if the whole street wasn’t about to show up asking what she was baking.
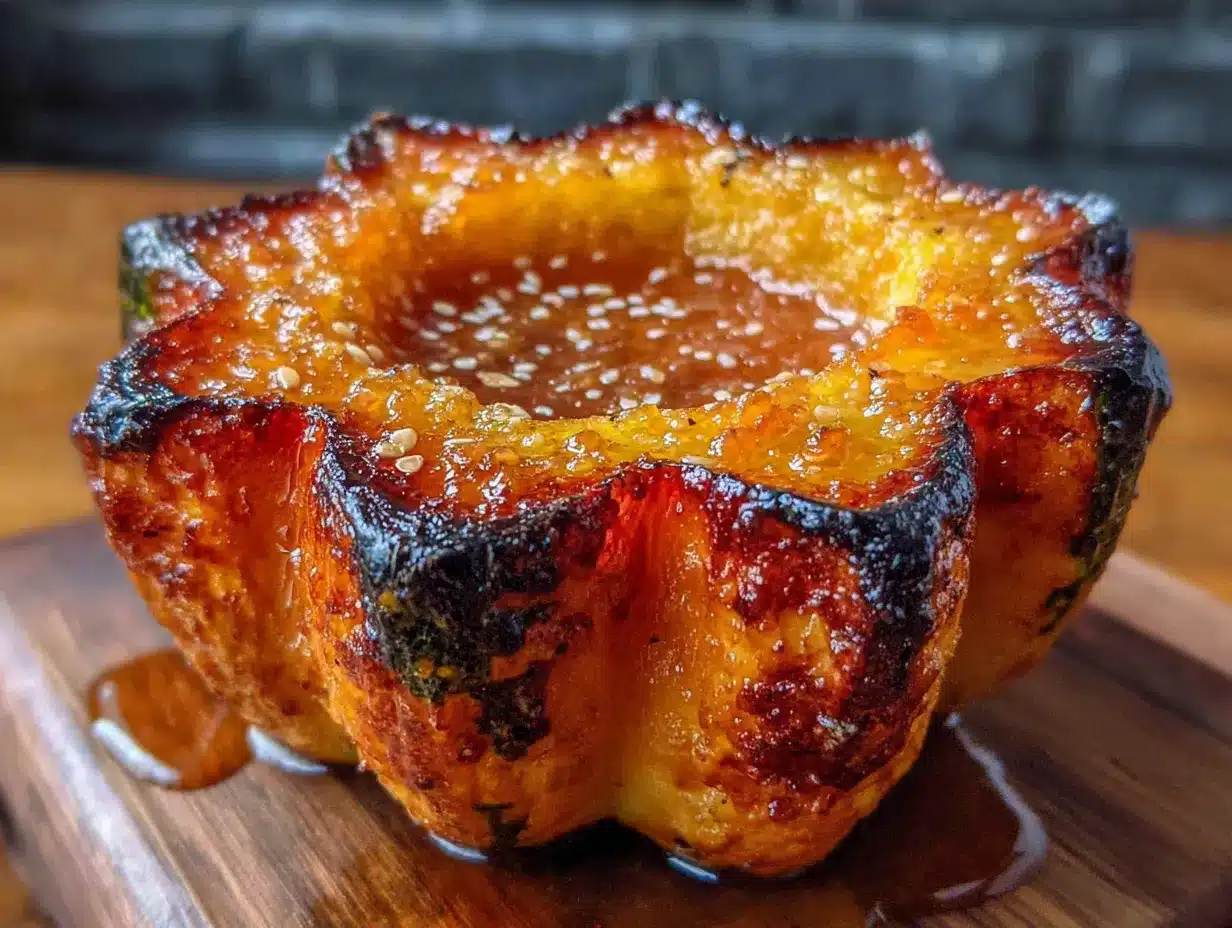
I stood there in her doorway, ladder forgotten, watching her pull out a baking sheet of the most beautiful roasted acorn squash I’d ever seen. The edges were caramelized to a deep amber, and there was this glossy sheen that caught the afternoon light. She didn’t even offer me a piece — she was that casual about it. I had to ask.
“You want some?” she finally said, like it was the most ordinary thing in the world. She cut me a wedge, and honestly, that first bite stopped me mid-sentence. The squash was tender, almost buttery, with these crispy edges that gave way to a soft, sweet center. And the maple — it wasn’t overpowering. It was just enough to make you think, “Huh, I didn’t know squash could taste like this.”
Maybe you’ve been there. You taste something at someone else’s house, and you know you’re going to be thinking about it for days. I practically begged her for the recipe, and she scribbled it on a scrap of paper while I held the ladder. No measurements, just a few words and a shrug. It took me three tries to get it right, but now? This light & easy maple butter roasted acorn squash is my go-to side dish for everything from Tuesday dinners to holiday tables. It’s the recipe that keeps me coming back — and I think it’ll do the same for you.
Why You’ll Love This Recipe
I’ve made this light & easy maple butter roasted acorn squash more times than I can count, and every single time, it delivers. There’s something about the way the maple syrup caramelizes with the butter that feels almost magical — like you’re getting away with something, because it’s so simple but tastes so special.
Here’s why this recipe stands out from the rest:
- Quick & Easy — From prep to plate in under 40 minutes. You can have this on the table while your main dish is resting. Perfect for busy weeknights when you want something that feels like a treat.
- Simple Ingredients — You probably already have maple syrup and butter in your kitchen. Just pick up an acorn squash, and you’re good to go. No fancy grocery store trips needed.
- Perfect for Any Occasion — It’s light enough for a weekday dinner but pretty enough for Thanksgiving. I’ve brought it to potlucks and watched it disappear before the green bean casserole.
- Crowd-Pleaser — I’m not kidding when I say even people who “don’t like squash” go back for seconds. There’s something about the sweet, buttery glaze that wins everyone over.
- Unbelievably Delicious — The texture is what gets me every time. The edges get all crispy and caramelized, while the inside stays tender and almost creamy. It’s comfort food that doesn’t weigh you down.
What makes this different from other roasted squash recipes is the technique. Instead of drowning the squash in butter and sugar, I use just enough maple syrup to enhance the natural sweetness of the squash. The butter adds richness without making it heavy. It’s balanced — that’s the word. You get the indulgence of a buttery glaze without feeling like you need a nap afterward.
Honestly, this is the kind of side dish that makes you close your eyes after the first bite. It’s simple, it’s satisfying, and it makes you feel good about eating your vegetables. What more could you want?
What Ingredients You Will Need
This light & easy maple butter roasted acorn squash uses a handful of simple ingredients that work together to create something truly special. The beauty of this recipe is that you don’t need much — just quality ingredients and a little bit of patience. Here’s what you’ll need:
For the Squash
- 1 medium acorn squash (about 1.5 to 2 pounds) — Look for one that feels heavy for its size and has a deep green color with some orange patches. That orange color means it’s ripe and sweet. I usually grab mine from the farmers market when they’re in season, but grocery store squash works great too.
- 2 tablespoons unsalted butter, melted — I use salted butter in a pinch, but unsalted lets you control the salt level better. Kerrygold is my go-to for the richest flavor, but any good quality butter will do.
- 2 tablespoons pure maple syrup — Please, please use real maple syrup here. The fake stuff has a different consistency and won’t caramelize the same way. Grade A dark amber gives the best flavor, but any pure maple syrup works.
- 1/4 teaspoon salt — Just a pinch to balance the sweetness. I prefer fine sea salt for even distribution.
- 1/8 teaspoon black pepper — A tiny bit of pepper adds a subtle warmth that complements the sweetness beautifully. Freshly ground is best.
- 1/4 teaspoon cinnamon (optional) — I add this when I’m feeling like the squash needs a little extra warmth. It’s not necessary, but it’s lovely.
For the Garnish (Optional but Recommended)
- Fresh thyme or rosemary sprigs — A few leaves sprinkled on top right before serving add a pop of color and a subtle herbaceous note that cuts through the sweetness.
- Flaky sea salt — A sprinkle of Maldon or similar flaky salt right at the end adds a lovely crunch and burst of saltiness.
- Toasted pecans or walnuts — If I’m feeling fancy, I’ll toss some chopped nuts on top for texture. Toast them in a dry pan for a couple of minutes until fragrant.
The ingredient list is short, but each component plays a role. The maple syrup isn’t just for sweetness — it helps create that beautiful caramelized crust. The butter adds richness and helps the squash brown evenly. And the salt? It’s the secret weapon that makes everything pop. Trust me on this one.
Equipment Needed
You don’t need a lot of fancy equipment for this light & easy maple butter roasted acorn squash, which is part of what makes it so great. Here’s what you’ll need:
- Sharp chef’s knife — Acorn squash can be tough to cut through. A sharp, heavy knife makes the job safer and easier. I learned this the hard way after nearly losing a finger to a dull blade.
- Cutting board — A sturdy one that won’t slide around. Put a damp paper towel underneath if yours tends to slip.
- Large spoon or ice cream scoop — For scooping out the seeds and stringy bits. An ice cream scoop works surprisingly well for this.
- Baking sheet or roasting pan — A rimmed baking sheet is ideal. Line it with parchment paper or aluminum foil for easier cleanup. Trust me, the caramelized maple syrup can be a pain to scrub off.
- Small bowl — For mixing the maple butter glaze.
- Pastry brush or spoon — For brushing the glaze onto the squash. A silicone pastry brush works great, but a regular spoon does the job too.
- Measuring spoons — For measuring the maple syrup, butter, and seasonings. Eyeballing works if you’re experienced, but measuring ensures consistency.
That’s it. No special gadgets, no expensive equipment. If you have a sharp knife and a baking sheet, you’re good to go. I’ve made this recipe in my tiny apartment oven and in a fancy kitchen — it turns out great every time.
Preparation Method
Making this light & easy maple butter roasted acorn squash is straightforward, but there are a few tricks I’ve picked up along the way. Let me walk you through it step by step.
- Preheat your oven to 400°F (200°C). Getting the oven hot is important — that high heat is what creates the caramelized edges. While the oven heats up, position a rack in the middle.
- Prepare the squash. Wash the acorn squash under cold water and pat it dry. Place it on your cutting board and carefully cut off the very top and bottom — just a thin slice so it sits flat. Then, cut the squash in half from top to bottom. Be careful here; acorn squash can be stubborn. If you’re having trouble, microwave the whole squash for 2-3 minutes to soften it slightly. I’ve done this plenty of times, and it works like a charm.
- Scoop out the seeds. Use your large spoon or ice cream scoop to remove the seeds and stringy fibers from the center of each half. Don’t throw the seeds away — you can roast them separately for a snack! Just rinse them, toss with a little oil and salt, and bake at 350°F for about 10 minutes.
- Slice the squash. Place each half cut-side down and slice into half-moon shapes about 1/2 to 3/4 inch thick. I aim for uniform thickness so they cook evenly. If some pieces are thinner, they’ll brown faster, so keep an eye on them.
- Make the maple butter glaze. In your small bowl, combine the melted butter, maple syrup, salt, pepper, and cinnamon if using. Whisk until smooth. Taste it — it should be sweet, buttery, and slightly salty. Adjust if needed.
- Arrange the squash on the baking sheet. Line your baking sheet with parchment paper or foil. Place the squash slices in a single layer, making sure they’re not overlapping. Overcrowding leads to steaming instead of roasting, and you want those caramelized edges.
- Brush with the glaze. Using your pastry brush or a spoon, generously brush the maple butter mixture over the squash slices. Make sure every piece gets coated. Don’t worry if some pools on the baking sheet — it’ll caramelize beautifully.
- Roast for 20 minutes. Place the baking sheet in the preheated oven and roast for 20 minutes. At this point, the squash should be starting to soften and brown around the edges.
- Flip and brush again. Carefully flip each slice using a spatula. Brush with any remaining glaze from the bowl. If there’s not enough, you can mix up a quick second batch — just equal parts melted butter and maple syrup.
- Roast for another 10-15 minutes. Return the baking sheet to the oven and roast until the squash is tender and caramelized. The edges should be deep golden brown, and a fork should slide easily into the thickest part. Total roasting time is usually 30-35 minutes, but ovens vary, so start checking at the 25-minute mark.
- Garnish and serve. Remove from the oven and let cool for 2-3 minutes on the baking sheet. Transfer to a serving platter, sprinkle with fresh thyme or rosemary, and add a pinch of flaky sea salt if you’re using it. Serve warm.
A few things I’ve learned from making this dozens of times: Don’t skip the flipping step. It ensures both sides get that beautiful caramelization. And if you want extra crispy edges, broil for the last 1-2 minutes — but watch it closely, because maple syrup can burn fast. I may or may not have learned that the hard way.
Cooking Tips & Techniques
After making this light & easy maple butter roasted acorn squash more times than I can count, I’ve picked up a few tricks that make a real difference. Here are my best tips for getting perfect results every time:
Cut the squash safely. Acorn squash is tough. If you’re struggling to cut through it, microwave the whole squash for 2-3 minutes to soften it. I also recommend using a sharp chef’s knife and cutting away from your body. A dull knife is actually more dangerous because it requires more force.
Don’t skip the salt. I know it sounds counterintuitive to add salt to sweet squash, but trust me on this. Salt enhances the natural sweetness and balances the richness of the butter. Without it, the squash can taste flat.
Watch the oven like a hawk. Maple syrup burns easily because of its high sugar content. I’ve had batches go from perfectly caramelized to carbonized in under a minute. Set a timer, and check on the squash frequently during the last 5 minutes of roasting. If you notice the edges getting too dark, pull it out early.
Use room temperature butter. If you forget to take the butter out ahead of time, microwave it in 5-second bursts until just melted. Hot butter can cook the maple syrup slightly, so let it cool for a minute before mixing.
Line your baking sheet. I cannot stress this enough. The caramelized maple syrup creates a sticky mess that’s a nightmare to clean. Parchment paper is your best friend here. If you use foil, give it a light spray of cooking oil to prevent sticking.
Multitask wisely. While the squash roasts, you can prep the rest of your meal. It pairs beautifully with roasted chicken, pork chops, or even a simple salad. The squash needs almost no hands-on time after the initial prep, so you can focus on other dishes.
One mistake I made early on: I tried to rush the process by cutting the squash into smaller pieces. Don’t do that. The thinner slices cook faster but can burn before they’re tender inside. Stick to 1/2 to 3/4 inch thickness for the best texture.
Variations & Adaptations
One of the things I love about this light & easy maple butter roasted acorn squash is how versatile it is. Over the years, I’ve experimented with different flavors and techniques, and here are some of my favorite variations:
Savory Herb Version — Skip the cinnamon and add 1 teaspoon of fresh chopped rosemary and 1/2 teaspoon of dried thyme to the maple butter glaze. The herbs add an earthy, savory note that pairs beautifully with roasted meats. I made this for a Sunday roast, and my husband said it was the best squash he’d ever had.
Spicy Maple Version — Add 1/4 teaspoon of cayenne pepper or red pepper flakes to the glaze. The heat cuts through the sweetness and adds a surprising kick. It’s perfect for when you want something a little more exciting. Start with less — you can always add more, but you can’t take it out.
Vegan Version — Replace the butter with coconut oil or a high-quality vegan butter. Use the same amount, and make sure it’s melted. The coconut oil adds a subtle tropical note that works surprisingly well with the maple syrup. I’ve made this for vegan friends, and they couldn’t tell the difference.
Balsamic Glaze Version — Replace 1 tablespoon of the maple syrup with balsamic vinegar. The acidity of the vinegar balances the sweetness and adds a complex, tangy flavor. Drizzle a little extra balsamic reduction over the top before serving for a restaurant-worthy presentation.
Air Fryer Version — If you’re short on time, the air fryer works beautifully. Preheat to 375°F (190°C), arrange the squash slices in a single layer in the basket, and cook for 12-15 minutes, flipping halfway through. The air fryer gives you extra crispy edges in less time. Just be careful not to overcrowd the basket.
Maple Orange Version — Add 1 teaspoon of orange zest and 1 tablespoon of fresh orange juice to the glaze. The citrus brightens up the dish and makes it feel fresher and lighter. I love this version in the winter when citrus is at its peak.
Don’t be afraid to experiment. The basic technique is so forgiving that you can really make it your own. I’ve tried all of these variations, and honestly, I can’t pick a favorite. They’re all delicious in their own way.
Serving & Storage Suggestions
This light & easy maple butter roasted acorn squash is best served warm, right after it comes out of the oven. The edges are at their crispiest, and the glaze is still glossy and beautiful. But it’s also delicious at room temperature, so don’t stress if you’re serving it buffet-style.
Serving Suggestions:
- As a side dish for roasted chicken, turkey, pork chops, or grilled salmon. The sweetness pairs beautifully with savory proteins.
- Alongside a holiday spread — it’s a lighter alternative to sweet potato casserole and fits right in with roasted vegetables.
- Tossed into a salad with arugula, goat cheese, and a simple vinaigrette. The warm squash wilts the greens slightly, creating a beautiful warm salad.
- As a topping for grain bowls with quinoa, roasted chickpeas, and tahini dressing.
Storage Instructions:
- Refrigerator: Store leftovers in an airtight container for up to 4 days. The squash will soften as it sits, but the flavor actually improves.
- Freezer: You can freeze the roasted squash for up to 3 months. Let it cool completely, then transfer to a freezer-safe bag or container. Thaw in the refrigerator overnight before reheating.
Reheating Tips:
- Oven: Reheat at 350°F (175°C) for 5-7 minutes. This is the best method for restoring some of the crispy edges.
- Air fryer: Reheat at 350°F for 3-4 minutes. This works almost as well as the oven.
- Microwave: Use for 30-second intervals if you’re in a hurry, but the squash will be softer and lose its caramelized texture.
How flavors develop: I actually think this squash tastes even better the next day. The maple butter glaze soaks into the squash overnight, making it even more flavorful. I’ve been known to make a double batch just so I have leftovers for lunch.
Nutritional Information & Benefits
This light & easy maple butter roasted acorn squash isn’t just delicious — it’s also packed with nutrients that make you feel good about eating it. Here’s a breakdown of what you’re getting in each serving:
| Nutrient | Amount Per Serving (1/4 recipe) |
|---|---|
| Calories | 145 |
| Total Fat | 6g |
| Saturated Fat | 3.5g |
| Carbohydrates | 24g |
| Fiber | 4g |
| Sugar | 12g |
| Protein | 2g |
| Vitamin A | 45% DV |
| Vitamin C | 25% DV |
| Potassium | 15% DV |
| Magnesium | 10% DV |
Health Benefits:
- Rich in Vitamin A: Acorn squash is loaded with beta-carotene, which your body converts into vitamin A. This supports eye health, immune function, and healthy skin.
- Good source of fiber: With 4 grams of fiber per serving, this squash helps keep your digestive system running smoothly and keeps you feeling full longer.
- High in Vitamin C: A single serving provides 25% of your daily vitamin C needs, which supports your immune system and helps your body absorb iron.
- Potassium-rich: Potassium is essential for heart health and muscle function. Acorn squash is a great source.
Dietary Considerations: This recipe is naturally gluten-free, nut-free, and soy-free. To make it vegan, simply substitute the butter with coconut oil or vegan butter. It’s also relatively low in calories for a side dish, making it a great choice if you’re watching your intake without sacrificing flavor.
Conclusion
This light & easy maple butter roasted acorn squash is one of those recipes that proves you don’t need complicated techniques or fancy ingredients to make something truly special. It’s simple, it’s beautiful, and it tastes like you spent way more effort than you actually did.
I love this recipe because it reminds me that the best dishes often come from the most casual moments. My neighbor didn’t set out to impress anyone that Tuesday afternoon — she was just making squash. But that casual, unpretentious approach is exactly what makes this recipe so approachable. You don’t need to be a professional chef to pull it off. You just need a sharp knife, a baking sheet, and a little bit of patience.
I encourage you to make this recipe your own. Try it with herbs, add a pinch of cayenne, or keep it exactly as written. However you make it, I promise you’ll be coming back to it again and again. It’s become a staple in my kitchen, and I have a feeling it’ll become one in yours too.
If you give this recipe a try, I’d love to hear about it. Leave a comment below and let me know how it turned out, or share your own variations. And if you’re looking for more easy, delicious side dishes, check out my honey glazed carrots or garlic parmesan roasted broccoli — they’re both perfect for busy weeknights.
Happy cooking, friends!
Frequently Asked Questions
Can I use butternut squash instead of acorn squash?
Absolutely! Butternut squash works great in this recipe. It’s slightly sweeter and has a creamier texture. Just peel it first, cut it into cubes, and follow the same roasting instructions. You may need to adjust the roasting time by 5-10 minutes depending on the size of your cubes.
Do I have to peel acorn squash before roasting?
Nope! The skin of acorn squash is completely edible once roasted. It becomes tender and adds a nice texture contrast to the soft flesh. Plus, leaving the skin on saves you a lot of prep time. Just make sure to wash the squash thoroughly before cutting.
Can I make this recipe ahead of time?
Yes, you can prep the squash up to 24 hours in advance. Slice the squash and store it in an airtight container in the refrigerator. When you’re ready to cook, arrange the slices on the baking sheet, brush with the glaze, and roast as directed. You can also roast the squash fully and reheat it — just know that the edges won’t be as crispy.
Why is my roasted squash soggy instead of caramelized?
Soggy squash usually means one of two things: either your oven wasn’t hot enough, or you overcrowded the baking sheet. Make sure your oven is fully preheated to 400°F, and give the squash plenty of space on the pan. If the slices are touching, they’ll steam instead of roast. Use two baking sheets if needed.
Can I use honey instead of maple syrup?
You can, but the flavor will be different. Honey is sweeter and has a more floral taste, while maple syrup has that distinctive woodsy sweetness. If you use honey, keep an eye on the squash because honey can burn faster than maple syrup. I’d recommend reducing the oven temperature to 375°F and watching it closely.
Pin This Recipe!
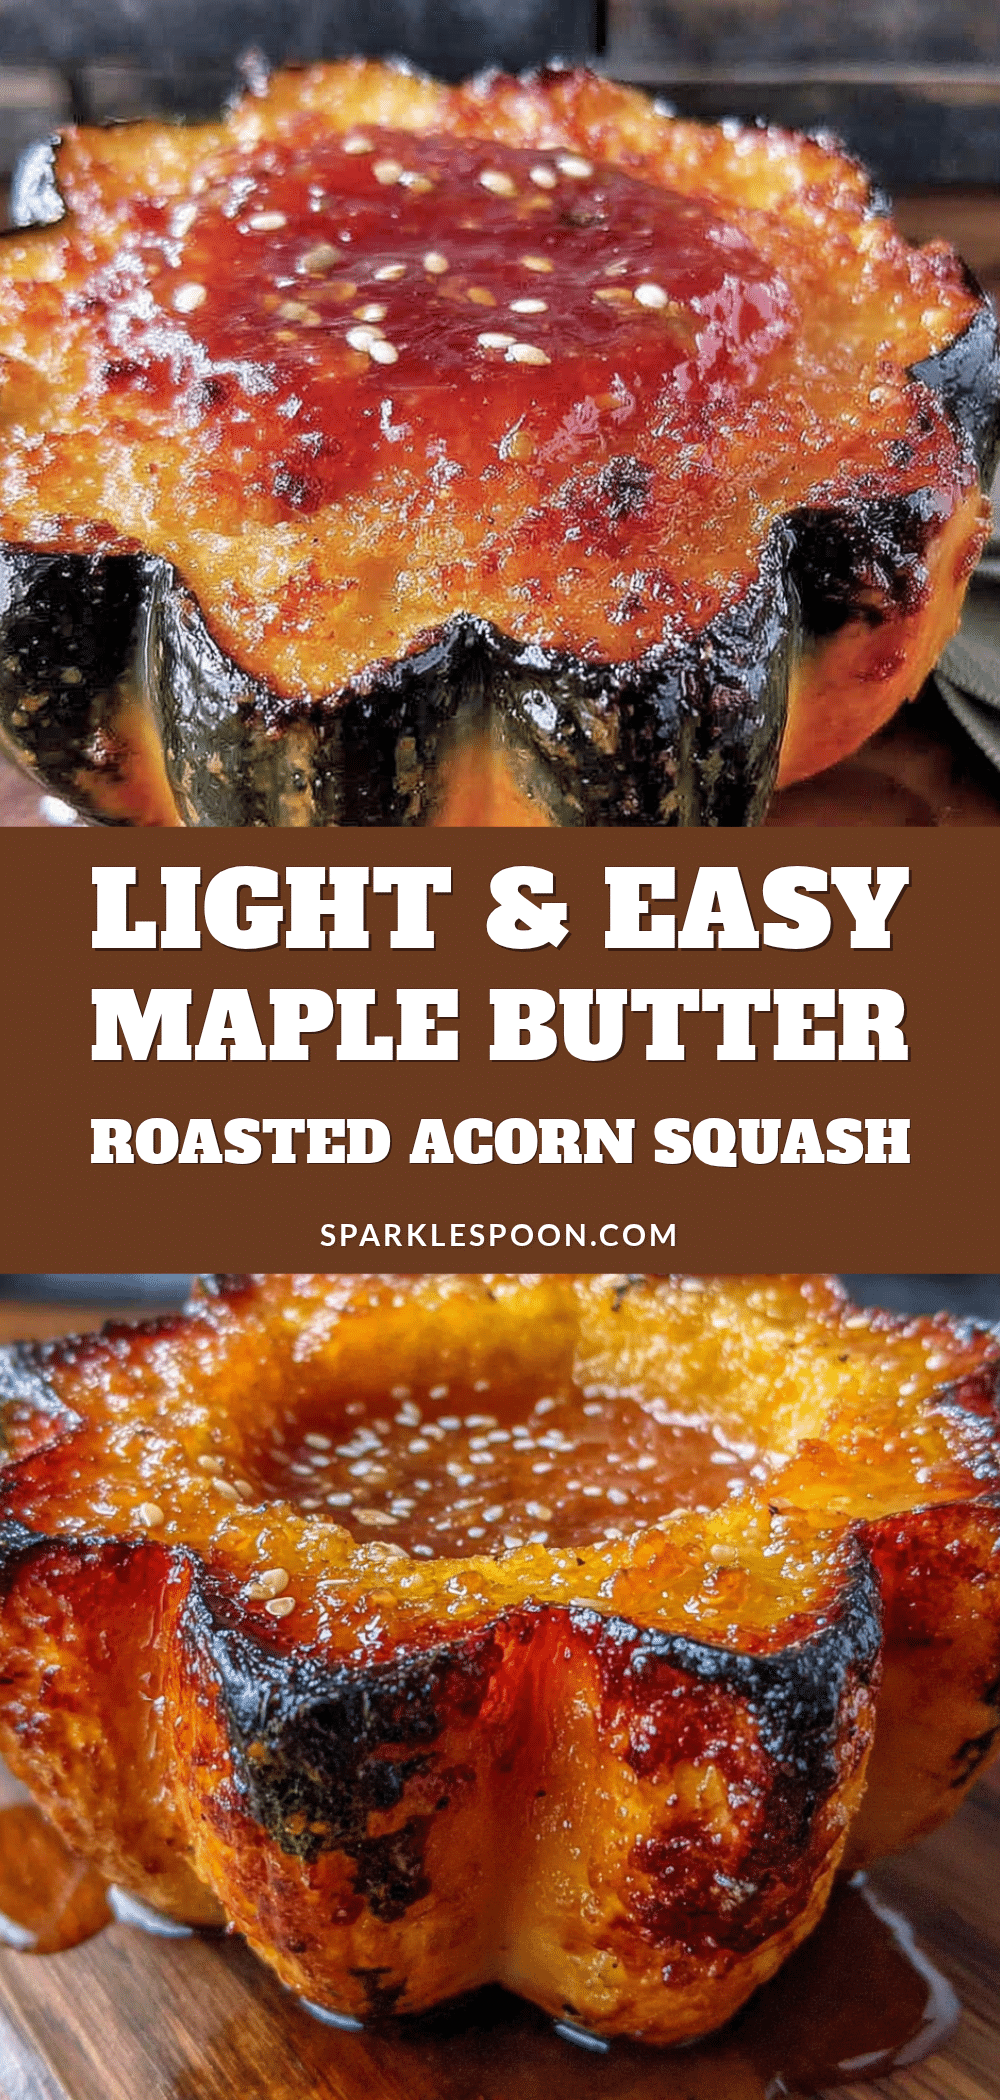
Light & Easy Maple Butter Roasted Acorn Squash
This light & easy maple butter roasted acorn squash is a simple yet stunning side dish, with caramelized edges and a tender, sweet center. It’s perfect for weeknight dinners or holiday feasts.
- Prep Time: 10 minutes
- Cook Time: 30 minutes
- Total Time: 40 minutes
- Yield: 4 servings 1x
- Category: Side Dish
- Cuisine: American
Ingredients
- 1 medium acorn squash (about 1.5 to 2 pounds)
- 2 tablespoons unsalted butter, melted
- 2 tablespoons pure maple syrup
- 1/4 teaspoon salt
- 1/8 teaspoon black pepper
- 1/4 teaspoon cinnamon (optional)
- Fresh thyme or rosemary sprigs (for garnish, optional)
- Flaky sea salt (for garnish, optional)
- Toasted pecans or walnuts (for garnish, optional)
Instructions
- Preheat your oven to 400°F (200°C). Position a rack in the middle.
- Wash the acorn squash and pat it dry. Cut off the very top and bottom, then cut the squash in half from top to bottom.
- Scoop out the seeds and stringy fibers from the center of each half.
- Place each half cut-side down and slice into half-moon shapes about 1/2 to 3/4 inch thick.
- In a small bowl, combine the melted butter, maple syrup, salt, pepper, and cinnamon (if using). Whisk until smooth.
- Line a baking sheet with parchment paper or foil. Arrange the squash slices in a single layer without overlapping.
- Brush the maple butter mixture generously over the squash slices.
- Roast for 20 minutes.
- Flip each slice carefully and brush with any remaining glaze.
- Roast for another 10-15 minutes, until the squash is tender and caramelized (total roasting time 30-35 minutes).
- Remove from the oven, let cool for 2-3 minutes, then transfer to a serving platter. Garnish with fresh thyme or rosemary and flaky sea salt if desired. Serve warm.
Notes
For extra crispy edges, broil for the last 1-2 minutes, but watch closely as maple syrup can burn quickly. Don’t skip flipping the slices for even caramelization. Leftovers can be stored in an airtight container in the refrigerator for up to 4 days.
Nutrition
- Serving Size: 1/4 of recipe
- Calories: 145
- Sugar: 12
- Sodium: 150
- Fat: 6
- Saturated Fat: 3.5
- Carbohydrates: 24
- Fiber: 4
- Protein: 2
Keywords: roasted acorn squash, maple butter squash, easy side dish, fall recipe, Thanksgiving side



