Love this? Save it for later!
Share the inspiration with your friends
It was 11:47 PM on a rainy Wednesday, and I was elbow-deep in pumpkin guts. Not for the aesthetic—I’d just finished carving a lopsided jack-o’-lantern that looked more like a deflated football than a festive gourd. The seeds were piling up in a colander, and I had every intention of tossing them. I mean, honestly, who has the energy for roasted pumpkin seeds at midnight? But then I saw the cinnamon stick sitting on my spice rack, and a weird, tired thought popped into my head: what if they were sweet instead of salty? I didn’t have the energy for the savory, garlicky version I usually make, but I had a hunch about sugar and heat. So I rinsed those slimy seeds, shook them dry with a towel that was probably meant for dishes, and started experimenting. Let me tell you—sometimes the best ideas come when you’re too tired to overthink them. This Light & Crispy Cinnamon Sugar Pumpkin Seeds recipe was born from a very specific late-night craving and a refusal to let good pumpkin seeds go to waste. Maybe you’ve been there, staring at a pile of pumpkin innards at an unreasonable hour, wondering if there’s a better way. There is.
Why You’ll Love This Recipe
This isn’t your average pumpkin seed recipe. Most versions come out either burnt on the outside or chewy in the middle, and let’s face it—nobody has time for that. After testing this method about seven times (and burning my tongue twice), I can confidently say this is the version you’ll come back to every fall.
- Light & Crispy Every Time: The secret is in the boiling step. It sounds extra, I know, but it transforms the texture completely. No more tough, fibrous seeds that feel like you’re eating wood chips.
- Simple Ingredients: You probably have everything in your pantry right now. Pumpkin seeds (obviously), sugar, cinnamon, butter or coconut oil, and a pinch of salt. That’s it.
- Perfect for Fall Gatherings: Whether it’s a Halloween party, a Friendsgiving snack table, or just a cozy Tuesday night, these seeds disappear fast. I’ve seen grown adults hover around a bowl of these like seagulls at the beach.
- Crowd-Pleaser: Kids love the sweetness, adults appreciate the crunch, and nobody complains about the mess because there isn’t one. These aren’t sticky or greasy like some versions.
- Unbelievably Addictive: I’m not exaggerating when I say you’ll struggle to stop at one handful. The cinnamon-sugar coating is perfectly balanced—not too sweet, with just enough warmth from the spice.
What makes this recipe different? It’s the boiling method. Most recipes skip this step, but it’s the key to getting that shatteringly crisp texture without burning the sugar. Plus, I use a lower oven temperature than most recipes call for, which means you get even browning without that bitter, burnt edge. It’s comfort food reimagined—lighter, faster, and honestly, way more satisfying than the savory versions you’re used to.
What Ingredients You Will Need
This recipe uses simple, wholesome ingredients to deliver that perfect sweet crunch. The magic happens when these pantry staples come together with a little patience and the right technique.
- Fresh pumpkin seeds (1 ½ cups, rinsed and patted dry) — These are the star of the show. I prefer seeds from sugar pumpkins or pie pumpkins because they’re smaller and more tender, but any pumpkin works. If you’re using seeds from a carving pumpkin, just know they’ll be a bit larger and chewier.
- Water (4 cups, for boiling) — This is the game-changer. Boiling the seeds softens the outer shell just enough so they crisp up evenly without turning into rocks.
- Salt (1 teaspoon, plus more for the boiling water) — Don’t skip the salt in the boil. It seasons the seeds from the inside out, which makes a huge difference.
- Unsalted butter (2 tablespoons, melted) — Butter gives that rich, nutty flavor that makes these seeds irresistible. You can swap in coconut oil for a dairy-free version, but honestly, butter is better here.
- Granulated sugar (3 tablespoons) — Regular white sugar works perfectly. It melts into the butter and creates that crackly coating. I’ve tried brown sugar, and it’s good, but it burns faster, so stick with granulated for the best results.
- Ground cinnamon (1 ½ teaspoons) — I recommend Saigon cinnamon if you can find it. It’s more aromatic and less bitter than standard cassia cinnamon. Trust me on this one.
- Vanilla extract (½ teaspoon, optional but recommended) — This adds a warmth that complements the cinnamon beautifully. It’s not essential, but it takes the flavor from good to “what did you put in these?”
- Pinch of nutmeg (optional) — If you’re feeling fancy, a tiny grating of fresh nutmeg adds a lovely depth. Don’t overdo it though—nutmeg is potent.
Ingredient Tips from My Kitchen
I’ve tested this with seeds from three different pumpkin varieties, and the sweetest, most tender results came from a small sugar pumpkin I bought at a farmers’ market. If you’re using seeds from a jack-o’-lantern, expect a slightly tougher texture. Also, make sure your cinnamon is fresh—spices lose their punch after about six months. I keep mine in a dark cabinet and replace them every fall.
Equipment Needed
You don’t need anything fancy for this recipe, which is part of the beauty. Here’s what you’ll want on hand:
- Medium saucepan — For boiling the seeds. Any pot works, just make sure it’s big enough to hold the seeds and water without overflowing.
- Colander or fine-mesh strainer — For draining the seeds after boiling. A regular colander works fine, but a fine-mesh strainer catches the smaller seeds better.
- Kitchen towel or paper towels — For drying the seeds. I’ve used both, and a clean kitchen towel works best because it doesn’t leave lint on the seeds.
- Baking sheet — A rimmed baking sheet is ideal. I use a half-sheet pan because it gives the seeds room to spread out in a single layer.
- Parchment paper or silicone baking mat — This prevents sticking and makes cleanup a breeze. Trust me, you don’t want to scrub caramelized sugar off a baking sheet at midnight.
- Mixing bowl — For tossing the seeds with butter and sugar. A medium bowl is perfect.
- Spatula or wooden spoon — For stirring. I prefer a silicone spatula because it doesn’t scratch my bowls.
If you don’t have a silicone baking mat, parchment paper works just as well. I’ve also used aluminum foil in a pinch, but the seeds tend to stick more. A good baking sheet makes a difference—I use a heavy-duty one from Nordic Ware that doesn’t warp in the oven. You can find similar ones for around $20, and they last for years.
Preparation Method
This method looks like a few extra steps, but I promise every single one matters. Here’s how to get those perfect, crispy, cinnamon-sugar seeds.
- Preheat your oven to 300°F (150°C). Yes, this is lower than most recipes. Trust me on this—higher heat burns the sugar before the seeds crisp up. Line a baking sheet with parchment paper or a silicone mat.
- Separate the seeds from the pumpkin pulp. I know this is the messy part. Fill a large bowl with cold water, dump the seeds and guts in, and use your fingers to separate them. The seeds float, the pulp sinks. It’s kind of satisfying, honestly. Rinse the seeds in a colander and pick off any stubborn stringy bits.
- Boil the seeds. Bring 4 cups of water to a rolling boil in a medium saucepan. Add 1 teaspoon of salt and the pumpkin seeds. Boil for exactly 10 minutes. This softens the outer seed coat so they crisp up instead of turning into little rocks. I set a timer because I’ve definitely forgotten and ended up with mushy seeds before.
- Drain and dry thoroughly. Pour the seeds into a colander and let them cool for a minute or two. Then spread them out on a clean kitchen towel and pat them completely dry. This is crucial—any excess moisture will steam the seeds instead of roasting them. I usually let them sit on the towel for about 5 minutes while I prep the other ingredients.
- Toss with butter and sugar. In a medium mixing bowl, combine the melted butter, granulated sugar, ground cinnamon, vanilla extract (if using), and a pinch of nutmeg. Add the dried seeds and toss until every seed is coated. Use a spatula to scrape the sides of the bowl—don’t leave any of that sugary goodness behind.
- Spread in a single layer. Pour the coated seeds onto the prepared baking sheet. Use the spatula to spread them into one even layer. Try not to overlap them too much, or they’ll steam instead of crisp. I know it’s tempting to cram them all on one sheet, but if they’re crowded, they won’t get that light, airy texture.
- Bake for 25-30 minutes, stirring halfway through. After 15 minutes, pull the pan out and give the seeds a good stir with a spatula. This ensures even browning. Return to the oven and bake for another 10-15 minutes. The seeds should be golden brown and fragrant. They’ll still feel slightly soft when you take them out—they crisp up as they cool.
- Cool completely before eating. This is the hardest part. Let the seeds cool on the baking sheet for at least 15 minutes. They’ll continue to crisp up as they cool. If you eat them warm, they’ll be a little chewy. I’ve made this mistake more times than I’d like to admit.
My Personal Efficiency Tip
While the seeds are boiling, I prep the butter mixture and line the baking sheet. That way, by the time the seeds are done, everything else is ready to go. It saves about 5 minutes and keeps me from standing around staring at a pot of boiling water.
Cooking Tips & Techniques
I’ve learned a few things the hard way so you don’t have to. Here’s what I wish someone had told me before I started making these.
Don’t skimp on the drying step. I know it’s tempting to just pat them quickly and move on, but wet seeds = steamed seeds. And steamed seeds are sad, chewy seeds. Take the extra 2 minutes to really dry them. I spread them on a towel and roll them around until the towel feels damp.
Watch the oven like a hawk during the last 5 minutes. Sugar burns fast. I’ve ruined a batch by getting distracted by my phone and coming back to a smoking pan. Set a timer and check them at the 25-minute mark. If they’re golden and fragrant, pull them out. If they need more time, check every 2 minutes.
Stirring halfway is non-negotiable. The edges of the pan cook faster than the center. If you skip the stir, you’ll end up with burnt seeds on one side and undercooked seeds on the other. I use a thin metal spatula to scrape and flip them.
Use room-temperature butter. If your butter is cold, it’ll clump up instead of coating the seeds evenly. Let it sit out for 10 minutes, or microwave it in 5-second bursts until it’s just melted but not hot.
My biggest failure: I once tried to double the batch and crammed everything onto one baking sheet. The seeds came out soggy and uneven. Now I always use two sheets if I’m making a big batch, and I rotate them halfway through baking. Lesson learned.
Variations & Adaptations
This recipe is a great starting point, but don’t be afraid to play around. Here are some variations I’ve tried that actually worked.
Spiced Chai Version
Add ½ teaspoon of ground ginger, ¼ teaspoon of ground cardamom, and a pinch of ground cloves to the butter mixture. It gives the seeds a warm, chai-like flavor that’s perfect for fall. I made this for a book club meeting and got three requests for the recipe.
Maple Pecan Twist
Substitute the granulated sugar with 2 tablespoons of maple syrup and add ¼ cup of chopped pecans. Toss the pecans in with the seeds before baking. The maple syrup makes the seeds a little stickier, so spread them out well and check them a few minutes early—maple syrup burns faster than sugar.
Dairy-Free Version
Replace the butter with melted coconut oil or avocado oil. Coconut oil adds a subtle tropical note that pairs surprisingly well with cinnamon. I’ve also used vegan butter, and it works fine, though the flavor is a little less rich.
Savory-Sweet Hybrid
Add ¼ teaspoon of cayenne pepper and ½ teaspoon of smoked paprika to the sugar mixture. The heat balances the sweetness in a way that’s honestly addictive. I served these at a Super Bowl party, and they were gone before the chips.
Serving & Storage Suggestions
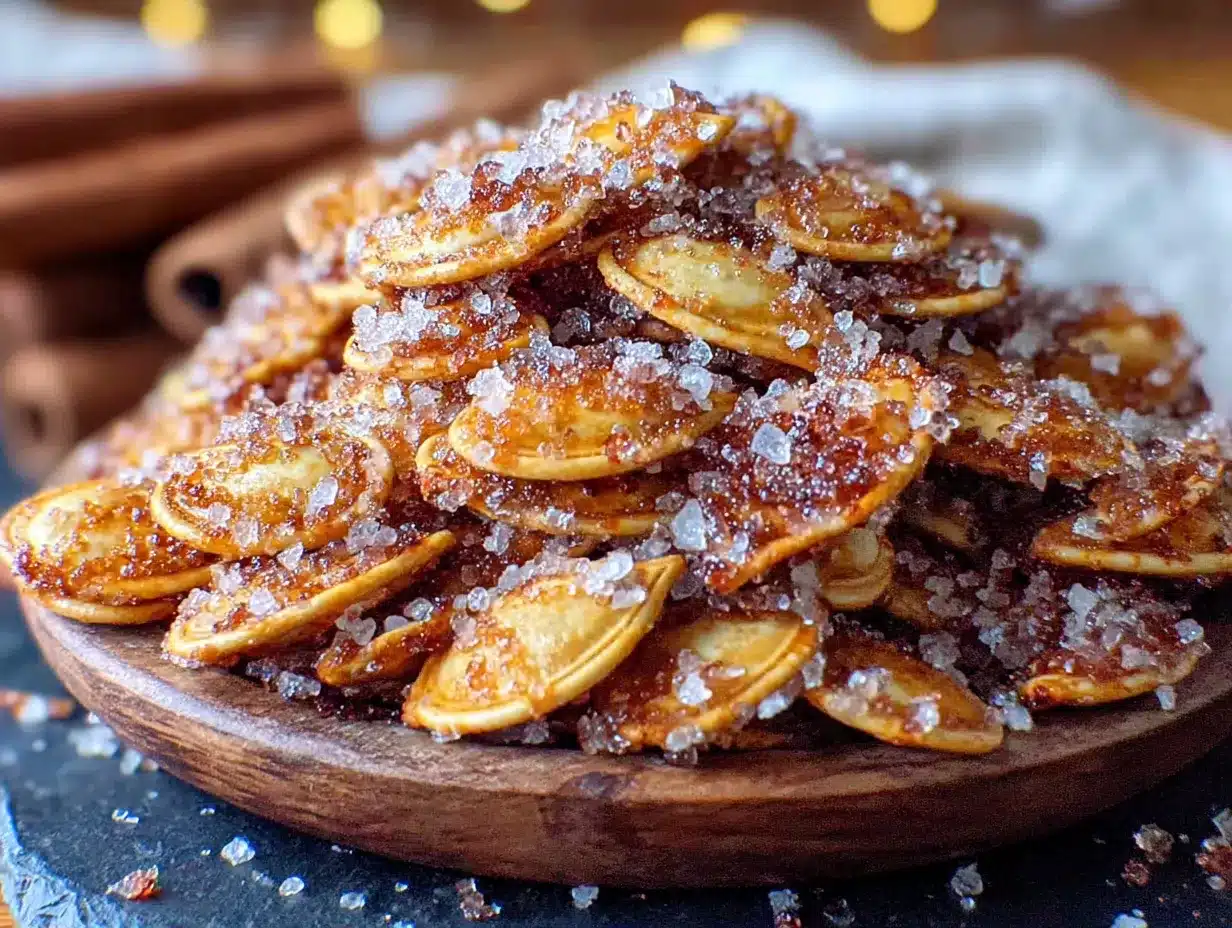
These seeds are best served at room temperature, straight from the baking sheet or a bowl. I like to pile them into a wooden serving bowl for a rustic look, but any bowl works. They make a great topping for fall salads—try them on a bed of arugula with dried cranberries and goat cheese. Or sprinkle them over a bowl of vanilla ice cream for an easy dessert that looks fancy.
For storage, let the seeds cool completely, then transfer them to an airtight container. They’ll stay fresh for up to 2 weeks at room temperature. I’ve kept them for 3 weeks before, and they were still crispy, though the flavor started to fade. Don’t store them in the refrigerator—the moisture will make them soft.
If they do lose their crunch, spread them on a baking sheet and pop them in a 300°F oven for 3-4 minutes. Let them cool again, and they’ll crisp right back up. I’ve done this twice with the same batch, and it works like a charm.
The flavors actually develop a bit after a day or two. The cinnamon mellows out and blends with the butter, so if you can resist eating them all immediately, they’ll taste even better tomorrow. (I usually can’t resist, but I’m telling you what I’ve been told.)
Nutritional Information & Benefits
Pumpkin seeds are a nutritional powerhouse, and this recipe keeps them relatively light. Here’s the estimated breakdown per ¼-cup serving:
- Calories: 180
- Fat: 12g (mostly healthy unsaturated fats)
- Protein: 7g
- Carbohydrates: 14g
- Fiber: 3g
- Sugar: 9g
Pumpkin seeds are packed with magnesium, zinc, and iron. Magnesium helps with sleep and muscle recovery, zinc supports your immune system (especially important during cold season), and iron keeps your energy levels up. The cinnamon adds antioxidants and may help regulate blood sugar, which is a nice bonus when you’re eating something sweet.
This recipe is naturally gluten-free and can be made dairy-free with a simple swap. If you’re watching your sugar intake, you can reduce the sugar to 2 tablespoons—the seeds will still be sweet, just less coated.
Conclusion
This Light & Crispy Cinnamon Sugar Pumpkin Seeds recipe is proof that the best ideas often come at weird hours when you’re not trying to impress anyone. It’s simple, it’s forgiving, and it turns something you might throw away into a snack that people actually crave. I’ve made these for Halloween parties, Thanksgiving appetizers, and random Tuesday night cravings, and they never disappoint.
I’d love to hear how yours turn out. Did you try a variation? Add a spice I didn’t think of? Burn a batch and learn something? Drop a comment below and let me know. And if you share a photo on Pinterest, tag me—I’m always looking for new ideas to try. Until next time, happy roasting, and may your seeds always be crispy.
Frequently Asked Questions
Can I use store-bought pumpkin seeds instead of fresh?
Yes, but the texture will be different. Store-bought pepitas (the green, hulled seeds) are already dry and won’t need boiling. Just toss them with the butter and sugar and bake for about 12-15 minutes at 300°F. They’ll be crispier and smaller than fresh seeds.
Why did my seeds come out chewy instead of crispy?
This usually happens for one of three reasons: they weren’t dried thoroughly before baking, they were overcrowded on the baking sheet, or they were undercooked. Next time, take the extra time to pat them dry, use a larger baking sheet, and bake until they’re golden and fragrant.
Can I make these in an air fryer?
Absolutely. Set your air fryer to 300°F and cook for 12-15 minutes, shaking the basket halfway through. Keep an eye on them—air fryers run hot, and sugar burns fast. Check at the 10-minute mark to be safe.
How do I prevent the sugar from burning?
Use a lower oven temperature (300°F is perfect) and stir the seeds halfway through. If your oven runs hot, check them at 20 minutes instead of 25. You can also reduce the sugar to 2 tablespoons if you’re worried about burning.
Can I freeze these pumpkin seeds?
Yes, but they’re best fresh. If you need to freeze them, let them cool completely, then store them in a freezer-safe bag for up to 3 months. Thaw at room temperature and re-crisp in a 300°F oven for 3-4 minutes before serving.
Pin This Recipe!
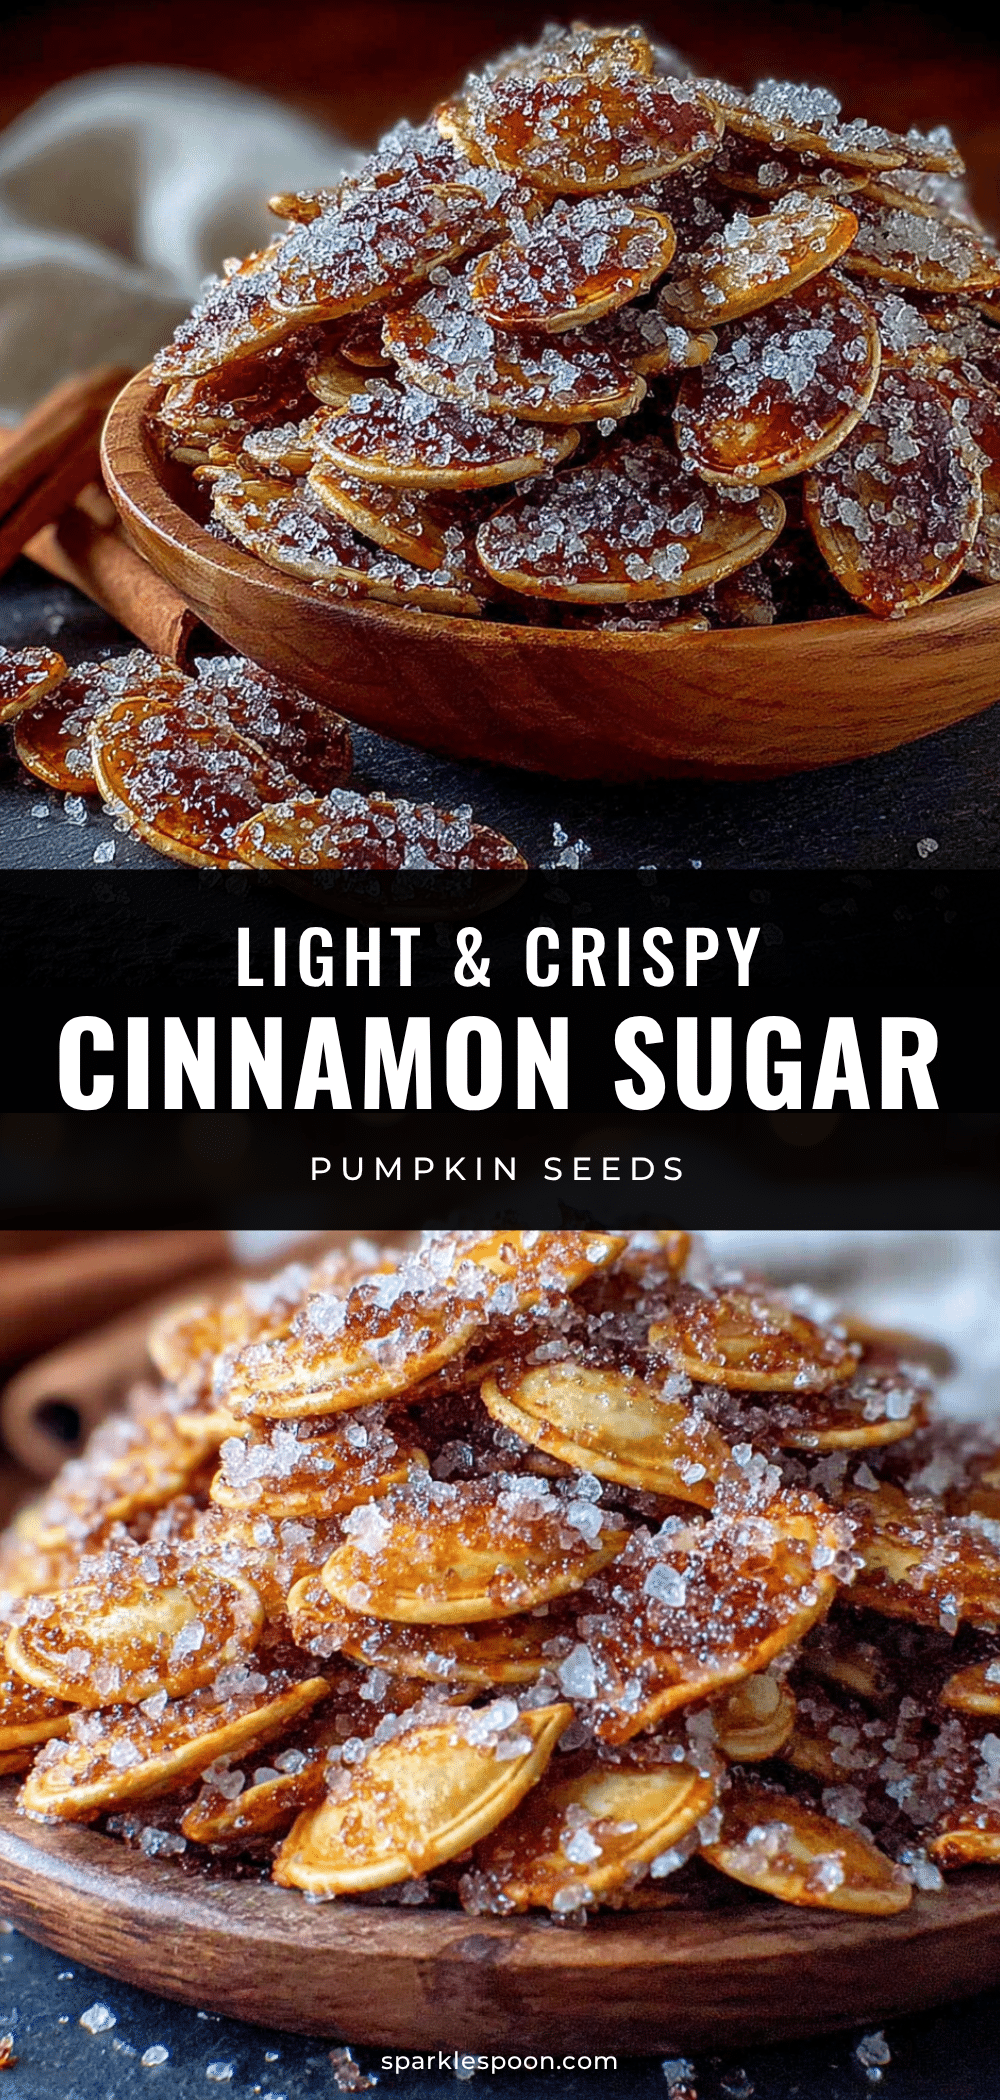
Light & Crispy Cinnamon Sugar Pumpkin Seeds – Best Easy Fall Snack
Transform fresh pumpkin seeds into a light, crispy, and sweet cinnamon-sugar snack. This easy recipe uses a simple boiling method for the perfect crunch every time, making it an irresistible fall treat.
- Prep Time: 15 minutes
- Cook Time: 30 minutes
- Total Time: 45 minutes
- Yield: 4 servings 1x
- Category: Snack
- Cuisine: American
Ingredients
- 1 ½ cups fresh pumpkin seeds (rinsed and patted dry)
- 4 cups water (for boiling)
- 1 teaspoon salt (plus more for boiling water)
- 2 tablespoons unsalted butter (melted)
- 3 tablespoons granulated sugar
- 1 ½ teaspoons ground cinnamon (preferably Saigon cinnamon)
- ½ teaspoon vanilla extract (optional but recommended)
- Pinch of nutmeg (optional)
Instructions
- Preheat your oven to 300°F (150°C). Line a baking sheet with parchment paper or a silicone baking mat.
- Separate the seeds from the pumpkin pulp. Fill a large bowl with cold water, add the seeds and pulp, and use your fingers to separate them. The seeds float, the pulp sinks. Rinse the seeds in a colander and pick off any stubborn stringy bits.
- Bring 4 cups of water to a rolling boil in a medium saucepan. Add 1 teaspoon of salt and the pumpkin seeds. Boil for exactly 10 minutes.
- Drain the seeds in a colander and let them cool for a minute or two. Spread them out on a clean kitchen towel and pat them completely dry. Let them sit on the towel for about 5 minutes.
- In a medium mixing bowl, combine the melted butter, granulated sugar, ground cinnamon, vanilla extract (if using), and a pinch of nutmeg. Add the dried seeds and toss until every seed is coated.
- Pour the coated seeds onto the prepared baking sheet and spread them into one even layer using a spatula.
- Bake for 25-30 minutes, stirring halfway through (after 15 minutes). The seeds should be golden brown and fragrant. They will still feel slightly soft when you take them out—they crisp up as they cool.
- Cool completely on the baking sheet for at least 15 minutes before eating.
Notes
The boiling step is crucial for a light, crispy texture. Dry the seeds thoroughly before coating to prevent steaming. Watch the oven closely during the last 5 minutes as sugar burns quickly. Stirring halfway through ensures even browning. For best results, use seeds from sugar pumpkins or pie pumpkins. Store in an airtight container at room temperature for up to 2 weeks. To re-crisp, bake at 300°F for 3-4 minutes.
Nutrition
- Serving Size: ¼ cup
- Calories: 180
- Sugar: 9
- Sodium: 150
- Fat: 12
- Saturated Fat: 4
- Carbohydrates: 14
- Fiber: 3
- Protein: 7
Keywords: pumpkin seeds, cinnamon sugar, fall snack, roasted pumpkin seeds, easy snack, Halloween snack, Thanksgiving snack, crispy pumpkin seeds



