Love this? Save it for later!
Share the inspiration with your friends
I was digging through the back of my pantry last Tuesday, looking for a jar of pickles I swore I had stashed away, when my hand brushed against a dusty quart jar. The label had faded to a pale ghost of itself, but I could still make out the loopy handwriting: “Vanilla Cinnamon Pears – Nov 2021.” I stood there in the dim light, holding that jar like it was a time capsule. And honestly? It kind of was.
That jar took me straight back to a gray November afternoon three years ago. My neighbor, Mrs. Gable, had just moved into the assisted living facility, and she’d left me her entire canning setup on my front porch with a note that said, “You’ll put these to better use than my dusty shelves.” I didn’t know what I was doing. I mean, I’d watched my mom can tomatoes once when I was twelve, but that was the extent of my experience. But there I was, with a bushel of Bosc pears from the farmers market that were about to turn, a vanilla bean I’d been hoarding, and a brand new water bath canner I was terrified to use.
The whole afternoon was a mess of sticky countertops and second-guessing. I remember dropping a cinnamon stick on the floor and fishing it out of the dog’s mouth. But when I finally twisted the lid on that first jar and heard the satisfying pop of the seal cooling, I felt like I’d just performed kitchen magic. Those pears sat in my pantry for months before I worked up the courage to open one. And let me tell you, that first bite of a vanilla-scented, cinnamon-warmed pear in the dead of winter was pure gold. Maybe you’ve been there—standing in your kitchen, holding a jar of something you made with your own two hands, and realizing that you’ve captured a moment in time. That’s exactly what this homemade canned pears recipe does. It takes a fleeting autumn afternoon and turns it into something you can open up months later, when you need a little warmth and sweetness the most.
Why You’ll Love This Recipe
Let me be real with you for a second. I’ve canned a lot of pears over the years. I’ve tried plain syrup packs, spiced versions with star anise, even a batch with cardamom that my family politely ignored. But this vanilla cinnamon version? It’s the one I keep coming back to. It’s the one I give as gifts. It’s the one my husband asks for by name.
- Simple Ingredients, Big Flavor: You don’t need a spice cabinet full of exotic things. Pears, sugar, water, a vanilla bean (or extract), and cinnamon sticks. That’s it. No weird additives or hard-to-find items.
- Beginner-Friendly Process: If I can figure this out on a rainy afternoon with no experience, so can you. The water bath canning method is straightforward, and I’ll walk you through every step so you don’t feel lost.
- Perfect for Gifting: I’ve lost count of how many jars of these I’ve given away for Christmas, hostess gifts, or just because. People go nuts for them. They look beautiful on the shelf, and they taste even better than they look.
- Year-Round Summer: There’s something deeply satisfying about opening a jar of these pears in February, when the world is gray and cold, and tasting that burst of cinnamon and vanilla. It’s like a little rebellion against winter.
- Unbelievably Versatile: Eat them straight from the jar with a spoon (no judgment here), spoon them over ice cream, chop them up for a cheese board, or use the syrup in cocktails. The possibilities are endless.
What makes this recipe different from all the other canned pear recipes out there? It’s the balance. Most recipes lean too heavy on the cinnamon, or they forget the vanilla entirely. This one gets it right. The vanilla softens the spice, and the spice warms the vanilla. They dance together in the syrup, infusing each pear slice with a cozy, almost nostalgic flavor that reminds me of my grandmother’s kitchen—even though she never canned a pear in her life. It’s comfort in a jar, and it’s easier to make than you think.
What Ingredients You Will Need
This recipe uses simple, wholesome ingredients to deliver that cozy, spiced flavor without any fuss. Most of these are pantry staples, which makes this a great project for a lazy weekend afternoon. Here’s what you’ll need:
For the Pears
- 4 to 5 pounds firm, ripe pears – Bosc or Bartlett work beautifully. You want them ripe but still firm, not mushy. If they yield too easily to thumb pressure, they’ll turn to mush during processing. I prefer Bosc for their honeyed flavor and dense texture.
- Lemon juice or citric acid – About 1 tablespoon lemon juice per quart of water for the soaking bath. This prevents the pears from browning while you work. I use bottled lemon juice for consistency, but fresh works too.
For the Vanilla Cinnamon Syrup
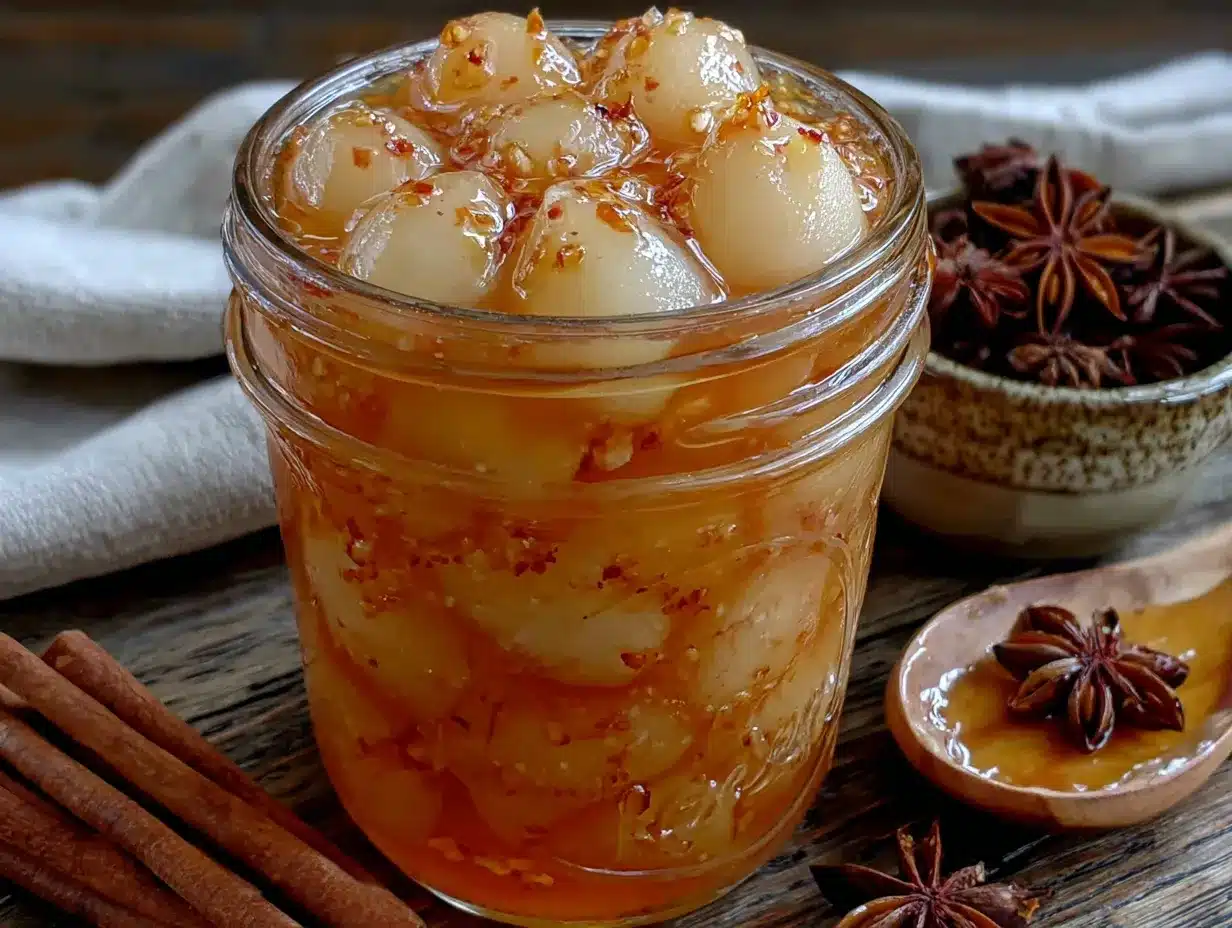
- 4 cups water – Filtered water is best if your tap water has a strong chlorine taste. It does make a difference in the final flavor.
- 2 cups granulated sugar – Regular white sugar is perfect. You can use organic cane sugar if you prefer, but don’t substitute with honey or maple syrup for canning safety reasons—it changes the density of the syrup.
- 1 whole vanilla bean – This is where the magic happens. I know vanilla beans are pricey, but one bean will infuse the entire batch with that deep, floral vanilla flavor that extract just can’t replicate. If you absolutely must substitute, use 2 teaspoons of pure vanilla extract added to the syrup after it’s cooled slightly.
- 3 to 4 cinnamon sticks – Use whole sticks, not ground cinnamon. Ground cinnamon will make the syrup cloudy and the pears gritty. I recommend Ceylon cinnamon if you can find it—it’s milder and sweeter than the more common Cassia variety.
- Pinch of salt – Just a tiny pinch. It won’t make the pears salty, but it will brighten all the other flavors.
Optional Add-Ins
- 1 star anise – Adds a subtle licorice note that pairs beautifully with the vanilla. I do this in one batch every year just for variety.
- Thin strip of orange zest – A little citrus brightness can really lift the flavor. Use a vegetable peeler to remove a strip of orange peel (no white pith) and add it to the syrup.
Equipment Needed
Before you start, make sure you have all your tools ready. There’s nothing worse than realizing you’re missing something mid-process, with pears browning on the counter and syrup boiling on the stove.
- Water bath canner or large stockpot – You need a pot deep enough to cover your jars with at least 1 to 2 inches of water. A dedicated water bath canner with a rack is ideal, but a deep stockpot with a folded kitchen towel on the bottom works in a pinch. I used an old spaghetti pot for my first two years of canning.
- Canning jars – Quart jars (32 ounces) or pint jars (16 ounces). I prefer quarts because they hold more pears, but pints are nice for gifting. Make sure they’re free of nicks or cracks.
- New lids and screw bands – Always use new lids for a proper seal. The screw bands can be reused as long as they’re not rusted or bent.
- Jar lifter – This is non-negotiable. Trying to grab hot jars with tongs is a disaster waiting to happen. Trust me on this—I have the burn scars to prove it.
- Wide-mouth funnel – Makes filling jars so much less messy. You can get a set for under ten dollars.
- Magnetic lid wand – Handy for lifting lids out of hot water without burning your fingers. Not essential, but nice to have.
- Clean kitchen towels – For wiping jar rims and setting hot jars on. I keep a stack dedicated just for canning.
- Sharp paring knife and vegetable peeler – A good peeler makes the prep work go so much faster. I use a Y-shaped peeler and it’s a game changer.
- Large bowl – For the lemon water bath that prevents browning.
Preparation Method
Alright, let’s get to the good part. I’ll walk you through this step by step, including all the little details I wish someone had told me that first time. Take your time, and don’t rush. Canning is a meditation, not a race.
- Prepare your jars and equipment. Wash your jars, lids, and screw bands in hot, soapy water. Rinse well. Place the jars in your water bath canner, cover them with water, and bring to a simmer (180°F). Keep them hot until you’re ready to fill them. Place the lids in a small saucepan of hot water (not boiling) to soften the sealing compound.
- Make the lemon water bath. Fill a large bowl with cold water and add 1 tablespoon of lemon juice or 1/4 teaspoon of citric acid per quart of water. This will be your holding station for the peeled pears.
- Prepare the pears. Wash your pears well. Using a vegetable peeler, remove the skin. Cut each pear in half lengthwise, then use a melon baller or small spoon to scoop out the core and seeds. If you want pretty slices, cut each half into thirds or quarters. Drop the pieces into the lemon water as you work to prevent browning. Work quickly but carefully—you’ve got time.
- Make the vanilla cinnamon syrup. In a large saucepan, combine 4 cups of water and 2 cups of sugar. Split the vanilla bean lengthwise with a sharp knife and scrape the tiny seeds into the water. Drop the empty pod in too—it still has plenty of flavor. Add the cinnamon sticks and a pinch of salt. Bring to a boil over medium-high heat, stirring until the sugar dissolves completely. Reduce the heat and let it simmer for 5 minutes to allow the flavors to meld. If you’re using vanilla extract instead of a bean, add it after you turn off the heat.
- Pack the jars. Remove a hot jar from the canner using your jar lifter. Drain the pear pieces and pack them tightly into the jar, leaving 1/2 inch of headspace at the top. Don’t cram them in too hard, but don’t leave big gaps either. Add one cinnamon stick from the syrup to each jar. Using a wide-mouth funnel, pour the hot syrup over the pears, maintaining that 1/2 inch headspace. Run a clean chopstick or bubble remover tool around the inside of the jar to release any trapped air bubbles. Add more syrup if needed.
- Wipe and seal. Wipe the rim of each jar with a clean, damp towel to remove any syrup residue. A clean rim is essential for a good seal. Center a lid on the jar and screw the band on until it’s fingertip-tight—meaning you tighten it with just your fingertips, not your whole hand. You want it snug, not cranked down.
- Process the jars. Place the filled jars back into the water bath canner using your jar lifter. Make sure the jars are covered by at least 1 to 2 inches of water. Put the lid on the canner and bring the water to a full, rolling boil. Process quart jars for 25 minutes, pint jars for 20 minutes. Start the timer when the water reaches a boil, not before. Adjust for altitude if you’re above 1,000 feet.
- Cool and check seals. Turn off the heat and remove the canner lid. Let the jars sit in the water for 5 minutes to cool slightly. Then, using your jar lifter, transfer them to a towel-covered countertop. Leave them undisturbed for 12 to 24 hours. You’ll hear the satisfying pop of the lids sealing as they cool. After 24 hours, press the center of each lid. If it doesn’t flex up and down, it’s sealed. If it pops, refrigerate that jar and use it first.
- Label and store. Write the date and contents on the lid or a label. Store in a cool, dark place for up to 12 to 18 months. The flavor actually improves after a month or two as the pears absorb more of the syrup.
Cooking Tips & Techniques
I’ve made every mistake in the book so you don’t have to. Here are the things I wish I’d known from the start.
Don’t skip the lemon water bath. I tried to save time once by peeling and coring all the pears first, thinking I’d just add the lemon juice later. Big mistake. By the time I had the syrup ready, my pears looked like they’d been through a mud fight. The lemon water keeps them pristine and pretty. Use it every time.
Test your pears for ripeness. The biggest canning mistake I made early on was using pears that were too ripe. They turned into pear sauce in the jar—tasty, but not what I was going for. Squeeze the pear gently near the stem. It should give just slightly, like a ripe avocado. If it’s rock hard, let it sit on the counter for a few days. If it’s mushy, make pear butter instead.
Keep your jars hot. This is one of those details that seems fussy but matters. If you pour hot syrup into a cold jar, the temperature shock can cause the jar to crack. I learned this the hard way when I lost an entire batch of peach jam to a shattered jar. Keep those jars in the hot water until you’re ready to fill them.
Don’t over-process. I know it’s tempting to boil the jars longer “just to be safe,” but over-processing makes the pears mushy. Stick to the recommended times. They’re tested for safety and quality.
Use a timer, not your phone. I can’t tell you how many times I’ve gotten distracted by a text or a notification and lost track of time. A simple kitchen timer with a loud beep is your best friend during canning.
Work in small batches. If you’re making a huge amount, don’t try to do it all at once. I prep and process 4 to 5 pounds of pears at a time. It keeps the quality high and the stress low.
Variations & Adaptations
One of the best things about this recipe is how flexible it is. Here are some variations I’ve tried and loved over the years.
Spiced Chai Pears: Add 2 cardamom pods, 1 star anise, and a slice of fresh ginger to the syrup along with the cinnamon and vanilla. It gives the pears a warm, chai-like flavor that’s incredible spooned over yogurt or oatmeal. I made a batch of these last fall and they were gone by Christmas.
Honey Vanilla Pears: Replace half the sugar with honey. Use a mild honey like clover or orange blossom so it doesn’t overpower the vanilla. Keep in mind that honey can change the flavor profile significantly, so taste your syrup before pouring it over the pears. This version is lovely with a sprinkle of granola and some Greek yogurt.
Bourbon-Infused Pears: Add 2 tablespoons of bourbon to each quart jar before pouring in the syrup. The alcohol will cook off during processing, leaving behind a warm, oaky depth that pairs beautifully with vanilla. These are my go-to for holiday gift baskets. Just make sure you label them clearly so nobody accidentally gives them to kids!
Low-Sugar Version: You can reduce the sugar to 1 cup without affecting the safety of the canning process, as long as you’re using a tested recipe. The pears will be less sweet and the syrup will be thinner, but the flavor will still be lovely. I’ve made this version for friends watching their sugar intake, and they’ve all asked for the recipe.
Peach Variation: Swap the pears for peaches, using the same syrup and processing times. Peaches are more delicate, so handle them gently. I did this one summer when my pear tree didn’t produce, and it was a happy accident. The vanilla and cinnamon work just as beautifully with peaches.
Serving & Storage Suggestions
These pears are so versatile that I keep multiple jars in my pantry at all times. Here’s how I use them throughout the year.
Straight from the jar: Honestly, this is how I eat most of them. Chilled or at room temperature, they’re a perfect snack. My kids fight over the cinnamon sticks when I open a new jar—they chew on them like candy.
Over ice cream or yogurt: Spoon the pears and a little syrup over vanilla ice cream, plain Greek yogurt, or even pancakes. It’s like having dessert for breakfast, but with fruit, so it’s basically health food. Right?
Cheese board star: Arrange the pear slices on a platter with sharp cheddar, blue cheese, or brie. The sweetness of the pears cuts through the richness of the cheese beautifully. Add some walnuts and a drizzle of honey, and you’ve got a showstopper appetizer.
Cocktail ingredient: Use the syrup in place of simple syrup in cocktails. A vanilla cinnamon pear old fashioned is absolutely divine. Muddle a pear slice in the bottom of a glass, add bourbon, a splash of the syrup, and a dash of bitters. Stir with ice and strain. You’re welcome.
Baking addition: Chop the pears and fold them into muffin or quick bread batter. They add moisture and flavor without extra fat. I made a batch of vanilla pear muffins last month that disappeared in a day.
Storage: Store sealed jars in a cool, dark place like a pantry or basement. They’ll keep for 12 to 18 months. Once opened, refrigerate and use within 2 weeks. The syrup will keep even longer, so don’t toss it when the pears are gone—use it in cocktails, tea, or over pancakes.
Reheating: If you prefer warm pears, simply spoon them into a small saucepan and heat gently over low heat. Don’t boil them or they’ll turn to mush. A few minutes is all it takes.
Nutritional Information & Benefits
While these pears are a treat, they do offer some nutritional benefits worth noting. A half-cup serving of canned pears in light syrup contains approximately:
- Calories: 90-110 (depending on syrup absorption)
- Carbohydrates: 24g (mostly from natural fruit sugars and added sugar)
- Fiber: 2-3g (pears are a good source of dietary fiber)
- Vitamin C: 4-6% of the daily value
- Potassium: 3-4% of the daily value
Pears themselves are a great source of fiber, which supports digestive health, and they contain antioxidants that help fight inflammation. The vanilla bean adds a touch of vanillin, which has been studied for its potential calming effects. And cinnamon? It’s been shown to help regulate blood sugar levels. Of course, this recipe does contain added sugar, so enjoy it as an occasional treat rather than a daily staple. I like to think of it as a way to preserve the goodness of fall fruit with a little indulgence thrown in.
Dietary Considerations: This recipe is naturally gluten-free, dairy-free, and vegan. If you’re watching your sugar intake, try the low-sugar variation mentioned above. Always check your cinnamon source if you have allergies, as some brands process cinnamon in facilities that also handle nuts.
Conclusion
I know canning can feel intimidating. It’s hot, it’s sticky, and there’s a little voice in your head that worries you’re going to mess it up. But here’s the thing: you won’t. Not if you follow the steps and trust the process. The first time I pulled a jar of these vanilla cinnamon pears out of the canner, I stood there in my messy kitchen, holding it up to the light like it was a treasure. And it kind of was. It was proof that I could take something simple—a pear, some sugar, a cinnamon stick—and turn it into something that would bring joy months later.
That’s the magic of canning. It’s not just about preserving food. It’s about preserving moments. The gray afternoon you spent peeling pears while listening to a podcast. The satisfaction of hearing that first lid pop. The surprise on your friend’s face when you hand them a jar of homemade pears in December. These are the little things that make life feel full.
So go ahead. Grab a bag of pears the next time you see them at the market. Clear off your counter. Put on some music. And make a batch of these vanilla cinnamon pears. You’ll thank yourself in February, I promise.
I’d love to hear how your batch turns out! Drop a comment below with your favorite way to eat these pears, or tag me in your photos if you share them online. Happy canning!
Frequently Asked Questions
Can I use ground cinnamon instead of cinnamon sticks?
I don’t recommend it. Ground cinnamon will make your syrup cloudy and give the pears a gritty texture. The sticks infuse the syrup gently without leaving sediment. If you’re in a pinch, you can tie a cinnamon stick in cheesecloth and remove it before packing the jars, but whole sticks are really the way to go.
How long do these canned pears last?
Properly sealed and stored in a cool, dark place, these pears will keep for 12 to 18 months. The flavor actually gets better after a month or two as the pears absorb more of the vanilla and cinnamon. I’ve found jars that were two years old and they were still perfectly safe to eat, though the texture was a bit softer.
Do I need a special canner, or can I use a regular pot?
You can absolutely use a regular stockpot as long as it’s deep enough to cover your jars with at least 1 to 2 inches of water. You’ll need to place a folded kitchen towel or a rack on the bottom to keep the jars from sitting directly on the heat. A dedicated water bath canner is nice to have, but definitely not required. I used a spaghetti pot for my first two years of canning.
Why did my pears turn brown in the jar?
This usually happens when the pears weren’t kept in the lemon water bath long enough, or if there wasn’t enough acid in the syrup. Make sure you’re using fresh lemon juice or citric acid in your soaking water, and don’t let the pears sit out uncovered for more than a minute or two. A little browning is harmless, but proper acid treatment will keep them looking beautiful.
Can I reuse the syrup from a previous batch?
Technically yes, but I wouldn’t recommend it for canning. The syrup will have a different density and sugar concentration, which can affect the safety of the canning process. If you have leftover syrup from an opened jar, use it in cocktails, over pancakes, or in tea. For a new canning batch, always make fresh syrup for the best results and safety.
Pin This Recipe!
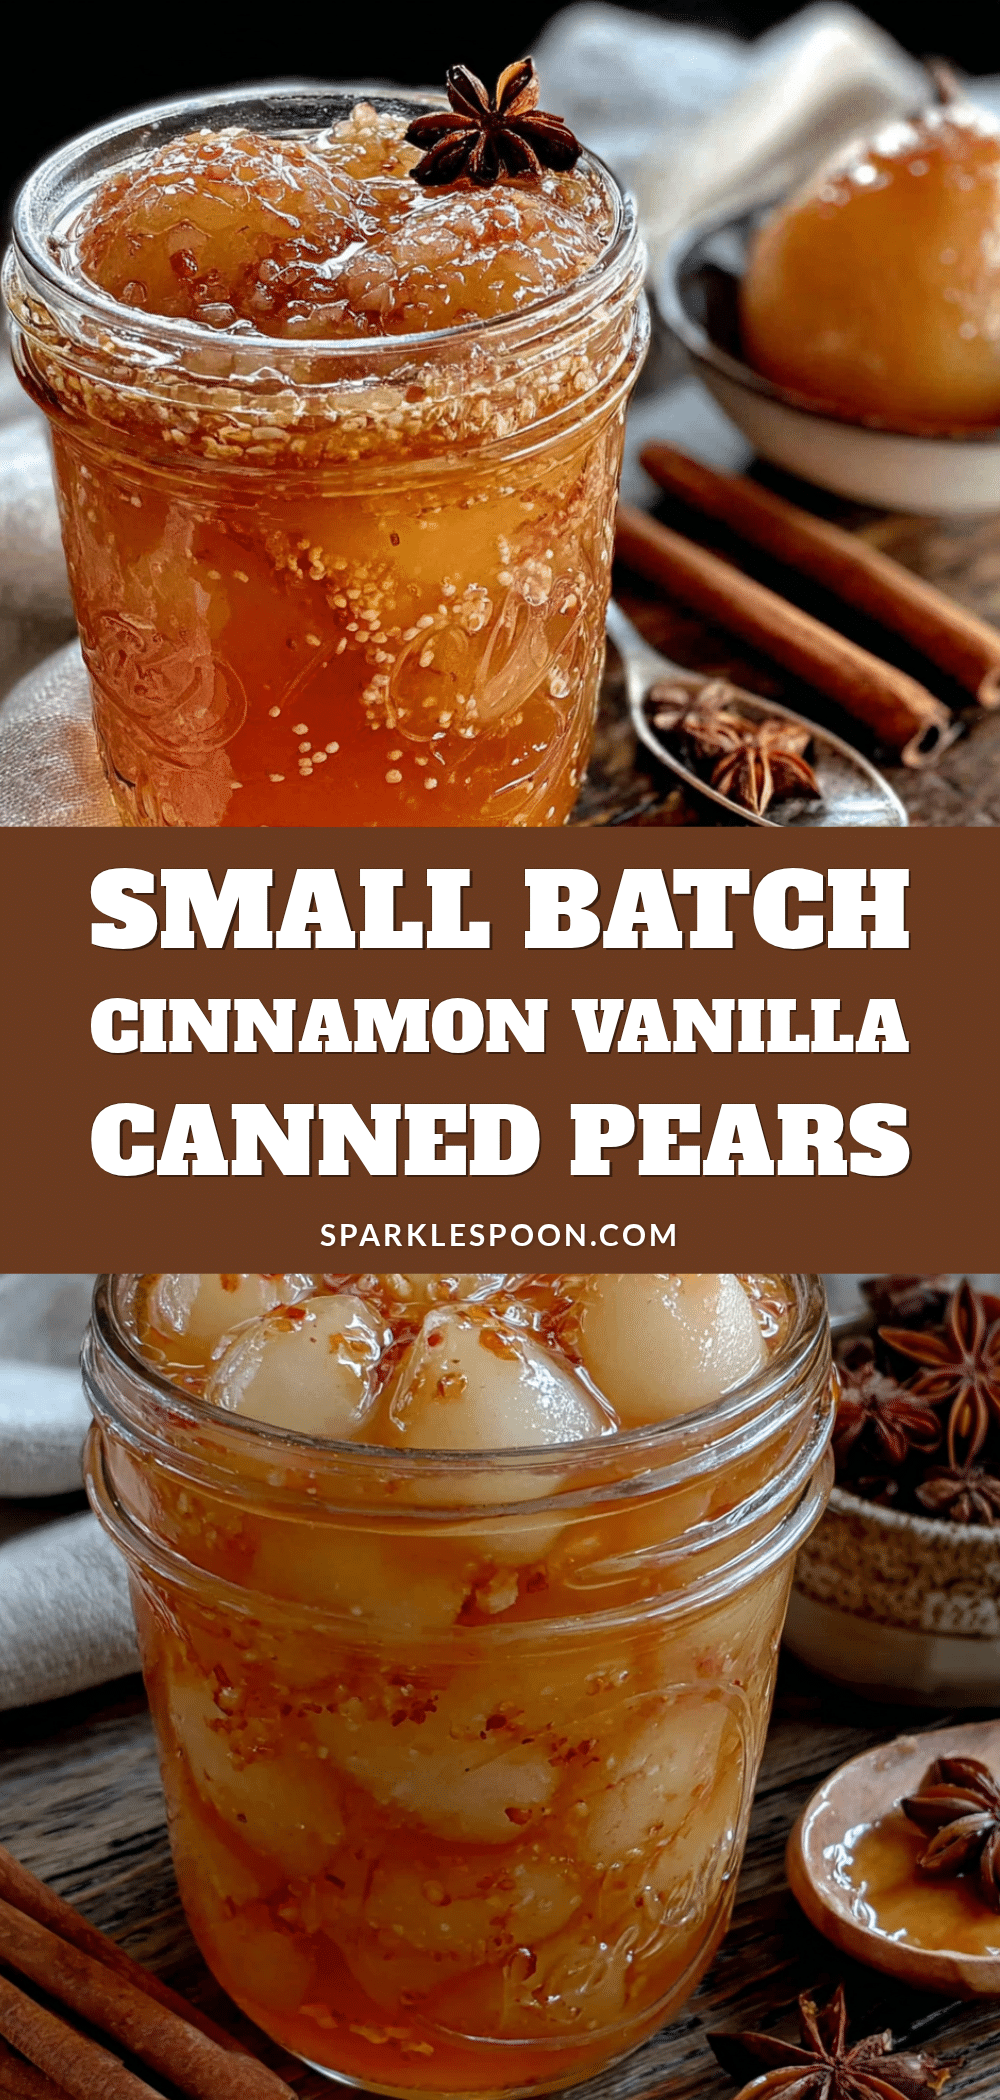
Homemade Canned Pears: The Best Easy Vanilla Cinnamon Recipe
Capture the essence of autumn with these homemade canned pears infused with vanilla and cinnamon. This beginner-friendly recipe yields beautifully spiced pears that are perfect for gifting, snacking, or adding to desserts all year round.
- Prep Time: 30 minutes
- Cook Time: 25 minutes
- Total Time: 55 minutes
- Yield: 4 servings 1x
- Category: Preserves
- Cuisine: American
Ingredients
- 4 to 5 pounds firm, ripe pears (Bosc or Bartlett)
- 1 tablespoon lemon juice per quart of water (for soaking bath)
- 4 cups water
- 2 cups granulated sugar
- 1 whole vanilla bean (or 2 teaspoons pure vanilla extract)
- 3 to 4 cinnamon sticks
- Pinch of salt
- 1 star anise (optional)
- Thin strip of orange zest (optional)
Instructions
- Prepare your jars and equipment. Wash jars, lids, and screw bands in hot, soapy water. Rinse well. Place jars in water bath canner, cover with water, and bring to a simmer (180°F). Keep hot until ready to fill. Place lids in a small saucepan of hot water (not boiling) to soften sealing compound.
- Make the lemon water bath. Fill a large bowl with cold water and add 1 tablespoon of lemon juice per quart of water. This will be your holding station for peeled pears.
- Prepare the pears. Wash pears well. Using a vegetable peeler, remove the skin. Cut each pear in half lengthwise, then use a melon baller or small spoon to scoop out the core and seeds. Cut each half into thirds or quarters. Drop pieces into the lemon water as you work to prevent browning.
- Make the vanilla cinnamon syrup. In a large saucepan, combine 4 cups water and 2 cups sugar. Split the vanilla bean lengthwise and scrape the tiny seeds into the water. Drop the empty pod in too. Add cinnamon sticks and a pinch of salt. Bring to a boil over medium-high heat, stirring until sugar dissolves completely. Reduce heat and let simmer for 5 minutes. If using vanilla extract, add after turning off heat.
- Pack the jars. Remove a hot jar from the canner using a jar lifter. Drain pear pieces and pack tightly into the jar, leaving 1/2 inch headspace. Add one cinnamon stick from the syrup to each jar. Using a wide-mouth funnel, pour hot syrup over pears, maintaining 1/2 inch headspace. Run a clean chopstick or bubble remover tool around the inside to release air bubbles. Add more syrup if needed.
- Wipe and seal. Wipe the rim of each jar with a clean, damp towel to remove any syrup residue. Center a lid on the jar and screw the band on until fingertip-tight.
- Process the jars. Place filled jars back into the water bath canner using a jar lifter. Ensure jars are covered by at least 1 to 2 inches of water. Put lid on canner and bring water to a full, rolling boil. Process quart jars for 25 minutes, pint jars for 20 minutes. Start timer when water reaches a boil. Adjust for altitude if above 1,000 feet.
- Cool and check seals. Turn off heat and remove canner lid. Let jars sit in water for 5 minutes. Transfer to a towel-covered countertop using jar lifter. Leave undisturbed for 12 to 24 hours. After 24 hours, press center of each lid. If it doesn’t flex, it’s sealed. If it pops, refrigerate and use first.
- Label and store. Write date and contents on lid or label. Store in a cool, dark place for up to 12 to 18 months. Flavor improves after a month or two.
Notes
Don’t skip the lemon water bath to prevent browning. Test pears for ripeness—they should be firm but give slightly. Keep jars hot to avoid cracking. Don’t over-process; stick to recommended times. Work in small batches for best quality.
Nutrition
- Serving Size: 1/2 cup
- Calories: 100
- Sugar: 20
- Sodium: 5
- Carbohydrates: 24
- Fiber: 2.5
- Protein: 0.5
Keywords: canned pears, vanilla cinnamon pears, homemade canned pears, water bath canning, pear preserves, easy canning recipe



