Love this? Save it for later!
Share the inspiration with your friends
It was 10:47 PM on a random Thursday in October, and I had completely forgotten about the school Halloween party the next morning. Not just forgotten—I had actively ignored the sign-up sheet that had been taped to my fridge for two weeks. My daughter, who had reminded me exactly seven times, was finally asleep, and I was staring into a pantry that contained exactly three things: a half-empty box of Rice Krispies, a bag of marshmallows that were more stale than I’d like to admit, and some butter. No fancy cookie cutters. No candy melts. No time. I had this wild, desperate thought—what if I just made the regular treats but turned them into pops? And stuck some candy eyes on them? Honestly, I was too tired to second-guess myself. I melted the butter, dumped in the marshmallows, and prayed the whole thing wouldn’t be a disaster. Twenty minutes later, I had a tray of the goofiest, most endearing little monster pops I’d ever seen. My hands were sticky, there was a smear of butter on my favorite sweatshirt, and I was grinning like an idiot. Maybe you’ve been there—that moment when necessity forces you to get creative, and it actually works out better than the Pinterest-perfect version. This recipe stayed with me because it proved that Halloween treats don’t need to be complicated. They just need a little personality—and candy eyes, obviously.
Why You’ll Love This Recipe
Let me tell you, as someone who has tested more Halloween recipes than I care to count (including a disastrous attempt at homemade caramel apples that ended up on the ceiling), this one is a winner. I’ve made these Easy Halloween Rice Krispie Treat Pops at least a dozen times since that panicked Thursday night, and they’ve never let me down.
- Quick & Easy: From start to finish, you’re looking at about 20 minutes of active work. The hardest part is waiting for them to set, which is basically just staring at them impatiently.
- Simple Ingredients: You need four things. That’s it. Butter, marshmallows, Rice Krispies cereal, and candy eyes. No special trips to a craft store or baking aisle required.
- Perfect for Halloween: School parties, office potlucks, trunk-or-treat events—these things disappear faster than a ghost in the dark. They’re kid-friendly, portable, and impossible to mess up.
- Crowd-Pleaser: I’ve watched adults grab three of these before the kids even got a chance. There’s something about the combination of crispy, chewy, and slightly spooky that appeals to everyone.
What makes these different from every other Halloween treat out there? It’s the texture, honestly. When you shape them into pops, you get this perfect ratio of crispy edges to soft, marshmallowy center. And the candy eyes aren’t just decoration—they give each pop its own little personality. My daughter named every single one before she ate them. That’s the kind of magic you can’t buy in a store.
This recipe is the kind that makes you feel like a holiday hero without the stress. It’s comfort food reimagined—faster, easier, but with the same soul-soothing satisfaction of a homemade treat. Perfect for impressing your kid’s classmates without spending hours in the kitchen, or turning a last-minute panic into a memorable moment.
What Ingredients You Will Need
This recipe uses four simple, pantry-friendly ingredients to deliver maximum Halloween fun with minimal effort. No fancy baking equipment or obscure specialty items required.
- 3 tablespoons unsalted butter (plus extra for greasing your hands and pan)
- 1 package (10 ounces) regular marshmallows (about 40 large marshmallows, or 4 cups mini marshmallows—I prefer Jet-Puffed for the best melt)
- 6 cups Rice Krispies cereal (or any crispy rice cereal; store brands work fine too)
- 1 bag (about 50-60) candy eyeballs (the flat-backed ones work best; Wilton brand is my go-to, but generic ones from the baking aisle are just as cute)
For the sticks:
- 12-14 lollipop sticks or paper straws (craft stores sell them cheap, or you can use sturdy drinking straws in a pinch)
Ingredient Selection Tips: Look for marshmallows that feel soft and fresh when you squeeze the bag. Stale marshmallows won’t melt as smoothly and can leave you with lumpy treats. I learned this the hard way during that first late-night attempt. For the candy eyes, the flat-backed ones adhere better to the treats than the rounded kind. If you can only find the round ones, just press them in firmly and they’ll still stay put.
Substitution Guidance: Need a dairy-free version? Use vegan butter and vegan marshmallows (Dandies brand works beautifully). For a gluten-free option, most crispy rice cereals are naturally gluten-free, but double-check the label on your specific brand. You can swap the Rice Krispies for Cocoa Krispies or Fruity Pebbles for a color twist—just know the flavor profile changes completely. I tried Fruity Pebbles once and got a very confused look from my neighbor, but the kids loved them.
Equipment Needed
Here’s what you’ll need to pull these together. Nothing too fancy, I promise.
- Large pot or Dutch oven (at least 4-quart capacity—you need room to stir without flinging cereal everywhere)
- Rubber spatula or wooden spoon (silicone spatulas are my favorite because nothing sticks to them)
- 9×13-inch baking pan (or any similarly sized dish)
- Parchment paper or wax paper (for lining the pan and preventing sticky disasters)
- Small bowl of water (for wetting your hands—trust me on this one)
- Lollipop sticks or paper straws (about 12-14)
If you don’t have a 9×13 pan, you can use a cookie sheet with edges or even a large casserole dish. The treats will just be a different thickness. I’ve used a disposable aluminum pan before when I was traveling for a party, and it worked perfectly. For the spatula, honestly, any sturdy spoon will do—I’ve used a metal serving spoon in a pinch and it was fine, though the marshmallow stuck to it a bit more. Budget-friendly tip: skip the fancy lollipop sticks and use paper straws cut in half. They’re cheaper and come in Halloween colors.
Preparation Method
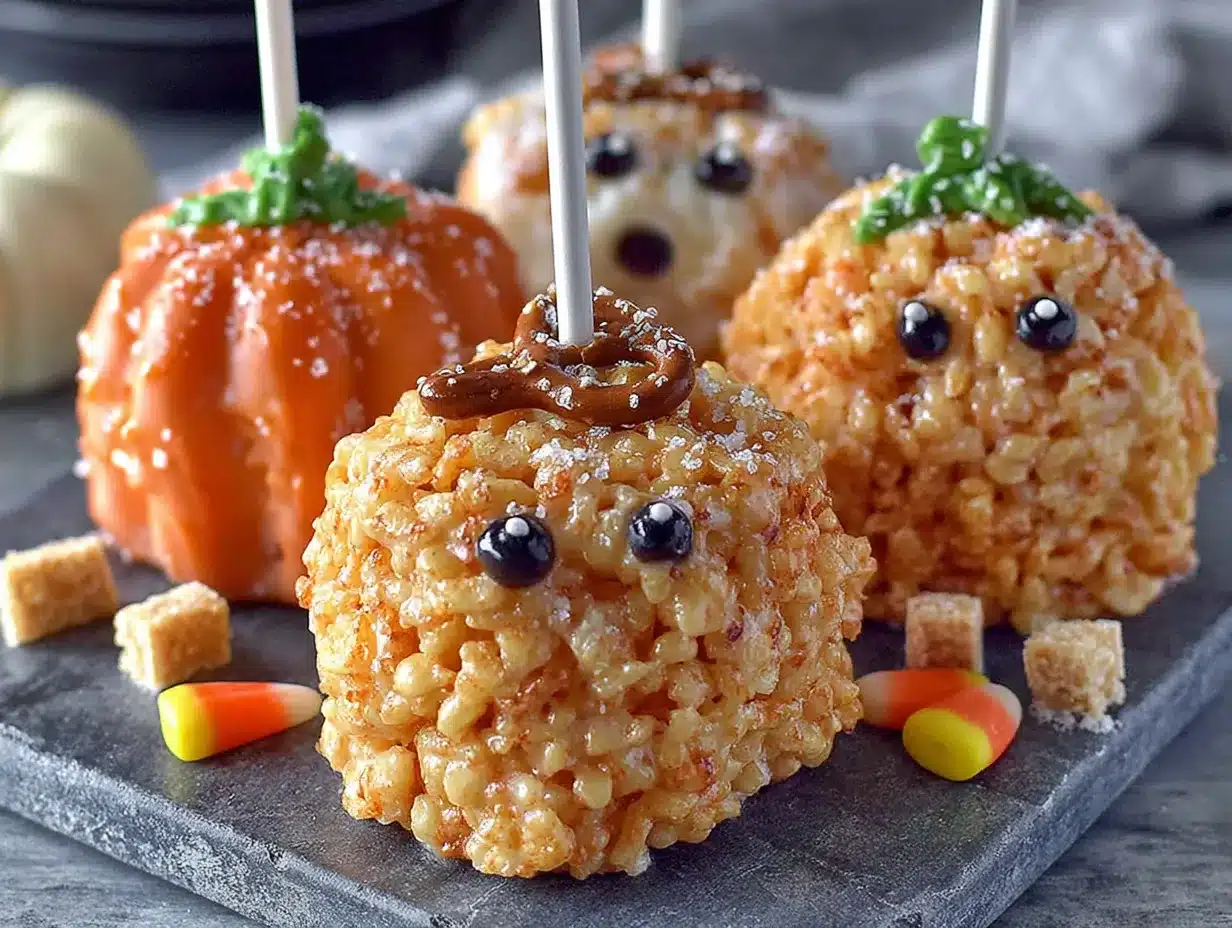
- Prep your pan. Line a 9×13-inch baking pan with parchment paper, leaving some overhang on two sides. This makes lifting the treats out later so much easier. Lightly grease the parchment with a little butter or non-stick spray.
- Melt the butter. Place your large pot over low heat and add 3 tablespoons of unsalted butter. Let it melt slowly—don’t crank up the heat to speed things up. Low and slow is the name of the game here. Swirl the pot occasionally so the butter melts evenly without browning.
- Add the marshmallows. Once the butter is fully melted, dump in the entire package of marshmallows. Stir continuously with your rubber spatula or wooden spoon. The marshmallows will start to puff up and then collapse into a gooey, glorious mess. Keep stirring until they’re completely melted and smooth—about 3-4 minutes. You shouldn’t see any white marshmallow lumps remaining.
- Remove from heat and add cereal. Take the pot off the burner immediately. Pour in the 6 cups of Rice Krispies cereal all at once. Fold everything together gently but thoroughly. You want every single kernel coated in marshmallow mixture. Be careful not to crush the cereal—you want those satisfying crispy bits intact. This takes about 1-2 minutes of gentle folding.
- Let it cool slightly. Here’s the trick I learned from my mistakes: let the mixture sit in the pot for about 2-3 minutes before shaping. If you try to handle it immediately, it’s lava-hot and you’ll burn your fingers. Trust me, I’ve got the war stories to prove it.
- Shape the treats. Wet your hands with a little water from your small bowl. This is non-negotiable—dry hands will turn into a sticky nightmare. Grab about a golf-ball-sized portion of the mixture and gently shape it into a ball or oval. Don’t squeeze too hard or you’ll end up with dense, hard treats instead of light and airy ones. Place each shaped ball on your parchment-lined pan.
- Insert the sticks. While the treats are still warm and pliable, gently push a lollipop stick or paper straw into each one. Insert it about halfway through the treat. If the treat cracks, just press the mixture back together around the stick. I usually do this step while the treats are still on the pan to avoid moving them around too much.
- Add the candy eyes. Here’s where the fun really starts. While the treats are still slightly warm and sticky, press 2-3 candy eyeballs into each pop. The warmth helps them adhere. Get creative with placement—some looking up, some looking sideways, some cross-eyed. I once made one with three eyes in a row and it looked like an alien. My daughter named it “Steve.”
- Let them set. Allow the treats to cool completely at room temperature, about 30-45 minutes. Don’t rush this by putting them in the fridge—the condensation can make them sticky and weird. Once they’re fully set, they should hold their shape and feel firm but still chewy.
Cooking Tips & Techniques
I’ve made these Easy Halloween Rice Krispie Treat Pops enough times to have a few tricks up my sleeve. Let me share what I’ve learned the hard way so you don’t have to.
Don’t over-melt the marshmallows. This was my biggest early mistake. If you keep cooking the marshmallow mixture too long, the treats will turn out hard and brittle instead of soft and chewy. You want the marshmallows just melted—no further. As soon as they’re smooth, you’re done.
Wet hands are your best friend. I cannot stress this enough. Keep that bowl of water nearby and re-wet your hands between every single pop. The moment your hands start feeling sticky, dip them again. It’s the difference between a fun baking project and a therapy-worthy meltdown.
Work quickly but not frantically. The mixture sets as it cools, so you have about 10-15 minutes of workable time. That’s plenty for 12-14 pops. Just move with purpose and don’t overthink the shaping. Imperfect pops look more charming anyway—they’re supposed to be monsters, right?
Use a light touch. When you shape the pops, think gentle pressure, not a death grip. The airy texture is what makes these treats special. If you squeeze too hard, you’ll get dense hockey pucks instead of light, crispy pops. I ruined my first batch this way and ended up with something that could have doubled as a doorstop.
Timing strategy: Make these the night before your event. They keep beautifully at room temperature for 2-3 days, and having them done ahead of time means zero stress on the day of the party. Just store them in an airtight container with parchment between layers so the eyes don’t get smushed.
Variations & Adaptations
One of the best things about this recipe is how easy it is to customize. Here are some variations I’ve tried and loved.
Monster Mash Pop: Before adding the cereal, stir in a few drops of green or purple food coloring to the marshmallow mixture. You’ll get brightly colored monster pops that look even more Halloween-y. I did a neon green batch for my daughter’s class party and the kids lost their minds.
Chocolate Drizzle: Once the pops have set, melt some chocolate chips (dark, milk, or white) and drizzle it over the tops. Add a sprinkle of orange or black sanding sugar before the chocolate sets. This turns them from cute to bakery-level impressive in about five minutes.
Peanut Butter Twist: Stir in 2 tablespoons of creamy peanut butter along with the butter and marshmallows. It adds a subtle nutty flavor that pairs beautifully with the crispy cereal. Just make sure no one has peanut allergies if you’re bringing these to a school event.
Spider Pop Variation: Instead of just candy eyes, use black licorice strings or pretzel sticks to create spider legs. Insert them before the treats set, angling them outward. Add the candy eyes on top and you’ve got adorable little spiders. I tried this for a Halloween party and they were the hit of the dessert table.
Dietary Adaptation: For a vegan version, use vegan butter and vegan marshmallows. The texture comes out slightly different—a bit denser—but still delicious. For a lower-sugar option, use a sugar-free marshmallow alternative, though I’ll warn you the texture isn’t quite the same. Sometimes you just have to embrace the sugar, you know?
Serving & Storage Suggestions
These pops are best served at room temperature. The texture is perfect—crispy on the outside, chewy on the inside, and the candy eyes stay firmly in place. If you’re serving them at a party, arrange them upright in a large cup or a block of floral foam wrapped in festive paper. It makes for a great centerpiece that doubles as dessert.
For complementary treats, these pair beautifully with warm apple cider or hot chocolate. I also like to serve them alongside a bowl of popcorn for a sweet-and-salty Halloween snack spread. If you’re feeling extra festive, add some pumpkin-shaped cookies or caramel apples to the table.
Storage: Store any leftover pops in an airtight container at room temperature. They’ll stay fresh for 2-3 days. Do not refrigerate them—the cold air makes them hard and the candy eyes can get condensation and start sliding off. If you need to stack them, place a sheet of parchment or wax paper between layers to protect the eyes.
Freezer Instructions: You can freeze these pops for up to 2 months. Wrap each one individually in plastic wrap, then place them in a freezer-safe bag. To thaw, leave them at room temperature for about 30 minutes. The texture will be slightly softer after freezing, but they’re still delicious. I’ve done this for pre-Halloween prep and it works great.
One thing I’ve noticed—these treats actually get better after a day. Something about the marshmallow settling into the cereal makes them even more chewy and satisfying. So don’t worry about making them too far in advance. They’re practically designed for batch prep.
Nutritional Information & Benefits
Let’s be real—these are a treat, not a health food. But here’s the estimated breakdown for one pop (based on 14 servings):
- Calories: Approximately 180-200
- Total Fat: 5g
- Saturated Fat: 3g
- Carbohydrates: 36g
- Sugar: 20g
- Protein: 1g
- Sodium: 180mg
On the bright side, Rice Krispies are fortified with iron and B vitamins, so there’s a tiny nutritional silver lining. The butter provides a small amount of vitamin A. But honestly, these are about fun and celebration, not daily nutrition. They’re perfect for occasional treats like Halloween parties, classroom celebrations, or movie nights.
Dietary Considerations: This recipe contains dairy (butter) and gluten (cereal). For dairy-free, use vegan butter and marshmallows. For gluten-free, check your cereal label—most brands are gluten-free but confirm to be safe. The candy eyes are typically free of common allergens, but always check the package if allergies are a concern.
Conclusion
These Easy Halloween Rice Krispie Treat Pops with Candy Eyes are proof that you don’t need fancy tools, expensive ingredients, or hours of free time to create something memorable. They’re the recipe that saved me from a last-minute parenting fail, and now they’re the recipe I turn to every October without fail. There’s something deeply satisfying about watching a handful of simple ingredients transform into little characters that make people smile.
I hope you’ll try these and make them your own. Maybe you’ll add chocolate drizzle or go wild with food coloring. Maybe you’ll make spider legs or give them silly names like my daughter does. The beauty of this recipe is that it invites creativity—there’s no wrong way to do it. If you make a batch, I’d love to hear about it. Drop a comment below and tell me what variations you tried, or tag me in your photos. And if your kids end up naming their monster pops, please share those names. I’m still not over “Steve.” Happy Halloween, friends—may your treats be crispy, your candy eyes stay put, and your kitchen stay (mostly) clean.
Frequently Asked Questions
Can I use mini marshmallows instead of regular ones?
Absolutely. Mini marshmallows actually melt faster and more evenly than large ones. Use 4 cups of mini marshmallows in place of the 10-ounce bag of regular marshmallows. Just keep stirring until they’re completely smooth.
How do I keep the candy eyes from falling off?
Press them into the treats while the mixture is still warm and slightly sticky. That natural tackiness holds them in place. If you’re adding them after the treats have cooled, dab a tiny bit of corn syrup or frosting on the back of each eye before pressing it on.
Can I make these without lollipop sticks?
Yes! You can skip the sticks entirely and just shape the mixture into regular Rice Krispie treats in a pan. Cut them into squares or use Halloween-shaped cookie cutters for a different look. The pops are just more portable and fun for parties.
Why did my treats turn out hard?
You likely overcooked the marshmallow mixture. Once the marshmallows are fully melted, remove the pot from heat immediately. Cooking them longer causes the sugar to firm up as it cools, resulting in hard, brittle treats. Also, avoid pressing the mixture too firmly when shaping.
Can I use a different cereal?
Definitely. Cocoa Krispies, Fruity Pebbles, or even generic crispy rice cereal all work well. Just keep the ratio the same—6 cups of cereal to the marshmallow mixture. Different cereals will change the flavor and color, which can be a fun twist for Halloween.
Pin This Recipe!
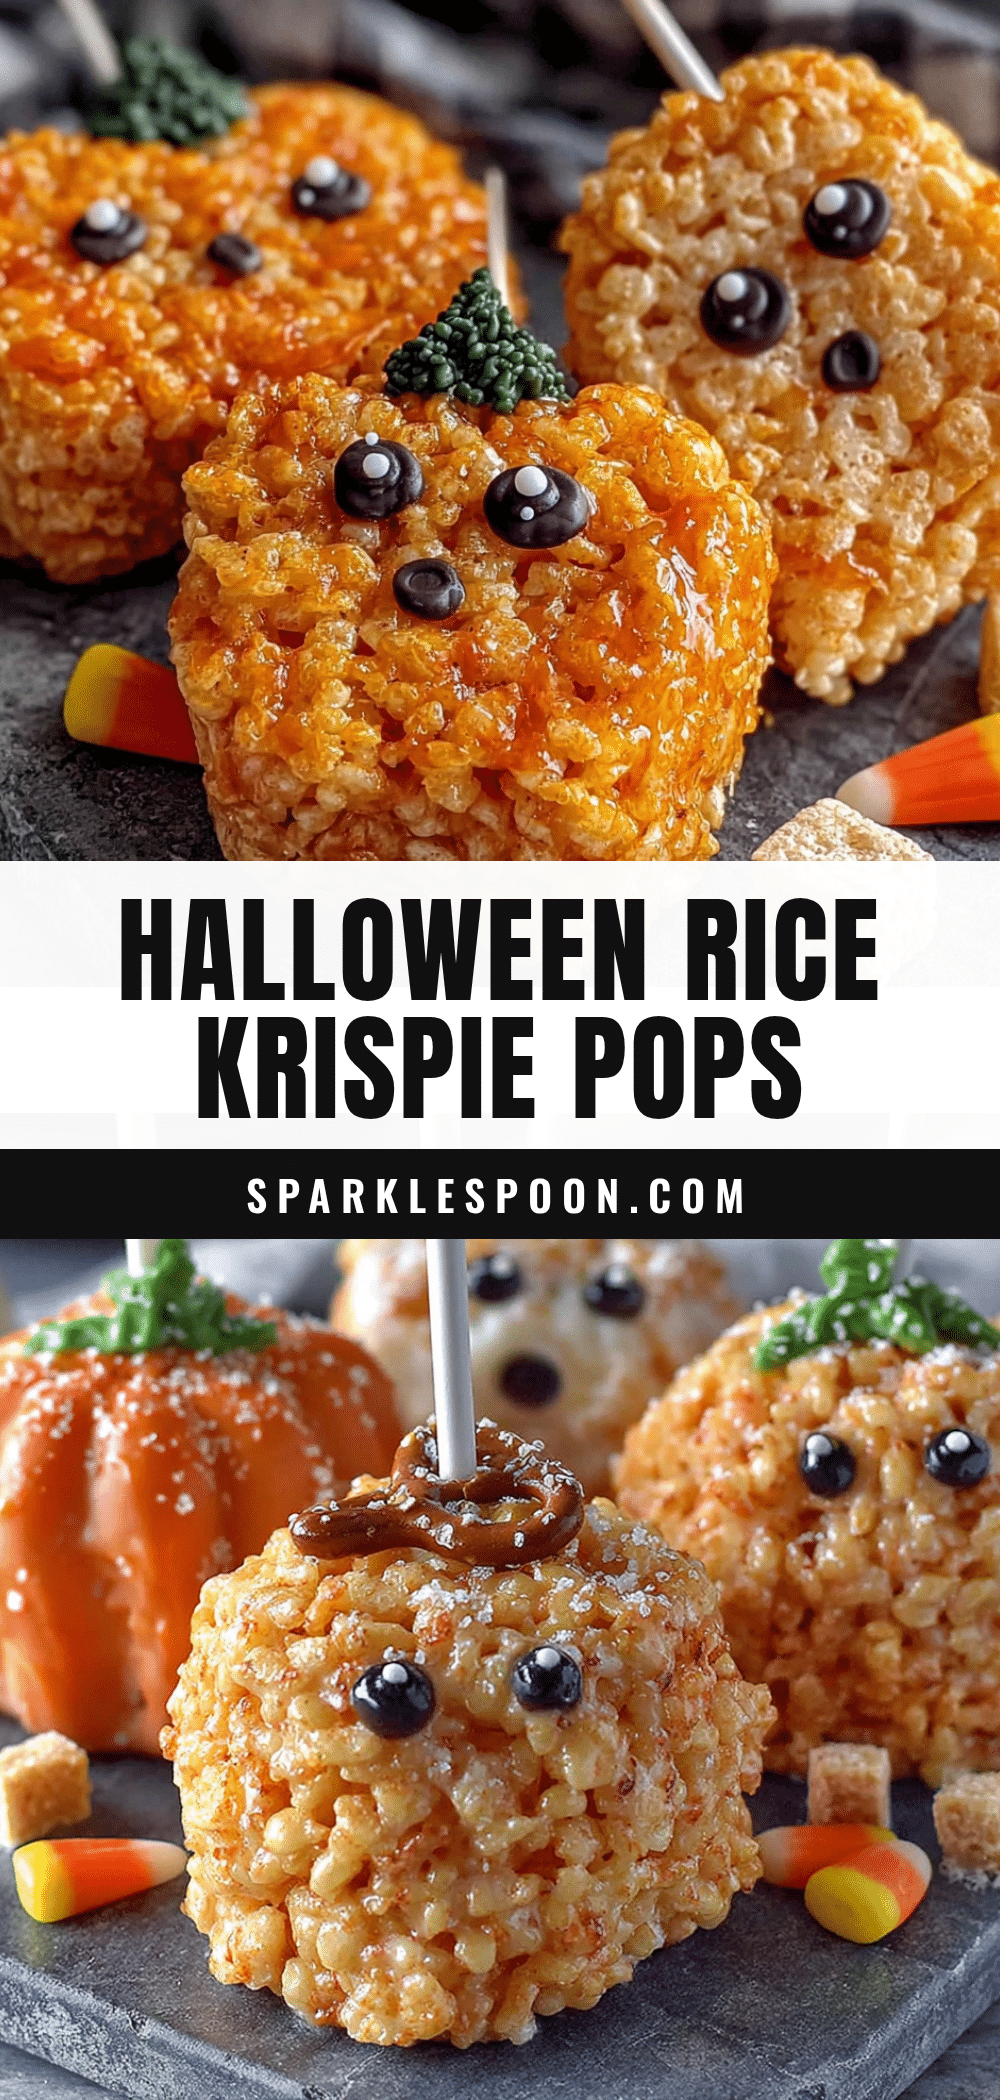
Easy Halloween Rice Krispie Treat Pops – 4-Ingredient Fun

These Easy Halloween Rice Krispie Treat Pops are a quick, 4-ingredient treat perfect for last-minute Halloween parties. With crispy edges, a soft marshmallowy center, and adorable candy eyes, they’re kid-friendly, portable, and impossible to mess up.
- Prep Time: 20 minutes
- Cook Time: 5 minutes
- Total Time: 25 minutes
- Yield: 12-14 servings 1x
- Category: Dessert
- Cuisine: American
Ingredients
- 3 tablespoons unsalted butter (plus extra for greasing)
- 1 package (10 ounces) regular marshmallows (about 40 large or 4 cups mini)
- 6 cups Rice Krispies cereal
- 1 bag (about 50-60) candy eyeballs (flat-backed preferred)
- 12–14 lollipop sticks or paper straws
Instructions
- Line a 9×13-inch baking pan with parchment paper, leaving overhang on two sides. Lightly grease the parchment with butter or non-stick spray.
- Place a large pot over low heat and melt 3 tablespoons unsalted butter. Swirl occasionally until fully melted.
- Add the entire package of marshmallows to the melted butter. Stir continuously until completely melted and smooth, about 3-4 minutes.
- Remove pot from heat. Pour in 6 cups Rice Krispies cereal and fold gently until every kernel is coated. Be careful not to crush the cereal.
- Let the mixture cool in the pot for 2-3 minutes before shaping.
- Wet your hands with water. Grab a golf-ball-sized portion of mixture and gently shape into a ball or oval. Place on prepared pan.
- While treats are still warm, gently push a lollipop stick or paper straw into each one about halfway through.
- Press 2-3 candy eyeballs into each pop while still warm and sticky. Get creative with placement.
- Let treats cool completely at room temperature, about 30-45 minutes, until firm but chewy.
Notes
Don’t over-melt the marshmallows or treats will become hard. Keep hands wet to prevent sticking. Work quickly but gently to maintain airy texture. Make ahead and store at room temperature for 2-3 days. For vegan version, use vegan butter and vegan marshmallows. For gluten-free, check cereal label.
Nutrition
- Serving Size: 1 pop
- Calories: 190
- Sugar: 20
- Sodium: 180
- Fat: 5
- Saturated Fat: 3
- Carbohydrates: 36
- Protein: 1
Keywords: Halloween treats, Rice Krispie treats, easy Halloween recipe, no-bake dessert, kid-friendly Halloween, last-minute Halloween, candy eyes, monster pops



