Love this? Save it for later!
Share the inspiration with your friends
I was at the hardware store, of all places, picking up a new light fixture for the kitchen. The woman in front of me in line was wearing a t-shirt covered in skeletons dancing, and she had the most incredible, mischievous smile. She turned around, saw me eyeing her shirt, and just started talking. “You know what the best part of Halloween is?” she asked, not waiting for an answer. “It’s not the costumes or the candy. It’s the dirt.” I blinked, and she laughed. “Graveyard dirt pudding cups. My kids are 25 and 30 now, and they still demand them every single October.”
I was so confused. Honest to goodness, I thought she meant actual dirt. She must have seen the look on my face because she pulled a crumpled, slightly stained index card from her back pocket. “Here,” she said. “This is my mother’s recipe. It’s the easiest thing you’ll ever make, and kids absolutely lose their minds over it.” I thanked her, paid for my light fixture, and promptly forgot about the card for a week. When I finally found it again, tucked inside a cookbook, I felt a little jolt of that same mischievous energy she had. I had to try it.
Let me tell you, that woman was not exaggerating. These Easy Graveyard Dirt Pudding Cups are a Halloween miracle. They take maybe fifteen minutes of actual work, and the payoff is pure joy. You get that creamy, chocolatey pudding, the crunch of crushed cookies that really looks like dark, rich soil, and those silly, wiggly gummy worms peeking out. It’s the kind of thing that makes adults feel like kids again and kids feel like they’ve won the dessert lottery. I’ve tweaked her original recipe just a bit over the years, making it a little richer and a little easier to throw together. Honestly, maybe you’ve been there, staring at a Pinterest board full of elaborate Halloween treats that look beautiful but take all day. This is the opposite of that. This is the recipe you actually make.
Why You’ll Love This Recipe
I have tested this recipe more times than I care to admit, tweaking the pudding-to-cookie ratio and the chilling time until it was just right. This isn’t just another version of a Halloween dessert; it is the version that works every single time, no stress, no fuss. Here is why this one is different.
- Quick & Easy: This comes together in under 20 minutes of active prep time. The hardest part is waiting for the pudding to set in the fridge, which is a breeze.
- Simple Ingredients: You likely have most of these items in your pantry already. There are no fancy baking supplies or hard-to-find seasonal ingredients.
- Perfect for Halloween Parties: These are the star of any spooky gathering, from classroom parties to adult get-togethers. They are individual portions, so there is no slicing or serving mess.
- Crowd-Pleaser: I have never, ever seen anyone turn down a dirt pudding cup. Kids adore them, and adults secretly love them even more.
- Unbelievably Delicious: It’s not just about the look. The combination of silky, rich chocolate pudding with the crunchy, buttery cookie topping is genuinely addictive. The gummy worms are the perfect chewy, fruity counterpoint.
What makes this recipe stand out is the texture. I use a specific trick—layering the crushed cookies just right—so you get a satisfying crunch in every single bite, not just a soggy mess. It is comfort food reimagined for a holiday, and it is the kind of dessert that makes you close your eyes after the first bite. It’s perfect for impressing a crowd without any of the stress.
What Ingredients You Will Need
This recipe relies on simple, store-bought ingredients to create something that feels wonderfully indulgent. The magic is in the assembly, not the complexity of the shopping list. You can find everything at your local grocery store.
- For the Pudding Base:
- 1 (3.9-ounce) package instant chocolate pudding mix (I prefer Jell-O brand for its consistent, smooth texture)
- 2 cups cold whole milk (2% or oat milk work fine, but whole milk gives the richest, creamiest pudding)
- For the “Dirt” Topping:
- 1 (14.3-ounce) package chocolate sandwich cookies (like Oreos, about 36 cookies) (You will need the whole cookie, cream filling and all)
- 2 tablespoons unsalted butter, melted (This helps the “dirt” clump together slightly, giving it a more realistic soil texture)
- For the Spooky Decorations:
- 1 (5-ounce) bag gummy worms (Look for the classic, multi-colored worms for the best visual effect)
- Optional: ½ cup whipped topping (like Cool Whip), thawed (This is for a creamy middle layer, which I highly recommend)
- Optional: 8-10 small pumpkin or skull-shaped gummies for decoration
I recommend using a high-quality instant pudding mix. The store-brand versions can sometimes be a bit grainy. For the cookies, regular Oreos are perfect. You don’t need to separate the cream from the wafer; the whole thing gets crushed up, and the cream helps bind the “dirt” together. If you want a gluten-free version, look for certified gluten-free chocolate sandwich cookies. For a dairy-free option, use a plant-based milk like oat milk in the pudding and a dairy-free butter alternative for the cookie crumbs. The gummy worms should be checked for gelatin if you are serving vegetarians, as many brands use it.
Equipment Needed
You don’t need a professional pastry kitchen to make these. A few basic tools will get the job done perfectly. I have made these in a tiny apartment kitchen and a large family home, and the process is exactly the same.
- 8 (6 to 8-ounce) clear plastic cups or small glass jars: Clear cups are essential for showing off the layers. I like using small mason jars or the disposable plastic cups you find at party supply stores.
- A food processor or a large resealable plastic bag and a rolling pin: The food processor makes quick work of the cookies. If you don’t have one, the bag-and-rolling-pin method is a great arm workout and just as effective.
- A medium mixing bowl and a whisk: For making the pudding. A whisk prevents lumps better than a spoon.
- A small bowl: For mixing the melted butter with the cookie crumbs.
- A rubber spatula: For scraping every last bit of pudding into the cups. Waste is not an option here.
- A measuring cup and spoons: For accurate measurements.
I have tried using a blender to crush the cookies, but it tends to turn them into a fine powder, which looks less like dirt and more like dust. The food processor with a few pulses is the sweet spot. If you are using the bag method, just make sure the bag is well-sealed before you start pounding, or you will have a chocolatey mess on your countertop. Trust me on that one.
Preparation Method
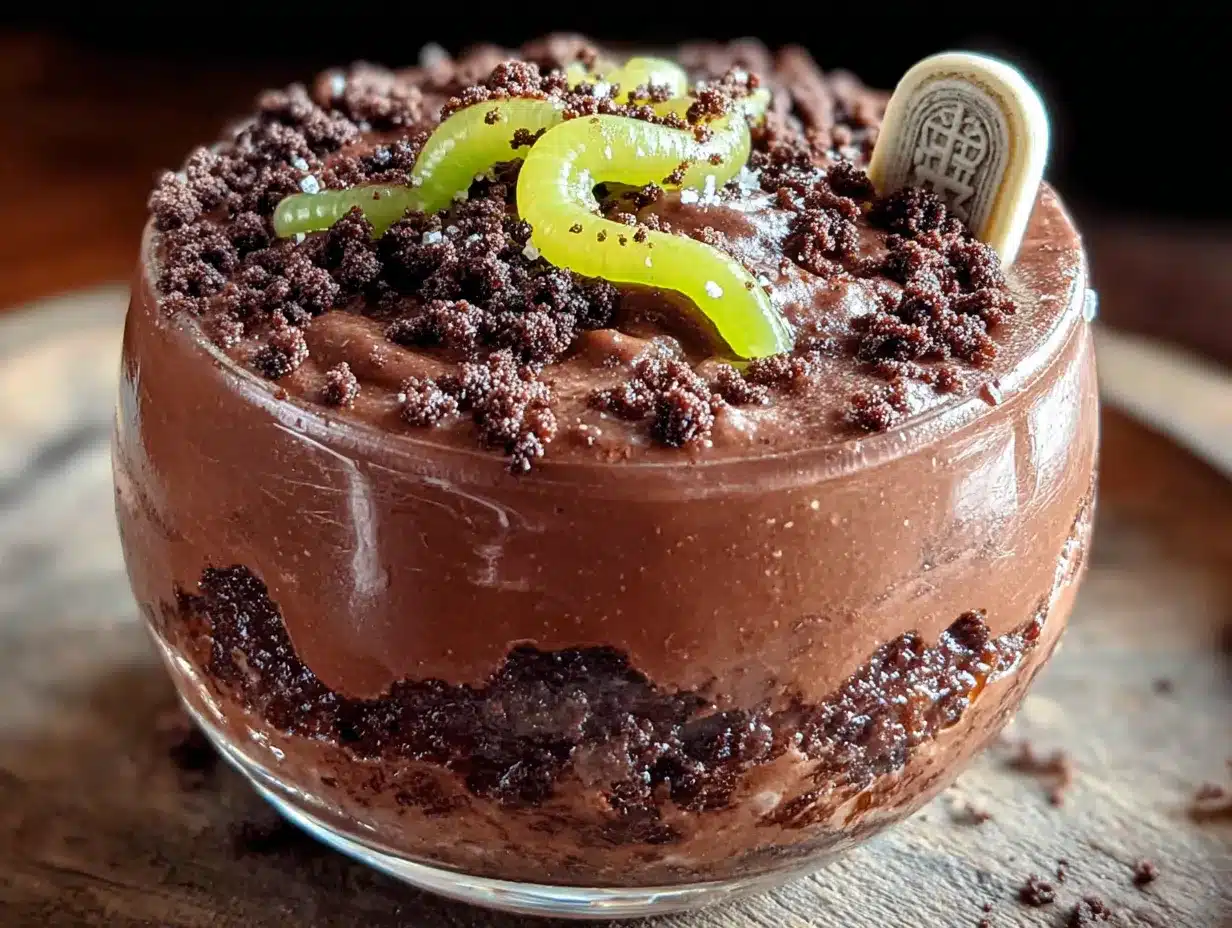
Follow these steps carefully, and you will have the most adorable, spooky dessert on the block. The key is to work quickly and let the layers set properly.
- Make the Pudding: In your medium mixing bowl, whisk together the instant chocolate pudding mix and the 2 cups of cold milk. Whisk vigorously for about 2 minutes, until the mixture is thick and smooth. It will be quite soft at this point. Set it aside for about 5 minutes to let it set up slightly. (Pro tip: If you want a really thick, mousse-like pudding, use 1 ¾ cups of milk instead of 2.)
- Crush the Cookies: While the pudding is resting, place all 36 chocolate sandwich cookies in your food processor. Pulse them about 10-12 times, until you have fine, dark crumbs that look like soil. You want some slightly larger pieces for texture, but no big chunks. If using the bag method, place the cookies in a large zip-top bag, seal it, and crush them with a rolling pin until you reach the desired consistency.
- Make the “Dirt”: Pour the crushed cookies into a small bowl. Drizzle the 2 tablespoons of melted butter over the crumbs and stir with a fork until the butter is evenly distributed. The crumbs should clump together slightly when you press them. This is what makes it look like real, slightly damp earth.
- Assemble the Layers (The Fun Part): Now, grab your 8 clear cups. You are going to create distinct layers. Start with a generous 2 tablespoons of the cookie “dirt” at the bottom of each cup. Press it down gently with the back of a spoon.
- Add the Pudding: Spoon or pipe the chocolate pudding evenly into each cup, filling them about halfway. If you are using the optional whipped topping layer, now is the time to add a generous dollop on top of the pudding. This adds a creamy, “mortuary” layer of richness.
- Top with “Dirt”: Cover the pudding (and whipped topping, if using) with another generous layer of the cookie crumbs. Fill the cups nearly to the top. You want a good inch of “dirt” on top.
- Add the Worms: This is the signature move. Take your gummy worms and gently poke them into the “dirt” so they look like they are crawling out of the ground. Leave some partially buried and some fully on top for a chaotic, fun look. You can also add the pumpkin or skull gummies at this point.
- Chill: Place the assembled cups in the refrigerator for at least 2 hours, but 4 hours is better. This allows the pudding to fully set and the cookie crumbs to soften just slightly, mimicking the texture of real soil. The flavors meld together beautifully during this time.
One thing I learned the hard way: don’t skip the chilling step. If you serve them immediately, the cookie crumbs are too crunchy and dry. The magic happens when they have time to absorb a tiny bit of moisture from the pudding, creating that perfect, crumbly “dirt” texture. Also, when you are poking the worms in, do it right before serving or after they have chilled for a bit. If you do it right after assembly, the worms can slip down into the pudding.
Cooking Tips & Techniques
Over the years, I have made a few mistakes with these dirt cups so you don’t have to. Here are my best tips for success.
- The Crumb Consistency is Key: If your cookie crumbs are too fine, they will turn into a paste when mixed with the butter. If they are too chunky, they won’t look like dirt. Aim for the texture of coarse sand. A few slightly larger pieces are fine and actually add to the realism.
- Don’t Overmix the Pudding: Whisk the pudding just until it thickens. Over-whisking can make it grainy or cause it to break down. Two minutes of steady whisking is all you need. Let it sit for the full 5 minutes to thicken naturally.
- Use a Piping Bag for Clean Layers: For the neatest, most professional-looking layers, spoon the pudding into a large piping bag (or a zip-top bag with the corner snipped off) and pipe it into the cups. This prevents drips on the sides of the cup and keeps the layers distinct.
- The Butter Trick: Don’t skip the melted butter in the cookie crumbs. It is the secret to getting that slightly clumpy, realistic soil texture. It also stops the crumbs from being too dusty and dry.
- Make-Ahead Magic: These are the perfect make-ahead dessert. You can assemble them a full day in advance. Just wait to add the gummy worms until a few hours before serving, or they will get a bit too soft and lose their shape.
I once forgot to add the butter to the cookie crumbs, and the “dirt” was so dry it flew everywhere when the kids tried to eat it. A fine layer of chocolate dust settled on everything in a five-foot radius. Learn from my mistakes!
Variations & Adaptations
This recipe is a fantastic canvas for your own creativity. Here are a few ways I have adapted it for different occasions and dietary needs.
- Peanut Butter Cup Dirt: This is my personal favorite variation. Swap the gummy worms for mini peanut butter cups. Press them halfway into the “dirt” so they look like tombstones. You can even write “R.I.P.” on them with a little melted white chocolate.
- Vegan & Dairy-Free Version: Use a high-quality vegan chocolate pudding mix (or make your own from scratch using avocado and cocoa powder) and a plant-based milk like oat or almond milk. Use a vegan butter alternative for the cookie crumbs. Most standard chocolate sandwich cookies are accidentally vegan, but double-check the label. Use vegan gummy worms made without gelatin.
- Spiced Pumpkin Dirt: For a fall twist, add ½ cup of pumpkin puree and 1 teaspoon of pumpkin pie spice to the pudding mix before whisking. This creates a beautiful, seasonal orange layer beneath the chocolate “dirt.” It tastes like autumn in a cup.
- Graveyard Scene: Make it a full graveyard scene. After adding the worms, press a few small, rectangular cookies (like graham crackers) into the “dirt” to act as headstones. Use a toothpick to write “R.I.P.” on them with a little frosting. Add some candy pumpkins or skeletons for a full diorama.
I have even made a “zombie” version by dying the whipped topping green with a few drops of food coloring and adding candy eyes. The possibilities are endless, and that is what makes this recipe so much fun.
Serving & Storage Suggestions
These dirt pudding cups are best served straight from the refrigerator. The cold temperature keeps the pudding firm and the “dirt” perfectly crumbly. I like to serve them on a tray lined with a little fake spiderweb for the full Halloween effect.
For a truly spooky presentation, you can place a few extra gummy worms on the side of the plate, or even scatter some candy corn around the base of the cups. They pair wonderfully with a warm cup of apple cider or a scoop of vanilla ice cream on the side for an extra indulgent treat.
Storage: Store any leftover cups in the refrigerator, tightly covered with plastic wrap or a lid. They will keep well for up to 3 days. The texture of the “dirt” will continue to soften the longer they sit, so they are at their best within the first 24-48 hours.
Freezing: I do not recommend freezing these cups. The pudding will become watery and grainy upon thawing, and the cookie crumbs will turn into a soggy mess. Stick to the fridge for this one.
If you are making them for a party, I recommend assembling them the morning of or the night before. The flavors meld beautifully, and it is one less thing to worry about on the day of the event.
Nutritional Information & Benefits
Let’s be honest, this is a treat, not a health food. But everything is about balance, right? Here is a rough estimate of what you are looking at per serving (one cup, using whole milk and standard ingredients).
- Calories: Approximately 380-420
- Fat: 16-20g
- Carbohydrates: 55-65g
- Protein: 6-8g
- Sugar: 40-48g
The milk provides a good dose of calcium and vitamin D, and the cocoa in the pudding and cookies is a source of antioxidants. The gummy worms are pure, silly fun. For a slightly lighter version, you can use sugar-free pudding mix, skim milk, and low-fat cookies. You can also reduce the amount of cookie “dirt” on top to cut down on sugar and fat.
This dessert is not gluten-free unless you use certified gluten-free cookies and pudding. It also contains dairy, so keep that in mind for guests with allergies. My personal perspective is that holidays are for joy, and a little bit of a decadent treat is part of that joy. I just make sure to balance it with healthy meals the rest of the week.
FAQs
Can I use homemade chocolate pudding instead of instant?
Absolutely! Homemade pudding will work beautifully. Just make sure it is fully cooled and thickened before you start layering. It will give you an even richer, more decadent flavor.
How far in advance can I make these?
You can make them up to 24 hours in advance. I recommend adding the gummy worms no more than 4 hours before serving to keep them from getting too soft and losing their shape.
Can I use a different type of cookie?
Yes! You can use chocolate wafer cookies, gluten-free chocolate cookies, or even crushed chocolate graham crackers. Just make sure you use a cookie that is dark in color to look like dirt.
My pudding is too runny. What did I do wrong?
This usually happens if you use low-fat or skim milk, which has less structure than whole milk. Make sure your milk is very cold, and whisk the pudding for the full 2 minutes. Let it sit for the full 5 minutes before assembling.
Can I make this in a large dish instead of individual cups?
Yes, you can! Use a 9×13-inch baking dish and layer the ingredients as directed. You will just need to scoop it out to serve. Individual cups are just cuter and easier for parties.
Conclusion
These Easy Graveyard Dirt Pudding Cups with Gummy Worms are more than just a dessert; they are a memory in the making. They are the recipe that gets pulled out every October, the one that makes kids’ eyes go wide and adults smile with nostalgia. They are ridiculously simple to make, wildly fun to decorate, and absolutely delicious to eat. I encourage you to make them your own—add your favorite gummy candies, use different cookie crumbs, or create a whole graveyard scene. The most important thing is to have fun with it.
I love this recipe because it reminds me of that woman in the hardware store and her simple, joyful approach to the holiday. It is a reminder that the best treats don’t have to be complicated. They just have to be made with a little bit of love and a whole lot of silly, spooky spirit. So go on, grab your ingredients, and make some dirt. Your family will thank you for it.
Have you made these? I would love to hear about your variations! Drop a comment below and tell me how you made them your own. Happy Halloween!
Pin This Recipe!
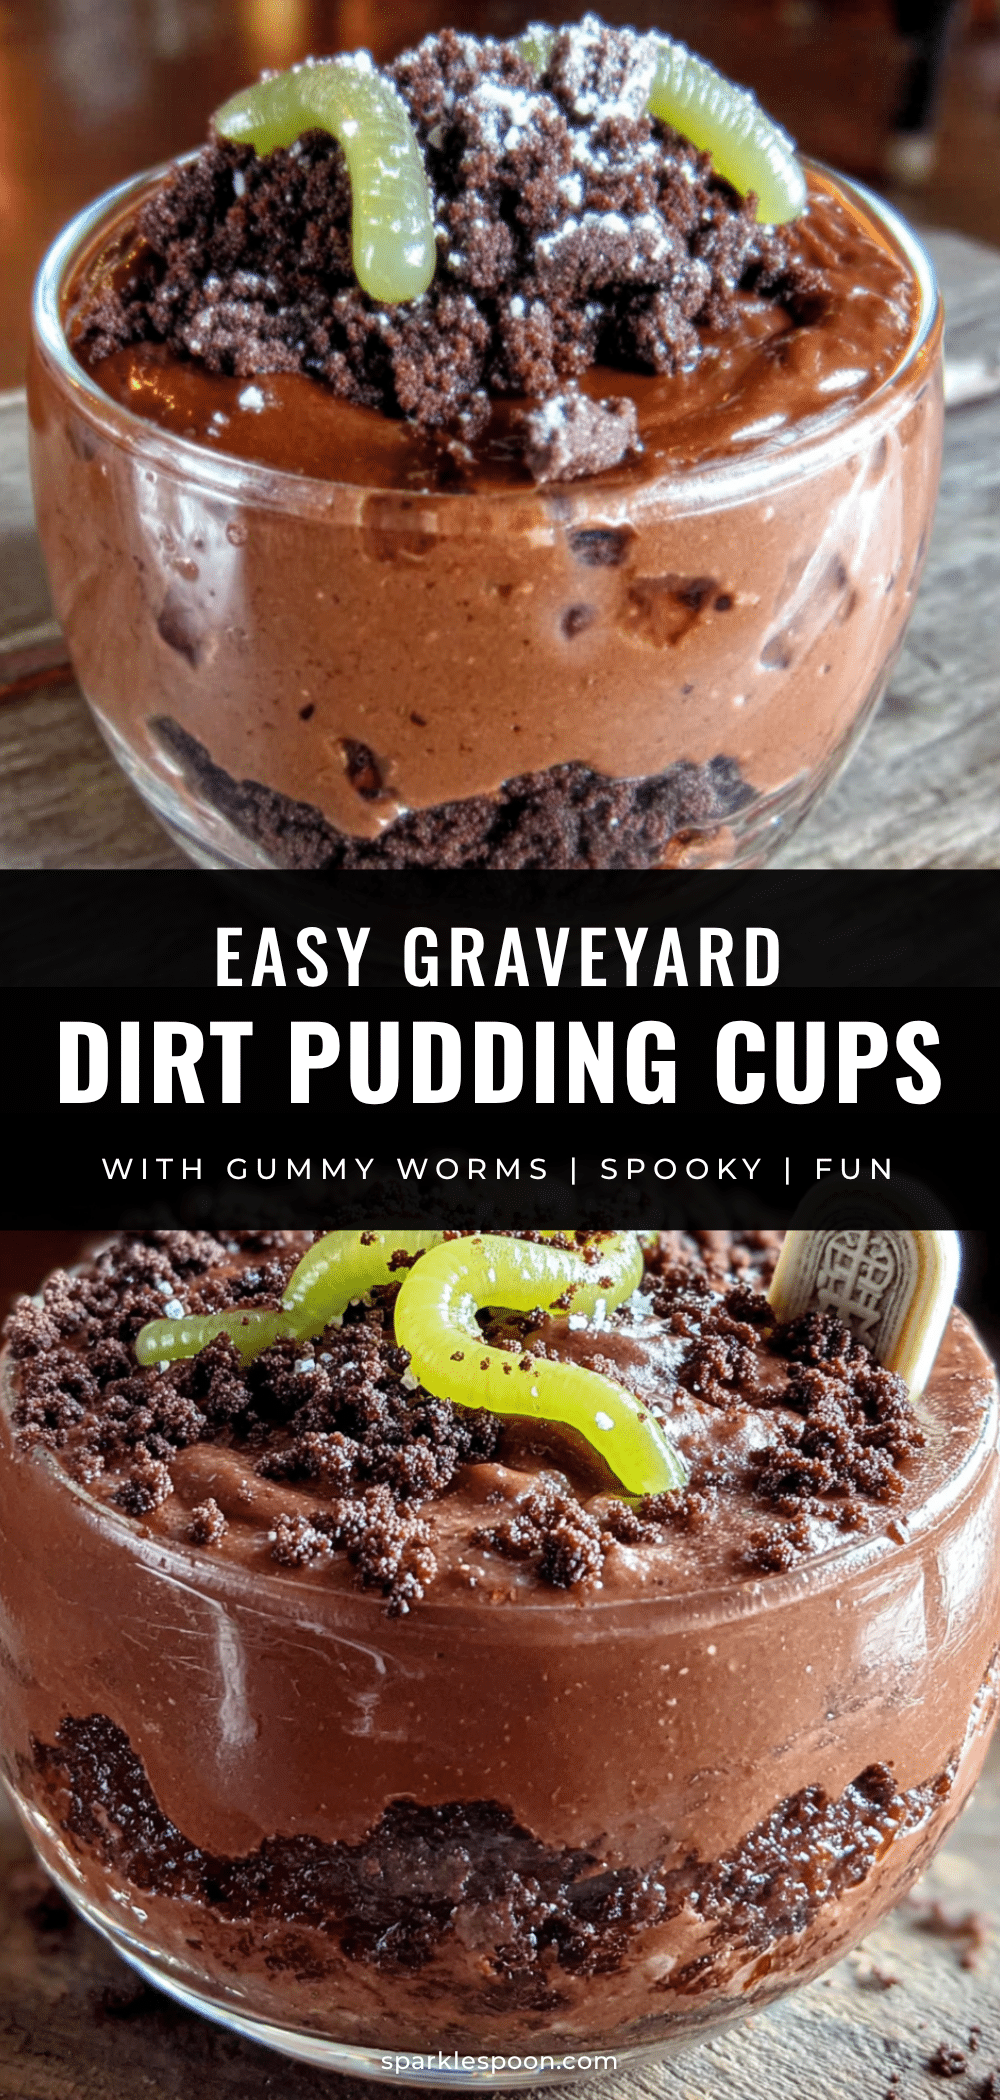
Easy Graveyard Dirt Pudding Cups: Best Halloween Treat
These Easy Graveyard Dirt Pudding Cups are a Halloween miracle. They take maybe fifteen minutes of actual work, and the payoff is pure joy: creamy chocolate pudding, crunchy cookie ‘dirt,’ and gummy worms peeking out.
- Prep Time: 15 minutes
- Cook Time: 0 minutes
- Total Time: 2 hours 15 minutes (includes chilling)
- Yield: 8 servings 1x
- Category: Dessert
- Cuisine: American
Ingredients
- 1 (3.9-ounce) package instant chocolate pudding mix (preferably Jell-O brand)
- 2 cups cold whole milk (2% or oat milk work, but whole milk is richest)
- 1 (14.3-ounce) package chocolate sandwich cookies (like Oreos, about 36 cookies)
- 2 tablespoons unsalted butter, melted
- 1 (5-ounce) bag gummy worms
- Optional: ½ cup whipped topping (like Cool Whip), thawed
- Optional: 8-10 small pumpkin or skull-shaped gummies for decoration
Instructions
- In a medium mixing bowl, whisk together the instant chocolate pudding mix and 2 cups cold milk. Whisk vigorously for about 2 minutes until thick and smooth. Set aside for 5 minutes to let it set up slightly.
- While the pudding rests, place all 36 chocolate sandwich cookies in a food processor. Pulse 10-12 times until you have fine, dark crumbs that look like soil (some slightly larger pieces are fine). Alternatively, place cookies in a large zip-top bag and crush with a rolling pin.
- Pour the crushed cookies into a small bowl. Drizzle with 2 tablespoons melted butter and stir with a fork until evenly distributed. The crumbs should clump together slightly when pressed.
- Grab 8 clear cups (6 to 8-ounce each). Start with a generous 2 tablespoons of cookie ‘dirt’ at the bottom of each cup. Press down gently with the back of a spoon.
- Spoon or pipe the chocolate pudding evenly into each cup, filling them about halfway. If using optional whipped topping, add a generous dollop on top of the pudding.
- Cover the pudding (and whipped topping, if using) with another generous layer of cookie crumbs, filling cups nearly to the top (about an inch of ‘dirt’).
- Gently poke gummy worms into the ‘dirt’ so they look like they are crawling out. Leave some partially buried and some fully on top. Add optional pumpkin or skull gummies.
- Refrigerate assembled cups for at least 2 hours, but 4 hours is better, to allow pudding to set and cookie crumbs to soften slightly.
Notes
Don’t skip the chilling step; it allows the cookie crumbs to soften slightly, mimicking real soil. For neat layers, pipe the pudding into cups using a piping bag or zip-top bag with corner snipped. Add gummy worms right before serving or after chilling to prevent them from slipping down. Store leftovers covered in the refrigerator for up to 3 days. Do not freeze.
Nutrition
- Serving Size: 1 cup
- Calories: 400
- Sugar: 44
- Sodium: 480
- Fat: 18
- Saturated Fat: 8
- Carbohydrates: 60
- Fiber: 2
- Protein: 7
Keywords: Halloween dessert, dirt pudding cups, graveyard pudding, easy Halloween treat, chocolate pudding, gummy worms, no-bake dessert



