Love this? Save it for later!
Share the inspiration with your friends
I was at a Halloween block party last October, balancing a paper plate of store-bought chips and trying not to spill my drink, when my neighbor—the guy who spends more time on his lawn than I do on my entire apartment—started talking about queso. Not just any queso, mind you. He was describing a creamy, pepper-stuffed situation that he swore would change how I thought about game day dips forever. I almost laughed. This was the same man who once asked me if I thought his hydrangeas looked “a little sad on the left side.” But there he was, sketching a rough diagram on a napkin, explaining how to hollow out bell peppers, carve little faces into them, and fill them with the most decadent cheese mixture I’d ever heard described. I nodded along, took the napkin, and honestly forgot about it for a week. Then I found it crumpled in my coat pocket on a rainy Tuesday, and I thought, why not?
That first batch was a glorious, cheesy mess. I overcooked the peppers, the queso split slightly, and I had to eat most of it myself because my roommate was out of town. But something about that combination—the sweet pepper, the smoky cheese, the little carved face staring up at you from the bowl—stuck with me. I’ve made it at least a dozen times since then, tweaking the ratios, testing different cheeses, and figuring out the best way to carve those little jack-o-lantern faces so they actually look like something. This Creamy Jack-O-Lantern Stuffed Pepper Queso Dip is the result of all that trial and error. It’s the kind of recipe that makes people stop mid-conversation and ask, “Wait, what is that?” And honestly, that’s the best compliment I can get.
Maybe you’ve been there—looking for something that feels festive without being fussy, something that looks impressive but doesn’t require a culinary degree. That’s exactly what this is. It’s a conversation starter, a crowd-pleaser, and honestly, just really, really good queso hiding inside a pepper. Let me show you how to make it.
Why You’ll Love This Recipe
I’ve tested this recipe more times than I care to admit, and I can tell you with absolute confidence: it works. Every single time. Here’s why this Creamy Jack-O-Lantern Stuffed Pepper Queso Dip stands out from every other dip you’ll see this season:
- Visually Stunning : The carved pepper face makes this the star of any Halloween party, tailgate, or fall gathering. People will take pictures before they take a bite.
- Deceptively Simple : Despite the impressive look, the actual prep takes about 15 minutes. The oven does the rest of the work.
- Perfect Make-Ahead Option : You can carve the peppers and prep the queso mixture a day in advance. Just stuff and bake when you’re ready.
- Customizable Heat Level : Want it mild? Use Monterey Jack and skip the jalapeño. Want a kick? Add pepper jack and some chipotle. It’s totally up to you.
- Naturally Gluten-Free : No flour, no roux, no worries. This dip is naturally thick and creamy without any gluten-containing ingredients.
- One-Bowl Wonder : The filling comes together in a single bowl. Less cleanup means more time enjoying the party.
I’ve brought this to three different gatherings now, and each time, someone asked for the recipe before the first hour was up. It’s not just good—it’s the kind of good that makes people text you the next day saying, “I’m still thinking about that dip.” That’s the power of a great recipe. And this one, I promise, delivers.
What Ingredients You Will Need
This recipe uses simple, grocery-store ingredients to build layers of flavor. Nothing fancy, nothing hard to find—just good, honest ingredients that work together beautifully. Here’s what you’ll need:
For the Peppers
- 4 large bell peppers (orange and red work best for the jack-o-lantern look, but yellow is fine too)
- 1 tablespoon olive oil (for brushing the peppers before roasting)
- Salt and black pepper, to taste
For the Queso Filling
- 8 ounces cream cheese, softened to room temperature (this is crucial for a smooth texture)
- 1 cup shredded sharp cheddar cheese (I prefer Tillamook or Cabot for the best melt)
- 1 cup shredded Monterey Jack cheese (or pepper jack if you want heat)
- 1/2 cup sour cream (full-fat works best, but Greek yogurt can substitute)
- 1 (4-ounce) can diced green chiles, drained
- 1/4 cup canned fire-roasted diced tomatoes, drained well (too much liquid will make the queso runny)
- 1/2 teaspoon smoked paprika
- 1/2 teaspoon garlic powder
- 1/4 teaspoon cumin
- 1/4 teaspoon onion powder
- Pinch of cayenne pepper (optional, for heat)
- 2 tablespoons chopped fresh cilantro (plus more for garnish)
- 2 green onions, thinly sliced
For Serving
- Tortilla chips, sliced baguette, or veggie sticks (carrots and celery work great)
- Additional cilantro and green onions for garnish
The cream cheese is the backbone here—it gives the queso that luscious, spoonable texture that keeps people coming back. I’ve tried this with reduced-fat cream cheese, and honestly, it’s just not the same. The full-fat version melts more smoothly and doesn’t separate as easily. For the shredded cheeses, I recommend buying blocks and shredding them yourself. Pre-shredded cheese has anti-caking agents that can make the queso grainy. It’s a small extra step, but it makes a noticeable difference in the final texture.
If you’re looking to switch things up, you can use pepper jack instead of Monterey Jack for a spicier dip, or add a tablespoon of chopped pickled jalapeños to the filling. Just make sure to pat them dry first so you don’t add extra moisture.
Equipment Needed
You don’t need any fancy gadgets for this recipe, which is part of its charm. Here’s what you’ll need:
- Sharp paring knife (for carving the pepper faces—a dull knife will crush the pepper walls)
- Small spoon or melon baller (for scooping out the pepper seeds and membranes)
- Cutting board
- Mixing bowl (medium-sized is fine)
- Baking dish (a 9×9-inch square dish or an 8-inch round dish works perfectly)
- Aluminum foil (for covering the peppers during the first part of baking)
- Pastry brush (for brushing the peppers with oil)
- Measuring cups and spoons
- Spatula or wooden spoon (for mixing the filling)
I’ve made this with a cheap paring knife from the grocery store, and it worked fine—just make sure it’s sharp. If you don’t have a pastry brush, you can rub the oil on the peppers with your hands or a paper towel. And if you don’t have a melon baller, a regular teaspoon works just as well for scooping out seeds.
Preparation Method
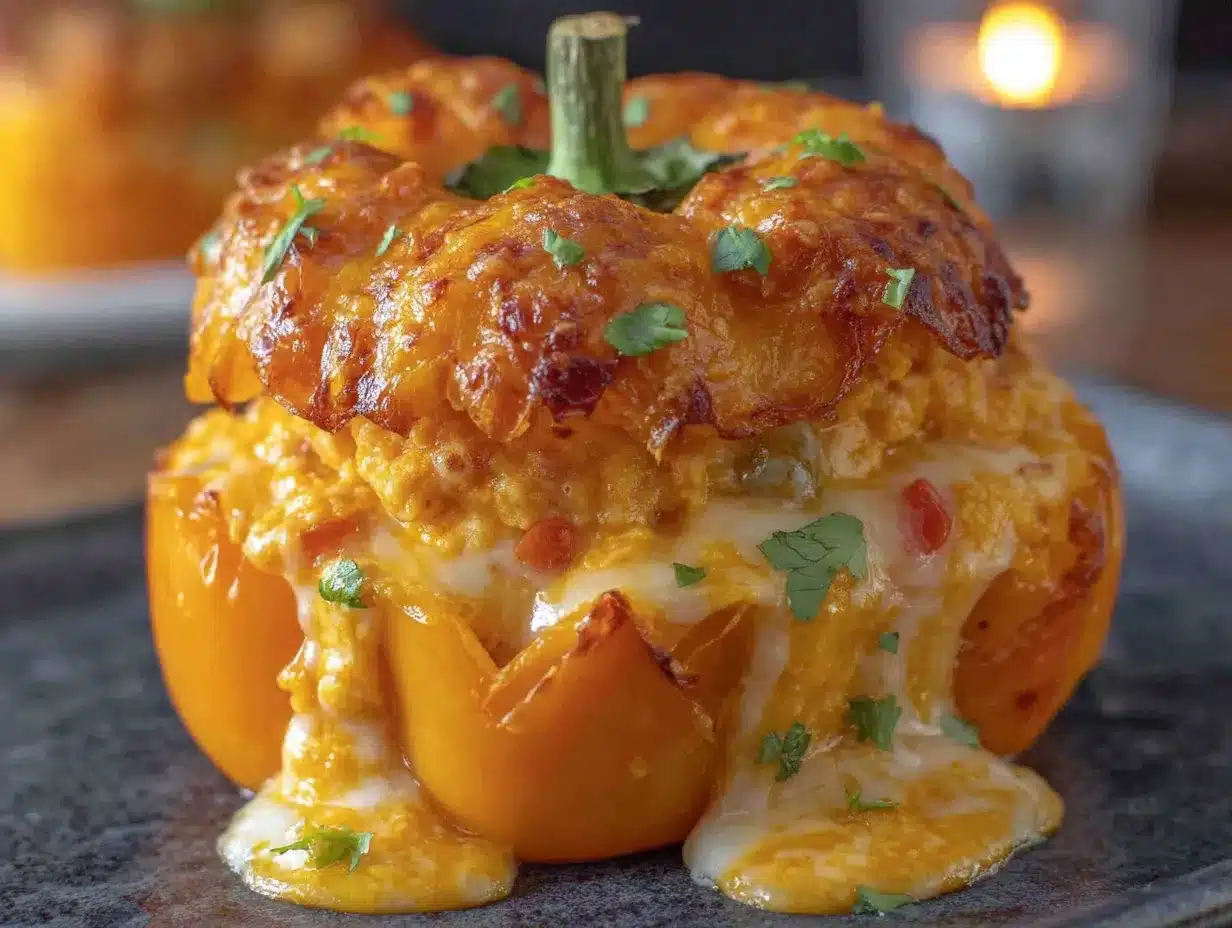
Let’s walk through this step by step. I’ll tell you exactly what to look for at each stage so you know you’re on the right track.
- Preheat your oven to 375°F (190°C). Position the rack in the center of the oven. While the oven heats, prepare your peppers.
- Prepare the bell peppers. Wash and dry all four peppers. Using your sharp paring knife, cut the top off each pepper—about 1/2 inch from the stem. Set the tops aside. Carefully remove the seeds and white membranes from inside each pepper. Use your small spoon or melon baller to scrape the inside walls clean. Don’t worry about being perfect; just get the loose seeds out. Rinse the peppers inside and out, then pat them dry with a paper towel.
- Carve the jack-o-lantern faces. This is the fun part. Using your paring knife, carefully cut triangle eyes, a jagged mouth, and maybe a nose into one side of each pepper. Cut all the way through the pepper wall. Keep the cut-out pieces if you want to use them as decoration around the serving dish, or just discard them. Take your time here—it’s not a race. If you mess up a cut, you can always flip the pepper and start again on a different side. I’ve definitely had a few lopsided faces in my day, and honestly, they just look more charming that way.
- Brush the peppers with olive oil. Lightly brush the outside of each pepper with olive oil, including the carved areas. Season the inside of each pepper with a tiny pinch of salt and pepper. Place the peppers upright in your baking dish. If they wobble, trim a tiny slice off the bottom to create a flat surface—just be careful not to cut through the bottom.
- Make the queso filling. In your mixing bowl, combine the softened cream cheese, shredded cheddar, shredded Monterey Jack, sour cream, drained green chiles, drained tomatoes, smoked paprika, garlic powder, cumin, onion powder, and cayenne (if using). Mix everything together with your spatula until it’s well combined and smooth. The mixture will be thick and slightly sticky—that’s exactly what you want. Fold in the chopped cilantro and sliced green onions.
- Stuff the peppers. Divide the queso mixture evenly among the four peppers. Pack it in gently but firmly, making sure there are no air pockets. You want the filling to reach the top of each pepper. If you have extra filling, you can pile it slightly above the rim—it will settle as it bakes.
- Bake covered. Cover the baking dish with aluminum foil, making sure it’s tented so it doesn’t touch the tops of the peppers. Bake for 20 minutes. This initial covered baking steams the peppers slightly, softening them without making them mushy.
- Bake uncovered. Remove the foil and continue baking for another 10-15 minutes. The peppers should be tender but still hold their shape, and the queso should be bubbly and lightly golden on top. If you want a deeper golden color, you can switch the oven to broil for the last 1-2 minutes—just watch it carefully so it doesn’t burn.
- Rest and serve. Let the peppers cool in the dish for 5 minutes before serving. This allows the queso to set slightly so it doesn’t run everywhere when you dip into it. Transfer the baking dish to your serving table, garnish with additional cilantro and green onions, and surround with chips or bread for dipping.
A few sensory cues to watch for: when you take off the foil, you should see the cheese gently bubbling around the edges of the pepper tops. The peppers should look slightly wrinkled but still vibrant in color. If you poke a pepper gently with a fork, it should give slightly but not collapse. The queso should be thick and creamy, not runny—if it looks too liquid, give it another 5 minutes uncovered in the oven.
Cooking Tips & Techniques
I’ve made every mistake in the book with this recipe, so you don’t have to. Here’s what I’ve learned:
- Don’t overbake the peppers. The first time I made this, I left the peppers in for 40 minutes total, and they came out so soft they practically collapsed when I tried to move them. The sweet spot is 30-35 minutes total. You want the peppers tender but still sturdy enough to hold their shape.
- Room temperature cream cheese is non-negotiable. I know, I know—we’re all impatient. But cold cream cheese will leave you with lumpy queso. Take it out of the fridge 30 minutes before you start. If you forget, you can microwave it in 10-second bursts until it’s soft but not melted.
- Drain your canned ingredients well. Extra moisture is the enemy of good queso. After you open the green chiles and tomatoes, dump them into a fine-mesh strainer and press gently with a spoon to remove as much liquid as possible. Your queso will thank you.
- Carve carefully. The pepper walls are thin, so use a gentle sawing motion with your knife rather than trying to push through. If you’re nervous, you can draw the face on the pepper with a food-safe marker first, then cut along the lines.
- Make it ahead. You can prepare the stuffed peppers up to 24 hours in advance. Just assemble them, cover tightly with plastic wrap, and refrigerate. Add 5-10 minutes to the covered baking time if starting from cold.
- Double the recipe easily. This scales beautifully. For a party, I’ve made eight peppers in a 9×13-inch baking dish. Just make sure they fit snugly so they support each other while baking.
One thing I wish someone had told me: the carved faces will look slightly different after baking. The pepper softens and the edges of the cuts curl inward a bit, giving the faces a more organic, slightly goofy look. Embrace it. It’s part of the charm.
Variations & Adaptations
This recipe is incredibly flexible. Here are some ways to make it your own:
- Spicy Southwest Version: Add 1/4 cup of drained and rinsed black beans, 2 tablespoons of chopped pickled jalapeños, and use pepper jack cheese instead of Monterey Jack. Top with a dollop of salsa verde before serving.
- Smoky Bacon Version: Cook 4 slices of bacon until crispy, crumble them, and mix half into the queso filling. Sprinkle the remaining bacon on top before the final uncovered bake. The smoky flavor pairs beautifully with the roasted peppers.
- Vegan Adaptation: Use vegan cream cheese, vegan shredded cheddar, and vegan sour cream. Add 2 tablespoons of nutritional yeast for a cheesier flavor. The texture will be slightly different, but it’s still delicious. Bake for the same amount of time.
- Mini Pepper Version: Use 8-10 mini sweet peppers instead of full-sized bell peppers. Cut them in half lengthwise, remove seeds, and fill each half with the queso mixture. Bake for 15-18 minutes total. These are perfect for appetizer platters.
- Breakfast Twist: Add 1/2 cup of cooked, crumbled breakfast sausage or chorizo to the queso filling. Serve with warm tortillas for a fun breakfast-for-dinner option.
I personally love the spicy Southwest version—it’s what I make when I want something with a little more kick. The black beans add a nice texture contrast, and the salsa verde on top cuts through the richness of the cheese perfectly.
Serving & Storage Suggestions
These peppers are best served warm, straight from the oven. The queso is at its creamiest and most dippable within the first 30 minutes. Here’s how to serve and store them:
- Serving temperature: Let the peppers rest for 5 minutes after baking, then serve immediately. The queso will be hot and gooey, so remind guests to be careful—it stays hot longer than you’d expect.
- Presentation: Place the baking dish on a trivet in the center of your table. Arrange tortilla chips around the peppers, or provide small plates and spoons for guests to scoop the queso onto their own plates. I like to scatter a few of the leftover pepper cut-out pieces around the dish for a fun, festive look.
- What to dip: Tortilla chips are the classic choice, but this queso is amazing with crusty bread, pretzel bites, pita chips, or even raw veggie sticks like carrot and celery. I’ve also used it as a topping for nachos or baked potatoes.
- Storage: Leftover stuffed peppers will keep in an airtight container in the refrigerator for up to 3 days. The peppers will soften more as they sit, but the flavor actually improves overnight as the ingredients meld together.
- Reheating: Reheat individual peppers in the microwave for 30-45 seconds, or reheat the whole dish covered in a 350°F oven for 10-15 minutes. If the queso seems thick after refrigeration, stir in a tablespoon of milk or cream before reheating to restore the creamy texture.
- Freezing: I don’t recommend freezing this dish—the texture of both the peppers and the queso changes too much upon thawing. It’s best made fresh or within a day or two.
The flavors actually deepen overnight, so if you’re making this for a party, I’d recommend assembling it the day before and baking it just before guests arrive. The smoked paprika and cumin really come forward after a few hours in the fridge.
Nutritional Information & Benefits
Here’s the honest truth: this is a rich, indulgent dish. It’s not health food, and it’s not pretending to be. But that doesn’t mean there aren’t some redeeming qualities. Here’s what you’re getting per serving (based on one stuffed pepper, assuming 4 servings total):
- Calories: Approximately 380-420
- Protein: 14-16 grams
- Fat: 30-34 grams
- Carbohydrates: 12-15 grams
- Fiber: 2-3 grams
- Calcium: 35-40% of the daily value
Bell peppers are an excellent source of vitamin C—one medium pepper provides more than 100% of your daily needs. They’re also rich in vitamin A and antioxidants. The cheese provides calcium and protein, while the sour cream adds a bit of probiotics (if you use a live-culture brand). The green chiles and tomatoes contribute a small amount of vitamins and fiber.
If you’re watching your sodium, you can use low-sodium canned ingredients and reduce the added salt. For a lower-fat version, use reduced-fat cream cheese and sour cream, though the texture won’t be quite as luxurious. This recipe is naturally gluten-free, making it a safe option for guests with celiac disease or gluten sensitivity. It’s also vegetarian as written.
I’m not here to tell you this is a health food—it’s a celebration food, a comfort food, a treat. But knowing what’s in it helps you make informed choices, and honestly, a little indulgence now and then is part of a balanced life.
Conclusion
This Creamy Jack-O-Lantern Stuffed Pepper Queso Dip has become my go-to for fall gatherings, and I think it’ll become yours too. It’s the kind of recipe that looks like you spent hours on it when really, it comes together in about 30 minutes of active time. The carved pepper faces make people smile, the creamy queso makes them go back for seconds, and the whole thing just feels like fall in the best possible way.
What I love most about this recipe is how adaptable it is. You can make it as mild or as spicy as you want, stuff it into mini peppers for a party appetizer, or load it up with bacon and black beans for a heartier version. It’s a template as much as it is a recipe—a starting point for your own creativity. If you come up with a variation I haven’t tried, I’d love to hear about it.
So here’s my challenge to you: make this for your next gathering, whether it’s a Halloween party, a football game, or just a Tuesday night when you need something comforting. Watch people’s faces when they see the little jack-o-lantern faces staring up from the baking dish. And then watch them go quiet as they take that first bite of creamy, cheesy, perfectly spiced queso. That moment right there? That’s why I keep making this recipe. And I hope you will too.
If you try this recipe, leave a comment below and let me know how it turned out. Did you carve a classic face or something more creative? Did you add extra heat? I genuinely want to know. And if you share it on social media, tag me—I love seeing your versions. Happy dipping!
Frequently Asked Questions
Can I use different colored bell peppers?
Absolutely! Orange and red peppers give the most jack-o-lantern-like appearance, but yellow peppers work well too. Green peppers are less sweet and have a slightly bitter flavor, but they’re still fine if that’s what you have. Just keep in mind that the final color won’t be as festive.
Can I make this in a slow cooker?
I don’t recommend it for the stuffed pepper version, as the peppers will become too soft and may fall apart. However, you can make the queso filling in a slow cooker on low for 2 hours, then serve it as a traditional dip in the slow cooker. Just skip the peppers and serve with chips directly from the slow cooker.
How do I prevent the queso from becoming grainy?
Grainy queso usually happens when the cheese gets too hot too quickly or when you use pre-shredded cheese with anti-caking agents. Shred your own cheese from blocks, make sure your cream cheese is at room temperature, and don’t overbake. If your queso does turn grainy, you can try whisking in a tablespoon of milk or cream to smooth it out.
Can I prepare the peppers ahead of time without baking?
Yes! You can carve the peppers and prepare the queso filling up to 24 hours in advance. Store the hollowed peppers and the filling separately in the refrigerator. When you’re ready to bake, stuff the peppers and follow the baking instructions, adding 5-10 minutes to the covered baking time since you’re starting from cold.
What if I don’t have all the spices listed?
No problem! The most important spices are the smoked paprika and garlic powder. If you don’t have cumin or onion powder, you can skip them or add a pinch of chili powder instead. The cayenne is completely optional. The queso will still be delicious with just the paprika and garlic powder—I’ve made it that way when my spice rack was bare, and no one complained.
Pin This Recipe!
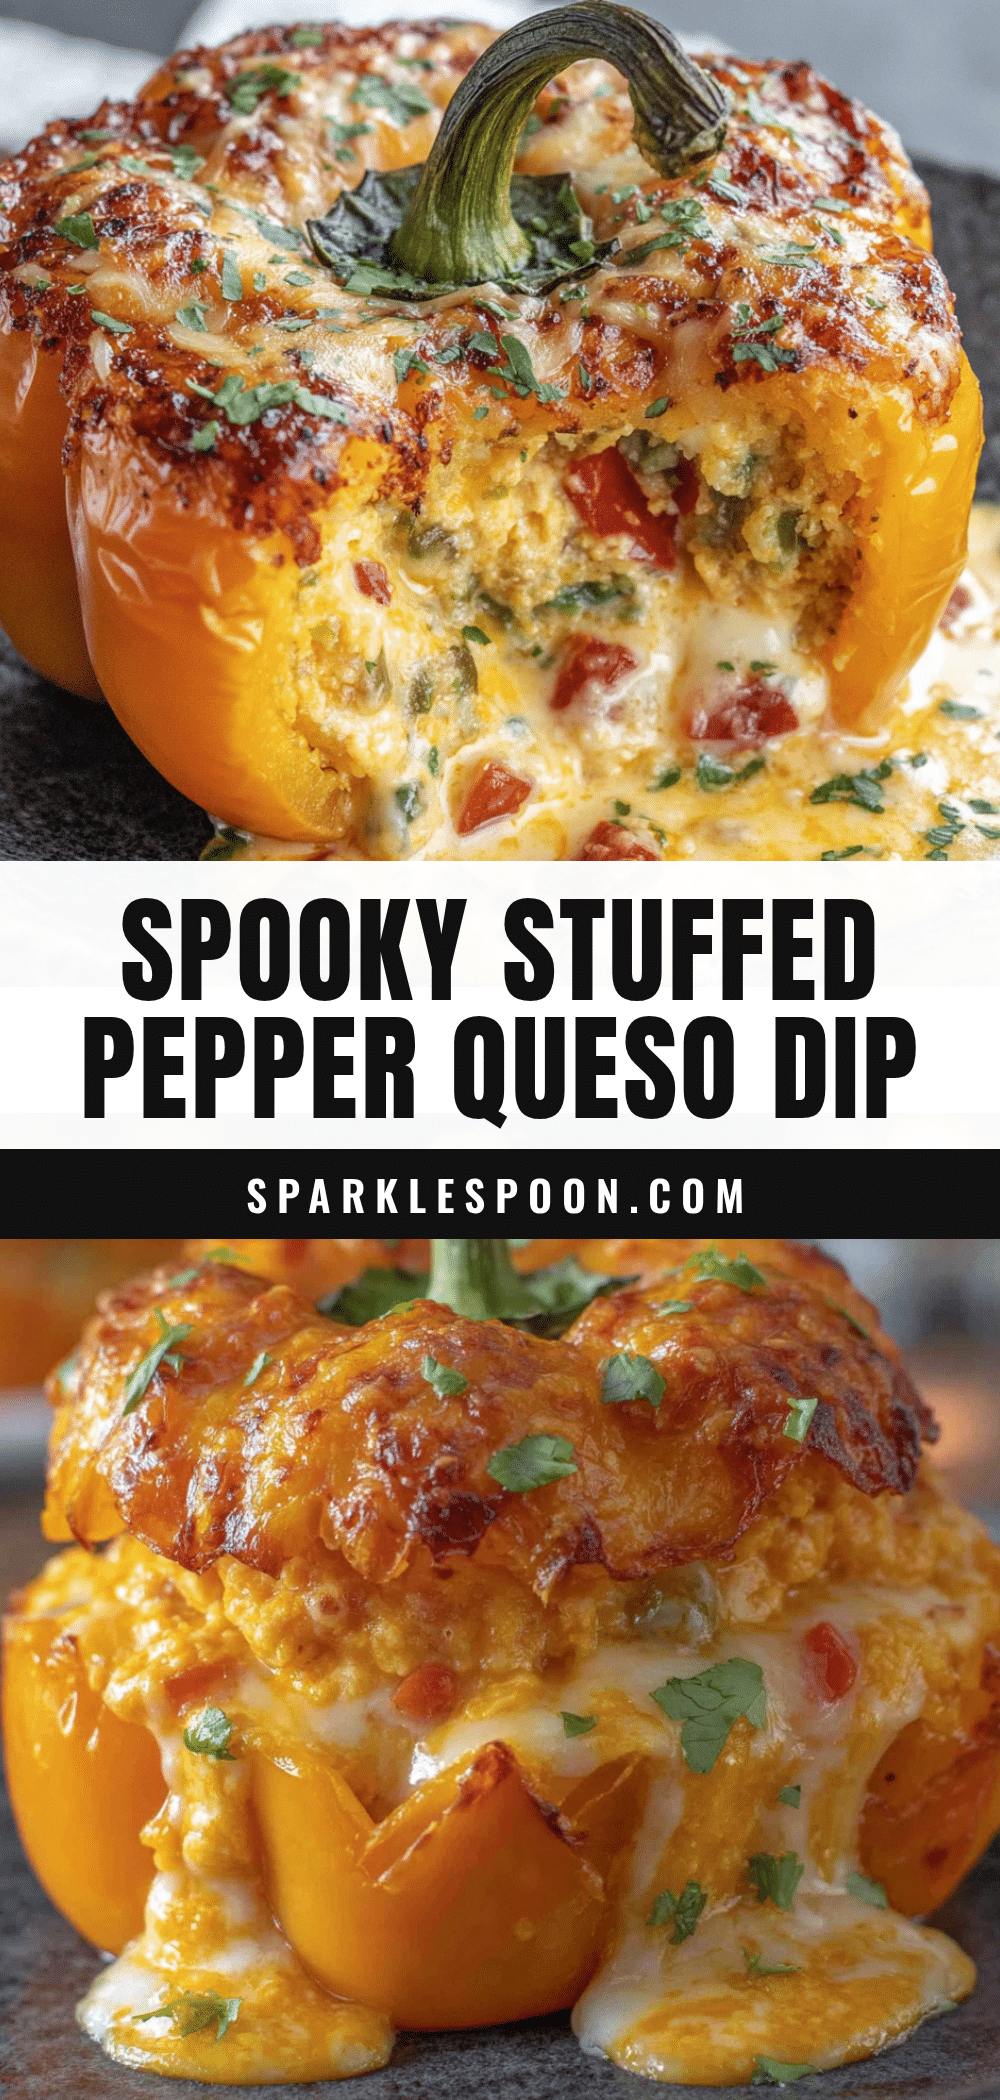
Creamy Jack-O-Lantern Stuffed Pepper Queso Dip Recipe

A festive and creamy queso dip stuffed inside hollowed bell peppers carved with jack-o-lantern faces. Perfect for Halloween parties, tailgates, or any fall gathering, this deceptively simple recipe is a crowd-pleaser that looks impressive but comes together in about 30 minutes of active time.
- Prep Time: 15 minutes
- Cook Time: 30 minutes
- Total Time: 45 minutes
- Yield: 4 servings 1x
- Category: Appetizer
- Cuisine: American
Ingredients
- 4 large bell peppers (orange and red work best)
- 1 tablespoon olive oil
- Salt and black pepper, to taste
- 8 ounces cream cheese, softened to room temperature
- 1 cup shredded sharp cheddar cheese
- 1 cup shredded Monterey Jack cheese (or pepper jack for heat)
- 1/2 cup sour cream (full-fat recommended)
- 1 (4-ounce) can diced green chiles, drained
- 1/4 cup canned fire-roasted diced tomatoes, drained well
- 1/2 teaspoon smoked paprika
- 1/2 teaspoon garlic powder
- 1/4 teaspoon cumin
- 1/4 teaspoon onion powder
- Pinch of cayenne pepper (optional, for heat)
- 2 tablespoons chopped fresh cilantro (plus more for garnish)
- 2 green onions, thinly sliced
- Tortilla chips, sliced baguette, or veggie sticks for serving
Instructions
- Preheat your oven to 375°F (190°C). Position the rack in the center of the oven.
- Prepare the bell peppers: Wash and dry all four peppers. Using a sharp paring knife, cut the top off each pepper—about 1/2 inch from the stem. Set the tops aside. Carefully remove the seeds and white membranes from inside each pepper. Rinse the peppers inside and out, then pat them dry.
- Carve the jack-o-lantern faces: Using your paring knife, carefully cut triangle eyes, a jagged mouth, and a nose into one side of each pepper. Cut all the way through the pepper wall. Discard or reserve the cut-out pieces.
- Brush the peppers with olive oil: Lightly brush the outside of each pepper with olive oil, including the carved areas. Season the inside of each pepper with a tiny pinch of salt and pepper. Place the peppers upright in a baking dish. If they wobble, trim a tiny slice off the bottom to create a flat surface.
- Make the queso filling: In a mixing bowl, combine the softened cream cheese, shredded cheddar, shredded Monterey Jack, sour cream, drained green chiles, drained tomatoes, smoked paprika, garlic powder, cumin, onion powder, and cayenne (if using). Mix until well combined and smooth. Fold in the chopped cilantro and sliced green onions.
- Stuff the peppers: Divide the queso mixture evenly among the four peppers. Pack it in gently but firmly, making sure there are no air pockets. The filling should reach the top of each pepper.
- Bake covered: Cover the baking dish with aluminum foil, tented so it doesn’t touch the tops of the peppers. Bake for 20 minutes.
- Bake uncovered: Remove the foil and continue baking for another 10-15 minutes, until the peppers are tender but still hold their shape and the queso is bubbly and lightly golden on top. For a deeper golden color, broil for the last 1-2 minutes, watching carefully.
- Rest and serve: Let the peppers cool in the dish for 5 minutes before serving. Garnish with additional cilantro and green onions, and surround with chips or bread for dipping.
Notes
For best results, use room temperature cream cheese and shred cheese from blocks to avoid graininess. Drain canned ingredients well to prevent runny queso. Peppers can be carved and filling prepared up to 24 hours in advance; add 5-10 minutes to covered baking time if starting from cold. The carved faces will look slightly different after baking—embrace the charm.
Nutrition
- Serving Size: 1 stuffed pepper
- Calories: 400
- Sugar: 6
- Sodium: 520
- Fat: 32
- Saturated Fat: 18
- Carbohydrates: 14
- Fiber: 2
- Protein: 15
Keywords: Halloween, queso dip, stuffed peppers, jack-o-lantern, fall appetizer, game day dip, gluten-free, vegetarian



