Love this? Save it for later!
Share the inspiration with your friends
My older brother claimed to hate sugar cookies for twenty-seven years. Twenty-seven years of birthday parties, bake sales, and holiday platters where he’d politely decline, reaching instead for anything chocolate or peanut butter-based. Then last Thanksgiving, I found him standing alone in my kitchen at 11 PM, the house finally quiet after everyone had gone home, eating one of these hand turkey sugar cookies with this look on his face I can’t quite describe. Caught red-handed—or rather, red-frosting-handed. “These don’t count,” he mumbled through a mouthful of royal icing. “These are turkeys.” And honestly? He wasn’t wrong.
That’s the thing about these Cozy Thanksgiving Hand Turkey Sugar Cookies. They’re not really cookies in the traditional sense—they’re more like edible memories, the kind you make with kids who have frosting up to their elbows and sprinkles in their hair. I mean, the first batch I ever attempted looked absolutely tragic. The turkeys had three legs, the feathers were all clumped together, and I may have cried a little when one slid off the baking sheet and landed face-down on the floor. But my niece declared them “the best cookies ever made in the history of cookies,” and that was that.
Maybe you’ve been there—standing in a flour-dusted kitchen, wondering why you thought this was a good idea while a four-year-old demands more pink frosting. Or maybe you’re the one who secretly loves these nostalgic projects but pretends to be above them. Either way, these cookies have a way of bringing out the kid in everyone. They’re messy, imperfect, and absolutely wonderful. And if you happen to catch someone eating one at midnight, well—that’s between you and the turkey.
Why You’ll Love This Recipe
These hand turkey sugar cookies aren’t just another holiday baking project—they’re the kind of recipe that creates genuine, laugh-until-your-sides-hurt memories. I’ve tested this recipe through four Thanksgiving seasons now, tweaking the sugar cookie base until it holds its shape perfectly while staying soft enough to actually enjoy eating. Here’s what makes them special:
- Kid-Approved Fun : The tracing-your-hand element turns cookie decorating into an activity that entertains kids for at least an hour. Trust me, that’s a win during holiday prep chaos.
- Simple Pantry Ingredients : You probably have everything already—flour, sugar, butter, eggs, vanilla. No specialty baking supply store trips required.
- Perfect for Thanksgiving Gatherings : These make the ideal pre-dinner activity while the turkey rests, or a fun afternoon project the day before the big meal.
- Completely Customizable : Every single cookie turns out different because every hand is different. That’s the beauty of it—no two turkeys look alike.
- Actually Delicious : Let’s be real—some decorated cookies taste like cardboard with frosting. This sugar cookie recipe is buttery, tender, and worth eating on its own.
What sets this recipe apart from other hand turkey cookies I’ve seen is the sugar cookie base itself. I spent three batches getting the flour-to-butter ratio just right so the cookies spread minimally during baking. Nothing worse than tracing a perfect hand shape only to have it puff into a blob in the oven. Plus, the royal icing recipe here dries hard enough to stack cookies for transport but softens slightly after a day, giving you that perfect bite.
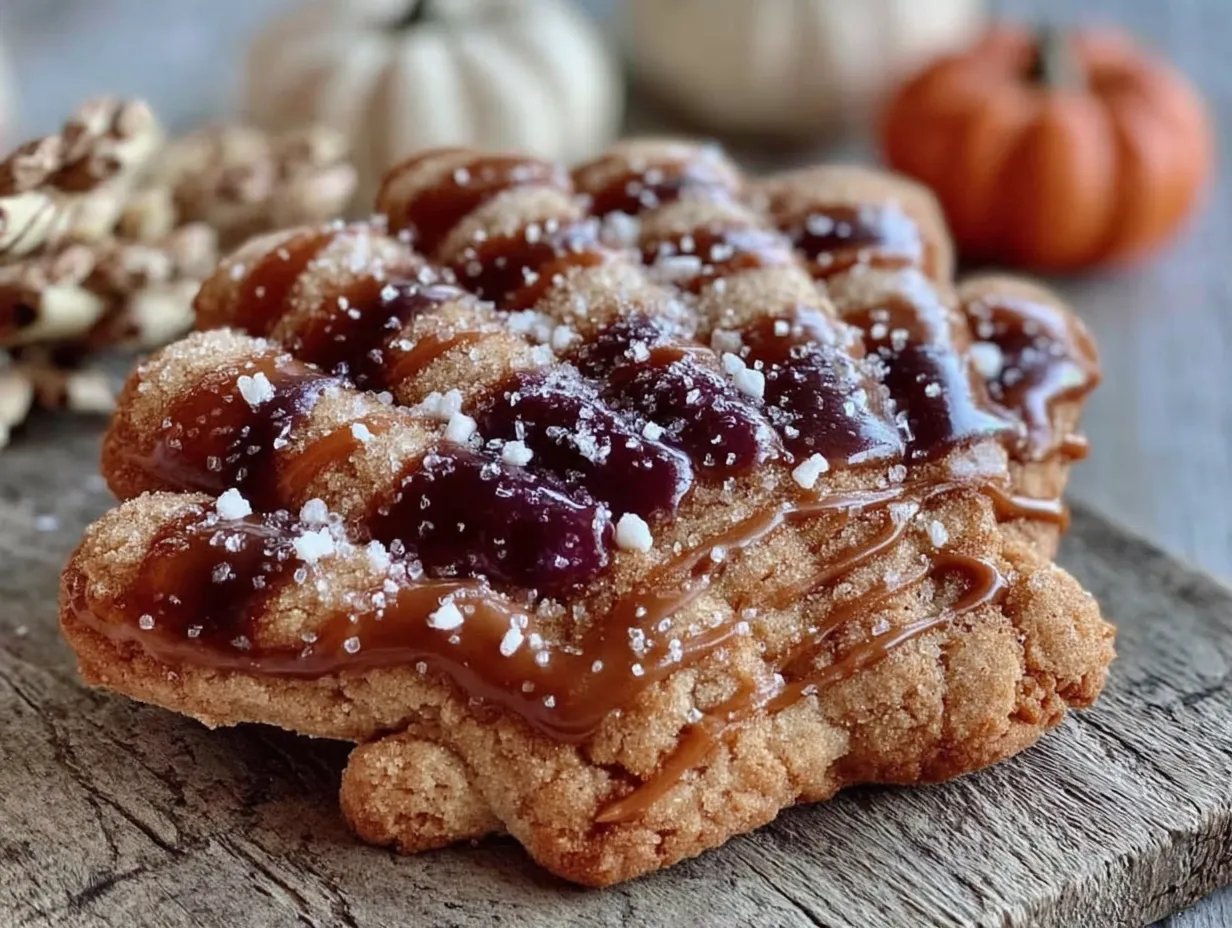
There’s something about seeing your own handprint transformed into a turkey that makes people smile. I’ve watched grown adults get genuinely excited about decorating these cookies, carefully placing each candy corn feather like they’re painting a masterpiece. It’s comfort food and craft project rolled into one, and honestly? That’s exactly what Thanksgiving should feel like.
What Ingredients You Will Need
This recipe uses simple, wholesome ingredients to deliver a sugar cookie that’s sturdy enough for decorating but tender enough to actually enjoy. Most of these are pantry staples, which means you can whip up a batch without a special grocery run.
For the Sugar Cookies
- 3 cups all-purpose flour (375 grams) — Spoon and level for accuracy; too much flour makes tough cookies
- 1 teaspoon baking powder — Helps the cookies rise just slightly without losing their shape
- 1/2 teaspoon salt — Balances the sweetness and enhances the buttery flavor
- 1 cup unsalted butter, softened (2 sticks, 226 grams) — I prefer Land O’Lakes for consistent results; margarine won’t give the same texture
- 1 cup granulated sugar (200 grams) — Regular white sugar creates the perfect crisp edge
- 1 large egg, room temperature — Cold eggs can make the dough seize up; let it sit out for 30 minutes
- 1 teaspoon vanilla extract — Pure vanilla makes a noticeable difference; avoid imitation if possible
- 1/2 teaspoon almond extract (optional but recommended) — Adds that bakery-style flavor that makes people ask for the recipe
For the Royal Icing
- 4 cups powdered sugar (480 grams) — Sift if clumpy; nobody wants lumpy icing
- 3 tablespoons meringue powder — This is what gives royal icing its hard, shiny finish; you can find it in the baking aisle or online
- 5-6 tablespoons warm water — Add gradually; humidity affects how much you’ll need
- 1/2 teaspoon cream of tartar — Stabilizes the icing and helps it dry perfectly
- Food coloring gels — Red, orange, yellow, brown, and green for classic turkey colors; gel colors work better than liquid drops
For Decorating
- Candy corn — The classic feather shape; one bag is plenty for multiple batches
- Mini chocolate chips or candy eyes — For the turkey’s eyes
- Orange decorating sugar or small orange candies — For the turkey’s beak and wattle
- Piping bags or zip-top bags — Snip a tiny corner for precise icing application
Ingredient Substitution Notes: For a dairy-free version, use vegan butter sticks (not tub margarine) in equal measure. The texture will be slightly different but still delicious. If you can’t find meringue powder, you can substitute 2 large egg whites plus 1/2 teaspoon cream of tartar for the royal icing—just note that cookies with egg-white icing don’t store as long at room temperature. For a gluten-free option, use a 1:1 gluten-free baking flour blend; I’ve had good results with Bob’s Red Mill.
Equipment Needed
You don’t need fancy equipment for these cookies, but a few tools make the process much smoother. Here’s what you’ll need:
- Baking sheets (2-3) — Light-colored aluminum sheets work best; dark sheets can over-brown the bottoms
- Parchment paper or silicone baking mats — Non-negotiable for preventing sticking and even baking
- Rolling pin — A standard rolling pin works fine; adjustable rings help maintain even thickness
- Sharp knife or pizza cutter — For cutting around hand tracings; a pizza cutter is actually easier for curves
- Hand mixer or stand mixer — Creaming butter and sugar by hand is possible but tedious; I’ve done it and don’t recommend it
- Mixing bowls — One large, one medium
- Wire cooling racks — Essential for cookies to cool evenly before icing
- Piping bags with small round tips (or zip-top bags with snipped corners) — For detailed icing work
- Small offset spatula — Makes spreading icing much easier; a butter knife works in a pinch
- Toothpicks — For popping air bubbles in icing and making small adjustments
If you don’t have piping bags, don’t stress. I’ve used sandwich bags more times than I can count—just fill, seal, snip a tiny corner, and you’re in business. For the rolling pin, a wine bottle works surprisingly well if you’re in a pinch, though you’ll want to chill the dough extra since the bottle warms it up faster.
Preparation Method
Let me walk you through this step by step. I’ve learned a few tricks the hard way, so listen carefully at the chilling stage—trust me on this one.
Step 1: Make the Cookie Dough
In a medium bowl, whisk together the flour, baking powder, and salt. Set aside. In a large mixing bowl, beat the softened butter and granulated sugar together on medium speed until light and fluffy—about 3 minutes. You want it to look pale and almost creamy. Scrape down the sides of the bowl, then add the egg, vanilla extract, and almond extract if using. Beat until combined, about 1 minute. Gradually add the dry ingredients to the wet mixture, mixing on low speed until just combined. The dough will look crumbly at first, but keep mixing—it will come together. Do not overmix, or your cookies will be tough.
Step 2: Chill the Dough
Divide the dough into two equal discs, wrap each tightly in plastic wrap, and refrigerate for at least 2 hours. I cannot stress this enough—chilled dough is non-negotiable for hand-shaped cookies. Warm dough will spread in the oven, and your turkey feathers will turn into one giant blob. I learned this the hard way when my first batch looked like mutant potatoes. Overnight chilling works even better if you have the time.
Step 3: Trace and Cut the Hand Shapes
Preheat your oven to 350°F (175°C). Line baking sheets with parchment paper. Lightly flour your work surface and rolling pin. Roll one disc of dough to about 1/4-inch thickness. Here’s the fun part: have each person press their hand firmly onto the dough to create an imprint. Using a sharp knife or pizza cutter, carefully cut around the handprint, leaving about 1/2 inch of dough around the fingers. You want the turkey to have room for feathers! Transfer the hand-shaped cookie to the prepared baking sheet using a thin spatula. Repeat with remaining dough, re-rolling scraps as needed. Place cookies about 2 inches apart—they will spread slightly.
Step 4: Bake the Cookies
Bake for 8-10 minutes, or until the edges are just barely golden. The centers should look set but not brown. Remove from the oven and let the cookies cool on the baking sheet for 5 minutes—this is crucial for them to firm up. Then transfer to wire cooling racks to cool completely. Do not even think about icing them while they’re warm. The icing will melt into a sticky mess. Ask me how I know.
Step 5: Make the Royal Icing
While the cookies cool, make the icing. In a large bowl, combine the powdered sugar, meringue powder, and cream of tartar. Add 5 tablespoons of warm water and beat on low speed until combined, then increase to medium-high and beat for 4-5 minutes until the icing is thick, glossy, and forms stiff peaks. Add more water, one teaspoon at a time, if the icing is too thick. You want it to be thick enough to hold its shape but thin enough to pipe smoothly. Divide the icing into separate bowls and tint with gel food coloring: brown for the turkey body, orange for the beak and feet, red for the wattle, and various colors for the feathers if desired.
Step 6: Decorate the Turkeys
This is where the magic happens. Using brown icing, pipe the turkey body in the center of the palm area. Use orange icing to pipe a small triangle beak and two little feet at the base. Add a tiny red wattle under the beak with red icing. Attach mini chocolate chips or candy eyes for the eyes. Now for the feathers: pipe colored icing along each finger to represent feathers. While the icing is still wet, press candy corn into the icing along the fingers—pointy ends facing outward. Let the decorated cookies sit at room temperature for 2-3 hours, or until the icing is completely hard and set.
Cooking Tips & Techniques
After four Thanksgivings of making these cookies, I’ve collected some hard-won wisdom. Let me save you from my mistakes.
Chill between batches. If you’re making multiple trays, pop the shaped cookies back in the fridge for 10 minutes before baking. This prevents spreading and keeps those finger shapes distinct. I once skipped this step because I was rushing, and my second batch came out looking like abstract art—interesting but not what I was going for.
Don’t over-flour your surface. I know it’s tempting to dump flour everywhere to prevent sticking, but too much flour makes the cookies dry and tough. Use a light dusting and re-flour as needed. If the dough starts sticking, it’s probably getting too warm—pop it back in the fridge for 15 minutes.
Test your icing consistency. Before you start decorating, test the icing on a piece of parchment paper. If it spreads into a puddle, it’s too thin—add more powdered sugar. If it won’t pipe smoothly, add a drop more water. The perfect consistency is like thick toothpaste: it holds a peak but spreads slightly when you smooth it.
Work in an assembly line. Pipe all the brown bodies first, then all the beaks, then all the eyes. This is way more efficient than decorating one cookie completely before moving to the next. I learned this from watching professional cookie decorators on YouTube, and it honestly changed my life.
Plan for drying time. These cookies need at least 2-3 hours for the icing to set completely. If you’re making them for Thanksgiving, do the decorating the day before. The cookies actually taste better the next day anyway—the flavors meld and the texture softens slightly.
Variations & Adaptations
One of the best things about this recipe is how easily it adapts. Here are some variations I’ve tried and loved:
Gluten-Free Version: Substitute the all-purpose flour with a 1:1 gluten-free baking blend. I’ve used both Bob’s Red Mill and King Arthur Flour’s gluten-free blends with great results. Add an extra tablespoon of butter since gluten-free flours tend to be more absorbent. The cookies will be slightly more crumbly but still delicious.
Vegan Hand Turkeys: Use vegan butter sticks (I like Miyoko’s) and replace the egg with a flax egg (1 tablespoon ground flaxseed mixed with 3 tablespoons water, let sit for 5 minutes). For the royal icing, use aquafaba (the liquid from a can of chickpeas) instead of meringue powder—3 tablespoons of aquafaba whipped with powdered sugar works beautifully.
Chocolate Sugar Cookie Base: Replace 1/3 cup of the flour with unsweetened cocoa powder. This gives you chocolate turkeys that look especially striking with bright colored icing and candy corn feathers. My nephew declared these “the best turkeys ever” and ate four in one sitting.
Mini Hand Turkeys: For younger kids or party favors, use children’s smaller handprints and reduce baking time to 6-7 minutes. These are perfect for classroom parties or as place card holders at the Thanksgiving table.
Spiced Sugar Cookies: Add 1 teaspoon cinnamon, 1/2 teaspoon nutmeg, and 1/4 teaspoon cloves to the flour mixture. This gives the cookies a warm, autumnal flavor that pairs perfectly with the Thanksgiving theme. I made these one year when I accidentally bought pumpkin pie spice instead of cinnamon—best mistake I ever made.
Serving & Storage Suggestions
These cookies are best served at room temperature, which lets the icing stay firm while the cookie underneath stays tender. Arrange them on a platter with the turkey “feet” pointing toward the center for a cute presentation—it looks like they’re all gathered around a table. For an extra festive touch, place them on a bed of autumn-colored sprinkles or alongside mini pumpkins and fall leaves.
Storage: Store decorated cookies in a single layer in an airtight container at room temperature for up to 5 days. If you need to stack them, place a sheet of parchment paper between layers. Do not refrigerate—the moisture in the fridge can make the icing sticky and cause the colors to bleed. I learned this when my beautiful turkeys turned into a rainbow mess overnight.
Freezing Instructions: You can freeze the undecorated baked cookies for up to 3 months. Wrap them tightly in plastic wrap, then place in a freezer-safe bag. When ready to decorate, thaw at room temperature for about an hour, then proceed with icing. The cookies will taste freshly baked. I always make a double batch in early November and freeze half for Thanksgiving week—it saves so much stress.
Re-crisping Tip: If your cookies have softened after a few days, pop them in a 300°F (150°C) oven for 3-4 minutes. Let them cool completely before serving. This works best with undecorated cookies, but if the icing is fully set, it can handle a quick warm-up.
The flavors actually develop over time—the butter and vanilla meld together, and the almond extract (if you used it) becomes more pronounced. I honestly prefer these cookies on day two or three, when they’ve had time to settle. Just make sure to hide a few for yourself before the crowd descends.
Nutritional Information & Benefits
Let’s be honest—these are a treat, not a health food. But here’s the approximate nutritional breakdown per cookie (based on a medium adult handprint size):
| Nutrient | Amount per Cookie |
|---|---|
| Calories | 285 |
| Total Fat | 12g |
| Saturated Fat | 7g |
| Carbohydrates | 42g |
| Sugar | 28g |
| Protein | 3g |
| Sodium | 110mg |
On the bright side, the butter provides a small amount of vitamin A, and the egg adds protein. If you use almond extract, you get a tiny dose of antioxidants. The real benefit here is emotional—there’s something genuinely therapeutic about decorating cookies with loved ones. The laughter, the creativity, the messy fingers—that’s the nutrition that matters most during the holidays.
For those with dietary concerns: these cookies contain wheat, dairy, and eggs. The royal icing made with meringue powder is pasteurized and safe for all ages. If you’re avoiding artificial colors, use natural food colorings from brands like Watkins or India Tree—they work beautifully with royal icing.
Conclusion
These Cozy Thanksgiving Hand Turkey Sugar Cookies aren’t just about the final product—they’re about the process. The flour on the counter, the laughter when someone’s turkey ends up with six fingers, the quiet pride when a five-year-old presents their creation like it’s a museum piece. That’s what makes this recipe special. It’s not the most elegant dessert you’ll ever make, and that’s exactly the point.
I’ve made these cookies with toddlers who ate more sprinkles than they placed, with teenagers who rolled their eyes but secretly loved it, and with grandparents who remembered doing the same craft as children. Every single time, someone says “this is the best part of Thanksgiving.” And honestly? I think they’re right.
So go ahead—get your hands dirty. Let the kids loose with the frosting. Make a mess. Take pictures of the ridiculous turkeys. And when someone asks why the cookies look a little lopsided or the feathers are wonky, just smile and say “that’s the handprint of the person who made it.” Because that’s the whole point of Thanksgiving, isn’t it? Imperfect, beautiful, handmade, and full of love.
I’d love to see your hand turkey creations! Drop a comment below with your decorating stories, or tag me in your photos. And if you have a variation I haven’t tried, please share it—I’m always looking for new ways to make these cookies even better. Happy Thanksgiving, friends. Go make some memories.
Frequently Asked Questions
Can I make the dough ahead of time?
Absolutely. The sugar cookie dough can be refrigerated for up to 3 days or frozen for up to 3 months. Just wrap it tightly in plastic wrap and then in foil. When you’re ready to use it, thaw overnight in the refrigerator. The dough actually gets easier to work with after a day or two in the fridge—the flavors meld and the gluten relaxes.
My cookies spread too much. What went wrong?
This usually happens for one of three reasons: the dough wasn’t chilled long enough, the butter was too soft when you creamed it, or your baking sheet was still warm from a previous batch. Make sure to chill the dough for at least 2 hours, use butter that’s softened but not melted, and always start with a cool baking sheet. If your kitchen is warm, pop the shaped cookies in the fridge for 10 minutes before baking.
Can I use store-bought sugar cookie dough?
You can, but I don’t recommend it for hand-shaped cookies. Store-bought dough tends to spread more than homemade, and the flavor isn’t as good. If you’re short on time, look for a refrigerated sugar cookie dough that’s labeled “cut-out” style—those hold their shape better. Just know that the texture and taste won’t be quite the same.
How do I transport these cookies without breaking them?
Let the icing dry completely—overnight is best. Place the cookies in a single layer in a sturdy container with a tight-fitting lid. If you need to stack them, put a piece of wax paper or parchment between layers. For extra protection, you can nestle crumpled parchment paper around the edges to prevent shifting. I’ve transported these cookies across town without any casualties using this method.
My royal icing is too runny. Can I fix it?
Yes! Just add more powdered sugar, one tablespoon at a time, until it reaches the right consistency. If it’s too thick, add water one drop at a time. The key is to make small adjustments—you can always add more, but you can’t take it out. Test the consistency on a piece of parchment before you start decorating.
Pin This Recipe!
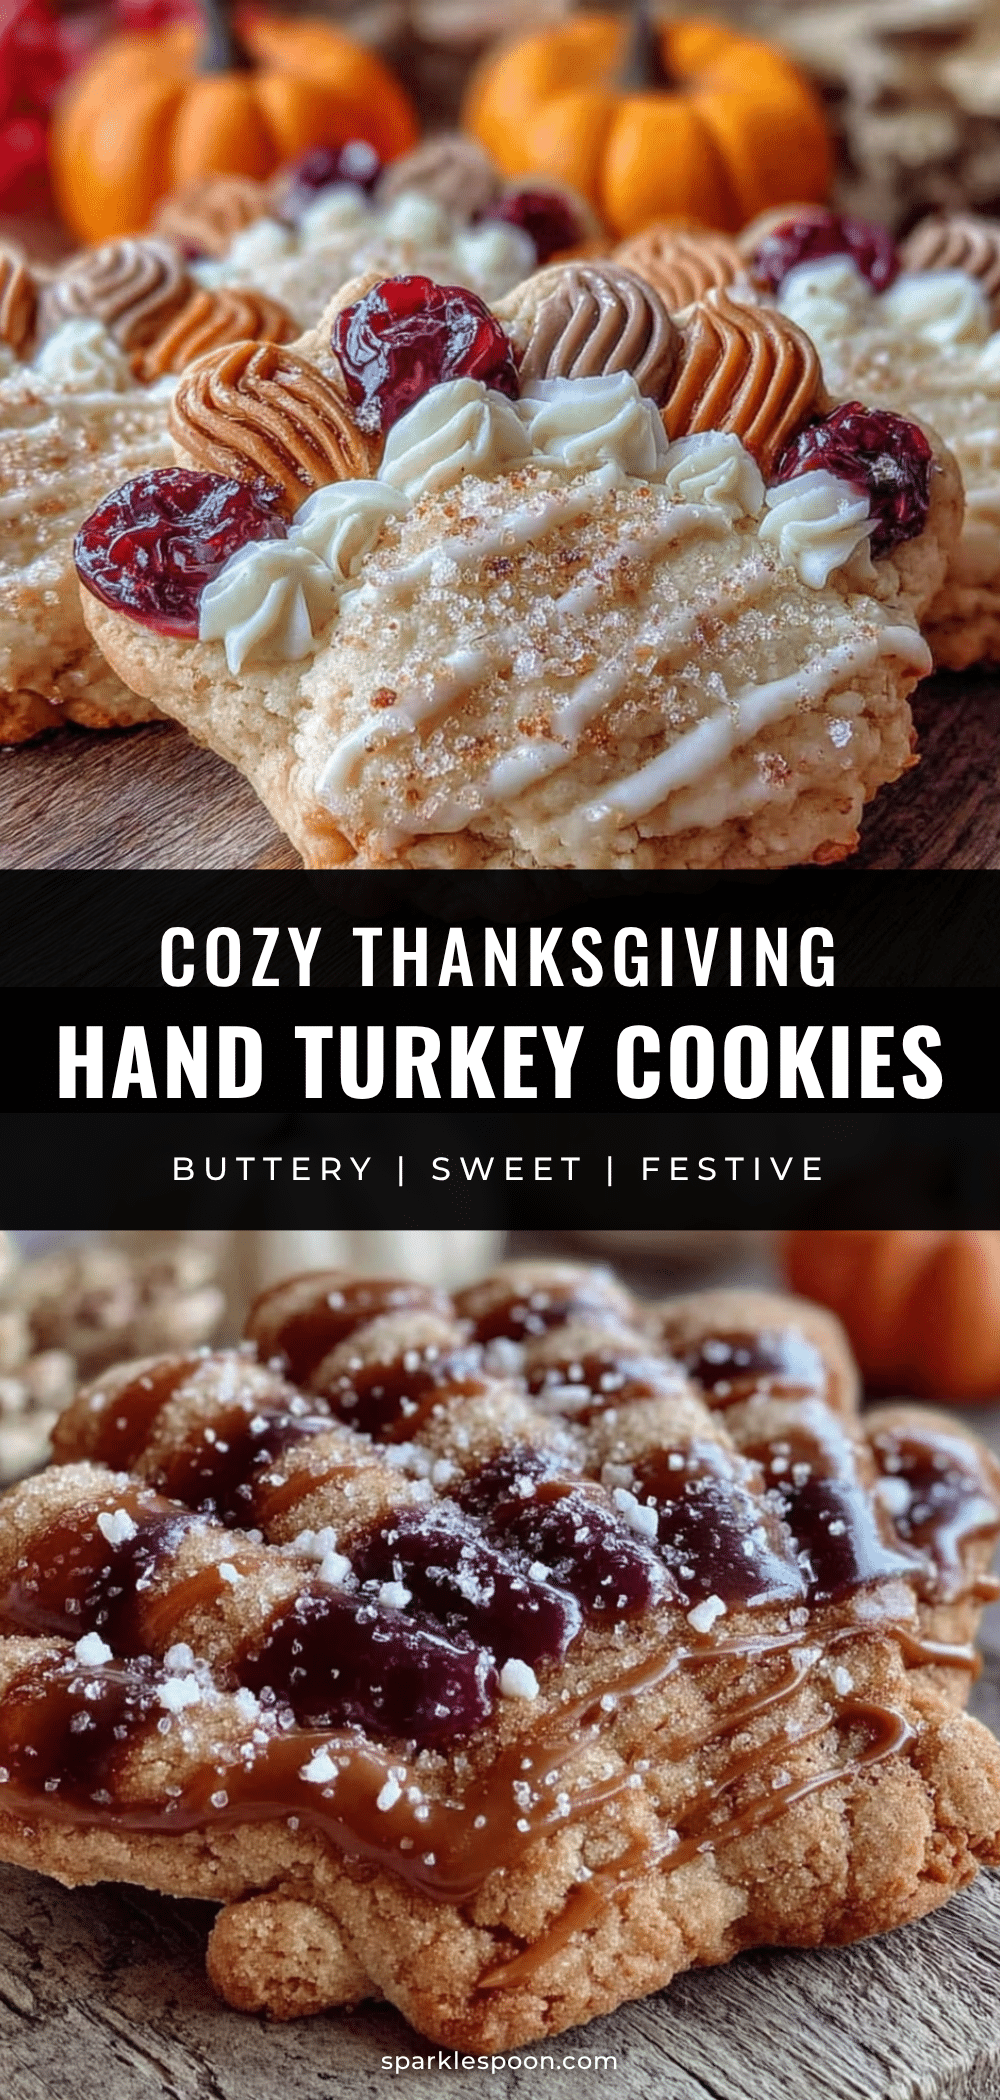
Cozy Thanksgiving Hand Turkey Sugar Cookies – Easy Homemade Recipe

These hand turkey sugar cookies are a fun, nostalgic Thanksgiving activity that turns cookie decorating into a memorable family project. With a buttery, tender sugar cookie base and colorful royal icing, each cookie is unique and delicious.
- Prep Time: 30 minutes
- Cook Time: 10 minutes
- Total Time: 2 hours 40 minutes (includes chilling and decorating time)
- Yield: 12 servings 1x
- Category: Dessert
- Cuisine: American
Ingredients
- 3 cups all-purpose flour (375 grams)
- 1 teaspoon baking powder
- 1/2 teaspoon salt
- 1 cup unsalted butter, softened (2 sticks, 226 grams)
- 1 cup granulated sugar (200 grams)
- 1 large egg, room temperature
- 1 teaspoon vanilla extract
- 1/2 teaspoon almond extract (optional but recommended)
- 4 cups powdered sugar (480 grams)
- 3 tablespoons meringue powder
- 5–6 tablespoons warm water
- 1/2 teaspoon cream of tartar
- Food coloring gels (red, orange, yellow, brown, green)
- Candy corn
- Mini chocolate chips or candy eyes
- Orange decorating sugar or small orange candies
- Piping bags or zip-top bags
Instructions
- In a medium bowl, whisk together the flour, baking powder, and salt. Set aside.
- In a large mixing bowl, beat the softened butter and granulated sugar together on medium speed until light and fluffy, about 3 minutes. Scrape down the sides, then add the egg, vanilla extract, and almond extract if using. Beat until combined, about 1 minute.
- Gradually add the dry ingredients to the wet mixture, mixing on low speed until just combined. Do not overmix.
- Divide the dough into two equal discs, wrap each tightly in plastic wrap, and refrigerate for at least 2 hours (overnight is better).
- Preheat oven to 350°F (175°C). Line baking sheets with parchment paper.
- Lightly flour your work surface and rolling pin. Roll one disc of dough to about 1/4-inch thickness.
- Have each person press their hand firmly onto the dough to create an imprint. Using a sharp knife or pizza cutter, carefully cut around the handprint, leaving about 1/2 inch of dough around the fingers.
- Transfer the hand-shaped cookie to the prepared baking sheet using a thin spatula. Repeat with remaining dough, re-rolling scraps as needed. Place cookies about 2 inches apart.
- Bake for 8-10 minutes, or until the edges are just barely golden. Let cool on the baking sheet for 5 minutes, then transfer to wire cooling racks to cool completely.
- While the cookies cool, make the royal icing: In a large bowl, combine the powdered sugar, meringue powder, and cream of tartar. Add 5 tablespoons of warm water and beat on low speed until combined, then increase to medium-high and beat for 4-5 minutes until thick, glossy, and forms stiff peaks. Add more water, one teaspoon at a time, if needed.
- Divide the icing into separate bowls and tint with gel food coloring: brown for the turkey body, orange for the beak and feet, red for the wattle, and various colors for the feathers.
- Using brown icing, pipe the turkey body in the center of the palm area. Use orange icing to pipe a small triangle beak and two little feet at the base. Add a tiny red wattle under the beak with red icing. Attach mini chocolate chips or candy eyes for the eyes.
- Pipe colored icing along each finger to represent feathers. While the icing is still wet, press candy corn into the icing along the fingers—pointy ends facing outward.
- Let the decorated cookies sit at room temperature for 2-3 hours, or until the icing is completely hard and set.
Notes
Chill the dough for at least 2 hours to prevent spreading. For best results, chill shaped cookies for 10 minutes before baking. Royal icing needs 2-3 hours to set completely. Cookies taste even better the next day. Store in an airtight container at room temperature for up to 5 days. Do not refrigerate.
Nutrition
- Serving Size: 1 cookie
- Calories: 285
- Sugar: 28
- Sodium: 110
- Fat: 12
- Saturated Fat: 7
- Carbohydrates: 42
- Protein: 3
Keywords: Thanksgiving cookies, hand turkey cookies, sugar cookies, holiday baking, kid-friendly, decorated cookies, turkey cookies



