Love this? Save it for later!
Share the inspiration with your friends
The neighborhood Halloween potluck was in six hours and I’d completely forgotten. Everyone else would be bringing those elaborate, bakery-style treats—you know the ones, with the perfect fondant ghosts and hand-piped spider webs. I had a half-empty bag of chocolate chips, a stick of butter, and absolutely no time. Honestly, I almost just grabbed a bag of candy from the gas station and called it a day.
But then I spotted my kid’s leftover Halloween cookie cutters, and a slightly frantic idea started forming. I mean, what if I made something that looked like it took all day, but actually came together in the time it took to preheat the oven? That’s how these Cozy Spider Cookies with Chocolate Cookie Legs were born. I was basically throwing things into a bowl, praying to the baking gods, and hoping for the best.
The potluck was held at my neighbor Carol’s house—she’s the type who labels her dip with cute little flags. I walked in with my slightly lopsided spider cookies, feeling like I was bringing a crayon drawing to an art gallery. But you know what? By the end of the night, Carol was asking for the recipe, and I had three people tell me these were the cutest things they’d ever seen. The secret, I realized, was that these cookies don’t try to be perfect. They’re charmingly messy, just like a real spider web. And honestly, that’s what makes them so cozy. Let me tell you, this recipe has become my go-to for every fall gathering since.
Why You’ll Love This Recipe
These Cozy Spider Cookies with Chocolate Cookie Legs aren’t just another Halloween treat. They’re a whole vibe. I’ve tested this recipe about six times now—my family is sick of spiders, but they keep eating them, so I think that’s a win. Here is why this version is the one you’ll come back to year after year:
- Quick & Easy: From start to finish, you’re looking at about 35 minutes. No chilling the dough, no complicated piping. Perfect for that “oh no, the school party is tomorrow” panic.
- Simple Ingredients: You probably have everything already. Butter, sugar, flour, cocoa powder, and some chocolate chips. No weird specialty items that you’ll use once and then forget about.
- Perfect for Halloween: These are great for classroom parties, office potlucks, or just a cozy night in with a scary movie. They’re spooky without being, you know, actually scary.
- Crowd-Pleaser: Kids love them because they look like spiders. Adults love them because they taste like a really good chocolate cookie. It’s a win-win.
- Unbelievably Delicious: The texture is this perfect mix of soft and chewy, with a slight crunch from the chocolate legs. The flavor is deep, rich chocolate that isn’t too sweet.
What makes these different from every other spider cookie out there? It’s the technique. I use a specific ratio of cocoa to flour that gives the cookie a dark, dramatic color without making it bitter. And the chocolate legs? I’ve figured out the exact way to press them in so they stay put during baking. No sad, legless spiders here.
This isn’t just a cookie—it’s the kind that makes you feel like you’ve got your act together, even when you’re just winging it. It’s comfort food with a spooky twist, perfect for turning a simple Tuesday into something memorable.
What Ingredients You Will Need
This recipe uses simple, pantry-friendly ingredients to create a cookie that’s both visually striking and deeply satisfying. The magic is in how these ordinary things come together to look like something extraordinary.
- Unsalted butter, softened (1 cup / 226g) – I always use unsalted so I can control the salt level. Let it sit out for about 30 minutes before you start. Trust me, cold butter will ruin the texture.
- Granulated sugar (1 cup / 200g) – Regular white sugar gives the cookies that perfect slightly crisp edge. You could use coconut sugar, but the color won’t be as dark.
- Large egg (1, room temperature) – This helps bind everything together. If you forget to take it out of the fridge, just put it in a bowl of warm water for 5 minutes.
- Vanilla extract (1 teaspoon) – Pure vanilla makes a difference here. I use Nielsen-Massey, but any good brand works.
- All-purpose flour (1 ½ cups / 180g) – Spoon and level it. Don’t scoop directly from the bag, or you’ll end up with dense cookies.
- Unsweetened cocoa powder (½ cup / 50g) – This is the key to the dark, spooky color. I recommend Hershey’s Special Dark for the richest color, but regular Dutch-process works great too.
- Baking soda (½ teaspoon) – Make sure it’s fresh. If it doesn’t fizz when you mix it with vinegar, toss it.
- Salt (¼ teaspoon) – Don’t skip this. It balances the sweetness and makes the chocolate flavor pop.
- Chocolate chips for legs (about ½ cup / 85g) – You’ll need 8 chocolate chips per cookie. I use semi-sweet, but milk chocolate is fine too. The point is they need to hold their shape when baked.
- Candy eyes (2 per cookie) – These are optional, but honestly, they make the cookies. You can find them at any craft store or online.
For the chocolate legs, I’ve tested a few options. Wilton melting wafers work really well because they don’t spread too much. But honestly, regular semi-sweet chips are my favorite. They get slightly soft in the oven but keep their shape, creating a perfect little spider leg.
If you’re gluten-free, you can substitute a 1:1 gluten-free flour blend. Just know the cookies might spread a tiny bit more. And for a dairy-free version, use vegan butter and dairy-free chocolate chips. I’ve done it, and they still taste amazing.
Equipment Needed
You don’t need a ton of fancy equipment for these Cozy Spider Cookies with Chocolate Cookie Legs. That’s part of the beauty. Here’s what you’ll need:
- Large mixing bowl – Any bowl works. I use a ceramic one because it feels more cozy.
- Electric hand mixer or stand mixer – You can do this by hand, but your arm will get tired. A hand mixer is perfect.
- Baking sheets (2) – I recommend light-colored metal sheets. Dark ones can cause the bottoms to burn.
- Parchment paper or silicone baking mats – Silicone mats are my favorite. They prevent spreading and make cleanup a breeze.
- Cookie scoop or tablespoon – A 1.5-tablespoon scoop ensures evenly sized cookies.
- Cooling rack – Essential for getting that perfect texture. Don’t skip this.
- Small offset spatula – Not required, but it helps transfer the cookies without breaking the legs.
I’ve made these with just a fork and a bowl before. It’s totally doable. The cookies won’t be as uniform, but they’ll taste just as good. Sometimes the imperfect ones are the cutest anyway.
Preparation Method
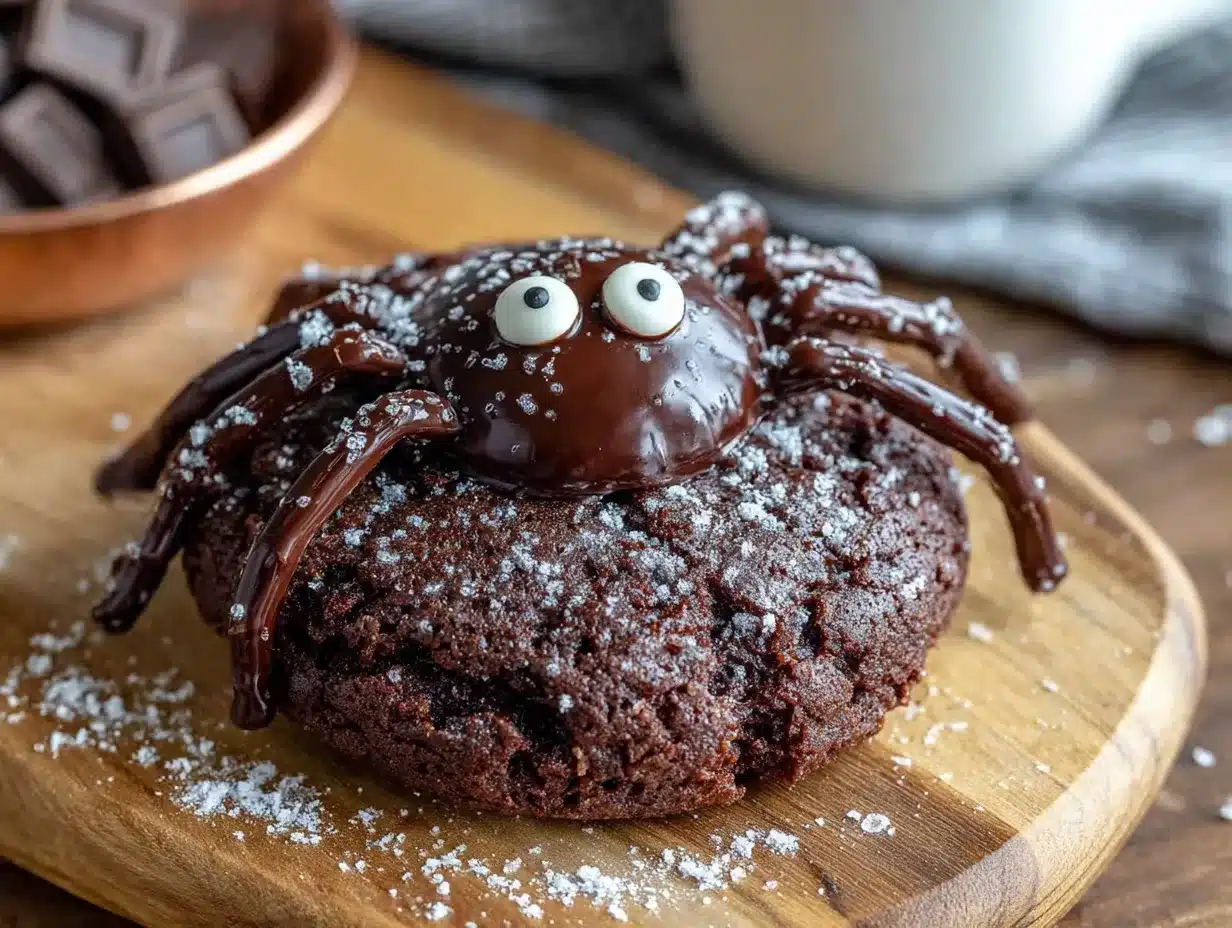
Let’s make some spiders! This process is straightforward, but I’ll walk you through every step so you get perfect cookies every time.
- Preheat your oven to 350°F (175°C). Line two baking sheets with parchment paper or silicone mats. This is important—don’t skip the lining, or the cookies will stick.
- Cream the butter and sugar. In your large mixing bowl, beat the softened butter and granulated sugar together until light and fluffy. This takes about 2-3 minutes with a hand mixer. You’re looking for a pale, creamy texture. Scrape down the sides of the bowl halfway through.
- Add the egg and vanilla. Crack in the room-temperature egg and add the vanilla extract. Beat on medium speed until fully combined, about 30 seconds. The mixture might look a little separated at this point—that’s totally normal.
- Mix the dry ingredients. In a separate bowl, whisk together the flour, cocoa powder, baking soda, and salt. This ensures the baking soda is evenly distributed. If you skip this step, you might get a cookie that’s flat in one spot and puffy in another.
- Combine wet and dry. Gradually add the dry ingredients to the wet mixture, mixing on low speed. Stop as soon as the dough comes together. Overmixing will make the cookies tough. The dough should be soft but not sticky. If it feels too sticky, add a tablespoon more flour.
- Scoop the dough. Use your cookie scoop to portion out 1.5-tablespoon balls of dough. Place them about 2 inches apart on the prepared baking sheets. You should get about 16 cookies total. I usually get 14-16, depending on how generous I’m feeling.
- Add the chocolate legs. Here’s the tricky part. Take 8 chocolate chips per cookie and gently press them into the dough, arranging them like spider legs. Place 4 on each side, angled slightly outward. Press them in about halfway—if you push them all the way in, they’ll disappear during baking. This takes a little patience, but it’s worth it.
- Bake the cookies. Bake for 10-12 minutes. At 10 minutes, the cookies should look set around the edges but still soft in the center. They will continue to cook on the hot baking sheet after you take them out. If you overbake them, they’ll be crispy instead of chewy.
- Cool on the baking sheet. Let the cookies rest on the baking sheet for 5 minutes. This is crucial. If you try to move them immediately, the chocolate legs will slide right off. After 5 minutes, transfer them to a cooling rack to cool completely.
- Add the eyes. Once the cookies are completely cool, use a tiny dab of melted chocolate or frosting to attach two candy eyes to each spider. I use a toothpick for precision. Place them close together near the front of the cookie.
One thing I learned the hard way: don’t overcrowd the baking sheet. These cookies spread more than you think, and if they touch, you’ll end up with a spider blob instead of individual creatures. Bake them in batches if you need to.
Cooking Tips & Techniques
After making these Cozy Spider Cookies with Chocolate Cookie Legs about a dozen times, I’ve picked up a few tricks that make a real difference.
The butter temperature is everything. I cannot stress this enough. If your butter is too cold, the dough won’t cream properly and your cookies will be dense. If it’s too soft (like, almost melted), the cookies will spread into flat puddles. You want it soft enough that your finger leaves an indent, but not so soft that it’s greasy. Leave it on the counter for 30-45 minutes before you start.
The chocolate leg placement. This was my biggest failure the first time. I pushed the chips in too deep, and they just melted into the cookie. You want to press them in so they’re about halfway submerged. The top half of the chip should still be visible. Also, angle them slightly outward from the center. It makes them look more like real spider legs.
Don’t overbake. I know it’s tempting to leave them in for that extra minute, but resist. The cookies will look slightly underdone when you take them out. That’s exactly what you want. They’ll set up perfectly as they cool. Overbaked cookies mean dry, crumbly spiders, and nobody wants that.
Chill the dough if needed. If your kitchen is warm or your dough feels too soft, pop the scooped cookies in the fridge for 15 minutes before baking. This helps them hold their shape and prevents excessive spreading. I do this when I’m baking on a humid day.
The candy eye trick. I once tried to press the eyes in before baking. Don’t do it. They melt and look like weird, goopy monster eyes. Always add them after baking with a tiny bit of melted chocolate as glue. It takes an extra minute but looks so much better.
One time, I forgot to add the baking soda. The cookies came out like little chocolate hockey pucks. My kids still ate them, but they were not pretty. So, double-check your ingredients before you start.
Variations & Adaptations
These Cozy Spider Cookies with Chocolate Cookie Legs are surprisingly versatile. Here are some ways to make them your own:
- Peanut Butter Spider Cookies: Swap out ¼ cup of the butter for creamy peanut butter. The peanut butter adds a savory note that pairs beautifully with the chocolate. Just know the cookies will spread a bit more, so add an extra tablespoon of flour.
- Gluten-Free Version: Use a 1:1 gluten-free flour blend. I’ve tested this with King Arthur Measure for Measure, and it works perfectly. The texture is slightly more tender, but the spiders still hold their shape.
- Vegan Adaptation: Use vegan butter (I like Earth Balance) and a flax egg (1 tablespoon ground flaxseed mixed with 3 tablespoons water). The cookies will be a little less rich, but they’re still delicious. Use dairy-free chocolate chips for the legs.
- Spooky White Chocolate Spiders: Use white chocolate chips for the legs instead of semi-sweet. The contrast of the dark cookie against the white legs is really striking. Add a drop of black food coloring to the dough for an even more dramatic look.
- Mint Chocolate Spiders: Add ½ teaspoon of peppermint extract along with the vanilla. It gives the cookies a refreshing, holiday-esque twist. These are great for Christmas, not just Halloween.
- Double Chocolate Spiders: Fold in ½ cup of mini chocolate chips into the dough before scooping. It makes the cookies extra fudgy and decadent. My personal favorite.
I tried a version with crushed Oreos mixed into the dough once. It was delicious, but the cookies fell apart a little. So, if you want to try that, add an extra tablespoon of flour to help bind everything together.
Serving & Storage Suggestions
These Cozy Spider Cookies with Chocolate Cookie Legs are best served at room temperature. The texture is perfectly chewy, and the chocolate legs are firm but not hard. I like to arrange them on a platter with some fake spiderwebs or autumn leaves for a fun presentation. They’re great for Halloween parties, classroom treats, or just a cozy night in with a cup of hot cocoa.
For drinks, these pair beautifully with a cold glass of milk, a warm chai latte, or even a pumpkin spice coffee. The rich chocolate flavor is balanced by the sweetness of the drink. If you’re feeling fancy, serve them with a scoop of vanilla ice cream for an extra special dessert.
Storage: Store the cookies in an airtight container at room temperature for up to 5 days. Layer them with parchment paper to prevent the chocolate legs from sticking together. Do not refrigerate them—the fridge dries out the cookies and makes them lose their chewy texture.
Freezing: You can freeze the baked cookies for up to 3 months. Place them in a single layer on a baking sheet and freeze until solid, then transfer to a freezer-safe bag. Thaw at room temperature for about 30 minutes before serving. The chocolate legs might get a little condensation, but they’ll still taste great.
Make Ahead: You can prep the dough up to 2 days in advance. Scoop the dough balls, place them on a baking sheet, and cover with plastic wrap. When you’re ready to bake, just add the chocolate legs and pop them in the oven. You might need to add an extra minute to the bake time if the dough is cold.
One thing I’ve noticed: these cookies actually taste better the next day. The flavors meld together, and the texture becomes even more chewy. So if you can resist eating them all, they’re even better on day two.
Nutritional Information & Benefits
Let’s be real—these are cookies, not health food. But here’s the nutritional breakdown for one cookie (based on 16 cookies):
| Nutrient | Amount |
|---|---|
| Calories | 185 |
| Total Fat | 10g |
| Saturated Fat | 6g |
| Cholesterol | 35mg |
| Sodium | 95mg |
| Total Carbohydrates | 24g |
| Dietary Fiber | 1g |
| Sugars | 14g |
| Protein | 2g |
While these aren’t exactly a health food, the cocoa powder does contain antioxidants called flavonoids, which can support heart health. The butter provides vitamin A, and the egg gives you a little protein. Honestly, I think the biggest benefit is the joy they bring. A little treat now and then is good for the soul.
For those with dietary restrictions, this recipe contains gluten, dairy, and eggs. The variations above offer alternatives for each. Always check your chocolate chips for potential allergens—some brands process them on shared equipment with nuts or soy.
Conclusion
These Cozy Spider Cookies with Chocolate Cookie Legs are proof that you don’t need hours of prep or fancy skills to create something truly special. They came from a moment of panic and turned into my most-requested Halloween recipe. That’s the thing about baking—sometimes the best recipes come from the messiest situations.
I love how these cookies make people smile. They’re spooky but not scary, cute but not fussy. They’re the kind of treat that brings a little magic to an ordinary day. Whether you’re making them for a party or just for yourself (no judgment here), I hope they bring you the same cozy joy they’ve brought me.
Now I want to hear from you! Have you tried these Cozy Spider Cookies? Did you add your own twist? Drop a comment below and let me know how they turned out. And if you share a photo on Pinterest, tag me—I’d love to see your spider creations. Happy baking, friends!
Frequently Asked Questions
Can I use a different type of chocolate for the legs?
Absolutely. Milk chocolate, dark chocolate, or even white chocolate chips all work. Just make sure they’re sturdy enough to hold their shape. I wouldn’t recommend chocolate chunks or chopped chocolate, as they can melt into uneven shapes.
My cookies spread too much. What went wrong?
This usually happens for one of three reasons: your butter was too soft, your dough wasn’t chilled, or your baking soda is old. Next time, try chilling the scooped dough for 15-20 minutes before baking. Also, make sure your butter is softened but not melted.
Can I make these cookies ahead of time?
Yes! You can prepare the dough up to 2 days in advance and store it in the fridge. You can also freeze the baked cookies for up to 3 months. Just thaw them at room temperature before serving.
How do I keep the chocolate legs from falling off?
Make sure you press the chips in about halfway, and let the cookies cool completely on the baking sheet before moving them. The 5-minute rest on the hot sheet helps the chocolate set. If they still fall off, you can reattach them with a tiny dab of melted chocolate.
Can I make these without candy eyes?
Of course! The cookies are still adorable without them. You can pipe little eyes with white and black icing, or just leave them plain. They’ll look like cute little chocolate spiders either way.
Pin This Recipe!
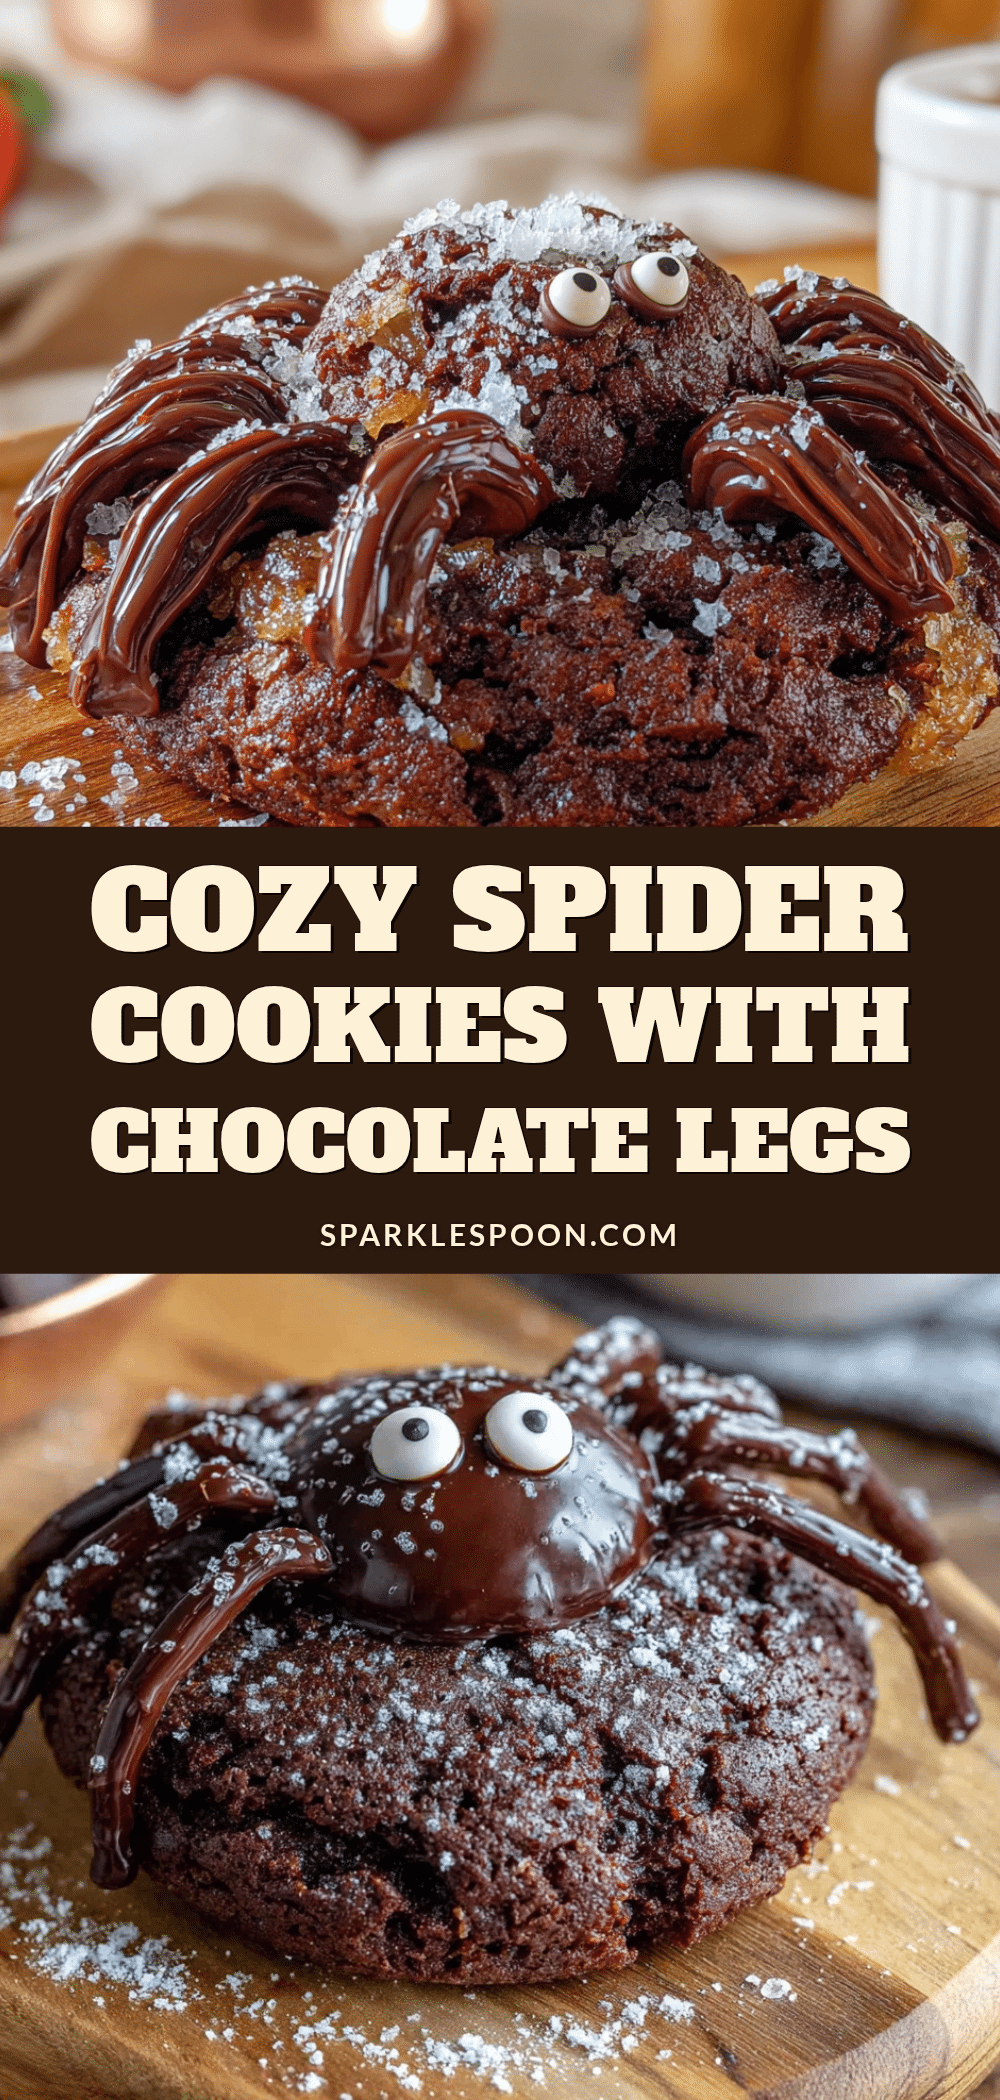
Cozy Spider Cookies with Chocolate Legs: Easy Halloween Treat
These Cozy Spider Cookies with Chocolate Cookie Legs are a quick and easy Halloween treat that looks like it took all day but comes together in about 35 minutes. With a deep, rich chocolate flavor and charmingly messy spider legs, they’re perfect for parties, potlucks, or a cozy night in.
- Prep Time: 15 minutes
- Cook Time: 12 minutes
- Total Time: 35 minutes
- Yield: 16 cookies 1x
- Category: Dessert
- Cuisine: American
Ingredients
- 1 cup (226g) unsalted butter, softened
- 1 cup (200g) granulated sugar
- 1 large egg, room temperature
- 1 teaspoon vanilla extract
- 1 ½ cups (180g) all-purpose flour
- ½ cup (50g) unsweetened cocoa powder
- ½ teaspoon baking soda
- ¼ teaspoon salt
- ½ cup (85g) chocolate chips (for legs)
- Candy eyes (2 per cookie)
Instructions
- Preheat your oven to 350°F (175°C). Line two baking sheets with parchment paper or silicone mats.
- In a large mixing bowl, beat the softened butter and granulated sugar together until light and fluffy, about 2-3 minutes. Scrape down the sides halfway through.
- Add the room-temperature egg and vanilla extract. Beat on medium speed until fully combined, about 30 seconds.
- In a separate bowl, whisk together the flour, cocoa powder, baking soda, and salt.
- Gradually add the dry ingredients to the wet mixture, mixing on low speed until just combined. Do not overmix.
- Use a cookie scoop to portion out 1.5-tablespoon balls of dough. Place them about 2 inches apart on the prepared baking sheets. You should get about 16 cookies.
- Take 8 chocolate chips per cookie and gently press them into the dough, arranging them like spider legs (4 on each side, angled slightly outward). Press them in about halfway.
- Bake for 10-12 minutes. The cookies should look set around the edges but still soft in the center.
- Let the cookies rest on the baking sheet for 5 minutes, then transfer to a cooling rack to cool completely.
- Once completely cool, use a tiny dab of melted chocolate or frosting to attach two candy eyes to each spider.
Notes
Butter should be softened but not melted. For best results, chill the scooped dough for 15 minutes if your kitchen is warm. Do not overbake; cookies will continue to set on the hot sheet. Add candy eyes after baking to prevent melting.
Nutrition
- Serving Size: 1 cookie
- Calories: 185
- Sugar: 14
- Sodium: 95
- Fat: 10
- Saturated Fat: 6
- Carbohydrates: 24
- Fiber: 1
- Protein: 2
Keywords: spider cookies, Halloween cookies, chocolate cookies, easy Halloween treat, cozy spider cookies



