Love this? Save it for later!
Share the inspiration with your friends
I was standing in line at the post office—of all places—two days before Valentine’s Day, clutching a package of late birthday cards and feeling the familiar holiday panic creeping in. The woman ahead of me had a bakery box tied with red string, and when she turned, I noticed her apron still dusted with flour. She caught me staring and laughed. “Don’t judge,” she said. “I’m a tax accountant by day, but on February 13th, I turn into the Cupcake Fairy.”
Her name was Carol, and she spent the next fifteen minutes—while the line crawled forward—telling me about her red velvet cupcakes. Not just any red velvet, mind you. These were heart-shaped, baked in a special pan her grandmother had passed down, and frosted with a cream cheese buttercream that she described as “the thing people fight over at parties.” I wasn’t expecting baking advice from a tax accountant in a post office line, but there I was, holding my late birthday cards, listening to her describe exactly how to make red velvet heart cupcakes for Valentine’s Day.
Honestly, I almost forgot to mail my packages. I scribbled her tips on the back of an envelope—cream cheese at room temperature, don’t overmix the batter, and for goodness’ sake, use a heart-shaped cookie cutter to trim the tops if your pan isn’t heart-shaped. I tried her method that same night, and let me tell you, it worked so well that I’ve been making these Best Red Velvet Heart Cupcakes for Valentine’s Day ever since. They’re the kind of treat that makes people close their eyes after the first bite. Maybe you’ve been there—that moment when a recipe comes from the most unexpected source and becomes your go-to forever.
Why You’ll Love This Recipe
These aren’t just pretty cupcakes. After testing this recipe at least a dozen times across different ovens and altitudes, I can tell you with confidence that these red velvet heart cupcakes deliver on every level. Here’s why they stand out:
- Quick & Easy: From start to finish, you’re looking at about 45 minutes. The batter comes together in one bowl with no complicated techniques. Perfect for busy weeknights or last-minute Valentine’s Day cravings.
- Simple Ingredients: No fancy grocery trips needed. Cocoa powder, buttermilk, vinegar, and red food coloring are all pantry-friendly staples. You likely have everything in your kitchen right now.
- Perfect for Valentine’s Day: These heart-shaped beauties are made for the occasion. Whether you’re surprising a partner, baking with kids for a class party, or treating yourself—they fit the moment.
- Crowd-Pleaser: I’ve brought these to potlucks, book clubs, and even a Super Bowl party. Kids and adults alike reach for seconds. The cream cheese frosting is the star that keeps people coming back.
- Unbelievably Delicious: The texture is where this recipe shines. That classic red velvet crumb—tender, moist, with a subtle cocoa tang—paired with silky cream cheese buttercream. It’s next-level comfort food disguised as a fancy dessert.
What makes this different from other red velvet recipes? It’s the balance. So many red velvet cupcakes are either too dense or too sweet. This version uses a precise ratio of buttermilk to vinegar for that signature tender crumb, plus a touch of vanilla that rounds out the cocoa without overwhelming it. I’ve tested versions with less sugar, more cocoa, and different fats—this one won every time. It’s not just another cupcake. It’s the one you’ll make every Valentine’s Day from now on.
What Ingredients You Will Need
This recipe uses simple, wholesome ingredients to deliver that classic red velvet flavor and tender texture. Most are pantry staples, and I’ve included notes on substitutions where they work well.
For the Cupcakes
- All-purpose flour, 1 ½ cups (190g) – Spoon and level for accuracy. Too much flour makes dense cupcakes.
- Unsweetened cocoa powder, 2 tablespoons (10g) – Use natural cocoa, not Dutch-processed. The acidity reacts with the vinegar for the right crumb.
- Granulated sugar, 1 cup (200g) – Regular white sugar works best. I’ve tried coconut sugar, and it changes the color and texture too much.
- Baking soda, 1 teaspoon – Make sure it’s fresh. Old baking soda won’t give you that rise.
- Salt, ½ teaspoon – Fine sea salt dissolves evenly.
- Vegetable oil, ½ cup (120ml) – Neutral oil like canola or avocado oil. Melted coconut oil works too, but the flavor is slightly different.
- Buttermilk, ½ cup (120ml) – Shake it before measuring. If you don’t have buttermilk, add 1 tablespoon of lemon juice or vinegar to regular milk and let it sit for 5 minutes.
- Large eggs, 2, at room temperature – Cold eggs can seize the batter. Let them sit on the counter for 30 minutes.
- White vinegar, 1 teaspoon – This reacts with the baking soda for lift. Don’t skip it.
- Vanilla extract, 1 teaspoon – Pure vanilla makes a difference. I prefer Nielsen-Massey for its rich flavor.
- Red food coloring, 1 tablespoon (or gel equivalent) – Gel food coloring gives a deeper red without thinning the batter. I use Americolor Super Red.
For the Cream Cheese Buttercream
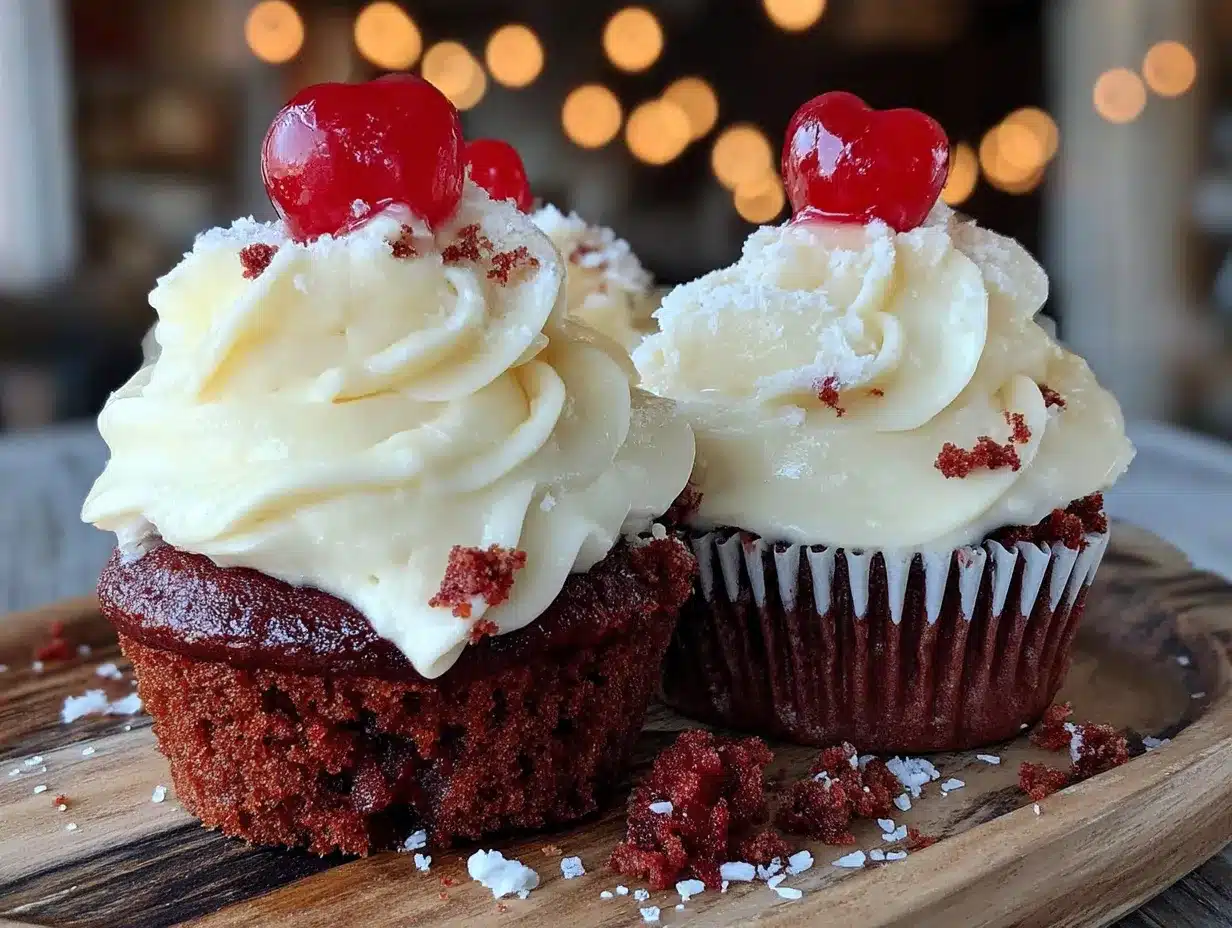
- Cream cheese, 8 ounces (226g), softened – Full-fat block cream cheese works best. Avoid the spreadable tub kind—it’s too soft.
- Unsalted butter, ½ cup (113g), softened – Let it soften on the counter for about an hour.
- Powdered sugar, 3 to 4 cups (360-480g) – Sift it if it’s lumpy. Start with 3 cups and add more for stiffer frosting.
- Vanilla extract, 1 teaspoon – Again, pure vanilla is worth it here.
- Pinch of salt – Balances the sweetness.
Equipment Needed
You don’t need a professional bakery setup for these red velvet heart cupcakes. Here’s what you’ll need:
- Heart-shaped cupcake pan – This is the easiest route. I found mine at a kitchen supply store for about $12. If you don’t have one, a standard muffin tin works—just use a heart-shaped cookie cutter to trim the cooled cupcakes.
- Standard 12-cup muffin tin – As a backup if you’re using the cookie cutter method.
- Paper liners – Heart-printed liners add a festive touch. I like the greaseproof ones from Wilton.
- Mixing bowls – One large bowl for dry ingredients, one medium for wet.
- Electric hand mixer or stand mixer – For the frosting. You can whisk it by hand, but your arm will thank you for using a mixer.
- Wire cooling rack – Essential for even cooling. Stacking hot cupcakes traps steam and makes them soggy.
- Piping bag with star tip – For that bakery-style swirl. A zip-top bag with the corner snipped off works in a pinch.
- Offset spatula – Makes frosting smooth and easy. A butter knife works too.
- Heart-shaped cookie cutter – Optional, but handy if you’re using a standard pan.
Budget-friendly tip: Skip the heart-shaped pan and use a standard muffin tin with heart-printed liners. The visual effect is still adorable, and you save money on specialty equipment.
Preparation Method
Follow these steps carefully, and you’ll have perfect red velvet heart cupcakes every time. I’ve included sensory cues so you know exactly what to look for at each stage.
- Preheat your oven to 350°F (175°C). Line your heart-shaped cupcake pan with paper liners. If using a standard pan, line it too—you’ll shape the hearts later.
- Whisk the dry ingredients together. In a large bowl, combine the flour, cocoa powder, sugar, baking soda, and salt. Whisk until everything is evenly distributed. The cocoa should disappear into the flour—no streaks. Set aside.
- Mix the wet ingredients. In a separate medium bowl, whisk together the vegetable oil, buttermilk, eggs, vinegar, vanilla extract, and red food coloring. Whisk until the mixture is smooth and uniformly red. It should look like a thick, glossy crimson liquid. Don’t worry if it seems thin—that’s normal.
- Combine wet and dry ingredients. Pour the wet mixture into the dry mixture. Use a rubber spatula to fold everything together gently. Mix just until no streaks of flour remain—about 15 to 20 strokes. Overmixing develops gluten and makes the cupcakes tough. The batter will be slightly lumpy, and that’s okay.
- Fill the liners. Divide the batter evenly among the 12 liners, filling each about two-thirds full. I use a cookie scoop for even portions. The batter should be thick but pourable.
- Bake for 18 to 22 minutes. The cupcakes are done when a toothpick inserted into the center comes out clean or with a few moist crumbs. The tops should spring back when lightly pressed. Don’t overbake—dry red velvet is sad red velvet.
- Cool completely. Let the cupcakes cool in the pan for 5 minutes, then transfer them to a wire cooling rack. Cool completely before frosting—at least 30 minutes. If you’re using the cookie cutter method, wait until they’re fully cool before cutting.
- Make the cream cheese buttercream. In a large bowl, beat the softened cream cheese and butter together with an electric mixer on medium speed until smooth and fluffy—about 2 minutes. Scrape down the sides. Add the vanilla and salt, then beat again. Gradually add the powdered sugar, 1 cup at a time, beating on low speed until incorporated. Increase to medium-high and beat for 2 minutes until light and airy. If the frosting is too soft, refrigerate it for 15 minutes before piping.
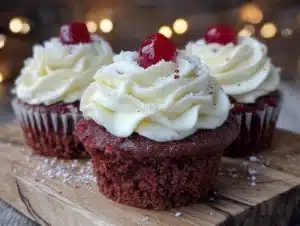
- Frost the cupcakes. Fit a piping bag with a star tip and fill it with the frosting. Pipe a swirl onto each cooled cupcake, starting from the outside and working inward. Or simply spread the frosting with an offset spatula for a rustic look.
- Add decorations (optional). Sprinkle with red sanding sugar, mini heart sprinkles, or a few chocolate shavings. A single fresh raspberry on top looks stunning.
Cooking Tips & Techniques
After making these red velvet heart cupcakes more times than I can count, I’ve learned a few things the hard way. Here’s what I wish someone had told me:
Room temperature ingredients matter more than you think. Cold eggs and cold cream cheese can make your batter seize and your frosting lumpy. I once tried to rush the process and ended up with frosting that looked like cottage cheese. Let everything sit on the counter for at least 30 minutes before starting.
Don’t overmix the batter. I know I said it already, but it’s worth repeating. Overmixing activates the gluten and gives you tough, rubbery cupcakes. Mix until the flour just disappears—a few lumps are fine. They’ll bake out.
Use gel food coloring for the best red. Liquid food coloring can thin the batter too much. Gel coloring gives a vibrant red without changing the consistency. I learned this after a batch of sad pink cupcakes that looked more like strawberry than red velvet.
Check your oven temperature. Ovens run hot or cold. An oven thermometer costs about $10 and saves you from overbaked disasters. My old oven ran 25 degrees hot, and I kept wondering why my cupcakes were dry.
Cool completely before frosting. Warm frosting on warm cupcakes melts into a puddle. I’ve done it. It’s messy. Wait until the cupcakes are completely cool to the touch—at least 30 minutes on a wire rack.
Pipe frosting immediately after making it. Cream cheese buttercream sets up as it chills. If you refrigerate it, let it sit at room temperature for 15 minutes and re-beat before piping.
Variations & Adaptations
One of the best things about these red velvet heart cupcakes is how adaptable they are. Here are some variations I’ve tested and loved:
Gluten-Free Version: Substitute the all-purpose flour with a 1:1 gluten-free baking flour blend. I’ve used Bob’s Red Mill with great results. Add ¼ teaspoon of xanthan gum if your blend doesn’t already include it.
Dairy-Free Version: Use dairy-free buttermilk (add 1 tablespoon of lemon juice to unsweetened almond milk) and replace the cream cheese with a vegan cream cheese alternative. Miyoko’s brand works beautifully. The texture is slightly less fluffy but still delicious.
Chocolate Lover’s Twist: Add ½ cup of mini chocolate chips to the batter. Fold them in gently after mixing. The little pockets of melted chocolate take these over the top.
Lemon-Raspberry Red Velvet: Replace the vanilla in the frosting with 1 teaspoon of lemon zest. Top each frosted cupcake with a fresh raspberry. The tartness cuts through the sweetness perfectly.
Mini Cupcakes: Use a mini muffin pan and bake for 10 to 12 minutes. You’ll get about 36 mini red velvet heart cupcakes—perfect for parties or gift boxes.
My personal favorite variation? I once made a batch with a cream cheese filling hidden inside. I froze small dollops of cream cheese frosting, placed one in the center of each cupcake before baking, and ended up with a molten surprise center. It was messy but unforgettable.
Serving & Storage Suggestions
These red velvet heart cupcakes are best served at room temperature. The cream cheese frosting softens slightly, and the crumb is at its most tender. If you’ve refrigerated them, let them sit on the counter for 20 minutes before serving.
For presentation, arrange them on a cake stand or a decorative platter. A dusting of powdered sugar or a scattering of fresh berries adds a beautiful finishing touch. They pair wonderfully with a hot cup of coffee, a glass of cold milk, or even a sparkling rosé for a Valentine’s Day treat.
Storage Instructions: Store unfrosted cupcakes in an airtight container at room temperature for up to 2 days. Frosted cupcakes should be refrigerated in a single layer in an airtight container for up to 4 days. The frosting will firm up in the fridge—that’s normal.
Freezing Instructions: You can freeze unfrosted cupcakes for up to 3 months. Wrap each one individually in plastic wrap, then place them in a freezer bag. Thaw at room temperature before frosting. Frosted cupcakes can also be frozen, but the texture of the cream cheese frosting may change slightly after thawing.
Reheating Tip: If you prefer your cupcakes slightly warm, microwave an unfrosted cupcake for 10 seconds. Add frosting after warming.
One thing I’ve noticed—the flavors actually deepen after a day in the fridge. The cocoa and buttermilk tang meld together beautifully. So if you can wait, these might taste even better on day two.
Nutritional Information & Benefits
Here’s the honest truth: these are indulgent cupcakes. They’re a treat, not a health food. But I believe in enjoying real food in moderation, and these are worth every bite.
Estimated Nutritional Values (per cupcake with frosting):
- Calories: 380
- Fat: 20g
- Carbohydrates: 47g
- Protein: 5g
- Sugar: 35g
Health Benefits of Key Ingredients:
- Cocoa powder is rich in antioxidants called flavonoids, which support heart health and reduce inflammation.
- Buttermilk contains probiotics and calcium, which are good for digestion and bone health.
- Eggs provide high-quality protein and essential vitamins like B12 and choline.
Dietary Considerations: This recipe contains gluten, dairy, and eggs. For gluten-free and dairy-free options, see the Variations section above. These cupcakes are not suitable for vegan diets without significant modifications.
Potential Allergens: Wheat, milk, eggs. If you’re serving a crowd, label them clearly.
My personal perspective? I don’t make these every week. But for special occasions—especially Valentine’s Day—they’re my go-to. Life is short. Eat the cupcake.
Conclusion
These Best Red Velvet Heart Cupcakes for Valentine’s Day are more than just a dessert. They’re a little piece of joy that came from an unexpected conversation in a post office line. Every time I make them, I think of Carol the tax accountant and her grandmother’s heart-shaped pan.
What I love most about this recipe is how forgiving it is. You don’t need to be a professional baker to get perfect results. The batter comes together in minutes, the frosting is foolproof, and the heart shape makes everyone smile. Whether you’re baking for a romantic dinner, a classroom party, or just because it’s Tuesday and you deserve something beautiful—these cupcakes deliver.
I encourage you to make them your own. Add sprinkles. Swap the frosting for chocolate ganache. Hide a raspberry in the center. The best recipes are the ones that evolve with you.
Now I’d love to hear from you. Have you made these? Did you try a variation? Drop a comment below and tell me about it. Share this recipe with someone who needs a little sweetness in their life. And if you’re looking for more Valentine’s Day treats, check out my heart-shaped sugar cookies or these chocolate-covered strawberries.
Happy baking, friends. May your cupcakes be red, your frosting be creamy, and your Valentine’s Day be full of love.
Frequently Asked Questions
Can I make these red velvet heart cupcakes ahead of time?
Yes! Bake the cupcakes up to 2 days in advance and store them unfrosted in an airtight container at room temperature. Frost them on the day you plan to serve for the best texture and appearance.
How do I get the red color without artificial food coloring?
You can use natural red food coloring made from beet juice or pomegranate powder. Keep in mind that natural colors are less vibrant and may result in a deeper pink rather than bright red. The flavor won’t be affected.
Why did my cupcakes sink in the middle?
Sinking usually happens when the oven door is opened too early or the batter is overmixed. Avoid opening the oven during the first 15 minutes of baking, and mix just until combined. Also, check that your baking soda is fresh.
Can I use a different frosting?
Absolutely. Cream cheese frosting is classic for red velvet, but you can use chocolate buttercream, vanilla buttercream, or even a simple whipped cream topping. Each brings a different flavor profile.
How do I make heart-shaped cupcakes without a heart-shaped pan?
Bake the cupcakes in a standard muffin tin. Once cooled, use a heart-shaped cookie cutter to press down into the center of each cupcake, cutting out a heart shape. Remove the excess cake around the edges. You’ll get a perfect heart-shaped top.
Pin This Recipe!
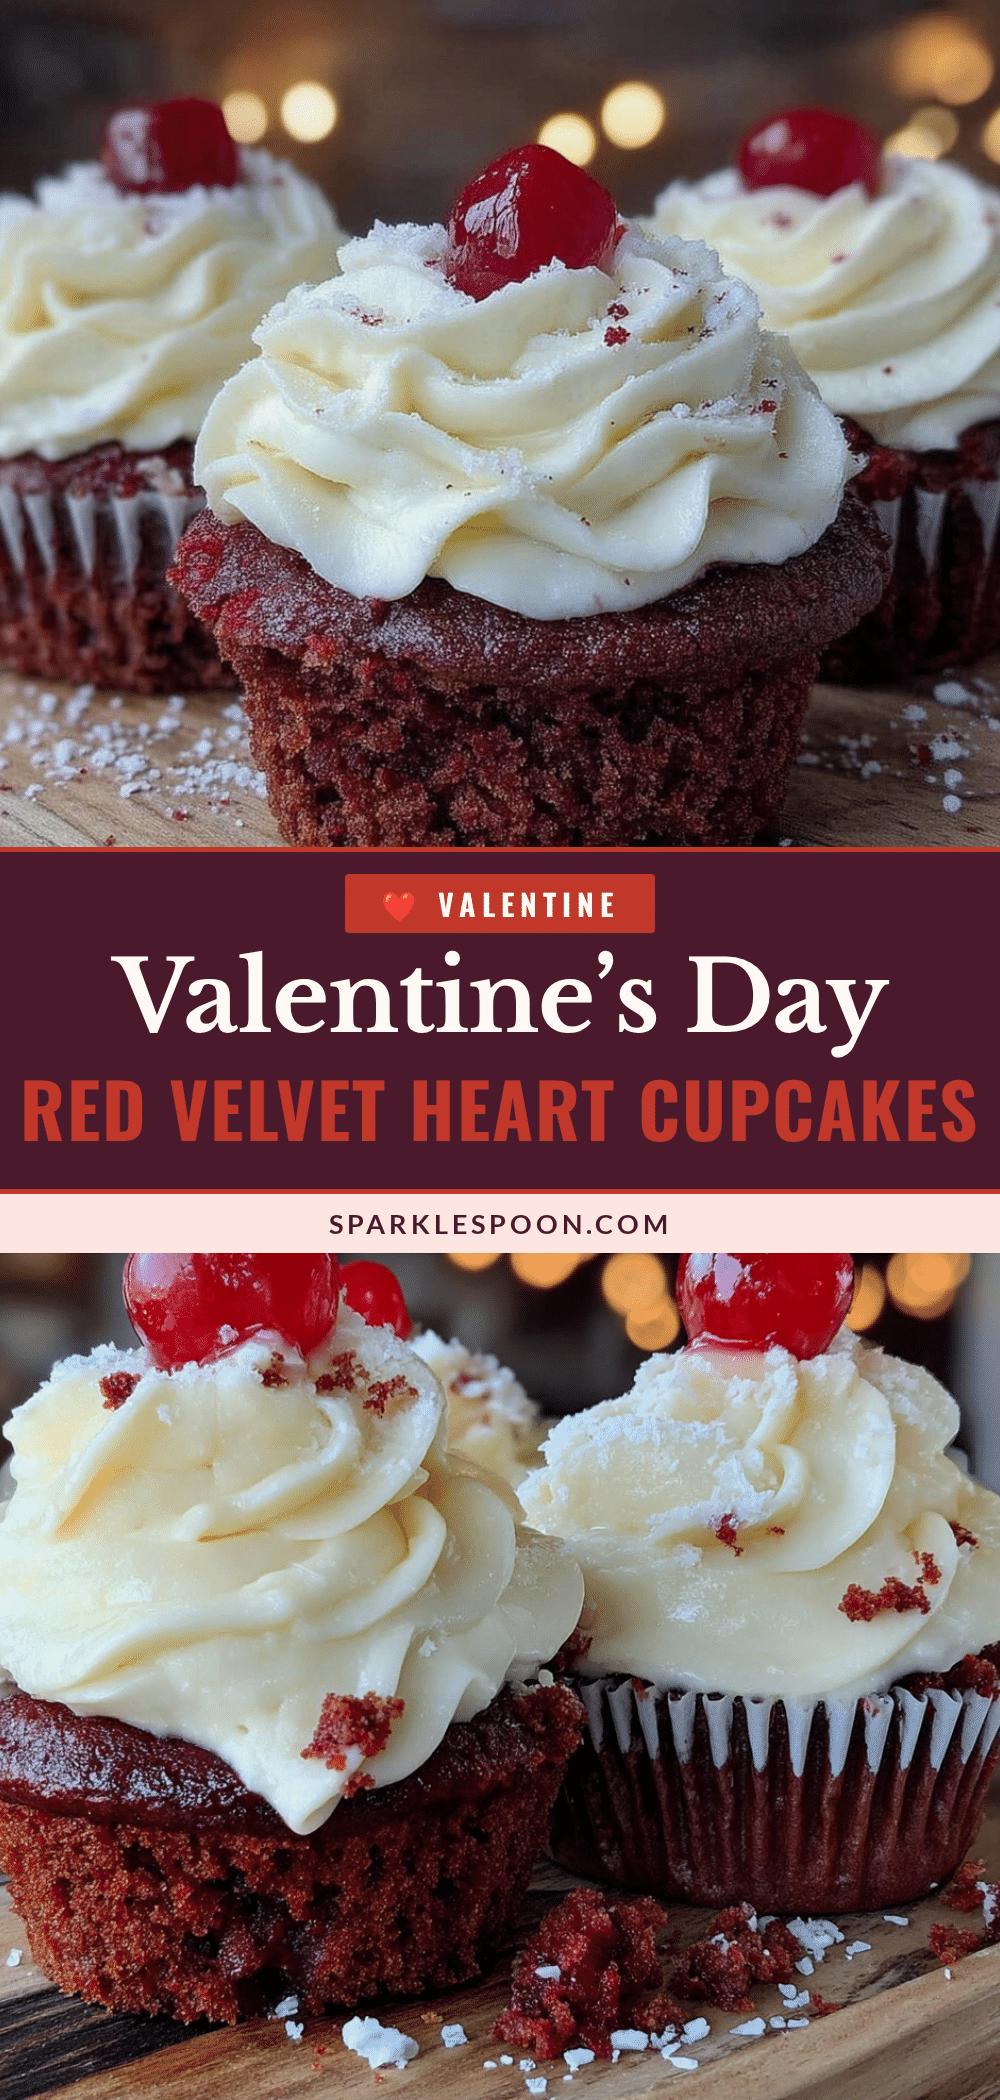
Best Red Velvet Heart Cupcakes for Valentine’s Day
These tender, moist red velvet heart cupcakes are topped with a silky cream cheese buttercream and are perfect for Valentine’s Day. Quick and easy to make, they’re a crowd-pleasing treat that comes together in about 45 minutes.
- Prep Time: 15 minutes
- Cook Time: 20 minutes
- Total Time: 45 minutes
- Yield: 12 servings 1x
- Category: Dessert
- Cuisine: American
Ingredients
- 1 ½ cups (190g) all-purpose flour
- 2 tablespoons (10g) unsweetened cocoa powder
- 1 cup (200g) granulated sugar
- 1 teaspoon baking soda
- ½ teaspoon fine sea salt
- ½ cup (120ml) vegetable oil (canola or avocado)
- ½ cup (120ml) buttermilk
- 2 large eggs, at room temperature
- 1 teaspoon white vinegar
- 1 teaspoon vanilla extract
- 1 tablespoon red food coloring (or gel equivalent)
- 8 ounces (226g) cream cheese, softened
- ½ cup (113g) unsalted butter, softened
- 3 to 4 cups (360-480g) powdered sugar, sifted if lumpy
- 1 teaspoon vanilla extract
- Pinch of salt
Instructions
- Preheat your oven to 350°F (175°C). Line a heart-shaped cupcake pan with paper liners. If using a standard pan, line it too.
- In a large bowl, whisk together the flour, cocoa powder, sugar, baking soda, and salt until evenly distributed.
- In a separate medium bowl, whisk together the vegetable oil, buttermilk, eggs, vinegar, vanilla extract, and red food coloring until smooth and uniformly red.
- Pour the wet mixture into the dry mixture. Fold gently with a rubber spatula until just combined—about 15 to 20 strokes. Do not overmix; a few lumps are fine.
- Divide the batter evenly among the 12 liners, filling each about two-thirds full.
- Bake for 18 to 22 minutes, until a toothpick inserted into the center comes out clean or with a few moist crumbs. The tops should spring back when lightly pressed.
- Let the cupcakes cool in the pan for 5 minutes, then transfer to a wire cooling rack. Cool completely before frosting—at least 30 minutes.
- For the cream cheese buttercream: In a large bowl, beat the softened cream cheese and butter together with an electric mixer on medium speed until smooth and fluffy—about 2 minutes. Scrape down the sides. Add the vanilla and salt, then beat again. Gradually add the powdered sugar, 1 cup at a time, beating on low speed until incorporated. Increase to medium-high and beat for 2 minutes until light and airy. If too soft, refrigerate for 15 minutes before piping.
- Fit a piping bag with a star tip and fill with frosting. Pipe a swirl onto each cooled cupcake, starting from the outside and working inward. Alternatively, spread with an offset spatula for a rustic look.
- Optional: Decorate with red sanding sugar, mini heart sprinkles, chocolate shavings, or a fresh raspberry.
Notes
Room temperature ingredients are crucial for best texture. Do not overmix the batter. Use gel food coloring for a vibrant red without thinning the batter. Cool cupcakes completely before frosting. For a dairy-free version, use dairy-free buttermilk and vegan cream cheese. For gluten-free, substitute with a 1:1 gluten-free flour blend plus ¼ tsp xanthan gum if needed.
Nutrition
- Serving Size: 1 cupcake
- Calories: 380
- Sugar: 35
- Fat: 20
- Carbohydrates: 47
- Protein: 5
Keywords: red velvet, heart cupcakes, Valentine's Day, cream cheese frosting, easy dessert