Love this? Save it for later!
Share the inspiration with your friends
The timer beeped, smoke curled from the oven, and I just stood there staring. This was supposed to be a fancy Halloween appetizer platter—you know, the kind with perfectly arranged mummies made from puff pastry and little cheese ghosts that look like they belong in a magazine. I had everything planned out. The grocery list was color-coded. I even bought those little cocktail swords for the eyeballs. But then I grabbed the wrong pizza dough at the store (the pre-made kind with herbs already mixed in, which I honestly didn’t even notice until I opened it), my oven decided to run about 25 degrees hot that day, and I had already texted my neighbor Maria that I’d bring “something fun” to her annual Halloween block party. Panic doesn’t even cover it.
So there I was, staring at this slightly over-proofed herbed pizza dough and a fridge full of ingredients that no longer matched my Pinterest board. The kids were asking for snacks. The dog kept trying to lick my ankle. And I had maybe forty-five minutes before I needed to walk out the door with something that didn’t look like a disaster. I grabbed a handful of pepperoni, some black olives I had no plan for, and a block of mozzarella that was definitely not meant for ghost shapes. And then, honestly, I just started making faces. Angry faces. Silly faces. One pepperoni eye, one olive eye. A crooked smile cut into cheese. I made about twelve of them on little rounds of dough, threw them in the hot oven, and hoped for the best.
Maria’s party was packed. Kids running everywhere, adults huddled around the fire pit, and my little pizza faces sat on the counter next to a store-bought veggie tray. I figured they’d get picked at, maybe a few kids would grab one. Instead, they vanished in under ten minutes. Maria came over and asked for the recipe before I even had my coat off. Someone’s dad asked if I catered kids’ parties. I just laughed and said, “Honestly, it was a happy little accident.” That was three Halloweens ago, and I haven’t made a “fancy” Halloween appetizer since. These mini pizza faces are the reason I stopped trying to be perfect and started having fun in the kitchen again. Maybe you’ve had one of those kitchen moments where everything goes wrong, and you end up with something better than the plan?
Why You’ll Love This Recipe
Let me tell you why these mini Halloween pizza faces have become my non-negotiable party trick. First off, they are genuinely the easiest thing you’ll make all spooky season. We’re talking about fifteen minutes of assembly and maybe ten minutes in the oven. If you can spread sauce and arrange pepperoni, you can absolutely nail this recipe.
Here’s what makes them a total winner:
- Quick & Easy : From fridge to table in under 30 minutes. Perfect for when the party starts in an hour and you forgot to plan anything.
- Simple Ingredients : Pizza dough, sauce, cheese, pepperoni, olives. That’s it. Nothing you have to hunt down at a specialty store.
- Perfect for Halloween Parties : Kids love them, adults sneak them, and they look way more impressive than they actually are to make.
- Crowd-Pleaser : I have never brought these anywhere and brought extras home. Not once.
- Unbelievably Customizable : Every face can be different, so everyone gets to make their own little monster.
What makes these different from every other Halloween snack out there? Most spooky appetizers are either all sugar or they’re those sad little hot dog mummies that take forever to wrap. These are actual pizza—warm, cheesy, satisfying pizza—disguised as something playful. The technique is simple: you use the toppings to build expressions instead of just covering the dough. A slice of olive becomes an eyeball. A sliver of pepperoni turns into a menacing grin. It’s creative without being complicated.
This is the kind of recipe that makes you close your eyes after the first bite, not because it’s fancy, but because it’s just so good. It’s comfort food with a costume on. Perfect for impressing guests without breaking a sweat, or turning a regular pizza night into something the kids will talk about for weeks.
What Ingredients You Will Need
This recipe uses simple, everyday ingredients to create something that looks like it took way more effort than it actually did. You probably have most of these in your kitchen right now.
For the Pizza Base:
- 1 lb (450g) store-bought pizza dough , at room temperature (I prefer the Trader Joe’s garlic herb dough for extra flavor, but plain works great too)
- 1/4 cup (60ml) pizza sauce (use your favorite jarred brand or leftover homemade sauce)
- 2 cups (200g) shredded low-moisture mozzarella cheese (the pre-shredded kind is fine, but shredding your own melts smoother)
- 1 tablespoon olive oil , for brushing the crusts (adds that golden, crispy edge)
For the Monster Faces:
- 1/2 cup (60g) pepperoni slices (regular size, not mini—you want room to cut shapes)
- 1/4 cup (30g) black olives , pitted and sliced into rounds (for eyeballs and pupils)
- 1/4 cup (30g) green olives , pitted (optional, for variety in eye color)
- 1/4 cup (30g) sliced mushrooms (great for making warts or bumpy monster skin)
- 1/4 cup (30g) red bell pepper , cut into small triangles or strips (for tongues or angry eyebrows)
- 1/4 cup (30g) fresh mozzarella pearls , halved (for bulging eyeballs—kids love these)
Ingredient Selection Tips: When buying pizza dough, look for one that’s labeled “fresh” in the refrigerated section rather than the frozen kind. It’s more pliable and easier to shape into small rounds. If you can’t find fresh dough, you can absolutely use a can of refrigerated pizza dough or even pre-baked naan or pita bread as a shortcut. For the pepperoni, I recommend getting the larger slices instead of the mini ones. You want room to cut them into shapes—triangles for teeth, strips for scars, or half-moons for angry eyebrows.
Substitution Guidance: Need a vegetarian version? Load up on olives, mushrooms, bell peppers, and even some canned corn for yellow monster teeth. Gluten-sensitive guests? Use gluten-free pizza dough or cauliflower crusts—just watch the baking time as they cook faster. Dairy-free? Skip the mozzarella and use a plant-based shredding cheese, though the melt won’t be quite as stretchy. You can also swap the pizza sauce for pesto or a white garlic sauce for a completely different flavor profile.
Equipment Needed
You don’t need much for this recipe, which is honestly one of the best things about it.
- Baking sheets (2 large ones, or work in batches if you only have one)
- Parchment paper (non-negotiable—prevents sticking and makes cleanup a breeze)
- Rolling pin (or a wine bottle in a pinch—I’ve done it)
- Small bowl for olive oil and a pastry brush (a clean paintbrush works too, don’t judge me)
- Sharp knife or pizza cutter (for cutting dough and shaping toppings)
- Cutting board (dedicate one to just toppings to avoid cross-contamination)
- Small cookie cutter (optional, but fun for cutting cheese into star or moon shapes for extra spooky faces)
- Measuring spoons and cups (eyeball everything after the first time, honestly)
If you don’t have a rolling pin, just press the dough out with your fingertips. It doesn’t have to be perfect—monster faces are supposed to look a little rough. For the baking sheets, any rimmed sheet pan works. I’ve even used a cast iron skillet in a pinch, though you can only fit a few at a time.
Preparation Method
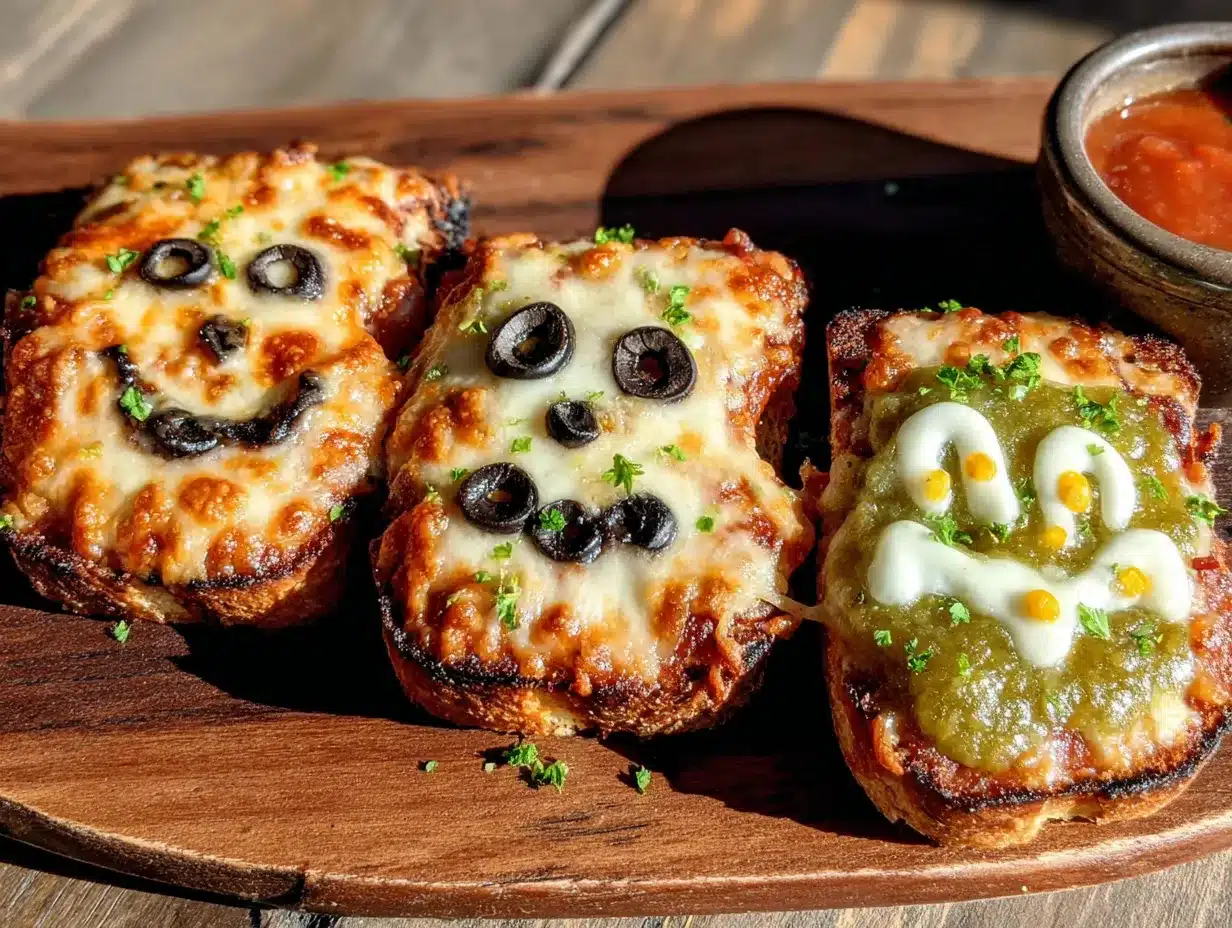
Let’s get into the fun part. Set your oven to 425°F (220°C) and let it preheat fully while you work. Line two baking sheets with parchment paper.
- Prepare the dough: On a lightly floured surface, divide your pizza dough into 12 equal pieces. A bench scraper helps here, but a knife works fine. Roll each piece into a ball, then flatten into a 3-inch (7.5 cm) round. They don’t need to be perfect circles—monsters come in all shapes. Place them on the prepared baking sheets, leaving about an inch of space between each. You should fit 6 per sheet.
- Par-bake the bases: Pop the baking sheets into the oven for 5 minutes. This is a step I learned after my first batch turned out soggy in the middle. Par-baking gives you a sturdy base that won’t go limp under the toppings. The rounds should look dry and just barely golden on the bottom when they come out. Let them cool for 2 minutes on the sheet.
- Add the sauce: Spoon about 1 teaspoon of pizza sauce onto each round and spread it gently with the back of the spoon. Leave a 1/4-inch (0.6 cm) border around the edge for the crust. Don’t over-sauce, or the faces will slide off. Trust me on this one—I made a batch where the pepperoni eyes literally drifted off the pizza like they were trying to escape.
- Layer the cheese: Sprinkle about 2 tablespoons of shredded mozzarella over the sauce on each round. This is the “canvas” for your monster faces. Make sure the cheese covers the sauce completely, but don’t pile it too high or you won’t see the faces.
- Build the faces: Here’s where you get creative. For a classic monster face, start with two olive slices for eyes. Cut a pepperoni slice into a crescent shape for an angry eyebrow above one eye. Use a strip of red bell pepper for a tongue sticking out sideways. Another pepperoni slice cut into small triangles becomes jagged teeth along the bottom edge. You can make a spider face with eight mushroom slice legs radiating from the center. Or a cyclops with one big mozzarella pearl eye in the middle of the forehead. Press each topping gently into the cheese so they stay put during baking.
- Brush the crusts: Use your pastry brush to lightly coat the exposed dough edges with olive oil. This gives them that golden, bakery-style finish. Sprinkle a tiny pinch of salt or garlic powder on the crusts if you’re feeling fancy.
- Bake: Slide the sheets back into the oven and bake for 8-10 minutes, rotating halfway through. You’re looking for the cheese to be fully melted and bubbly, and the crusts to be golden brown on the edges. The bottoms should be firm and slightly crisp when you lift one with a spatula.
- Cool and serve: Let them rest on the baking sheet for 2-3 minutes before transferring to a serving platter. This lets the cheese set slightly so the faces don’t slide off when someone picks one up. Arrange them on a black platter or a wooden board for maximum spooky effect.
Preparation Note: If you’re making these for a party, you can prep the dough rounds and cut all the toppings ahead of time. Store the dough rounds in the fridge on the parchment-lined sheets, covered with plastic wrap. Keep the toppings in separate small bowls. When guests arrive, let everyone build their own monster face—it’s an instant activity that keeps kids busy and adults laughing.
Cooking Tips & Techniques
I’ve made these mini pizza faces probably twenty times now, and I’ve messed up plenty along the way. Here’s what I’ve learned so you don’t have to repeat my mistakes.
Don’t skip the par-bake. I know it’s an extra step, and the first time I made these I thought, “Eh, it’ll be fine.” It was not fine. The dough puffed up unevenly, the cheese slid off, and the faces looked like they’d been through a blender. Par-baking for just 5 minutes firms up the base so everything stays where you put it.
Use room temperature dough. Cold dough is a nightmare to shape. It fights back, shrinks, and refuses to stay flat. Let it sit on the counter for at least 30 minutes before you start. If you forgot to take it out, microwave it for 10 seconds on a low setting—just enough to take the chill off.
Cut toppings into small, distinct shapes. Big chunks of pepperoni will just look like blobs after baking. Take the extra 30 seconds to cut them into triangles, crescents, or little strips. The detail shows up in the final product and makes people go, “Whoa, you made those?”
Watch your oven like a hawk. Every oven runs differently. My current oven takes exactly 9 minutes at 425°F, but my old one needed 11 minutes. Start checking at 7 minutes. The cheese should be bubbling, and the edges should be deep golden brown. If the bottoms are burning but the tops aren’t done, slide the baking sheet to a higher rack.
Multitask strategically. While the first batch of par-baked rounds is cooling, I cut all my toppings and arrange them on a plate by type—olives here, pepperoni there, bell pepper strips over there. It makes assembly so much faster. I also set out small bowls for each topping so I can grab and go.
One mistake I still make: Overcrowding the baking sheet. When the rounds are too close together, they steam instead of bake, and the bottoms come out soft. Leave at least an inch of space between each one. It’s worth doing two batches if you have to.
Variations & Adaptations
One of the best things about this recipe is how easy it is to change up. Here are some variations I’ve tried and loved.
Spider Pizza Faces: Instead of traditional monster faces, make little spiders. Use a whole black olive for the body, slice another olive into thin strips for legs (eight per spider, obviously), and add two small dots of red bell pepper for eyes. Kids go absolutely nuts for these.
Mummy Pizza Faces: Cut mozzarella cheese into thin strips and lay them across the pizza in a crisscross pattern, leaving a small gap for the eyes. Use two olive slices for the eyes peeking out. Bake as directed. These look deceptively fancy but take almost no extra effort.
Jack-O’-Lantern Faces: Use orange bell pepper strips to create a pumpkin face shape on top of the cheese. Cut a triangle for the nose, a jagged mouth, and angled eyes. The orange pops against the white cheese and looks very festive.
Vegetarian Monster Mash: Skip the pepperoni entirely and load up on colorful veggies. Yellow corn kernels become monster teeth. Sliced cherry tomatoes turn into bloody wounds. Thin strips of zucchini make excellent monster scars. I made a batch for a friend’s vegetarian Halloween party and they were gone before the meat versions.
Spicy Diablo Faces: For the adults who want a kick, add thin slices of jalapeño for angry eyebrows or a sprinkle of red pepper flakes on top before baking. You can also use spicy pepperoni or add a drizzle of hot honey after baking. I tried this last year and now I can’t go back to plain.
Dessert Pizza Faces: Want a sweet version? Swap the pizza sauce for Nutella or cookie butter. Use banana slices for eyes, strawberry slices for mouths, and mini marshmallows for teeth. Bake at 375°F for 6-8 minutes, just until the marshmallows start to brown. These are dangerous—I ate four in one sitting.
Serving & Storage Suggestions
These mini pizza faces are best served warm, straight from the oven, when the cheese is still stretchy and the crusts are crispy. But they’re also surprisingly good at room temperature, which makes them perfect for parties where people graze over an hour or two.
Presentation Tips: Arrange them on a large black platter or a dark wooden board to make the colors pop. I like to scatter a few whole olives and pepperoni slices around the board for visual interest. Add a small bowl of warm marinara sauce for dipping—kids love dunking the monster faces. For extra spooky vibes, put a few fake spider webs around the platter (just make sure they’re not touching the food).
What to Serve Alongside: These pair beautifully with a simple green salad for a full meal, or with other finger foods like stuffed mushrooms, deviled eggs, or a cheese board. For drinks, a crisp apple cider or a dark beer works great for adults, and kids love them with apple juice or sparkling water.
Storage Instructions: If you have leftovers (unlikely, but possible), let them cool completely, then store in an airtight container in the refrigerator for up to 3 days. The crusts will soften a bit, but they’re still delicious. To reheat, pop them in a 350°F oven for 5-6 minutes, or in an air fryer at 350°F for 3-4 minutes. The microwave works in a pinch, but the crusts get chewy. I don’t recommend freezing these—the texture of the toppings changes too much.
Flavor Development: Honestly, these are best the day they’re made. The cheese loses its stretchiness overnight, and the crusts never quite get back to that fresh-baked crispness. That said, I’ve eaten them cold straight from the fridge at midnight more times than I care to admit, and they’re still pretty great.
Nutritional Information & Benefits
Let’s be real—these are pizza. They’re not health food, and that’s okay. But here’s a rough breakdown per mini pizza face (based on 12 servings):
Estimated per serving: 180 calories, 8g fat, 20g carbohydrates, 8g protein, 1g fiber, 3g sugar, 380mg sodium.
Health Highlights: The mozzarella provides a decent amount of calcium and protein. The tomato sauce offers a small dose of lycopene, an antioxidant linked to heart health. If you load up on veggie toppings like bell peppers and mushrooms, you’re adding vitamins A and C, plus some fiber. The olive oil on the crust gives you healthy monounsaturated fats.
Dietary Considerations: This recipe can easily be made vegetarian by skipping the pepperoni. For a lower-carb version, use cauliflower crusts or portobello mushroom caps as the base. For gluten-free guests, swap in your favorite gluten-free pizza dough. The main allergens here are wheat (from the dough) and dairy (from the cheese). If you’re serving a crowd with allergies, make a separate batch with dairy-free cheese and gluten-free dough—it’s worth the extra effort to include everyone.
My Personal Take: I don’t make these for their nutritional value. I make them because they bring people together and make everyone smile. That said, using whole wheat pizza dough and loading up on veggie toppings is an easy way to make them a little more balanced. And portion control is built in—each one is small enough that you can have two or three without feeling guilty.
Conclusion
These mini Halloween pizza faces are proof that you don’t need fancy ingredients, complicated techniques, or a perfectly planned Pinterest board to make something memorable. They started as a kitchen disaster—a wrong dough, a hot oven, and a panicked neighbor—and turned into the recipe I get asked for every single October. That’s the kind of recipe worth keeping.
I hope you make these your own. Change the faces, swap the toppings, let the kids go wild. The best part is watching everyone’s personality come out in their monster designs. My nephew makes his with all pepperoni and no vegetables. My best friend arranges hers so symmetrically they look like they belong in an art gallery. And me? I still make the same goofy, lopsided face I made that first night—one olive eye higher than the other, a crooked pepperoni grin, and a bell pepper tongue sticking out sideways.
If you try these, I’d love to hear about it. Drop a comment below with a photo of your monster faces, or tag me on social media. Tell me which variation your family loved most, or share your own twist on the idea. And if you’re looking for more easy party recipes, check out my best Halloween party snacks roundup or this easy spinach artichoke dip that always disappears fast. Happy Halloween, and happy cooking!
Frequently Asked Questions
Can I make these mini pizza faces ahead of time?
Yes, but with a caveat. You can prep the dough rounds and cut all the toppings up to 24 hours in advance. Store the dough rounds on parchment-lined baking sheets covered with plastic wrap in the fridge. Keep the toppings in separate airtight containers. Assemble and bake right before serving for the best texture.
What if I don’t have pizza dough?
No problem at all. Pre-baked naan, pita bread, English muffins, or even thick slices of French bread work beautifully. Just adjust the baking time—pre-baked bases need less time in the oven, usually about 5-7 minutes total instead of 8-10.
How do I keep the toppings from falling off during baking?
The par-baking step is key—it firms up the dough so the cheese and toppings have a stable base. Also, press each topping gently into the cheese rather than just laying it on top. And don’t over-sauce; too much moisture makes everything slide around.
Can I make these in an air fryer?
Absolutely. Preheat your air fryer to 375°F (190°C). Place the assembled mini pizzas in the basket in a single layer (you’ll need to work in batches). Cook for 5-7 minutes, checking at the 5-minute mark. The crusts get extra crispy this way, which I actually prefer.
What’s the best way to reheat leftovers?
Oven or air fryer both work great. For the oven, bake at 350°F for 5-6 minutes. For the air fryer, 350°F for 3-4 minutes. The microwave works but the crusts get soft and chewy. If you’re in a hurry, the microwave is fine—just know the texture won’t be as good.
Pin This Recipe!
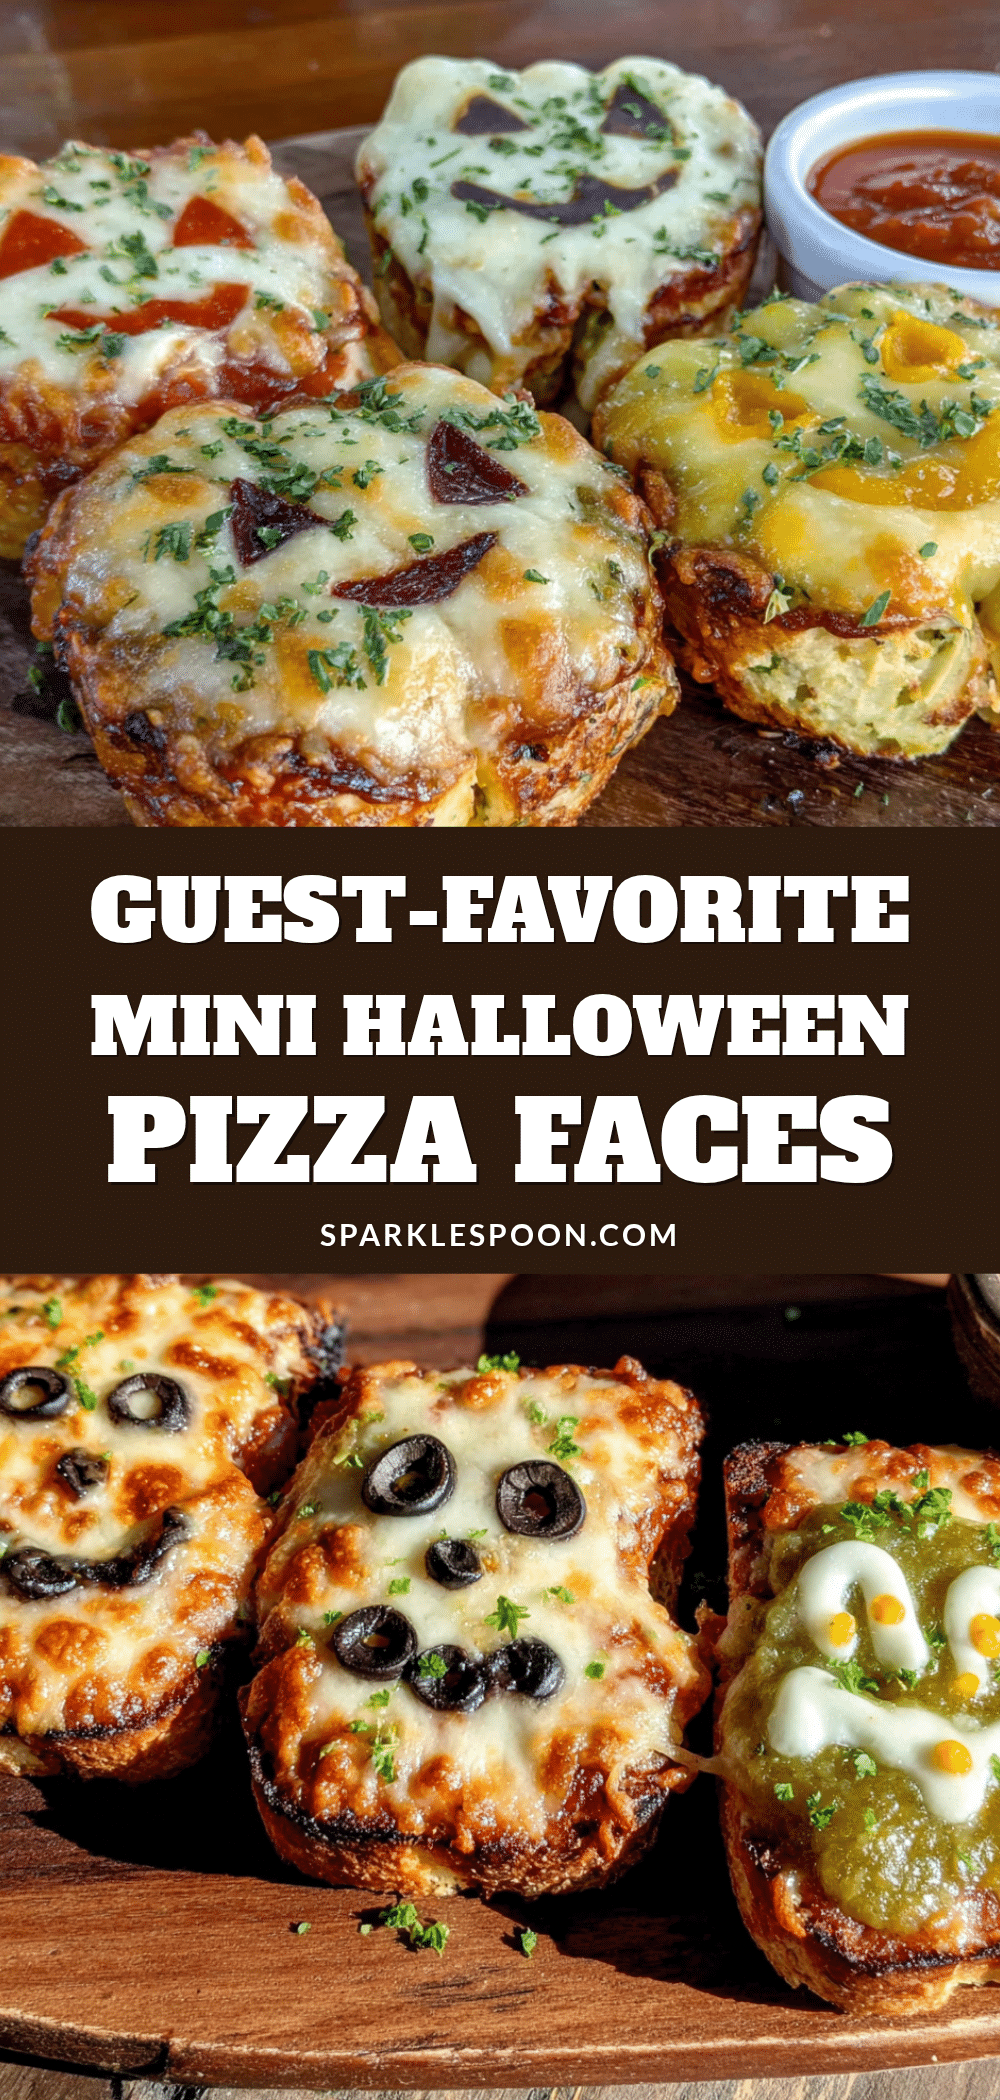
Best Mini Halloween Pizza Faces – Easy Guest Favorite
These mini Halloween pizza faces are the easiest spooky appetizer you’ll make all season. With simple ingredients and creative topping arrangements, they’re a guaranteed crowd-pleaser that kids and adults love.
- Prep Time: 15 minutes
- Cook Time: 10 minutes
- Total Time: 25 minutes
- Yield: 12 servings 1x
- Category: Appetizer
- Cuisine: American
Ingredients
- 1 lb (450g) store-bought pizza dough, at room temperature
- 1/4 cup (60ml) pizza sauce
- 2 cups (200g) shredded low-moisture mozzarella cheese
- 1 tablespoon olive oil
- 1/2 cup (60g) pepperoni slices
- 1/4 cup (30g) black olives, pitted and sliced into rounds
- 1/4 cup (30g) green olives, pitted (optional)
- 1/4 cup (30g) sliced mushrooms
- 1/4 cup (30g) red bell pepper, cut into small triangles or strips
- 1/4 cup (30g) fresh mozzarella pearls, halved
Instructions
- Preheat oven to 425°F (220°C). Line two baking sheets with parchment paper.
- On a lightly floured surface, divide pizza dough into 12 equal pieces. Roll each into a ball, then flatten into a 3-inch (7.5 cm) round. Place on prepared baking sheets, leaving about an inch of space between each.
- Par-bake the bases for 5 minutes. Remove from oven and let cool for 2 minutes.
- Spoon about 1 teaspoon of pizza sauce onto each round and spread gently, leaving a 1/4-inch (0.6 cm) border.
- Sprinkle about 2 tablespoons of shredded mozzarella over the sauce on each round.
- Build the faces: Use olive slices for eyes, pepperoni cut into shapes for eyebrows or teeth, bell pepper strips for tongues, etc. Press each topping gently into the cheese.
- Brush the exposed dough edges with olive oil.
- Bake for 8-10 minutes, rotating halfway through, until cheese is melted and bubbly and crusts are golden brown.
- Let rest on baking sheet for 2-3 minutes before transferring to a serving platter.
Notes
Par-baking the dough is essential to prevent sogginess. Use room temperature dough for easier shaping. Cut toppings into small, distinct shapes for best visual effect. Watch the oven closely as baking times vary.
Nutrition
- Serving Size: 1 mini pizza face
- Calories: 180
- Sugar: 3
- Sodium: 380
- Fat: 8
- Saturated Fat: 3
- Carbohydrates: 20
- Fiber: 1
- Protein: 8
Keywords: Halloween, pizza, appetizer, party food, mini pizzas, monster faces, easy recipe



