Love this? Save it for later!
Share the inspiration with your friends
This was supposed to be a taco bar. I had it all planned out—ground beef seasoned just right, a lineup of toppings, soft flour tortillas warming in foil. But the power went out halfway through preheating the oven. Not the whole house, just the oven. I stood there staring at the dark digital display, ground beef already sizzling on the stovetop, and I felt that familiar kitchen panic creeping in. You know that feeling when a plan unravels and you have to pivot fast?
I grabbed a bag of tortilla chips from the pantry out of pure desperation. I mean, what else was I supposed to do? The broiler still worked on my range, so I layered those chips with the seasoned beef, piled on cheese, and threw it under the heat. I figured I’d salvage something edible. What came out was nothing like the plan—and better. The edges of the chips got all toasty and brown, the cheese bubbled into those crispy, golden patches you dream about, and I drizzled ranch over the whole thing because, honestly, why not?
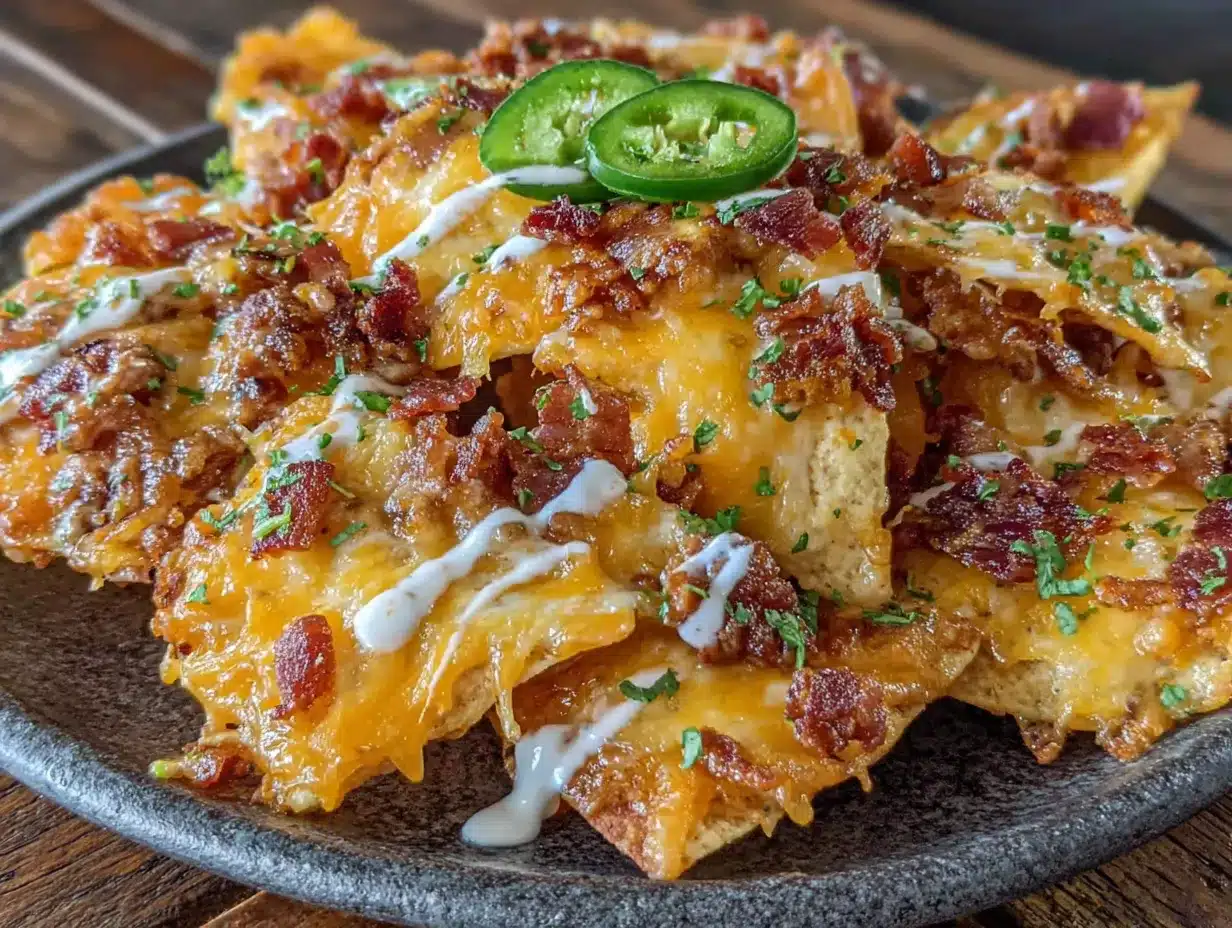
That accidental sheet pan dinner turned into what I now call the Ultimate Loaded Bacon Ranch Football Nachos. It’s the recipe I’ve made for every game day since, and it’s the one people ask me to bring to parties. The bacon? That came later, because everything is better with bacon. The ranch? Non-negotiable. If you’ve ever had a kitchen fail turn into something you actually love, you’ll understand why this recipe stuck with me. It’s messy, it’s indulgent, and it’s exactly what you want when the game is on and you need something that delivers every single time.
Why You’ll Love This Recipe
I’ve tested this recipe more times than I care to count. I made it for a Super Bowl party where the chips went soggy (lesson learned), I made it for a casual Tuesday when I needed comfort food fast, and I finally nailed the perfect version that stays crispy, cheesy, and loaded with flavor from first bite to last. Let me tell you why this one is different.
- Quick & Easy: This comes together in under 25 minutes. No complicated steps, no fancy techniques. Just layer, broil, and devour.
- Simple Ingredients: You probably have most of these in your kitchen right now. No weird specialty items or expensive ingredients.
- Perfect for Game Day: Whether it’s football, basketball, or just a movie marathon, these nachos are the ultimate crowd-pleaser. They disappear fast.
- Crowd-Pleaser: Kids love them, adults love them, even picky eaters go back for seconds. I’ve never had leftovers.
- Unbelievably Delicious: The combination of crispy chips, melted cheese, seasoned beef, crispy bacon, and cool ranch dressing is next-level comfort food. It’s the kind of dish that makes you close your eyes after the first bite.
What makes this recipe different from every other nacho recipe out there? It’s the layering technique. Most people pile everything on top and hope for the best. I’ve learned that layering the chips and cheese twice ensures every chip gets coated in gooey goodness. And the ranch isn’t just a drizzle at the end—it’s baked into the whole experience. This isn’t just another version of nachos. It’s the best version.
This recipe is comfort food reimagined—faster, easier, and with the same soul-soothing satisfaction. Perfect for impressing guests without stress, or turning a simple game day snack into something memorable.
What Ingredients You Will Need
This recipe uses simple, everyday ingredients that come together to create something truly special. Most of these are pantry staples, and the ones that aren’t are easy to find at any grocery store.
For the Nachos Base
- Tortilla chips (1 large bag, about 13 ounces)—I recommend thick, restaurant-style chips. They hold up better under all the toppings. I personally prefer Tostitos Scoops or Juanita’s for extra sturdiness.
- Ground beef (1 pound, 80/20 blend)—The fat adds flavor and keeps the meat juicy. You can use ground turkey if you prefer, but the flavor won’t be quite as rich.
- Taco seasoning (1 packet or 3 tablespoons homemade)—I use McCormick or make my own with chili powder, cumin, garlic powder, and paprika.
- Shredded Mexican blend cheese (2 cups)—Pre-shredded works fine, but freshly shredded melts better. I like Sargento or Kraft for convenience.
- Shredded cheddar cheese (1 cup)—Sharp cheddar adds that bold, tangy flavor. Look for block cheese and shred it yourself if you have time.
- Bacon (8 slices, cooked and crumbled)—Thick-cut bacon gives the best crunch. I like Wright Brand or Oscar Mayer.
- Ranch dressing (½ cup)—Use your favorite brand. I’m partial to Hidden Valley, but any creamy ranch works.
- Ranch seasoning mix (1 tablespoon)—This is the secret weapon. Sprinkling it over the chips before baking takes the flavor to another level.
Toppings (Optional but Recommended)
- Roma tomatoes (2, diced)—Adds freshness and acidity to cut through the richness.
- Green onions (4, sliced)—For a mild onion kick and a pop of color.
- Jalapeños (2, sliced, seeds removed for less heat)—Fresh or pickled, both work great.
- Black olives (¼ cup, sliced)—Adds a briny, salty element.
- Sour cream (½ cup)—For cooling contrast. Daisy is my go-to brand.
- Fresh cilantro (¼ cup, chopped)—If you’re one of those people who love it, load it up.
For substitutions, you can swap the ground beef with shredded chicken, black beans for a vegetarian option, or use dairy-free cheese and ranch if needed. In summer, I sometimes add fresh corn kernels or diced avocado for extra texture.
Equipment Needed
You don’t need a lot of fancy equipment for these nachos, which is part of why I love making them. Here’s what you’ll need:
- Large sheet pan (half-sheet size, 18×13 inches)—This is the workhorse. A rimmed baking sheet keeps everything contained. I use Nordic Ware, but any heavy-duty pan works.
- Large skillet (12-inch)—For browning the ground beef. Cast iron is my favorite, but nonstick works fine too.
- Small bowl—For mixing the ranch seasoning into the ranch dressing if you want an extra flavor boost.
- Cutting board and knife—For dicing tomatoes, slicing jalapeños, and chopping green onions. A sharp chef’s knife makes this go faster.
- Spatula or wooden spoon—For breaking up the ground beef as it cooks.
- Paper towels—For draining the bacon. I know, it’s not glamorous, but it’s necessary.
- Oven mitts—That sheet pan gets hot under the broiler. Trust me on this one.
If you don’t have a sheet pan, a large oven-safe skillet or even a disposable aluminum pan works in a pinch. I’ve used both during camping trips and tailgates, and they work just fine. Just make sure whatever you use can handle the heat of the broiler.
Preparation Method
Let me walk you through this step by step. I’ve made these nachos so many times I could do it in my sleep, but I still follow these exact steps every time. Here’s how to get perfect results.
- Preheat your broiler. Set it to high and move the oven rack to the top position, about 6 inches from the heating element. This is crucial—too close and the chips burn, too far and the cheese won’t bubble properly.
- Cook the bacon. Place 8 slices of bacon in a cold skillet. Turn the heat to medium and cook until crispy, about 8-10 minutes, flipping once. Transfer to a paper towel-lined plate to drain. Once cool, crumble into small pieces. Pro tip: save the bacon grease for another use—it’s liquid gold.
- Brown the ground beef. Drain all but 1 tablespoon of bacon grease from the skillet (or use a fresh skillet). Add 1 pound of ground beef and cook over medium-high heat, breaking it apart with a spatula. Cook until no longer pink, about 6-8 minutes. Drain excess fat if needed, but leave a little for flavor.
- Season the beef. Add 1 packet of taco seasoning and ⅓ cup of water. Stir well and let it simmer for 2-3 minutes until the sauce thickens. You want it slightly saucy but not watery. If it looks dry, add another tablespoon of water.
- Layer the first round of chips and cheese. Spread half the tortilla chips in an even layer on the sheet pan. Sprinkle half the cooked beef over the chips. Top with half the Mexican blend cheese and half the cheddar. This double-layering is the secret to getting cheese on every single chip.
- Add the second layer. Spread the remaining chips over the first layer. Top with the remaining beef, then the remaining cheeses. Sprinkle 1 tablespoon of ranch seasoning powder evenly over everything. This is the step most people skip, and it makes all the difference.
- Broil the nachos. Place the sheet pan under the broiler for 3-5 minutes. Watch it carefully—broilers vary wildly. You want the cheese fully melted and starting to brown in spots, but the chips should still be crispy. Rotate the pan halfway through for even melting.
- Add the toppings. Remove the pan from the oven. Immediately drizzle ½ cup of ranch dressing over the hot nachos. Sprinkle the crumbled bacon, diced tomatoes, sliced jalapeños, black olives, and green onions over the top. The heat from the nachos will slightly warm the toppings.
- Finish with fresh elements. Dollop sour cream in small spoonfuls across the nachos. Sprinkle fresh cilantro if using. Serve immediately while everything is hot and the chips are still crunchy.
A few sensory cues to watch for: the cheese should stretch when you pull a chip up, the edges of the chips should be lightly browned, and you should smell the ranch seasoning mixing with the beef. If the chips start to smoke, pull them out immediately—you’ve gone too far.
Cooking Tips & Techniques
I’ve learned a lot of these lessons the hard way, so you don’t have to. Here are my best tips for perfect nachos every time.
Don’t overload the sheet pan. I know it’s tempting to pile everything on, but overcrowding leads to soggy chips. Use a large enough pan and leave some space between chips. They need room for the heat to circulate.
Layer strategically. The biggest mistake people make is putting all the toppings on top and leaving the bottom chips bare. Double-layering ensures every chip gets some love. I’ve had nachos where the bottom layer was just sad, plain chips. Never again.
Watch the broiler like a hawk. I once walked away for “just a second” and came back to a smoking pan of burnt cheese. Broilers are unforgiving. Set a timer for 3 minutes and check frequently. Every oven is different, and the difference between perfect and burnt is about 30 seconds.
Add cold toppings after baking. This is non-negotiable. Sour cream, fresh tomatoes, and cilantro go on after the nachos come out of the oven. If you put them on before baking, you get warm, soggy toppings that ruin the texture. The contrast between hot, melty cheese and cool, fresh toppings is what makes these nachos special.
Use a cooling rack. If you have one, place a wire cooling rack on the sheet pan before adding the chips. This allows air to circulate underneath and keeps the bottom chips from getting soggy. It’s a game-changer, especially if you’re making a large batch.
Make the beef ahead. You can brown and season the ground beef up to two days in advance. Store it in the fridge, then reheat it in the microwave or on the stovetop before assembling the nachos. This makes game day assembly even faster.
Variations & Adaptations
One of the best things about this recipe is how flexible it is. Here are some variations I’ve tried and loved.
Chicken Bacon Ranch Nachos: Swap the ground beef for shredded rotisserie chicken. Toss the chicken with a little ranch dressing and taco seasoning before layering. It’s lighter but just as satisfying. I made this version for a friend who doesn’t eat red meat, and she asked for the recipe immediately.
Vegetarian Loaded Nachos: Replace the ground beef with a can of black beans (drained and rinsed) and a cup of corn kernels. Season them with the same taco seasoning. The beans add protein and fiber, and the corn adds sweetness. My vegetarian sister-in-law requests this version every time she visits.
Spicy Buffalo Ranch Nachos: Mix ¼ cup of buffalo sauce into the ranch dressing before drizzling. Add pickled jalapeños and a sprinkle of cayenne pepper for extra heat. This is my personal favorite when I want something with a serious kick.
Loaded Breakfast Nachos: Swap the ground beef for crumbled breakfast sausage, add scrambled eggs, and use a mix of cheddar and Monterey Jack cheese. Drizzle with ranch and top with salsa verde. Yes, breakfast nachos are a thing, and yes, they’re amazing.
Low-Carb or Keto Version: Use pork rinds or cheese crisps instead of tortilla chips. Follow the same layering and topping instructions. The texture is different, but the flavor is still incredible. I’ve made this for keto friends and they were thrilled.
For dietary restrictions, use dairy-free cheese and ranch for a lactose-free option, or gluten-free certified chips and taco seasoning for gluten sensitivity. Most bacon and ground beef are naturally gluten-free, but always check labels to be safe.
Serving & Storage Suggestions
These nachos are best served immediately, hot from the oven, when the chips are still crunchy and the cheese is stretchy. But I’ve got some tips for making them work for different situations.
Serving temperature: Serve these nachos hot, straight from the oven. The contrast between the warm, melty cheese and the cool toppings is part of the magic. If you’re serving them at a party, set the sheet pan on a trivet and let people dig in directly. It’s casual, fun, and means fewer dishes.
Presentation: I like to serve these on a large wooden board or directly on the sheet pan lined with parchment paper. Garnish with extra green onions and a few whole jalapeño slices on top for visual appeal. A squeeze of fresh lime juice right before serving brightens everything up.
What to serve with them: These nachos are a full meal on their own, but they pair beautifully with Mexican street corn salad, refried beans, or a simple guacamole. For drinks, a cold beer or a margarita is the perfect companion. I also love serving them alongside a big bowl of salsa and extra ranch for dipping.
Storage: Nachos don’t store well—the chips get soft and the toppings lose their texture. But if you have leftovers (unlikely, but possible), transfer them to an airtight container and refrigerate for up to 2 days. To reheat, spread them on a sheet pan and bake at 350°F for 5-7 minutes. They won’t be as crispy as fresh, but they’ll still taste good.
Make-ahead tips: You can prep all the components ahead of time. Cook the beef, crumble the bacon, chop the vegetables, and shred the cheese. Store everything separately in the fridge. When you’re ready to serve, assemble and broil. This makes game day hosting so much less stressful.
Nutritional Information & Benefits
Let’s be real—these are indulgent nachos, not health food. But knowing what’s in them helps you enjoy them mindfully. Here’s an estimated breakdown per serving (about ¼ of the full recipe).
| Nutrient | Amount Per Serving |
|---|---|
| Calories | 620 |
| Total Fat | 38g |
| Saturated Fat | 15g |
| Cholesterol | 95mg |
| Sodium | 1340mg |
| Total Carbohydrates | 38g |
| Dietary Fiber | 3g |
| Sugars | 5g |
| Protein | 32g |
These nachos provide a good amount of protein from the beef and cheese, which helps keep you full. The tomatoes and jalapeños add a small dose of vitamins A and C, plus some antioxidants. The bacon… well, the bacon is there for flavor and happiness, and that counts for something too.
If you’re watching your sodium, use low-sodium taco seasoning and reduce the added salt. For a lighter version, use ground turkey, reduced-fat cheese, and turkey bacon. You can also load up on fresh vegetable toppings to add volume and nutrients without many calories.
These nachos are not gluten-free unless you use certified gluten-free chips and seasonings. They contain dairy from the cheese and ranch, and the bacon adds nitrates. As with any indulgent dish, enjoy them in moderation as part of a balanced diet.
Conclusion
These Ultimate Loaded Bacon Ranch Football Nachos started as a kitchen accident, but they’ve become a staple in my home for a reason. They’re the kind of recipe that brings people together, that makes everyone lean in and grab a chip, that turns a regular game day into something special. The combination of crispy chips, seasoned beef, melty cheese, smoky bacon, and cool ranch is just unbeatable.
I love this recipe because it’s forgiving. You can customize it to your heart’s content, use whatever toppings you have on hand, and it still turns out amazing. It’s proof that sometimes the best dishes come from happy accidents. And honestly? That makes me smile every time I make them.
I’d love to hear how your nachos turn out! Leave a comment below and let me know what variations you tried. Did you add extra jalapeños? Swap the beef for chicken? Make a vegetarian version? Share your creations and tag me on social media—I can’t wait to see what you come up with. Now go make some nachos and enjoy the game!
Frequently Asked Questions
Can I make these nachos in the oven instead of under the broiler?
Yes, absolutely. If you’re making a larger batch or your broiler is unreliable, bake the nachos at 400°F for 8-10 minutes. The cheese will melt evenly, and the chips will stay crispy. Just keep an eye on them so the edges don’t burn.
How do I keep the chips from getting soggy?
The key is layering and not overloading. Use thick, sturdy chips, double-layer them, and don’t drown them in sauce. Adding the cold toppings after baking also helps. If you’re really worried, spread the chips on a wire rack set inside the sheet pan for maximum airflow.
Can I use pre-cooked bacon?
You can, but I don’t recommend it. Pre-cooked bacon tends to be chewy rather than crispy, and it doesn’t have the same smoky flavor. Taking 10 minutes to cook fresh bacon makes a noticeable difference in the final dish.
What’s the best way to reheat leftover nachos?
The oven or air fryer is your best bet. Spread leftovers on a sheet pan and bake at 350°F for 5-7 minutes. The microwave will make them soggy, so avoid it if you can. And honestly, leftover nachos are rare in my house, so you might not even need to worry about this.
Can I make these nachos ahead of time for a party?
You can prep all the components ahead, but assemble and bake right before serving. Cook the beef, crumble the bacon, and chop the toppings up to two days in advance. Store everything separately in the fridge, then layer and broil when your guests arrive. Freshly baked nachos are always best.
Pin This Recipe!
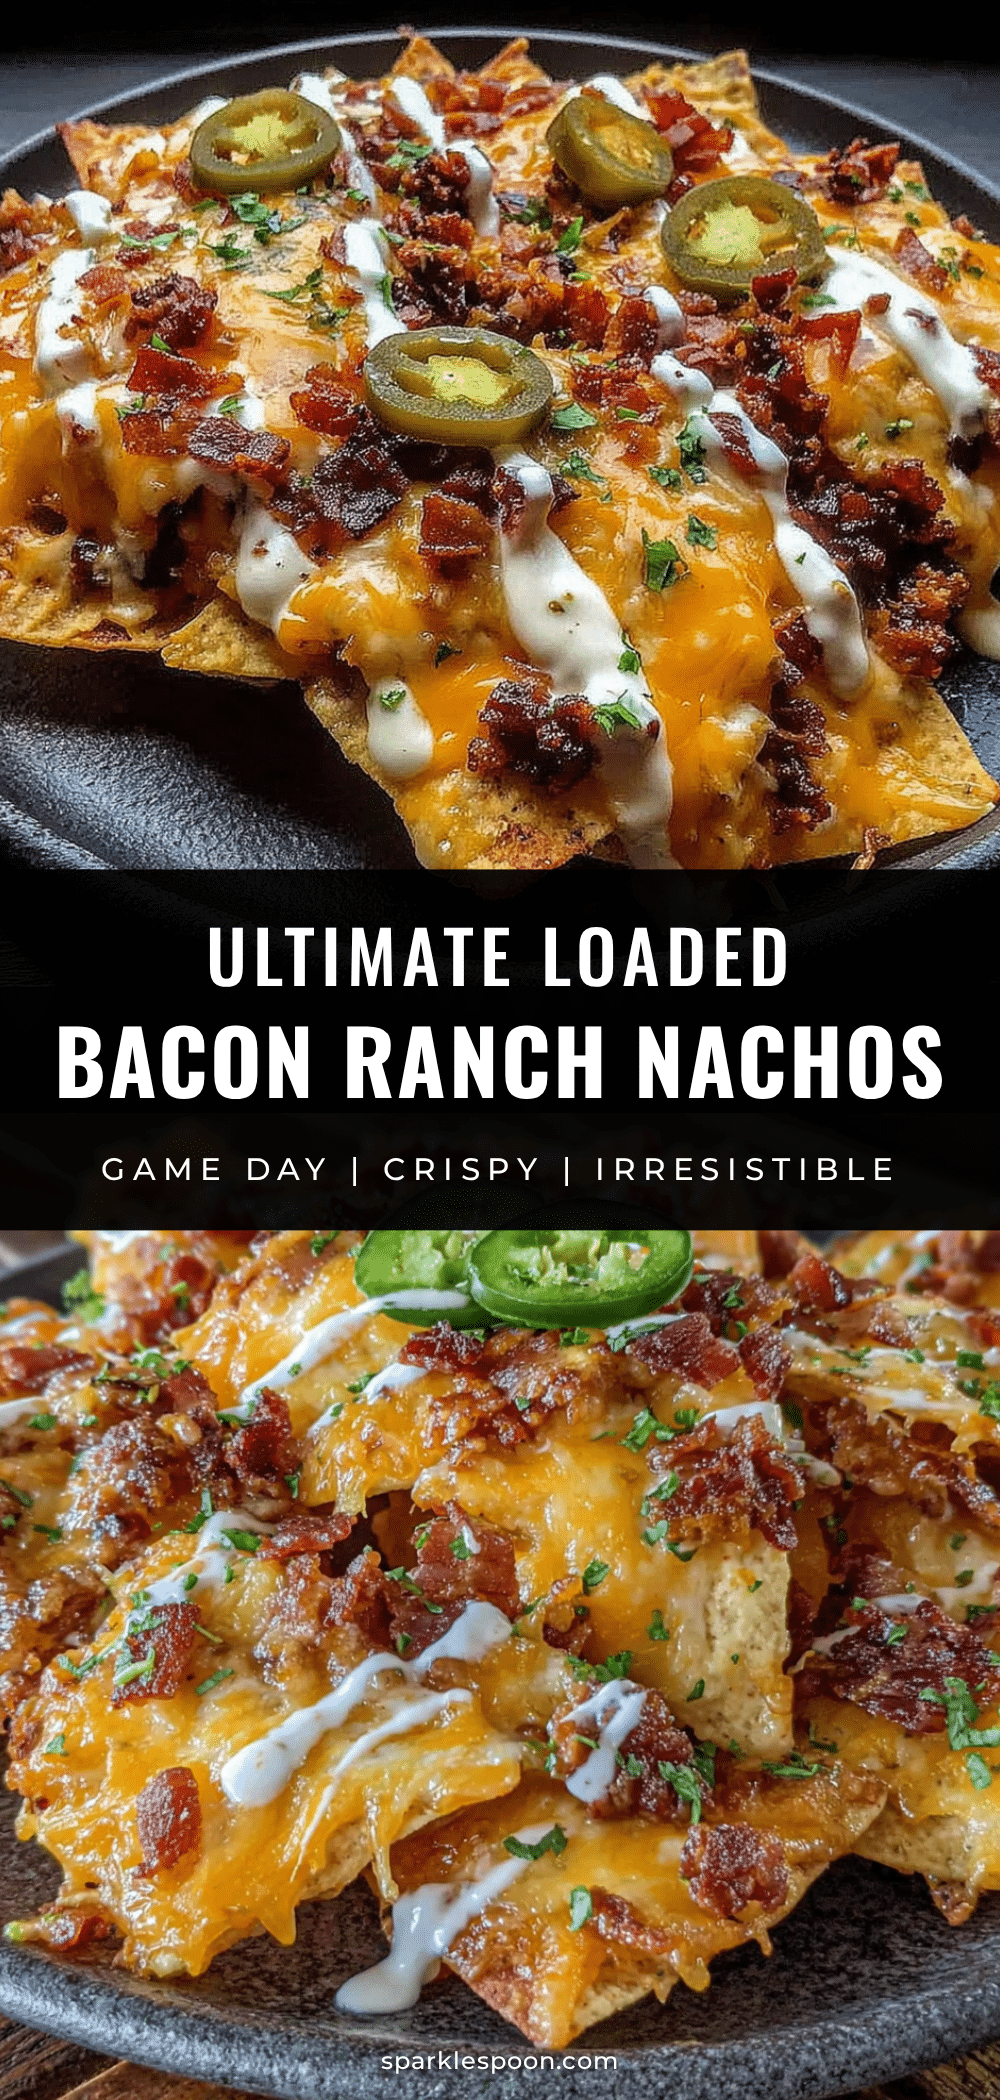
Best Loaded Bacon Ranch Nachos – Easy Game Day Recipe

These Ultimate Loaded Bacon Ranch Football Nachos are the perfect game day snack, featuring crispy tortilla chips layered with seasoned ground beef, melted cheese, crispy bacon, and a cool ranch dressing. Quick and easy to make in under 25 minutes, they’re a crowd-pleaser that will disappear fast.
- Prep Time: 15 minutes
- Cook Time: 10 minutes
- Total Time: 25 minutes
- Yield: 4 servings 1x
- Category: Appetizer
- Cuisine: American
Ingredients
- 1 large bag (13 ounces) tortilla chips (thick, restaurant-style, e.g., Tostitos Scoops or Juanita’s)
- 1 pound ground beef (80/20 blend)
- 1 packet (3 tablespoons) taco seasoning (e.g., McCormick or homemade)
- 2 cups shredded Mexican blend cheese
- 1 cup shredded sharp cheddar cheese
- 8 slices thick-cut bacon, cooked and crumbled
- ½ cup ranch dressing
- 1 tablespoon ranch seasoning mix
- 2 Roma tomatoes, diced
- 4 green onions, sliced
- 2 jalapeños, sliced (seeds removed for less heat)
- ¼ cup sliced black olives
- ½ cup sour cream
- ¼ cup fresh cilantro, chopped
Instructions
- Preheat your broiler to high and move the oven rack to the top position, about 6 inches from the heating element.
- Cook the bacon: Place 8 slices of bacon in a cold skillet. Turn heat to medium and cook until crispy, about 8-10 minutes, flipping once. Transfer to a paper towel-lined plate to drain. Once cool, crumble into small pieces.
- Brown the ground beef: Drain all but 1 tablespoon of bacon grease from the skillet (or use a fresh skillet). Add 1 pound of ground beef and cook over medium-high heat, breaking it apart with a spatula. Cook until no longer pink, about 6-8 minutes. Drain excess fat if needed.
- Season the beef: Add 1 packet of taco seasoning and ⅓ cup of water. Stir well and let it simmer for 2-3 minutes until the sauce thickens.
- Layer the first round of chips and cheese: Spread half the tortilla chips in an even layer on a large sheet pan. Sprinkle half the cooked beef over the chips. Top with half the Mexican blend cheese and half the cheddar.
- Add the second layer: Spread the remaining chips over the first layer. Top with the remaining beef, then the remaining cheeses. Sprinkle 1 tablespoon of ranch seasoning powder evenly over everything.
- Broil the nachos: Place the sheet pan under the broiler for 3-5 minutes, watching carefully. Rotate the pan halfway through for even melting. The cheese should be fully melted and starting to brown in spots, but the chips should still be crispy.
- Add the toppings: Remove the pan from the oven. Immediately drizzle ½ cup of ranch dressing over the hot nachos. Sprinkle the crumbled bacon, diced tomatoes, sliced jalapeños, black olives, and green onions over the top.
- Finish with fresh elements: Dollop sour cream in small spoonfuls across the nachos. Sprinkle fresh cilantro if using. Serve immediately.
Notes
Don’t overload the sheet pan to avoid soggy chips. Layer strategically to ensure every chip gets cheese. Watch the broiler closely to prevent burning. Add cold toppings after baking for the best texture. Use a cooling rack on the sheet pan for extra crispiness. Make the beef ahead of time for faster assembly.
Nutrition
- Serving Size: 1/4 of the full reci
- Calories: 620
- Sugar: 5
- Sodium: 1340
- Fat: 38
- Saturated Fat: 15
- Carbohydrates: 38
- Fiber: 3
- Protein: 32
Keywords: nachos, loaded nachos, bacon ranch nachos, game day recipe, easy appetizer, football food, sheet pan nachos



