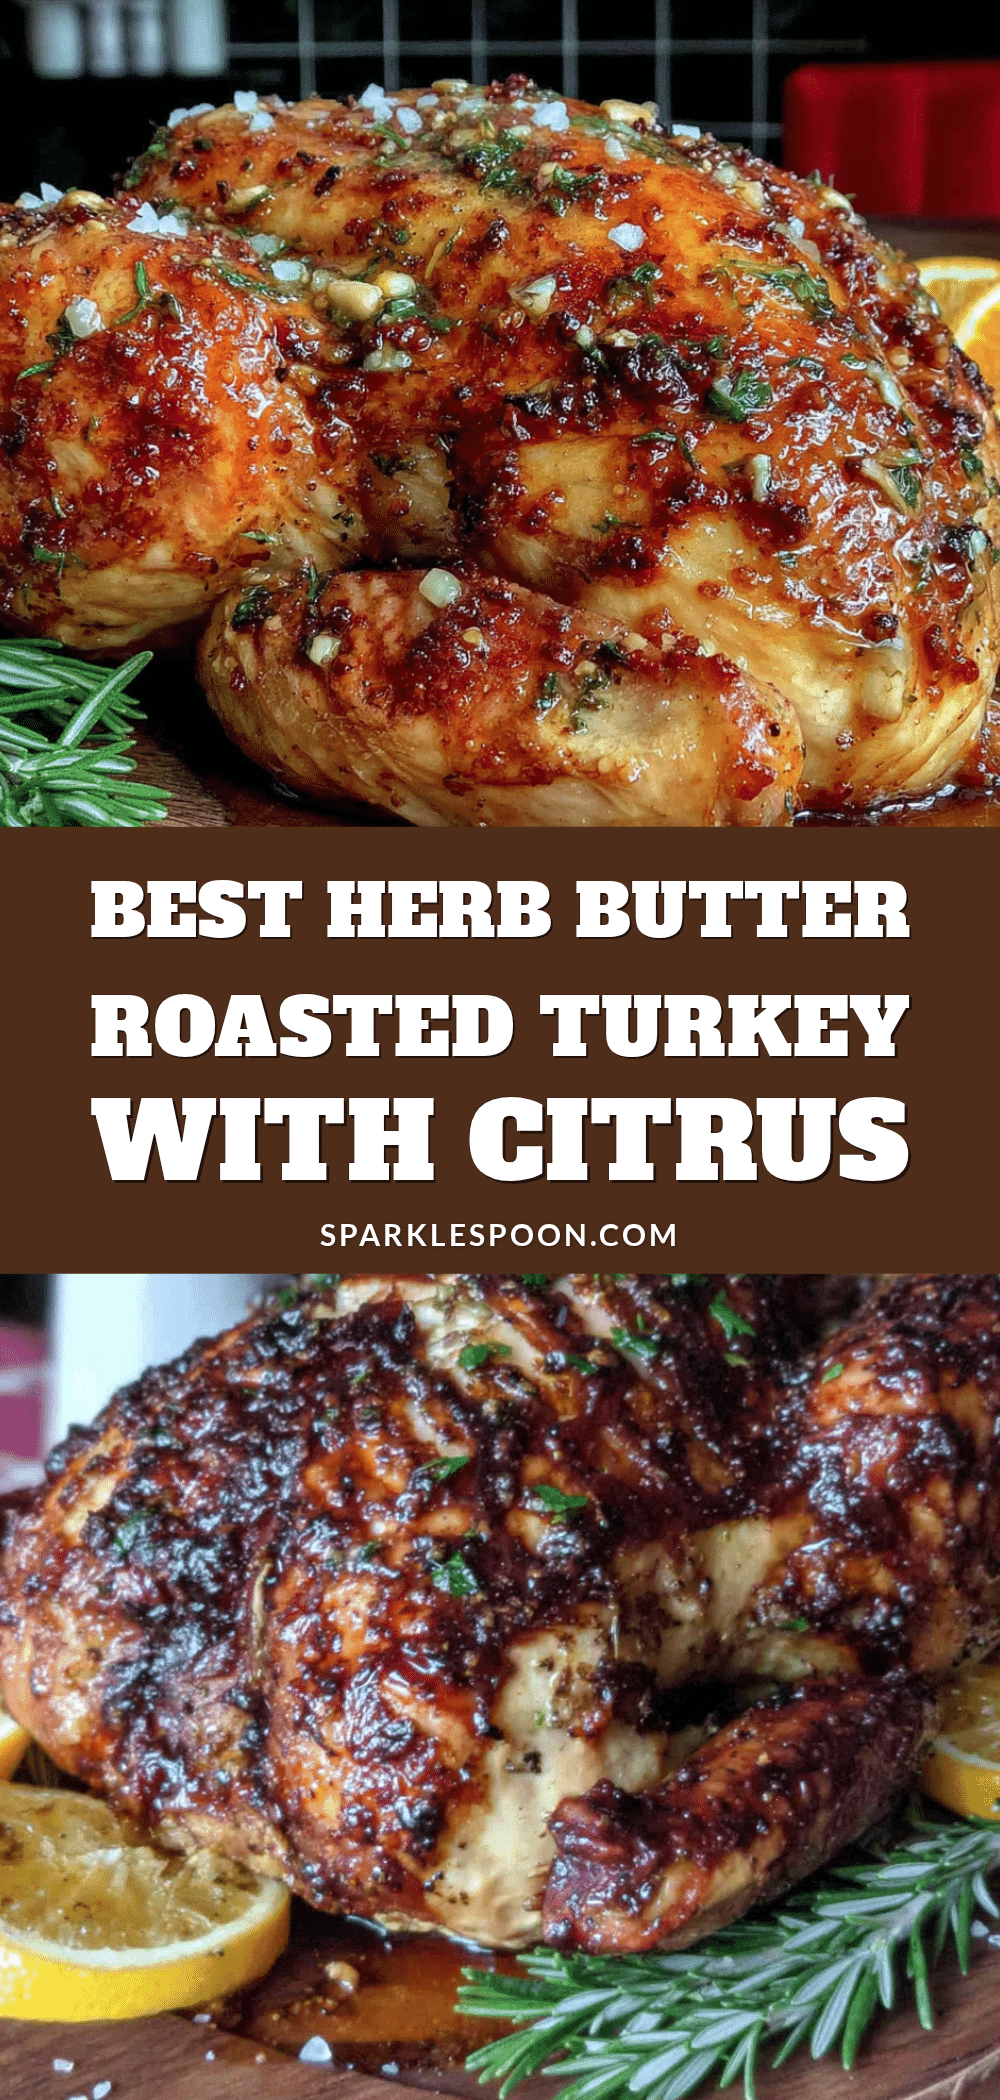
Love this? Save it for later!
Share the inspiration with your friends
Introduction
Marta wasn’t trying to impress anyone. I’d stopped by her place on a rainy Tuesday afternoon to borrow a lug wrench—my car had made a concerning noise in the driveway—and the smell hit me before I even got through the screen door. It wasn’t Thanksgiving. It wasn’t even October. But there she was, pulling this golden-brown turkey out of her oven like it was the most normal Tuesday activity in the world.
“Oh, that?” she said when I asked, wiping her hands on her apron. “Just testing something for the family reunion next month. You want a plate?”
The casualness of it all threw me. Here was a bird so perfectly bronzed it looked like something from a magazine cover, and she was offering me a slice like it was leftover pizza. I sat at her kitchen table—chipped Formica, a salt shaker shaped like a chili pepper—and took my first bite. And honestly? I almost cried. The meat was so tender it practically fell apart under the fork. The skin had this incredible crispness, and underneath it all was this bright, citrusy warmth that I’d never tasted in a turkey before.
“What’s your secret?” I asked, probably sounding a little too desperate.
Marta just shrugged. “Butter. Citrus. A little patience.”
That was five years ago, and I’ve been perfecting her approach ever since. Maybe you’ve been there—standing in the grocery aisle, staring at a frozen turkey, wondering if you’ll ever pull off a holiday meal that doesn’t leave you stressed and disappointed. I get it. I’ve ruined more than my share of dry birds. But this Best Herb Butter Roasted Turkey with Citrus? This one changed everything for me. And I think it might do the same for you.
Why You’ll Love This Recipe
Let me tell you why this recipe has become my go-to for every gathering where I need to show up and show out. First off, the flavor is unreal. The herb butter seeps into every nook and cranny of the bird, while the citrus brightens everything up without making it taste like a fruit salad. It’s the kind of turkey that makes people close their eyes after the first bite.
- Perfect for Hosting: This bird is designed to impress. It comes out of the oven looking like a centerpiece from a cooking show, and your guests will think you slaved for hours. Between us? Most of the work happens while the turkey just sits there, doing its thing.
- Simple Ingredients: You don’t need a specialty grocery store or a culinary degree. Butter, fresh herbs, a couple of oranges and lemons, and a good turkey. That’s it. You probably have most of this in your kitchen right now.
- Scales Beautifully: Cooking for twelve? Twenty? This method works for any size bird. I’ve made it for small Thanksgiving dinners and for potlucks where I needed to feed a crowd. Never let me down.
- Foolproof Technique: The herb butter acts as insulation, keeping the breast meat moist while the dark meat cooks through. No more dry white meat. No more undercooked thighs. Just perfect turkey, every time.
- Stress-Free Prep: You can make the herb butter days ahead. You can stuff the citrus in the cavity the night before. When your guests arrive, you’re not running around like a headless chicken—you’re just popping a beautiful bird in the oven.
This isn’t just another turkey recipe. It’s the one I’ve tested more times than I can count, tweaking the herb ratios, adjusting the cooking times, figuring out exactly how to get that skin so crispy you can hear it crackle across the table. It’s the one that made my mother-in-law ask for the recipe. It’s the one that turns a stressful holiday meal into something you actually enjoy making.
What Ingredients You Will Need
Every ingredient here plays a specific role. The butter carries the herbs and creates that golden crust. The citrus adds brightness without overwhelming the turkey’s natural flavor. The aromatics build depth from the inside out. Trust the process—each component matters.
For the Herb Butter:
- 1 cup (2 sticks) unsalted butter, softened to room temperature (I prefer Kerrygold for its richness, but any good-quality butter works)
- 4 cloves garlic, minced (use a microplane for the best paste-like consistency)
- 2 tablespoons fresh rosemary, finely chopped (strip the leaves from the woody stems first)
- 2 tablespoons fresh thyme leaves (strip these from the stems too—tedious but worth it)
- 2 tablespoons fresh sage, finely chopped (the earthy flavor is essential)
- 1 tablespoon fresh parsley, chopped (adds a fresh note at the end)
- 1 teaspoon salt (I use kosher salt for better control)
- 1/2 teaspoon black pepper, freshly ground
- Zest of 1 lemon (only the yellow part—the white pith is bitter)
- Zest of 1 orange (same rule applies)
For the Turkey:
- 1 whole turkey, 12-14 pounds (thawed completely if frozen—this takes 3-4 days in the fridge, so plan ahead)
- 1 lemon, quartered (for stuffing the cavity)
- 1 orange, quartered (adds sweetness and moisture)
- 1 onion, quartered (adds savory depth)
- 4 cloves garlic, smashed (don’t bother peeling them—the skins add flavor)
- 4 sprigs fresh rosemary (for the cavity)
- 4 sprigs fresh thyme (same)
- Salt and pepper for seasoning the outside
- 2 cups chicken or turkey broth (for the bottom of the roasting pan—keeps the drippings from burning)
For the Pan Drippings (optional but recommended):
- The drippings from the roasting pan
- 2 tablespoons all-purpose flour (or cornstarch for gluten-free)
- 1 cup additional broth, if needed
- Salt and pepper to taste
Ingredient Tips from My Kitchen: When choosing your turkey, look for one that hasn’t been pre-brined or injected with solution if you can find it. This gives you more control over the seasoning. I’ve used both fresh and frozen turkeys with this recipe, and both work beautifully—just make sure that frozen bird is fully thawed. A partially frozen turkey will cook unevenly and throw off all your timing.
For the herbs, fresh is non-negotiable here. Dried herbs won’t give you the same bright flavor, and they’ll burn more easily under the high heat. If you’re growing rosemary in your garden, even better—that’s what Marta used, and I swear it made a difference.
Equipment Needed
You don’t need a professional kitchen to pull this off, but a few key tools make the job much easier.
- Roasting Pan: A sturdy metal pan with a rack is ideal. The rack lifts the turkey off the bottom of the pan, allowing hot air to circulate and crisp the skin evenly. If you don’t have a rack, you can use thick carrot and celery slices as a makeshift rack—they add flavor too.
- Instant-Read Thermometer: This is non-negotiable. Guessing doneness by color or time is how dry turkey happens. A good thermometer costs about $15 and will save every holiday meal you ever make.
- Kitchen Twine: For trussing the legs. You can skip this if you’re in a pinch, but tying the legs together helps the turkey cook more evenly.
- Mixing Bowl: For combining the herb butter. Nothing fancy needed.
- Microplane or Zester: For getting the citrus zest without the bitter pith. I’ve used the small side of a box grater in a pinch, but a microplane is easier.
- Basting Brush or Spatula: For spreading the herb butter under the skin. Your hands work too—just make sure they’re clean.
- Aluminum Foil: For tenting the turkey if the skin browns too quickly.
- Measuring Cups and Spoons: For accuracy, especially with the salt.
I’ll be honest—I roasted my first few turkeys in a cheap disposable pan from the grocery store, and it worked fine. Upgrade when you can, but don’t let equipment hold you back from making this recipe.
Preparation Method
Take your time with these steps. Rushing is the enemy of good turkey.
- Make the Herb Butter (Up to 3 Days Ahead): In a medium bowl, combine the softened butter, minced garlic, chopped rosemary, thyme, sage, parsley, salt, pepper, lemon zest, and orange zest. Mix until everything is evenly distributed. Taste a tiny bit—yes, raw butter—to check the seasoning. It should taste herby and bright. Cover and refrigerate until you’re ready to use it. Let it come back to room temperature before spreading—cold butter won’t spread under the skin.
- Prep the Turkey (Day Of): Remove the turkey from the refrigerator 1 hour before roasting. This takes the chill off and helps it cook more evenly. Remove the neck and giblets from the cavities—save them for stock if you’re ambitious. Pat the turkey completely dry with paper towels, inside and out. Moisture is the enemy of crispy skin, so be thorough. Season the cavity generously with salt and pepper.
- Stuff the Cavity: Stuff the quartered lemon, orange, onion, smashed garlic cloves, rosemary sprigs, and thyme sprigs into the main cavity. Don’t pack them too tight—you want air to circulate. The citrus and aromatics will steam from the inside, infusing the meat with flavor and moisture.
- Apply the Herb Butter (This Is the Magic Step): Using your fingers, gently loosen the skin from the breast meat. Start at the neck cavity and work your fingers down between the skin and the meat, being careful not to tear the skin. You want to create a pocket. Take about two-thirds of the herb butter and spread it directly onto the breast meat under the skin. Massage it around to cover as much surface area as possible. Then take the remaining butter and spread it all over the outside of the turkey—the legs, the thighs, the wings, every visible inch of skin. Don’t forget the underside.
- Truss the Turkey: Tuck the wing tips under the turkey’s back—this prevents them from burning. Tie the legs together with kitchen twine at the ankles. This keeps the turkey compact and helps it cook evenly.
- Set Up the Roasting Pan: Place the turkey breast-side up on the rack in your roasting pan. Pour the 2 cups of broth into the bottom of the pan—not over the turkey. The broth will catch the drippings and keep them from burning, which means better gravy later.
- Roast the Turkey: Preheat your oven to 425°F (220°C). Roast the turkey at this high temperature for 30 minutes. This initial blast of heat starts crisping the skin. After 30 minutes, reduce the oven temperature to 350°F (175°C). Continue roasting, basting every 30 minutes with the pan juices. Baste quickly—every time you open the oven door, heat escapes. Total roasting time will be about 13-15 minutes per pound. For a 12-pound turkey, that’s roughly 2.5 to 3 hours total.
- Check for Doneness: Start checking the temperature about 30 minutes before you expect the turkey to be done. Insert your instant-read thermometer into the thickest part of the thigh, avoiding the bone. You’re looking for 165°F (74°C). Also check the breast—it should be at least 160°F (71°C), and it will continue cooking as it rests. If the skin is browning too quickly, tent the turkey loosely with aluminum foil.
- Rest the Turkey (Do Not Skip This): Once the turkey reaches the right temperature, remove it from the oven. Transfer it to a cutting board and tent it loosely with foil. Let it rest for at least 30 minutes, and up to 45. I know you’re hungry. I know the house smells amazing. But resting is when the juices redistribute throughout the meat. Carve too early, and all that moisture ends up on the cutting board instead of on your plate.
- Make the Gravy (While the Turkey Rests): Pour the pan drippings through a fine-mesh strainer into a fat separator or a glass measuring cup. Let the fat rise to the top. Skim off most of the fat, leaving about 2 tablespoons in the drippings. Place the roasting pan over two burners on medium heat. Add the flour and whisk constantly for 1-2 minutes until it forms a golden paste. Slowly pour in the defatted drippings plus enough additional broth to make 2 cups total, whisking constantly. Simmer for 3-5 minutes until thickened. Season with salt and pepper. If you’re feeling fancy, add a splash of white wine or a squeeze of lemon juice.
Cooking Tips & Techniques
I’ve made this Best Herb Butter Roasted Turkey with Citrus at least twenty times now, and I’ve learned a few things the hard way. Let me save you the trouble.
Don’t Skip the Drying Step: I once got lazy and didn’t pat the turkey dry thoroughly. The skin came out splotchy and soft instead of that gorgeous golden brown. Paper towels are cheap. Take the extra two minutes.
Room Temperature Butter Is Crucial: Cold butter won’t spread under the skin. It’ll tear the skin or just sit there in clumps. Leave your butter out on the counter for a good hour before you start mixing the herb butter. If you forgot, microwave it in 5-second bursts, checking after each one. You want it soft, not melted.
Baste Quickly or Not at All: Every time you open the oven door, the temperature drops significantly. If you’re basting, have everything ready—oven mitts on, basting brush in hand—and close that door fast. Honestly, with all the butter under the skin, you could skip basting entirely and still get a beautiful bird. I do it more for the ritual than anything else.
Trust Your Thermometer, Not the Timer: I’ve had a 14-pound turkey finish in 2 hours and 45 minutes. I’ve had a 12-pound turkey take over 3 hours. Ovens vary. The pop-up timer that comes with some turkeys is notoriously unreliable. Your instant-read thermometer is your best friend here.
Let the Turkey Rest Longer Than You Think: I know it’s tempting to carve immediately. But I promise you—resting for a full 45 minutes makes a noticeable difference. The meat stays hot, the juices stay in the meat, and carving is actually easier because the muscles have relaxed.
My Biggest Failure: The first time I made this for my in-laws, I forgot to take the giblet bag out of the neck cavity. I discovered it halfway through roasting when the bag started smoking. The turkey was fine—the bag hadn’t burst—but I was mortified. Now I check both cavities three times before the turkey goes anywhere near the oven.
Variations & Adaptations
This recipe is forgiving. Here are some ways to make it your own.
Citrus Variations: Try swapping the lemon and orange for grapefruit and lime for a more tropical vibe. Or use blood oranges when they’re in season for a stunning color and slightly sweeter flavor. I did a version with Meyer lemons and tangerines last winter, and it was honestly the best one yet.
Herb Swaps: Not a fan of sage? Use tarragon instead—it has a lovely anise-like flavor that pairs beautifully with citrus. Or try marjoram in place of the oregano for a milder, sweeter herb note. Fresh dill works too, especially if you’re serving the turkey with a dill-forward side dish.
Spice It Up: Add 1 teaspoon of smoked paprika and 1/2 teaspoon of cayenne pepper to the herb butter for a smoky, spicy kick. This is my husband’s favorite variation—he calls it “turkey with attitude.”
Dietary Adaptations: For a dairy-free version, substitute the butter with a high-quality vegan butter or ghee (which is technically dairy but has minimal lactose). The texture will be slightly different, but the flavor is still fantastic. For a lower-sodium option, reduce the salt in the herb butter to 1/2 teaspoon and season the outside of the turkey with a salt-free seasoning blend.
Different Cooking Methods: If you’re short on oven space (holiday cooking, am I right?), you can spatchcock the turkey—cut out the backbone and flatten it—for faster, more even cooking. It takes about 45 minutes less time and frees up oven space for sides. The herb butter and citrus work exactly the same way. I’ve also had success with this recipe on a charcoal grill using indirect heat. It takes longer and requires more attention, but the smoky flavor is incredible.
Serving & Storage Suggestions
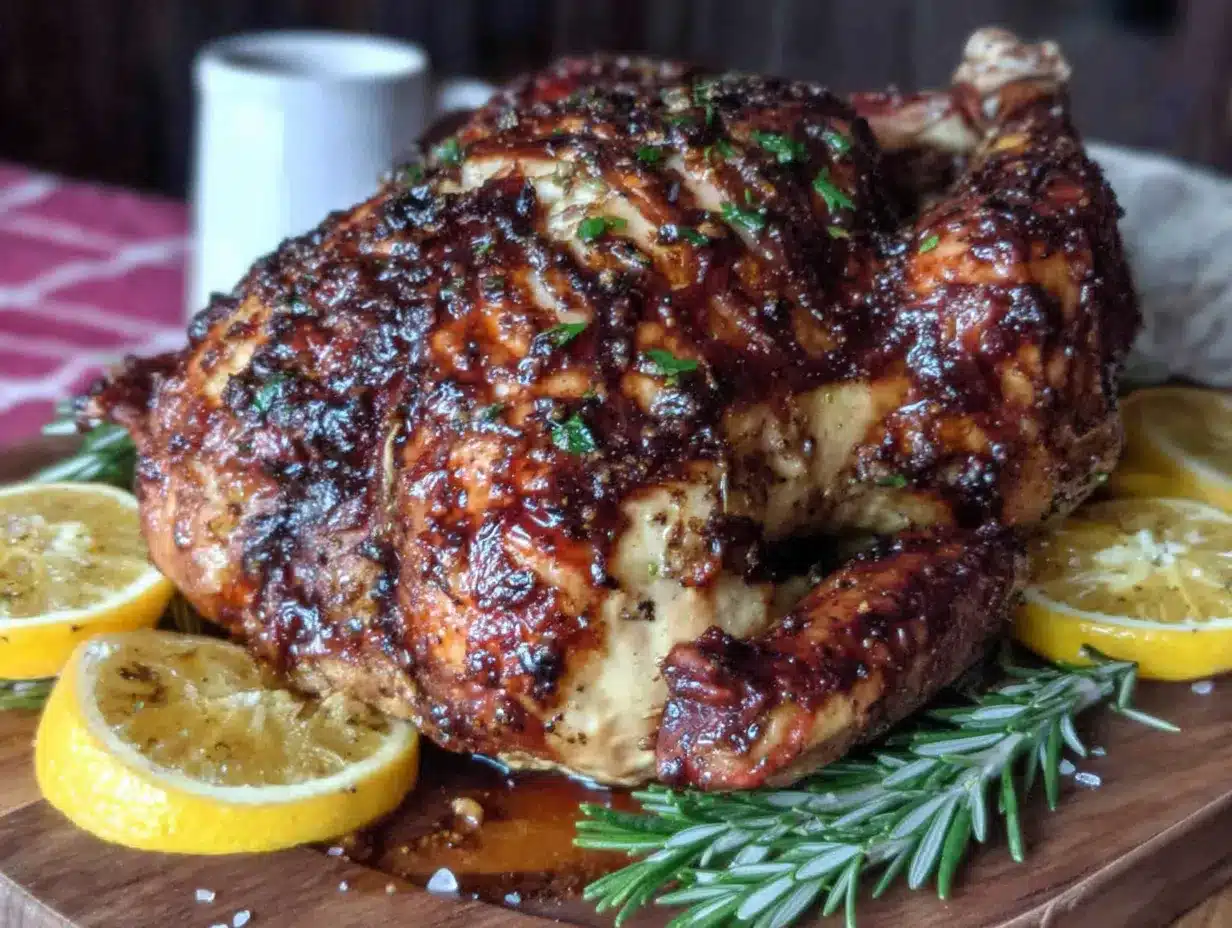
Serving: Carve the turkey at the table for maximum drama. Arrange the sliced meat on a warm platter and garnish with fresh herb sprigs and thin citrus slices. The contrast of the golden skin against the green herbs and bright citrus makes for a stunning presentation that your guests will photograph before they eat.
What to Serve Alongside: This turkey pairs beautifully with classic sides like mashed potatoes, green bean casserole, and dinner rolls. The citrus notes also work surprisingly well with a bright, acidic cranberry sauce—the tartness cuts through the richness of the herb butter. For drinks, a crisp Chardonnay or a light Pinot Noir complements the herbal and citrus flavors without overwhelming them.
Storage: Remove all the meat from the bones within 2 hours of cooking. Store leftover turkey in an airtight container in the refrigerator for up to 4 days. The carcass and any bones make excellent stock—just cover with water, add a carrot and an onion, and simmer for a few hours.
Reheating: The best way to reheat leftover turkey without drying it out is to place slices in a baking dish, add a splash of broth or water, cover with foil, and warm in a 300°F (150°C) oven for 10-15 minutes. Avoid the microwave if you can—it tends to make the meat tough and rubbery.
Freezing: Shredded or sliced turkey freezes beautifully for up to 3 months. Wrap it tightly in plastic wrap, then foil, and place in a freezer bag. Thaw overnight in the refrigerator before reheating.
Flavor Development: Here’s a secret—leftover turkey often tastes even better the next day. The flavors have had time to meld, and the meat has absorbed more of that citrus-herb goodness. I always make extra on purpose just for sandwiches.
Nutritional Information & Benefits
Turkey is naturally lean and packed with protein—a 4-ounce serving of roasted turkey breast provides about 35 grams of protein with minimal saturated fat. The herb butter adds some fat, but most of it renders off during cooking. The citrus provides a boost of vitamin C, and the herbs contribute antioxidants and anti-inflammatory compounds.
Estimated Nutritional Values (per 4-ounce serving of breast meat with skin):
- Calories: 250-300
- Protein: 35g
- Fat: 12-15g
- Saturated Fat: 6-8g
- Carbohydrates: 1-2g
- Sodium: 400-500mg (varies based on salt used)
Dietary Considerations: This recipe is naturally gluten-free (use cornstarch for the gravy if needed), low-carb, and keto-friendly. It contains dairy from the butter, but you can easily substitute for a dairy-free version. Always check your broth for gluten if that’s a concern.
My Wellness Perspective: Look, this is a holiday recipe. It’s meant to be indulgent. I don’t stress about the butter content because I’m balancing it with lean protein and serving it alongside vegetables. One amazing meal isn’t going to derail your health goals—enjoy it, savor it, and get back to your routine tomorrow.
Conclusion
This Best Herb Butter Roasted Turkey with Citrus has become my absolute favorite way to prepare a holiday bird. It’s the recipe that made me stop fearing Thanksgiving and start looking forward to it. The combination of herby, buttery richness with bright, citrusy freshness is something you won’t find in any other turkey recipe.
I love that it’s impressive enough for a crowd but simple enough that I don’t spend the whole meal stressed out. I love that the leftovers make the best sandwiches. And I love that every time I make it, I think of Marta and her chipped Formica table and her casual, “You want a plate?”
Give this recipe a try for your next gathering. Customize the herbs, play with the citrus, make it your own. I’d love to hear how it turns out—drop a comment below and let me know what variations you tried. And if you’re looking for more crowd-pleasing main dishes, check out our honey glazed ham recipe or our stuffed pork tenderloin for another show-stopping option.
Happy cooking, friends. Your best holiday meal yet is just a roast away.
Frequently Asked Questions
Can I prepare the herb butter in advance?
Absolutely. The herb butter can be made up to 3 days ahead and stored in the refrigerator. Just let it come to room temperature before spreading so it’s soft and pliable.
Do I need to brine the turkey first?
Not with this recipe. The herb butter and citrus do the work of keeping the meat moist and flavorful without the extra step of brining. If you prefer a brined turkey, reduce the salt in the herb butter slightly to avoid over-salting.
What if my turkey is larger than 14 pounds?
The same method works for larger birds—just increase the roasting time. Plan for about 13-15 minutes per pound, and always rely on your thermometer for doneness. For turkeys over 16 pounds, consider spatchcocking for more even cooking.
Can I use dried herbs instead of fresh?
Fresh herbs really do make a difference here. Dried herbs are more concentrated and can burn under high heat. If you absolutely must substitute, use 1 teaspoon of dried herbs for every tablespoon of fresh, and add them later in the cooking process to prevent burning.
How do I keep the turkey warm while it rests?
Tent the turkey loosely with aluminum foil after it comes out of the oven. The foil traps heat without steaming the skin, keeping the bird warm for up to 45 minutes while you finish the sides and gravy.
Pin This Recipe!