Love this? Save it for later!
Share the inspiration with your friends
It was 11:47 PM on a frantic Wednesday in mid-December, and I was elbow-deep in a sticky disaster. The gingerbread walls were standing tall, the roof was perfectly slanted, but the icing—the so-called “glue” of the entire operation—was a runny, sad puddle that refused to hold anything together. I didn’t have the fancy piping bags I’d seen online, but I had a Ziploc bag with a snipped corner and a desperate idea that arrived after my third cup of tea. You know that feeling when a recipe just… fights you? Honestly, I was this close to using hot glue. But then I remembered a trick from a baking class I took years ago, involving meringue powder and a little patience. That night, I made the best royal icing of my life, and my gingerbread house didn’t just stand—it looked like it could survive a snowstorm. Maybe you’ve been there, staring at a pile of broken cookies and wondering if it’s worth it. Let me tell you, it is, but only if you have the right icing recipe.
This meringue powder royal icing for gingerbread houses is the one I’ve used every single year since that chaotic night. It’s not just a recipe; it’s a rescue mission in a bowl. It dries hard, holds tight, and pipes like a dream, even for beginners. I’ve tried the fresh egg white versions, and while they work, they feel fussy and risky when you’re building with kids or sharing with a crowd. This version is stable, safe, and reliable—everything you need when your house’s structural integrity depends on it. And honestly, there’s something magical about watching a simple mix of sugar and powder transform into a glossy, strong cement that turns cookies into a village. This is the recipe that saved my holiday baking, and I’m pretty sure it’ll save yours too.
Why You’ll Love This Recipe
This isn’t just any royal icing—it’s the one I’ve tested and tweaked over countless holiday seasons, and it’s earned its spot as my go-to. I’ve had my fair share of icing failures (weeping roofs, sliding walls, you name it), and this recipe came out of those trials. It’s the kind of reliable you can count on when you’re building with a group of excited kids or trying to impress at a holiday party.
- Quick & Easy: Comes together in under 10 minutes, perfect for last-minute decorating sessions or when the gingerbread is already baked and waiting.
- Simple Ingredients: No fresh eggs or fancy cream of tartar hunts—just meringue powder, powdered sugar, water, and a splash of vanilla. You probably have everything already.
- Perfect for Holiday Baking: Ideal for gingerbread houses, sugar cookies, and any project that needs a strong, edible glue that dries rock-hard.
- Crowd-Pleaser: This icing holds up to enthusiastic little hands and doesn’t crack under pressure. It’s a lifesaver for group decorating.
- Unbelievably Strong: The texture is glossy and smooth, but once it dries, it’s like concrete. Your gingerbread house will stand tall through the entire holiday season.
What makes this recipe different is the technique I picked up from that late-night baking class: letting the icing rest for a few minutes before piping. It sounds small, but it makes the texture silky and the lines crisp. This isn’t just another version of royal icing—it’s the one that actually works, every single time. It’s the kind that makes you close your eyes after the first perfect piped line, knowing your house is finally going to hold together.
What Ingredients You Will Need
This recipe uses simple, pantry-friendly ingredients to deliver a strong, glossy icing that’s perfect for building and decorating. The magic is in the balance, and each ingredient plays a specific role in making your gingerbread house a success.
- Meringue Powder: This is the star. I recommend Wilton or Genius Gourmet for consistent results. Meringue powder gives the icing structure and stability without the risk of raw eggs. (Look for a brand that lists cornstarch as a main ingredient for best texture.)
- Powdered Sugar: Also called confectioners’ sugar, this is the bulk of the icing. Sift it before measuring to avoid lumps. A good quality brand like C&H or Domino works perfectly.
- Water: Use room temperature water. Cold water can make the icing seize, and hot water can thin it out too quickly.
- Vanilla Extract: A splash adds warmth and masks the slight “powder” taste of the meringue powder. Use clear vanilla if you want a pure white icing for decorating. (You can also substitute almond extract for a different flavor.)
- Cream of Tartar: This is optional but highly recommended. It stabilizes the meringue and helps the icing whip up fluffier. A tiny pinch goes a long way.
Substitution Guidance: If you’re out of meringue powder, you can use powdered egg whites, but the texture will be slightly different. For a vegan version, aquafaba (chickpea liquid) can work, but it requires a different technique and isn’t as stable for heavy construction. Stick with meringue powder for the best, most reliable results.
Equipment Needed
You don’t need a professional bakery setup for this recipe. Most of these tools are probably already in your kitchen, and I’ve included a few budget-friendly alternatives.
- Stand Mixer or Hand Mixer: A stand mixer with a whisk attachment makes this effortless, but a hand mixer works just fine. I’ve used both, and the key is patience—you want to whip until stiff peaks form.
- Large Mixing Bowl: Use a clean, grease-free bowl. Any trace of oil can prevent the icing from whipping up properly. Glass or stainless steel is ideal.
- Rubber Spatula: For scraping down the sides and folding in the last bits of sugar.
- Piping Bags and Tips: Disposable piping bags are easiest for cleanup. For gingerbread houses, a small round tip (like Wilton #2 or #3) is perfect for outlining and detail work. If you don’t have tips, you can snip a tiny corner off a Ziploc bag—just be careful not to cut too much!
- Sifter or Fine-Mesh Strainer: Sifting the powdered sugar is a game-changer. It prevents lumps that can clog your piping tip.
- Measuring Cups and Spoons: Accuracy matters here. Too much water and your icing will be runny; too little and it won’t pipe.
Budget-Friendly Tip: If you don’t have a stand mixer, a hand mixer is a great investment. I started with a $20 model from a big box store, and it lasted me years. For piping, you can use a simple plastic squeeze bottle with a fine tip—it’s a cheap alternative that works surprisingly well for flooding and details.
Preparation Method

Follow these steps carefully, and you’ll have a perfect batch of royal icing every time. The key is to not rush the whipping process and to add water slowly.
- Sift the Powdered Sugar: Measure out 4 cups (about 480g) of powdered sugar and sift it into your mixing bowl. This step is non-negotiable—lumps will ruin your piping. If you’re in a hurry, you can skip sifting and whisk the sugar vigorously with a fork to break up clumps.
- Combine Dry Ingredients: Add 3 tablespoons (about 24g) of meringue powder and 1/2 teaspoon of cream of tartar (if using) to the sifted sugar. Whisk them together with a fork to distribute the meringue powder evenly. This prevents clumps when you add the liquid.
- Start Mixing: Add 1/2 cup (120ml) of room temperature water and 1 teaspoon of vanilla extract to the bowl. Using the paddle attachment (or your hand mixer), mix on low speed for about 30 seconds to incorporate the liquid. The mixture will look dry and crumbly at first—don’t panic.
- Whip to Stiff Peaks: Switch to the whisk attachment and increase the speed to medium-high. Whip for 5 to 7 minutes, stopping to scrape down the sides once. The icing will transform from a thin, watery mixture into a thick, glossy, and fluffy cloud. You’re looking for stiff peaks—when you lift the whisk, the icing should stand up straight without drooping. This is the most important step; under-whipped icing will be runny and weak.
- Adjust Consistency: For gingerbread house construction, you want a stiff consistency. If the icing is too thick to pipe, add water 1 teaspoon at a time and mix on low for 10 seconds. If it’s too thin, add more sifted powdered sugar 1 tablespoon at a time. The perfect texture should hold a sharp peak when you lift the whisk.
- Rest the Icing: Here’s my secret trick. Let the icing sit in the bowl, covered with a damp paper towel, for 5 to 10 minutes. This allows any tiny air bubbles to rise to the surface and pop. It also gives the meringue powder time to fully hydrate, resulting in a smoother, silkier texture. Stir it gently before filling your piping bag.
- Fill Your Piping Bag: Place a piping tip (or snip the corner of a Ziploc bag) and fold the top of the bag over your hand to create a cuff. Spoon the icing into the bag, filling it no more than halfway. Twist the top to seal, and gently push the icing down toward the tip. Practice on a piece of parchment paper before you start on your gingerbread house.
Personal Tip: I always make a double batch. One for construction (stiff consistency) and one for decorating (slightly thinner, for flooding details). It saves time and frustration later.
Cooking Tips & Techniques
Over the years, I’ve made every mistake you can imagine with royal icing. Here’s what I’ve learned so you can skip the failures and get straight to the fun part.
- Don’t Over-Whip: It’s possible to whip royal icing too long, which can make it grainy and stiff. Stop as soon as you reach stiff peaks. If you see the icing starting to look dry or curdled, you’ve gone too far. You can try to rescue it by adding a teaspoon of water and mixing gently, but it’s better to stop early.
- Keep It Covered: Royal icing dries out incredibly fast. If you’re not actively using it, keep the bowl covered with a damp paper towel or plastic wrap. I learned this the hard way when my entire batch crusted over in the time it took me to answer the door for a delivery. A dry skin will clog your piping tip and ruin the texture.
- Test the Consistency: Before you pipe on your house, draw a few lines on a piece of parchment paper. The icing should hold its shape without spreading. If it melts into a puddle, it’s too thin. If it looks lumpy or cracks when you bend the paper, it’s too thick. Adjust accordingly.
- Use a Toothpick for Details: For tiny dots or fine lines, dip a toothpick into the icing and apply it directly. This is a lifesaver for adding eyes to gingerbread people or small snowflakes.
- Multitasking Strategy: While the icing is resting for 5 minutes, prep your gingerbread pieces. Make sure they’re completely cool and flat. If any edges are uneven, you can sand them down with a fine grater or a knife. A flat surface is crucial for a strong bond.
Variations & Adaptations
This recipe is incredibly versatile. Here are a few ways to adapt it for different needs and tastes.
- Flavor Twist: Swap the vanilla extract for almond, lemon, or peppermint extract. Peppermint is especially festive for gingerbread houses, but use it sparingly—it’s strong. I made a batch with peppermint one year, and my house smelled like a candy cane factory. It was glorious.
- Color It: Gel food coloring is best for royal icing because it doesn’t thin the consistency. Liquid food coloring can make the icing runny. Add a tiny drop at a time with a toothpick and mix thoroughly. For a gingerbread house, white, red, and green are classics.
- Dietary Adaptation: For a gluten-free version, this recipe is naturally gluten-free as long as your meringue powder is certified gluten-free (most are). For a vegan version, you can try aquafaba, but be warned—it’s not as strong. I’ve tested it, and while it works for decorating cookies, it’s not reliable for holding up walls.
- Thicker for Structural Support: If you’re building a particularly heavy or complex house, add an extra 1/4 cup of powdered sugar to make the icing even stiffer. This creates a stronger “glue” that can support extra candy decorations.
Serving & Storage Suggestions
Once your gingerbread house is assembled, you’ll want it to last through the holidays. Here’s how to serve and store it properly.
- Serving Temperature: Royal icing sets best at room temperature. Don’t refrigerate your finished house—the humidity can make the icing soft and sticky. Display it in a cool, dry place away from direct sunlight.
- Presentation: Place your house on a sturdy cake board or a large plate. You can create a snowy scene by spreading a thin layer of icing on the board and dusting it with powdered sugar. Add miniature trees, snowmen, or even a path of candy rocks.
- Storage: An assembled gingerbread house can last for weeks if stored properly. Keep it in a cool, dry place, and cover it loosely with plastic wrap if you need to protect it from dust. Do not refrigerate—the moisture will ruin the icing and make the cookies soft.
- Reheating (Not Applicable): This isn’t a recipe you reheat. But if you have leftover icing, it can be stored in an airtight container in the refrigerator for up to 2 weeks. Before using, let it come to room temperature and re-whip it for a minute to restore the texture.
- Flavor Development: The flavor of the icing actually improves over a day or two as the vanilla melds with the meringue powder. Don’t be surprised if your house tastes even better on day two than the day you built it.
Nutritional Information & Benefits
Let’s be honest—royal icing is a sugar-based treat, so it’s not a health food. But here’s a quick look at what’s in it.
- Estimated Nutritional Values (per 2 tablespoons serving): Calories: 120, Fat: 0g, Carbohydrates: 30g, Sugar: 29g, Protein: 0g. These are approximate and will vary based on the exact brands you use.
- Health Benefits of Key Ingredients: Meringue powder is made from dried egg whites, which are a good source of protein. However, the amount used in this recipe is very small, so the nutritional impact is minimal. The main benefit is that it’s a safe alternative to raw egg whites, eliminating the risk of salmonella.
- Dietary Considerations: This recipe is gluten-free, nut-free, and soy-free (depending on your meringue powder brand). It is not vegan due to the egg whites. For a low-sugar version, you can try a sugar-free powdered sugar substitute, but the texture will be different and may not be as stable for construction.
- Potential Allergens: Contains eggs (from meringue powder). Always check the label on your meringue powder to ensure it’s processed in a facility free from other allergens if that’s a concern.
My personal take? This is a treat for special occasions. It’s meant to be enjoyed in small amounts, and the joy of building and decorating far outweighs the sugar content. It’s about the experience, not the nutrition.
Conclusion
This meringue powder royal icing for gingerbread houses has saved my holiday baking more times than I can count. It’s the recipe I turn to when I need something reliable, strong, and beautiful. Whether you’re building a simple cottage or a full gingerbread village, this icing will hold everything together—literally and figuratively. I love how it transforms a pile of cookies into a memory that lasts all season. It’s not just about the house; it’s about the laughter, the messy hands, and the pride in seeing your creation stand tall.
I’d love to hear how your gingerbread house turns out! Drop a comment below and share your decorating tips, your biggest wins, or even your funny failures. Don’t forget to pin this recipe for next year, and if you try a fun variation, let me know in the comments. Happy building, and may your walls never fall!
Frequently Asked Questions
Can I use this icing for sugar cookies too?
Absolutely! This royal icing works beautifully for decorating sugar cookies. Just thin it slightly (add a teaspoon of water at a time) for flooding, and keep a stiffer batch for outlining. It dries to a smooth, glossy finish that’s perfect for detailed designs.
How long does it take for the icing to dry completely?
At room temperature, a thin layer of icing will dry in about 1 to 2 hours. For thicker lines or structural bonds on a gingerbread house, it can take 4 to 6 hours or even overnight. Be patient—rushing it can lead to collapsed walls. I usually let my house dry for 24 hours before adding heavy candy decorations.
My icing is too runny. Can I fix it?
Yes! If your icing is too thin, add sifted powdered sugar 1 tablespoon at a time and mix on low speed until it reaches the right consistency. The key is to add the sugar slowly to avoid making it too thick. If it becomes too stiff, add a drop of water.
Can I make this icing ahead of time?
Yes, you can make the icing up to 2 weeks in advance. Store it in an airtight container in the refrigerator. When you’re ready to use it, let it come to room temperature and re-whip it for a minute or two to restore the texture. It might need a tiny splash of water to loosen it up.
Why is my royal icing not getting stiff?
This is usually due to not whipping it long enough or having a trace of grease in your bowl. Make sure your bowl and whisk are completely clean and dry. Also, check that your meringue powder is fresh—old powder can lose its ability to whip up. If all else fails, add a pinch more cream of tartar and continue whipping.
Pin This Recipe!
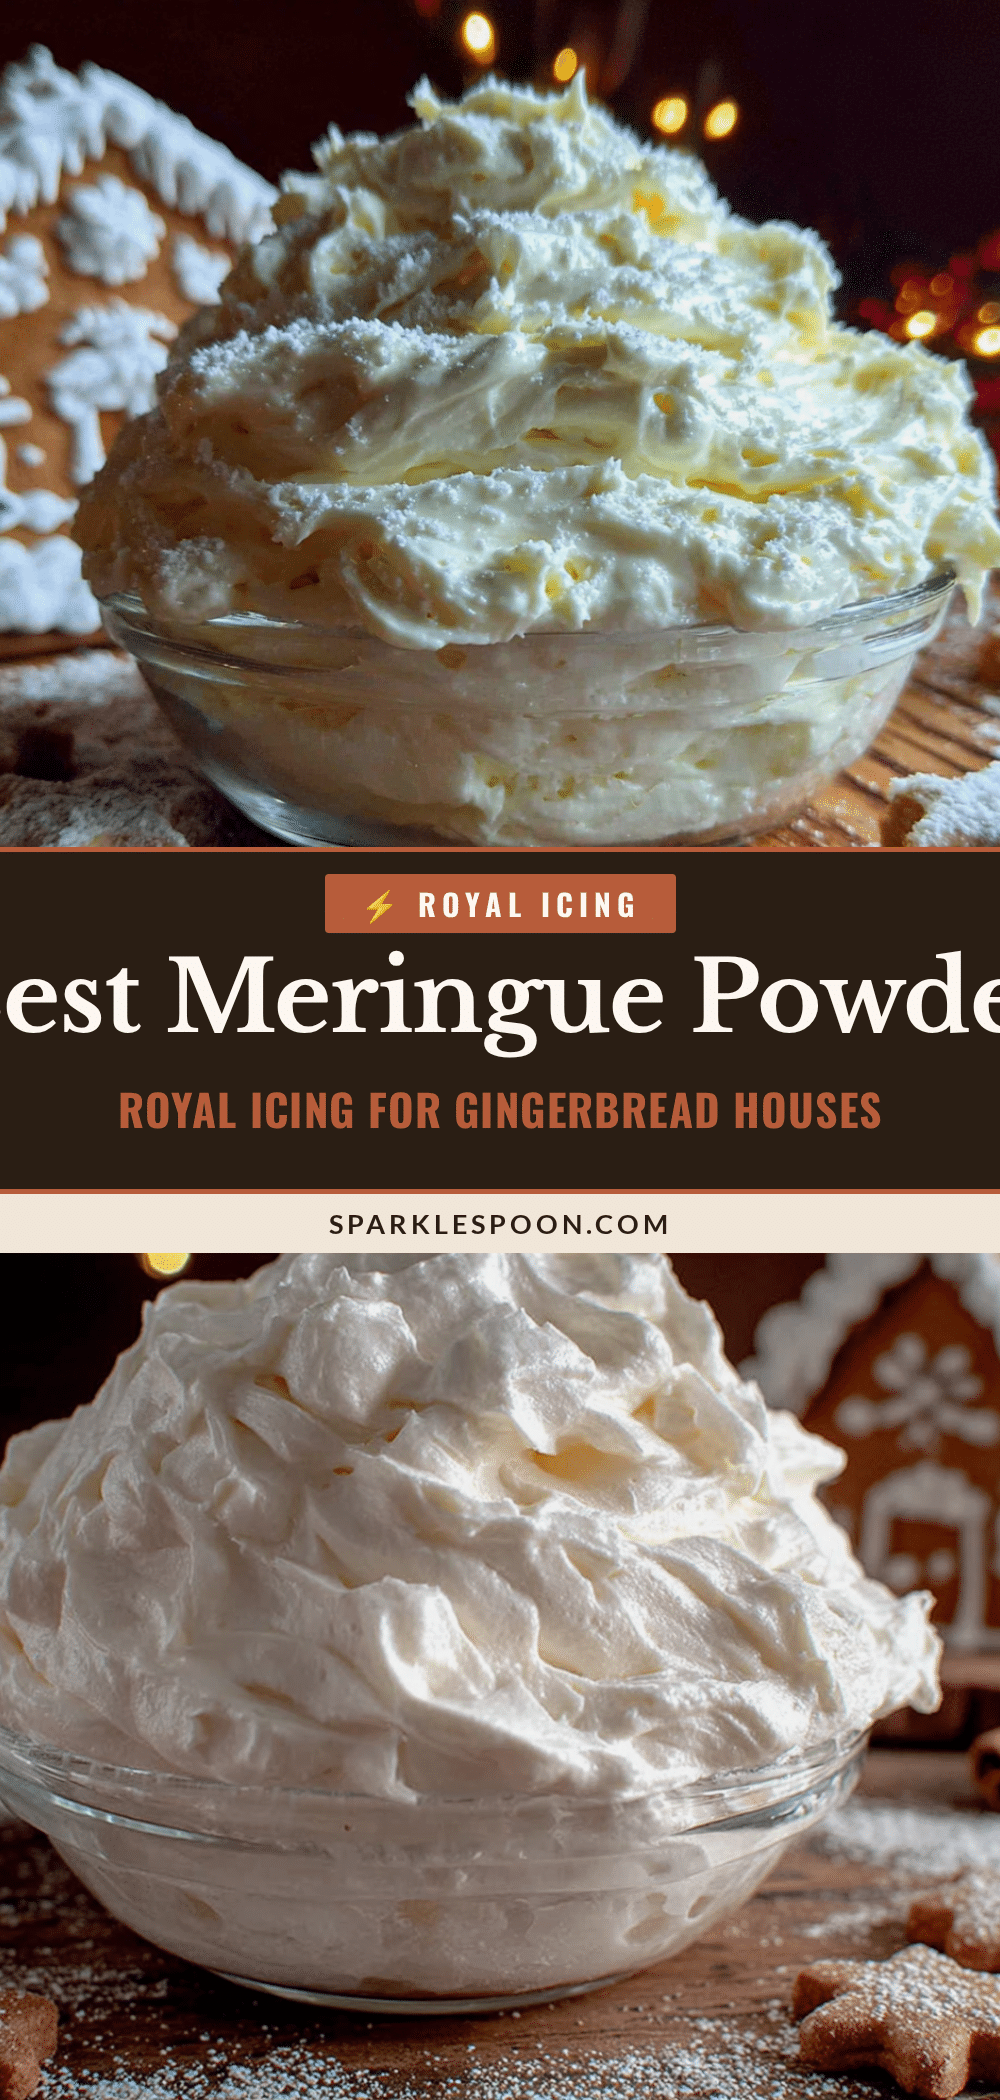
Best Easy Meringue Powder Royal Icing for Gingerbread Houses

This meringue powder royal icing for gingerbread houses dries hard, holds tight, and pipes like a dream. It’s stable, safe, and reliable—perfect for building and decorating gingerbread houses with kids or for holiday parties.
- Prep Time: 10 minutes
- Cook Time: 0 minutes
- Total Time: 10 minutes
- Yield: 2 cups of icing (enough for one gingerbread house) 1x
- Category: Dessert
- Cuisine: American
Ingredients
- 4 cups (about 480g) powdered sugar
- 3 tablespoons (about 24g) meringue powder
- 1/2 teaspoon cream of tartar (optional)
- 1/2 cup (120ml) room temperature water
- 1 teaspoon vanilla extract (or clear vanilla for pure white icing)
Instructions
- Sift the powdered sugar into a large mixing bowl.
- Add the meringue powder and cream of tartar (if using) to the sifted sugar and whisk together with a fork.
- Add the room temperature water and vanilla extract. Mix on low speed with a paddle attachment or hand mixer for about 30 seconds until incorporated.
- Switch to the whisk attachment and whip on medium-high speed for 5 to 7 minutes until stiff peaks form. The icing should stand up straight when the whisk is lifted.
- Adjust consistency: For gingerbread house construction, the icing should be stiff. If too thick, add water 1 teaspoon at a time; if too thin, add more sifted powdered sugar 1 tablespoon at a time.
- Let the icing rest, covered with a damp paper towel, for 5 to 10 minutes to allow air bubbles to rise and the meringue powder to hydrate.
- Fill a piping bag with a small round tip (or a Ziploc bag with a snipped corner) and pipe as desired.
Notes
For best results, use room temperature water and ensure all equipment is clean and grease-free. Let the icing rest for 5-10 minutes before piping for a smoother texture. Keep unused icing covered with a damp paper towel to prevent drying. For a stronger structural icing, add an extra 1/4 cup of powdered sugar.
Nutrition
- Serving Size: 2 tablespoons
- Calories: 120
- Sugar: 29
- Carbohydrates: 30
Keywords: royal icing, meringue powder icing, gingerbread house icing, easy royal icing, holiday baking, cookie decorating