Love this? Save it for later!
Share the inspiration with your friends
The woman at the farmers market stand watched me staring at her display of tiny pumpkins for a solid minute before she said anything. I wasn’t even shopping for pumpkins—I was supposed to be buying apples for a pie, but there I was, completely transfixed by these perfect little sugar pumpkins stacked like orange jewels. “You know,” she said, wiping her hands on her apron, “my granddaughter makes the cutest turkey-shaped treats every Thanksgiving. She uses cake pops. Drives her mother crazy, but the kids go wild for them.” She didn’t give me a recipe. She just smiled and went back to arranging her squash.
That conversation stuck with me for weeks. I mean, I’d made cake pops before—honestly, who hasn’t had that moment of dipping a round ball of cake into melted candy coating and thinking, “Well, this looks nothing like the Pinterest photo”? But turkey cake pops? That was a whole new level of adorable I hadn’t considered. I went home, grabbed a box of cake mix I had stashed in the pantry, and started experimenting. Let me tell you, the first batch looked more like sad chickens than festive turkeys. But by round three, something clicked.
These Adorable Thanksgiving Turkey Cake Pops became my signature contribution to every Friendsgiving, family dinner, and classroom party. They’re silly in the best way—the kind of treat that makes adults giggle and kids light up. Maybe you’ve been there, staring at a dessert table full of the same pies and cookies, wishing for something that feels a little more playful? That’s exactly why these little guys exist. They’re not trying to be fancy. They’re trying to make you smile.
Why You’ll Love This Recipe
Let’s be real for a second—Thanksgiving desserts can get a little predictable. Pumpkin pie, pecan pie, maybe a random apple crisp if someone’s feeling adventurous. These turkey cake pops? They’re the unexpected guest that steals the show. Here’s why they work so well:
- Quick & Easy: You can whip these up in about 30 minutes of active time. Seriously. The cake bakes in 20 minutes, you let it cool while you prep the candy melts, and before you know it, you’ve got a whole flock of turkeys ready to party.
- Simple Ingredients: No exotic grocery store runs needed. Boxed cake mix, store-bought frosting, candy melts, and some pretzel sticks. You probably have most of this stuff already.
- Perfect for Thanksgiving: Whether it’s a kids’ table activity, a Friendsgiving potluck, or just something fun to do while the turkey rests, these pops fit right in. They’re festive without being fussy.
- Crowd-Pleaser: I’ve brought these to gatherings where people swore they “weren’t dessert people” and watched them eat three. Kids especially lose their minds over them—they’re basically edible crafts.
- Unbelievably Delicious: The combination of moist cake, creamy frosting, and that snap of candy coating is genuinely satisfying. It’s not just cute—it tastes good too.
What makes these different from every other cake pop recipe out there? It’s the construction. Instead of trying to mold complicated body shapes, you’re using a simple round cake ball as the turkey’s body, then building the feathers, head, and beak using candy melts and pretzels. No special molds, no fancy tools. Just some creativity and a steady hand.
This recipe isn’t just good—it’s the kind that makes you close your eyes after the first bite. It’s comfort food reimagined as a holiday centerpiece. Perfect for impressing guests without stress, or turning a simple dessert into something memorable.
What Ingredients You Will Need
This recipe uses simple, wholesome ingredients to deliver bold flavor and satisfying texture without the fuss. Most of these are pantry staples or easy to find at any grocery store during the holiday season.
For the Cake Pops
- 1 box vanilla cake mix (I prefer Duncan Hines or Betty Crocker for consistent results)
- 3 large eggs (room temperature, helps the batter mix evenly)
- 1/2 cup vegetable oil (or melted butter for a richer flavor)
- 1 cup water (or milk for a denser, more tender crumb)
- 1/2 cup vanilla frosting (store-bought is fine; I use Pillsbury or homemade)
For the Decoration
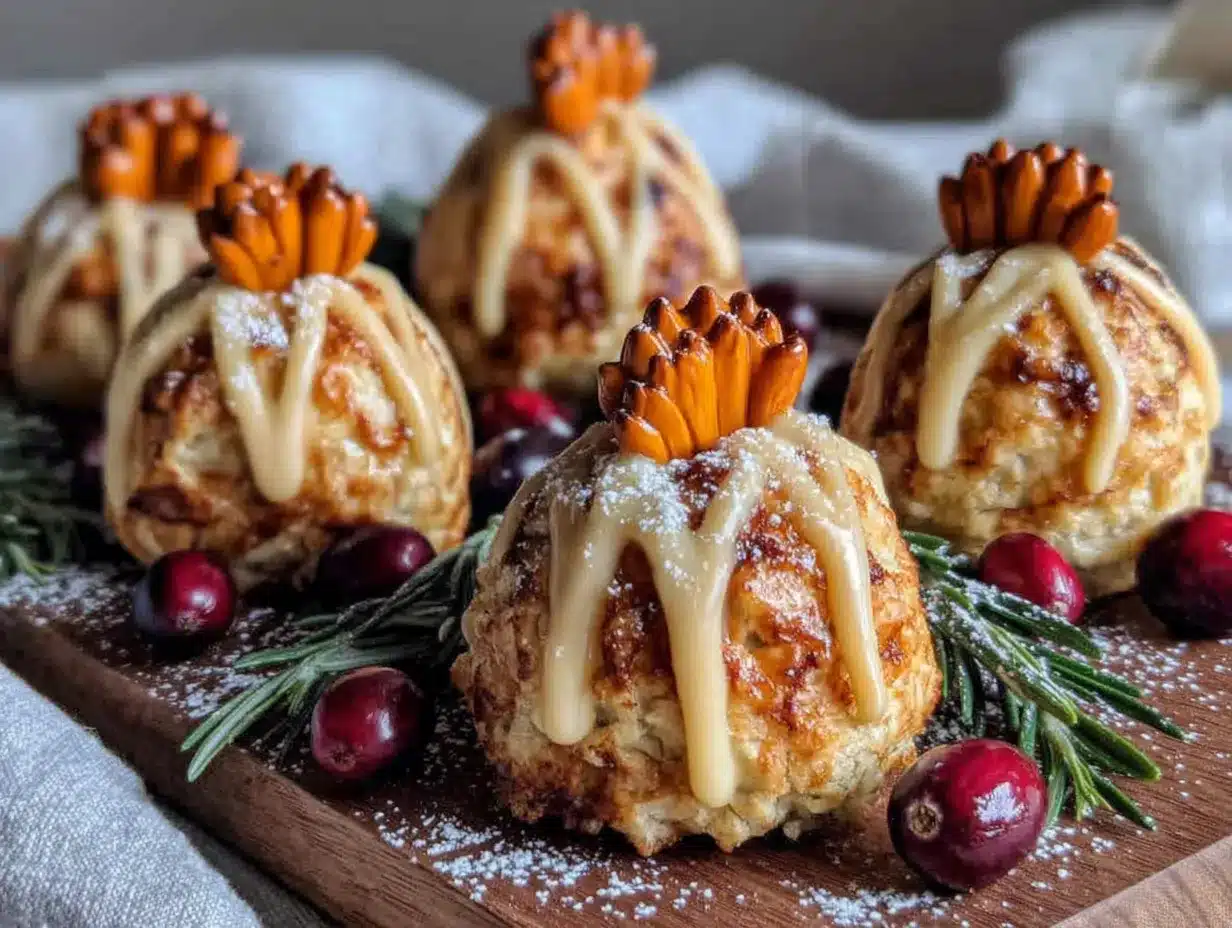
- 1 bag candy melts in orange (for the beak and feet—Wilton brand works great)
- 1 bag candy melts in red (for the wattle—that dangly bit under the beak)
- 1 bag candy melts in brown or chocolate (for coating the cake balls)
- 1 bag candy melts in fall colors (yellow, red, orange, or green for the feathers—mix and match)
- 24 pretzel sticks (for the turkey bodies—the straight kind, not the twists)
- 24 lollipop sticks (available at craft stores or online)
- Candy eyes (small round ones, about 48 pieces)
- White decorating icing (for adding tiny details if desired)
Substitution Notes
If you’re gluten-free, use a gluten-free cake mix and check that your candy melts are certified gluten-free. For a dairy-free version, swap the frosting for a dairy-free alternative and use dairy-free milk in the batter. You can also skip the candy melts entirely and use melted chocolate chips—just add a teaspoon of coconut oil to thin them out for dipping.
Equipment Needed
- 9×13 baking pan (or two 8-inch rounds—whatever you have)
- Large mixing bowl and whisk
- Food processor (for crumbling the cake—optional but faster than using your hands)
- Cookie scoop (about 1.5-inch size for uniform balls)
- Baking sheet lined with parchment paper
- Microwave-safe bowls (one for each color of candy melt)
- Styrofoam block or cardboard box (to hold the pops upright while they dry)
- Piping bags or small zip-top bags (for precise candy melt application)
I’ve made these with just a fork and a bowl when I was camping once—honestly, it’s doable but messy. If you don’t have a food processor, crumble the cake with your hands. It takes longer but works fine. The Styrofoam block is a game-changer for drying; you can use an egg carton in a pinch.
Preparation Method
Step 1: Bake and Cool the Cake
Preheat your oven to 350°F (175°C). In a large bowl, combine the cake mix, eggs, oil, and water. Mix until smooth—about 2 minutes. Pour into your greased 9×13 pan and bake for 20-25 minutes, or until a toothpick inserted in the center comes out clean. Let the cake cool completely. I usually bake it the night before and let it sit on the counter overnight. Trust me, a completely cool cake crumbles better.
Step 2: Crumble and Mix
Once the cake is cool, crumble it into a large bowl. You want fine, even crumbs—no big chunks. Add 1/2 cup of vanilla frosting and mix with your hands (yes, get in there) until the mixture holds together when pressed. It should feel like damp sand. If it’s too dry, add a teaspoon more frosting. Too wet? Add a few more cake crumbs.
Step 3: Form the Balls
Using your cookie scoop, portion out the cake mixture and roll into smooth balls. Place them on a parchment-lined baking sheet. You should get about 24 balls. Pop them in the freezer for 15 minutes—this makes them easier to dip later.
Step 4: Insert the Lollipop Sticks
Melt a small amount of brown candy melts in the microwave (30-second bursts, stirring in between). Dip the tip of each lollipop stick into the melted candy, then insert it about halfway into a cake ball. This glue step is crucial—without it, the pops will slide off. Return to the freezer for another 10 minutes.
Step 5: Dip the Cake Balls
Melt your brown candy melts completely. Holding the lollipop stick, dip each cake ball into the melted coating until fully covered. Gently tap off excess coating. Insert the stick into your Styrofoam block to dry. Let them set completely—about 20 minutes at room temperature.
Step 6: Add the Feathers
Melt your fall-colored candy melts separately. Using a piping bag or zip-top bag with a tiny corner snipped off, pipe small teardrop shapes onto a piece of parchment paper—these will be the tail feathers. You’ll need about 5-6 feathers per turkey. Let them set for 10 minutes, then carefully peel them off and attach them to the back of each cake pop using a dab of melted brown coating.
Step 7: Create the Head and Beak
Melt the orange candy melts. Pipe a small triangle onto each pop for the beak. Melt the red candy melts and pipe a tiny teardrop shape underneath the beak for the wattle. Attach two candy eyes on each pop. Let these set for 5 minutes.
Step 8: Add the Pretzel Legs
Break each pretzel stick in half. Melt a small amount of orange candy melts and dip the broken end of each pretzel half. Attach two pretzel legs to the bottom of each turkey body. Let everything set completely—about 30 minutes.
Step 9: Final Touches
Use white decorating icing to add tiny highlights to the eyes if you want them to look extra lively. You can also pipe little feet on the pretzels using the orange candy melts. Arrange your turkey cake pops on a serving platter and watch people lose their minds.
Cooking Tips & Techniques
Here’s the thing about cake pops—they can be finicky. I learned the hard way that rushing the cooling process leads to cracked coating and sad-looking turkeys. Let your cake cool completely before crumbling. I mean completely. Warm cake creates steam, which makes the frosting mixture too sticky and the coating crack.
Another mistake I made? Using too much frosting. The mixture should hold together when pressed, but it shouldn’t feel greasy. If you can see streaks of frosting, you’ve added too much. Start with 1/3 cup and add more as needed.
For the candy melts, microwave in short bursts. I do 20 seconds, stir, then 10 seconds, stir, until smooth. Overheating ruins them—they become thick and clumpy. If that happens, add a teaspoon of vegetable oil and stir vigorously.
When dipping, work quickly but carefully. Hold the pop at a slight angle and let the excess drip off before inserting into the Styrofoam. If the coating pools at the bottom, tap gently on the side of the bowl.
Timing is everything. I like to bake the cake and form the balls the night before. Then in the morning, I do the dipping and decorating. It breaks the work into manageable chunks and keeps me from feeling overwhelmed.
Variations & Adaptations
Chocolate Turkey Cake Pops: Use a chocolate cake mix and chocolate frosting for a richer flavor. The chocolate coating pairs beautifully with the candy melts.
Pumpkin Spice Version: Add 1 teaspoon pumpkin pie spice to the cake batter and use cream cheese frosting instead of vanilla. It tastes like fall in every bite.
Mini Turkey Bites: Instead of lollipop sticks, make smaller balls and serve them on a platter as bite-sized treats. Perfect for kids who can’t handle a whole pop.
Vegan Adaptation: Use a vegan cake mix, applesauce instead of eggs, and dairy-free frosting. Most candy melts are accidentally vegan, but check the label.
Savory Surprise: Okay, this one’s weird but I tried it—use cornbread instead of cake and cream cheese instead of frosting. It’s more of a savory appetizer pop, and honestly, it’s surprisingly good. Not for everyone, but adventurous eaters might love it.
Serving & Storage Suggestions
These turkey cake pops are best served at room temperature. Arrange them on a large platter with the feathers facing outward—they look like a flock of turkeys marching across your table. If you’re bringing them to a gathering, transport them in a tall container with the sticks upright. A cardboard box with holes punched in the lid works perfectly.
For storage, keep them in an airtight container at room temperature for up to 3 days. Do not refrigerate—the candy coating will sweat and become sticky. If you need to make them ahead, you can freeze the undipped cake balls for up to a month. Just thaw them in the fridge overnight before dipping.
The flavors actually get better after a day. The cake absorbs the coating slightly, making everything taste more cohesive. I’ve made these a week ahead for parties and they were still perfect.
Nutritional Information & Benefits
Each turkey cake pop contains approximately 180 calories, 8g fat, 26g carbohydrates, and 2g protein. These are estimates based on standard ingredients—your numbers may vary depending on the brands you use.
While these aren’t health food, they do offer some surprising benefits. The cake provides quick energy, and if you use a whole wheat cake mix, you’ll get a bit more fiber. The candy melts contain antioxidants from cocoa if you use chocolate-based ones. Plus, the act of making them is a great stress reliever—there’s something meditative about rolling those little balls.
For dietary considerations, these are nut-free if you check your cake mix label. They contain gluten, dairy, and eggs unless you use substitutions. Always check candy melt ingredients for potential allergens.
Conclusion
These Adorable Thanksgiving Turkey Cake Pops are more than just a dessert—they’re a conversation starter, a memory maker, and honestly, just pure fun. I’ve made them for four Thanksgivings now, and every year someone asks for the recipe. They’re the kind of treat that makes people smile before they even take a bite.
Don’t be afraid to customize them. Use different candy melt colors, add sprinkles, or make them extra googly-eyed. The beauty of this recipe is that it’s forgiving. Even if your turkey looks a little lopsided, it’ll still taste amazing.
I’d love to see your creations! Drop a comment below with your turkey cake pop photos, or share your own variations. Tag me on social media so I can cheer you on. And hey—if you make these for your Thanksgiving table, you’re officially the coolest person at the dinner. Happy baking!
Frequently Asked Questions
Can I use a different cake flavor?
Absolutely! Chocolate, lemon, red velvet, or even carrot cake all work beautifully. Just stick with a frosting that complements the cake flavor.
How far in advance can I make these?
You can make the undipped cake balls up to a month ahead and freeze them. Dip and decorate them up to 3 days before serving for best results.
Why did my candy coating crack?
This usually happens when the cake balls are too cold when you dip them, or the coating is too thick. Let the frozen balls sit at room temperature for 5 minutes before dipping, and make sure your candy melts are smooth and thin.
Can I use chocolate chips instead of candy melts?
Yes, but add 1 teaspoon of coconut oil or vegetable shortening per cup of chocolate chips to thin them out. Candy melts are formulated to set firmly, so chocolate chips alone may be too thick.
How do I get the feathers to stay on?
Use a dab of melted candy coating as glue. Press the feather gently against the back of the pop and hold for 10 seconds. Let them set upright in the Styrofoam block so the feathers don’t get squished.
Pin This Recipe!
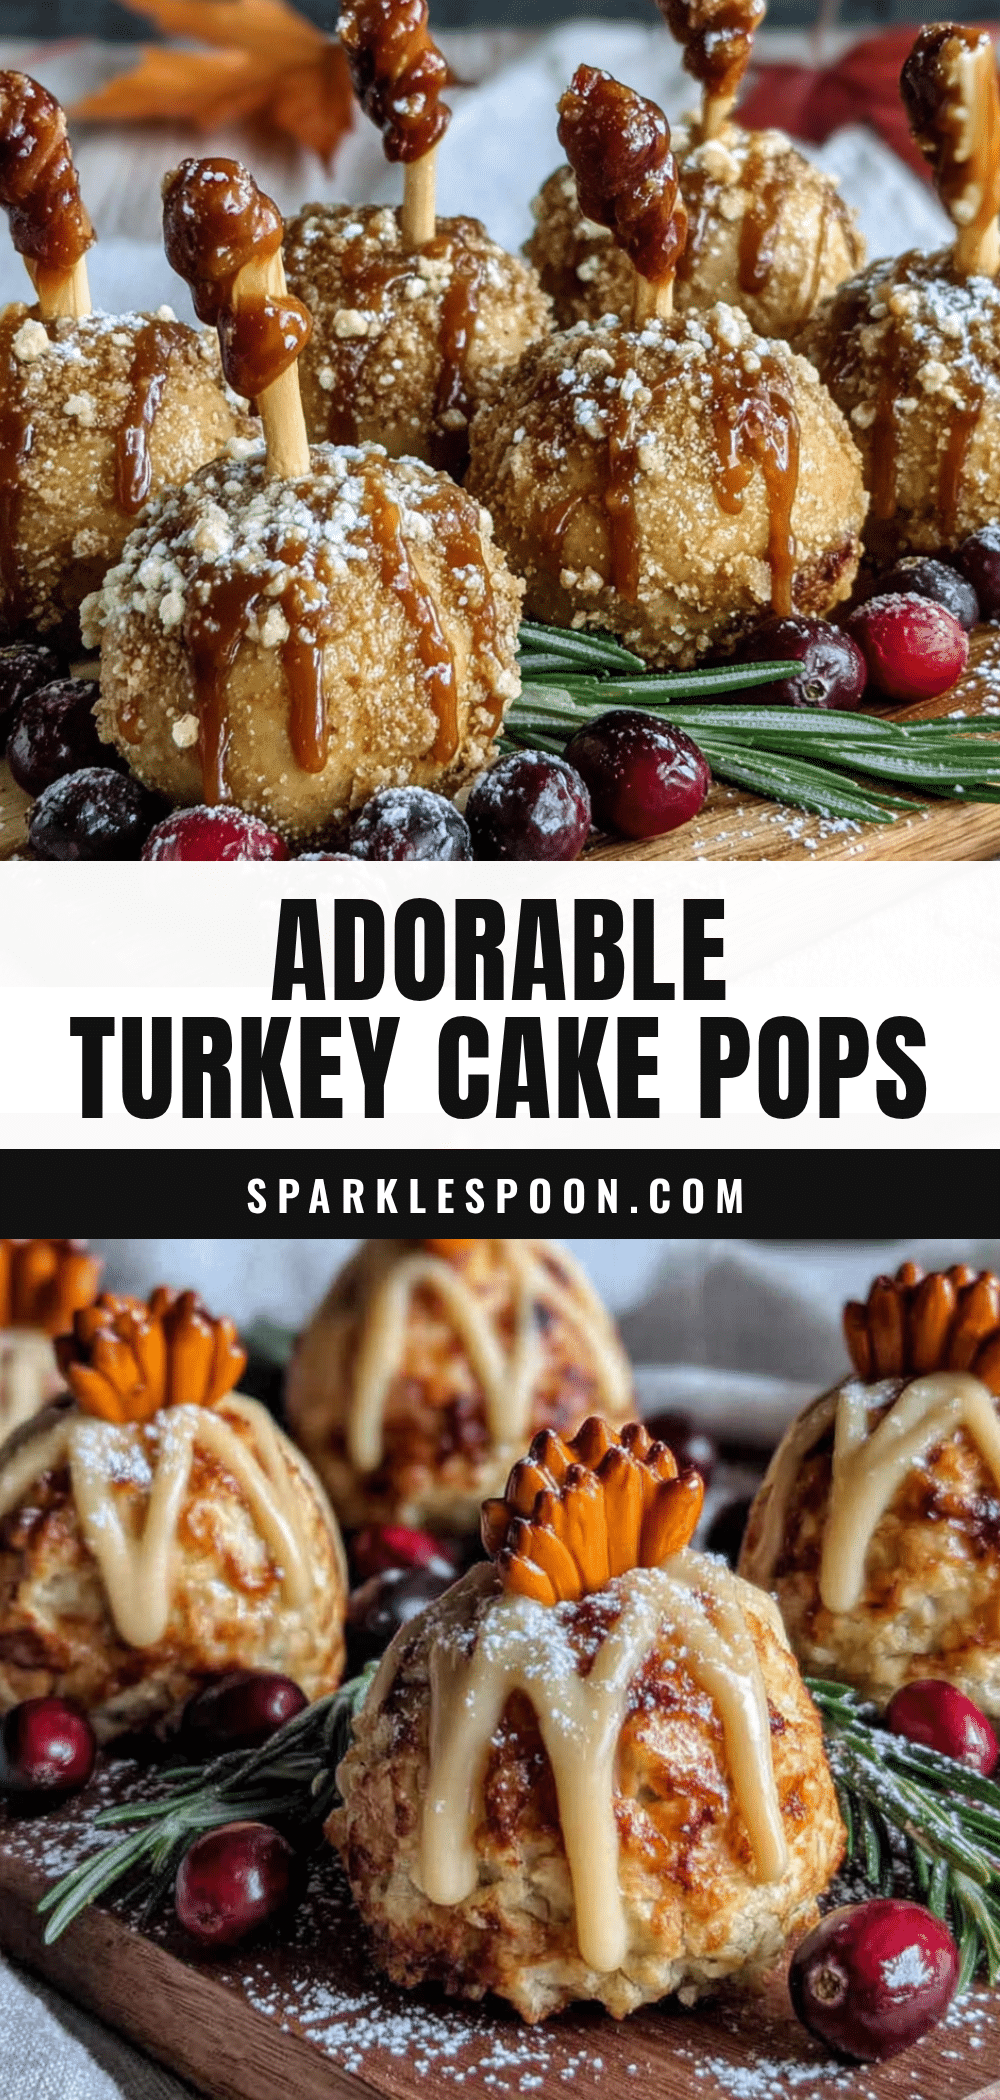
Adorable Thanksgiving Turkey Cake Pops: Easy 30-Minute Treat
These adorable turkey cake pops are a fun and festive Thanksgiving treat that’s quick to make and perfect for kids and adults alike. Made with simple ingredients, they’re a playful addition to any holiday dessert table.
- Prep Time: 30 minutes
- Cook Time: 20 minutes
- Total Time: 50 minutes
- Yield: 24 servings 1x
- Category: Dessert
- Cuisine: American
Ingredients
- 1 box vanilla cake mix (I prefer Duncan Hines or Betty Crocker for consistent results)
- 3 large eggs (room temperature, helps the batter mix evenly)
- 1/2 cup vegetable oil (or melted butter for a richer flavor)
- 1 cup water (or milk for a denser, more tender crumb)
- 1/2 cup vanilla frosting (store-bought is fine; I use Pillsbury or homemade)
- 1 bag candy melts in orange (for the beak and feet—Wilton brand works great)
- 1 bag candy melts in red (for the wattle—that dangly bit under the beak)
- 1 bag candy melts in brown or chocolate (for coating the cake balls)
- 1 bag candy melts in fall colors (yellow, red, orange, or green for the feathers—mix and match)
- 24 pretzel sticks (for the turkey bodies—the straight kind, not the twists)
- 24 lollipop sticks (available at craft stores or online)
- Candy eyes (small round ones, about 48 pieces)
- White decorating icing (for adding tiny details if desired)
Instructions
- Step 1: Bake and Cool the Cake. Preheat your oven to 350°F (175°C). In a large bowl, combine the cake mix, eggs, oil, and water. Mix until smooth—about 2 minutes. Pour into your greased 9×13 pan and bake for 20-25 minutes, or until a toothpick inserted in the center comes out clean. Let the cake cool completely. I usually bake it the night before and let it sit on the counter overnight. Trust me, a completely cool cake crumbles better.
- Step 2: Crumble and Mix. Once the cake is cool, crumble it into a large bowl. You want fine, even crumbs—no big chunks. Add 1/2 cup of vanilla frosting and mix with your hands (yes, get in there) until the mixture holds together when pressed. It should feel like damp sand. If it’s too dry, add a teaspoon more frosting. Too wet? Add a few more cake crumbs.
- Step 3: Form the Balls. Using your cookie scoop, portion out the cake mixture and roll into smooth balls. Place them on a parchment-lined baking sheet. You should get about 24 balls. Pop them in the freezer for 15 minutes—this makes them easier to dip later.
- Step 4: Insert the Lollipop Sticks. Melt a small amount of brown candy melts in the microwave (30-second bursts, stirring in between). Dip the tip of each lollipop stick into the melted candy, then insert it about halfway into a cake ball. This glue step is crucial—without it, the pops will slide off. Return to the freezer for another 10 minutes.
- Step 5: Dip the Cake Balls. Melt your brown candy melts completely. Holding the lollipop stick, dip each cake ball into the melted coating until fully covered. Gently tap off excess coating. Insert the stick into your Styrofoam block to dry. Let them set completely—about 20 minutes at room temperature.
- Step 6: Add the Feathers. Melt your fall-colored candy melts separately. Using a piping bag or zip-top bag with a tiny corner snipped off, pipe small teardrop shapes onto a piece of parchment paper—these will be the tail feathers. You’ll need about 5-6 feathers per turkey. Let them set for 10 minutes, then carefully peel them off and attach them to the back of each cake pop using a dab of melted brown coating.
- Step 7: Create the Head and Beak. Melt the orange candy melts. Pipe a small triangle onto each pop for the beak. Melt the red candy melts and pipe a tiny teardrop shape underneath the beak for the wattle. Attach two candy eyes on each pop. Let these set for 5 minutes.
- Step 8: Add the Pretzel Legs. Break each pretzel stick in half. Melt a small amount of orange candy melts and dip the broken end of each pretzel half. Attach two pretzel legs to the bottom of each turkey body. Let everything set completely—about 30 minutes.
- Step 9: Final Touches. Use white decorating icing to add tiny highlights to the eyes if you want them to look extra lively. You can also pipe little feet on the pretzels using the orange candy melts. Arrange your turkey cake pops on a serving platter and watch people lose their minds.
Notes
Let the cake cool completely before crumbling to prevent cracking. Start with 1/3 cup frosting and add more as needed to avoid a greasy mixture. Microwave candy melts in short bursts (20 seconds, stir, then 10 seconds) to prevent overheating. For best results, bake the cake and form the balls the night before, then dip and decorate the next day.
Nutrition
- Serving Size: 1 turkey cake pop
- Calories: 180
- Sugar: 18
- Sodium: 150
- Fat: 8
- Saturated Fat: 2
- Carbohydrates: 26
- Protein: 2
Keywords: Thanksgiving, turkey, cake pops, easy dessert, holiday treat, kids dessert, fall dessert



