Love this? Save it for later!
Share the inspiration with your friends
My friend Jen asked why I couldn’t just toss the chicken thighs in the air fryer without all the extra steps. I started to explain why that wouldn’t work — then stopped. Honestly, I had a whole speech ready about how you need the right coating and the right timing and the right everything. But something about the way she said it, so sure and simple, made me pause. So I tried it her way. And let me tell you, I ate my words along with the most ridiculously crispy chicken I’ve ever made.
It was a Tuesday night, and I was supposed to be teaching her how to make my famous oven-baked chicken. She kept asking questions, and I kept being the know-it-all. “Why not just use the air fryer?” she asked. “Because it won’t get crispy enough,” I said, all confident. She just raised an eyebrow. So I handed her the tongs and said, “Fine. You do it.” She patted those thighs dry, seasoned them simply, and popped them in. Twenty minutes later, I was staring at golden-brown perfection. You know that feeling when you realize you’ve been overcomplicating things for years? Yeah, that was me.
The best part? She didn’t even gloat. She just said, “See? Sometimes less is more.” And now I make these Best Crispy Air Fryer Chicken Thighs with Garlic Parmesan at least once a week. The garlic and parmesan add a savory crust that’s next-level, but the real secret is trusting the air fryer to do its thing. I mean, I still add my own touches — a little garlic powder, some fresh parmesan — but the core method? That’s all Jen. It’s humbling, honestly. But this recipe stayed with me because it taught me something: sometimes the best cooking advice comes from the person who doesn’t know they’re giving it.
Why You’ll Love This Recipe
These Best Crispy Air Fryer Chicken Thighs with Garlic Parmesan are everything you want in a weeknight dinner. They’re quick, they’re easy, and they deliver that satisfying crunch without the mess of deep frying. I’ve tested this recipe more times than I can count, and every single batch comes out perfectly. Here is why you’ll keep coming back to it:
- Quick & Easy: Ready in under 30 minutes from start to finish. Perfect for those nights when you need dinner on the table fast.
- Simple Ingredients: You probably have everything in your kitchen right now. No fancy grocery trips required.
- Perfect for Hosting: These chicken thighs are a showstopper at dinner parties. They look impressive but take almost no effort, so you can actually enjoy your guests.
- Crowd-Pleaser: Kids love the crispy coating, and adults appreciate the garlic parmesan flavor. Everyone wins.
- Unbelievably Delicious: The texture is what gets me every time. Crispy on the outside, juicy on the inside, with that savory garlic parmesan crust that makes you close your eyes after the first bite.
What makes this recipe different from the rest is the technique. I use a simple dry brine method that draws out moisture and ensures the skin gets incredibly crispy. Then I add a generous coating of freshly grated parmesan and garlic powder. The air fryer does the rest, circulating hot air to create that golden crust. It’s not just another chicken recipe — it’s my best version.
This recipe is the kind that makes you feel like a hero in the kitchen. It is comfort food reimagined — healthier, faster, but with the same soul-soothing satisfaction. Perfect for impressing guests without stress, or turning a simple Tuesday dinner into something memorable.
What Ingredients You Will Need
This recipe uses simple, wholesome ingredients to deliver bold flavor and satisfying texture without the fuss. Most of these are pantry staples, which makes this recipe perfect for last-minute hosting or a busy weeknight dinner.
- 6 bone-in, skin-on chicken thighs (about 2 pounds or 900g) — The bone keeps the meat juicy, and the skin gets beautifully crispy. I prefer organic or free-range chicken for better flavor.
- 2 tablespoons olive oil — Helps the seasoning stick and promotes browning. Use a good quality extra virgin olive oil for best results.
- 1 teaspoon salt — I use kosher salt for its clean flavor and easy handling. It draws out moisture for that perfect crispy skin.
- 1 teaspoon black pepper — Freshly ground is always better. It adds a subtle warmth that complements the garlic.
- 1 teaspoon garlic powder — Not to be confused with garlic salt. Garlic powder gives you that deep, savory flavor without the moisture of fresh garlic.
- 1 teaspoon onion powder — Adds a sweet, savory depth that rounds out the seasoning.
- 1 teaspoon paprika — I use sweet paprika for color and a mild, smoky flavor. Smoked paprika works great too if you want a bolder taste.
- 1/2 cup freshly grated Parmesan cheese — Please, please use the real stuff. The pre-shredded kind has anti-caking agents that won’t melt properly. Grate it yourself for the best texture and flavor.
- 4 cloves garlic, minced — Fresh garlic adds a pungent kick that pairs perfectly with the parmesan. If you’re in a pinch, use 1 teaspoon of jarred minced garlic.
- 2 tablespoons unsalted butter, melted — This gets mixed with the garlic and brushed on after cooking for that final touch of richness.
- 2 tablespoons fresh parsley, chopped — For garnish. It adds a pop of color and freshness that balances the richness of the chicken.
Substitution Guidance: If you need a dairy-free option, skip the parmesan and butter. Use 2 tablespoons of nutritional yeast mixed with 1 tablespoon of olive oil for a similar savory flavor. For a gluten-free version, this recipe is naturally gluten-free as written. Just double-check your paprika and garlic powder labels to ensure no cross-contamination.
Equipment Needed
You don’t need much for this recipe, which is part of the beauty. Here is what you’ll need:
- Air fryer — I use a 6-quart basket-style air fryer, but any size works. Just make sure the chicken thighs are in a single layer with space between them for proper air circulation.
- Paper towels — Essential for patting the chicken dry. This step is non-negotiable for crispy skin.
- Mixing bowls — One for the seasoning mix and one for the garlic butter.
- Tongs — For flipping the chicken halfway through. Silicone-tipped tongs won’t scratch your air fryer basket.
- Meat thermometer — This is your best friend for perfectly cooked chicken. I recommend an instant-read digital thermometer for accuracy.
- Pastry brush — For brushing on the garlic butter at the end. A silicone brush works best and is easy to clean.
- Cutting board and knife — For mincing the garlic and chopping the parsley.
Budget-friendly options: If you don’t have a meat thermometer, you can check doneness by cutting into the thickest part of the thigh. The juices should run clear, and the meat should no longer be pink. I’ve done it this way for years before I got my thermometer. Also, if your air fryer is on the smaller side, just cook the chicken in batches. It takes a little longer, but the results are still perfect.
Preparation Method
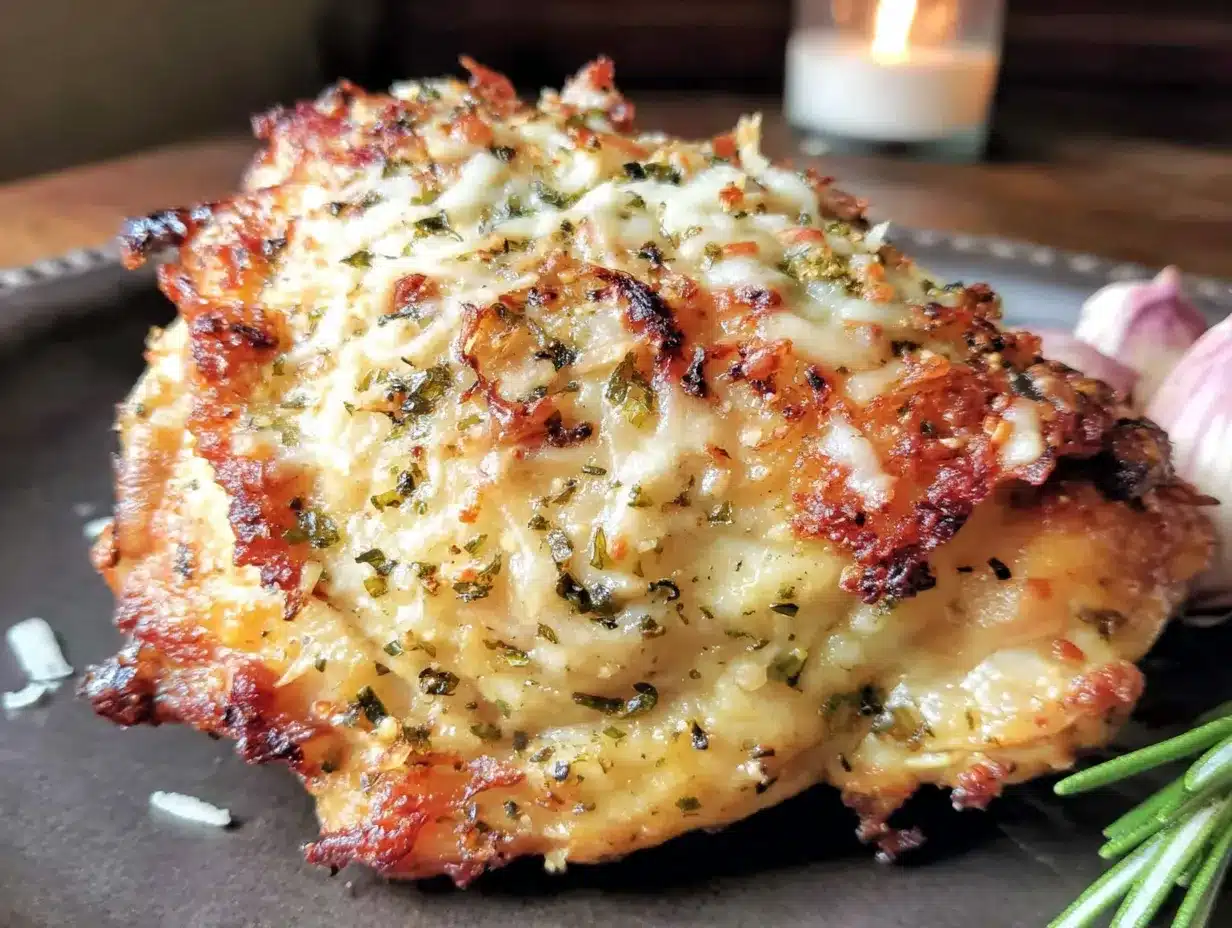
Follow these steps, and you’ll have the best crispy air fryer chicken thighs of your life. Trust me, I’ve made this dozens of times, and this method never fails.
- Pat the chicken thighs dry. Use paper towels to remove as much moisture as possible from the skin. This is the most important step for crispy skin. If the chicken is wet, the skin will steam instead of crisp. I usually pat each thigh dry on both sides, then let them sit on a plate for 5 minutes while I prep the seasoning.
- Season the chicken. In a small bowl, mix the salt, black pepper, garlic powder, onion powder, and paprika. Drizzle the olive oil over the chicken thighs and rub it in evenly. Then sprinkle the seasoning mixture over both sides of each thigh. Use your hands to really work it into the skin. Don’t be shy — every bit of flavor counts.
- Preheat the air fryer. Set your air fryer to 400°F (200°C) and let it preheat for 3-5 minutes. A hot air fryer means the chicken starts cooking immediately, which helps the skin crisp up faster. I usually do this while I’m seasoning the chicken.
- Arrange the chicken in the air fryer basket. Place the chicken thighs skin-side down in a single layer. Make sure they’re not touching each other. If your air fryer is small, cook them in batches. Crowding the basket will trap steam and prevent crisping. I can fit 3-4 thighs comfortably in my 6-quart air fryer.
- Cook for 12 minutes at 400°F (200°C). Set the timer and let the air fryer work its magic. You’ll start to smell the garlic and paprika — that’s a good sign. Don’t open the basket during this time. Let the hot air circulate.
- Flip the chicken thighs. Using tongs, carefully flip each thigh over so the skin side is now facing up. Be gentle — the skin is starting to crisp, and you don’t want to tear it. If the skin sticks a little, that’s okay. Just use a gentle lifting motion.
- Cook for another 8-10 minutes. This is where the magic happens. The skin will turn golden brown and incredibly crispy. At the 8-minute mark, start checking the internal temperature. You’re looking for 165°F (74°C) in the thickest part of the thigh, away from the bone. I usually take one thigh out and test it with my meat thermometer.
- Make the garlic butter. While the chicken finishes cooking, melt the butter in a small microwave-safe bowl. Add the minced garlic and stir. Let it sit for a minute so the garlic infuses into the butter. The heat from the butter will gently cook the garlic, mellowing its sharpness.
- Brush with garlic butter. Once the chicken is done, transfer it to a serving plate. Using a pastry brush, generously brush each thigh with the garlic butter. The heat from the chicken will help the butter soak in. Don’t skip this step — it adds so much flavor.
- Garnish and serve. Sprinkle the freshly grated Parmesan cheese over the hot chicken thighs. The cheese will melt slightly from the residual heat. Then top with fresh chopped parsley. Let the chicken rest for 5 minutes before serving. This allows the juices to redistribute, ensuring every bite is tender and juicy.
Cooking Tips & Techniques
Here are some things I’ve learned the hard way so you don’t have to. These tips will help you nail this recipe every single time.
Dry the chicken thoroughly. I cannot stress this enough. Moisture is the enemy of crispy skin. I pat the chicken dry, then let it sit uncovered in the fridge for 10 minutes if I have time. This extra step dries out the surface even more. The first time I made this, I skipped the drying step, and the skin came out chewy instead of crispy. Never again.
Don’t overcrowd the basket. I learned this one the hard way when I tried to cook all six thighs at once in my small air fryer. They came out steamed and sad. Now I cook them in batches, and the difference is night and day. If you’re cooking for a crowd, keep the cooked thighs warm in a 200°F (90°C) oven while you finish the rest.
Use a meat thermometer. Chicken thighs are forgiving, but they’re best at 165°F (74°C). Overcooking them dries out the meat, even with the bone in. I use an instant-read thermometer and check the thickest part of each thigh. It takes two seconds and guarantees perfect results.
Let the chicken rest. This is a step I used to skip, and I regret every single time. Resting allows the juices to settle so they don’t run out when you cut into the chicken. Five minutes is all it takes. Use that time to brush on the garlic butter and grate the parmesan.
Timing strategy for hosting. When I’m making these for a dinner party, I prep everything ahead of time. I season the chicken in the morning and keep it covered in the fridge. Then I just pop it in the air fryer when guests arrive. The garlic butter and parsley can also be prepped in advance. This way, I’m not stuck in the kitchen while everyone else is having fun.
Variations & Adaptations
This recipe is incredibly versatile. Here are some ways to switch it up based on your mood, dietary needs, or what you have on hand.
Spicy Buffalo Version: Skip the garlic butter and instead toss the cooked chicken thighs in 1/4 cup of buffalo wing sauce mixed with 2 tablespoons of melted butter. Serve with blue cheese or ranch dressing for dipping. I made this for a game day party, and it was gone in minutes.
Lemon Herb Variation: Add the zest of one lemon and 1 teaspoon of dried oregano to the seasoning mix. After cooking, squeeze fresh lemon juice over the chicken before adding the parmesan. The brightness of the lemon cuts through the richness beautifully. This is my go-to for spring dinners.
Keto-Friendly Adaptation: This recipe is already low-carb, but to make it even more keto-friendly, add an extra tablespoon of parmesan and skip the olive oil. The parmesan will create an even crispier crust. I’ve served this to keto friends who couldn’t believe it wasn’t breaded.
Air Fryer vs. Oven: If you don’t have an air fryer, you can bake these thighs at 425°F (218°C) on a wire rack set over a baking sheet. Bake for 35-40 minutes, flipping halfway through. The wire rack allows air to circulate underneath, which helps the skin crisp. It’s not quite as fast as the air fryer, but it still delivers great results.
Dairy-Free Option: Use nutritional yeast instead of parmesan and skip the butter. Brush the chicken with olive oil mixed with minced garlic instead. The nutritional yeast gives a cheesy, savory flavor that’s surprisingly close to the real thing.
Serving & Storage Suggestions
These Best Crispy Air Fryer Chicken Thighs with Garlic Parmesan are best served hot, right out of the air fryer. The skin is at its crispiest within the first 15 minutes. But here is how to serve and store them like a pro.
Serving Temperature: Serve the chicken hot, with the garlic butter still glistening and the parmesan slightly melted. I like to arrange them on a platter with the crispy side up and sprinkle a little extra parsley on top for color.
What to Serve Alongside: These chicken thighs pair beautifully with roasted vegetables like asparagus, broccoli, or Brussels sprouts. A simple green salad with lemon vinaigrette cuts through the richness. For a heartier meal, serve with mashed potatoes or crusty bread to soak up any leftover garlic butter. If you’re hosting, I love serving them with creamy garlic mashed potatoes and a side of roasted balsamic Brussels sprouts for a complete dinner that looks like you spent hours in the kitchen.
Storage Instructions: Store leftover chicken in an airtight container in the refrigerator for up to 4 days. The skin will lose some of its crispiness, but the flavor will still be amazing. I like to shred the leftovers and use them in salads or wraps the next day.
Reheating Methods: The air fryer is your best friend for reheating. Pop the thighs back in at 375°F (190°C) for 3-4 minutes, or until heated through and the skin crisps back up. You can also reheat them in a 375°F (190°C) oven for 10 minutes. Avoid the microwave — it will make the skin soggy and rubbery.
Freezing Instructions: These chicken thighs freeze well for up to 3 months. Let them cool completely, then wrap each thigh individually in plastic wrap and place them in a freezer-safe bag. To reheat, thaw overnight in the refrigerator, then reheat in the air fryer at 375°F (190°C) for 5-6 minutes.
Flavor Development: Interestingly, the flavors deepen overnight. The garlic and parmesan meld together, creating an even more savory taste. I’ve been known to make extra just for leftovers — they’re that good the next day.
Nutritional Information & Benefits
Here is the estimated nutritional breakdown per serving (one chicken thigh with garlic butter and parmesan):
| Nutrient | Amount |
|---|---|
| Calories | 320 |
| Protein | 28g |
| Fat | 22g |
| Saturated Fat | 8g |
| Carbohydrates | 2g |
| Fiber | 0g |
| Sugar | 0g |
| Sodium | 450mg |
Health Benefits: Chicken thighs are a great source of high-quality protein, which is essential for muscle repair and growth. They also provide B vitamins, particularly B6 and B12, which support energy metabolism and brain function. The skin contains healthy fats that help your body absorb fat-soluble vitamins. Garlic is known for its anti-inflammatory and immune-boosting properties, while parsley is packed with vitamin K and antioxidants.
Dietary Considerations: This recipe is naturally gluten-free, low-carb, and keto-friendly. It’s also suitable for paleo diets if you use dairy-free alternatives. The main allergens are dairy (butter and parmesan) and potential traces of garlic if you have sensitivities.
Personal Wellness Perspective: I love that this recipe lets me enjoy crispy, flavorful chicken without the guilt of deep frying. The air fryer uses minimal oil, so I’m getting all the satisfaction with fewer calories and less fat. It’s the kind of meal that makes you feel good about what you’re eating — and that’s a win in my book.
Conclusion
These Best Crispy Air Fryer Chicken Thighs with Garlic Parmesan are proof that sometimes the simplest methods yield the most incredible results. I learned that lesson from a friend who didn’t know she was teaching me something important. And now I’m passing it on to you.
This recipe is worth trying because it delivers on every promise: crispy skin, juicy meat, bold flavor, and almost no effort. It’s perfect for busy weeknights, lazy Sundays, or impressing guests without breaking a sweat. And the best part? You can customize it to your heart’s content. Add more garlic, swap the parmesan for cheddar, or throw in some red pepper flakes for heat. Make it your own.
I love this recipe because it reminds me that cooking doesn’t have to be complicated to be amazing. Sometimes the best dishes come from letting go of control and trusting the process. So go ahead — give these chicken thighs a try. I promise you’ll be as surprised as I was.
I’d love to hear how yours turn out! Leave a comment below and let me know if you tried any variations. Don’t forget to share this recipe with your friends and family — because good food is meant to be shared. Happy cooking!
Frequently Asked Questions
Can I use boneless, skinless chicken thighs for this recipe?
Yes, you can, but the cooking time will be shorter. Boneless, skinless thighs will cook in about 12-15 minutes total at 400°F (200°C). You’ll also lose the crispy skin element, so I recommend adding an extra tablespoon of parmesan to the seasoning mix for a flavorful crust.
How do I keep the chicken from sticking to the air fryer basket?
Make sure your air fryer basket is clean and lightly spray it with cooking spray before adding the chicken. The olive oil on the chicken also helps prevent sticking. If you’re still having trouble, use a silicone liner or parchment paper specifically designed for air fryers.
Can I make this recipe ahead of time for a party?
Absolutely! You can season the chicken up to 24 hours in advance and keep it covered in the refrigerator. When you’re ready to cook, just pop it in the air fryer. You can also cook the chicken a few hours ahead, then reheat it in the air fryer at 375°F (190°C) for 3-4 minutes right before serving.
Why is my chicken skin not getting crispy?
The most common reason is moisture. Make sure you pat the chicken thighs completely dry before seasoning. Also, don’t overcrowd the air fryer basket — the thighs need space for hot air to circulate. Finally, check that your air fryer is preheated and set to the correct temperature (400°F or 200°C).
Can I use frozen chicken thighs?
I don’t recommend using frozen chicken thighs for this recipe. Frozen chicken releases too much moisture as it cooks, which prevents the skin from crisping. If you’re in a pinch, thaw the chicken completely in the refrigerator, then pat it very dry before seasoning and cooking.
Pin This Recipe!
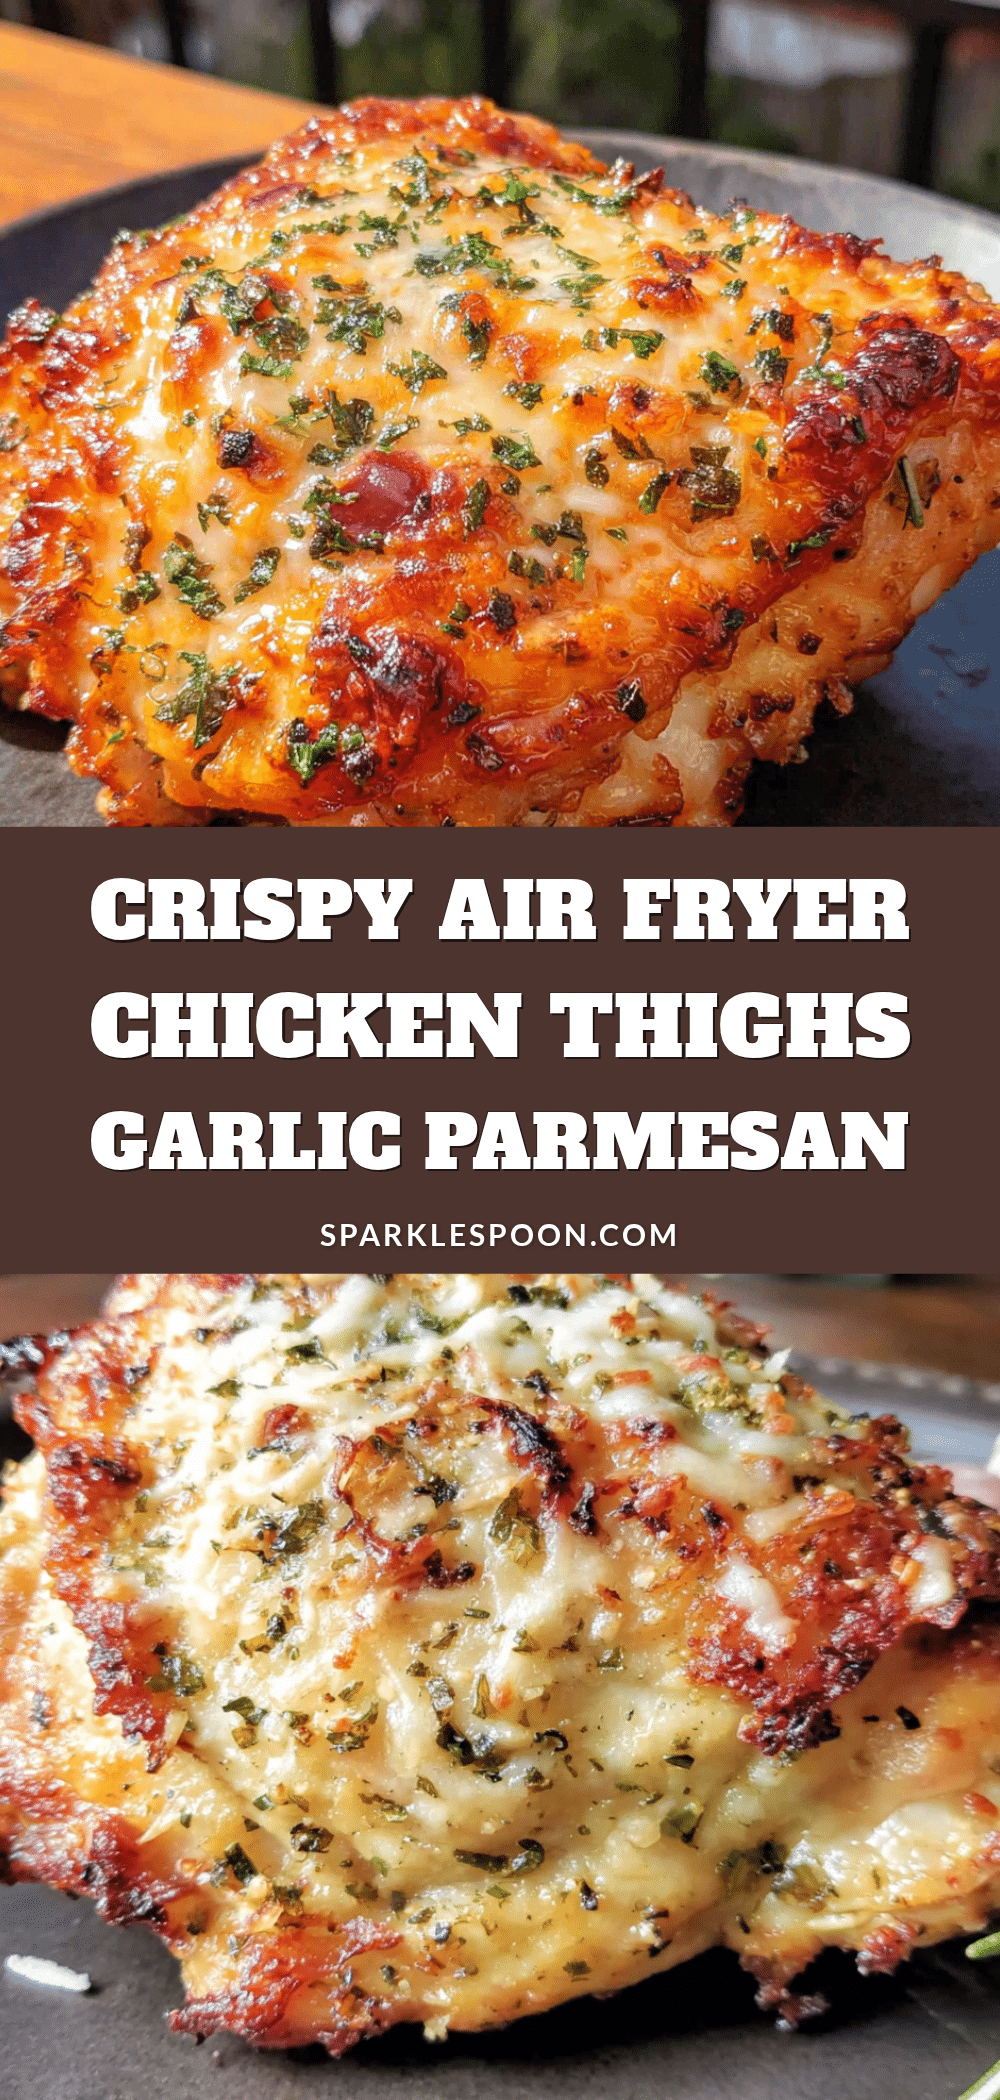
Best Crispy Air Fryer Chicken Thighs with Garlic Parmesan

These Best Crispy Air Fryer Chicken Thighs with Garlic Parmesan are quick, easy, and deliver a satisfying crunch without the mess of deep frying. The simple dry brine method and garlic parmesan crust create incredibly crispy skin and juicy meat in under 30 minutes.
- Prep Time: 10 minutes
- Cook Time: 20 minutes
- Total Time: 30 minutes
- Yield: 6 servings 1x
- Category: Main Course
- Cuisine: American
Ingredients
- 6 bone-in, skin-on chicken thighs (about 2 pounds or 900g)
- 2 tablespoons olive oil
- 1 teaspoon salt
- 1 teaspoon black pepper
- 1 teaspoon garlic powder
- 1 teaspoon onion powder
- 1 teaspoon paprika
- 1/2 cup freshly grated Parmesan cheese
- 4 cloves garlic, minced
- 2 tablespoons unsalted butter, melted
- 2 tablespoons fresh parsley, chopped
Instructions
- Pat the chicken thighs dry with paper towels to remove as much moisture as possible.
- In a small bowl, mix salt, black pepper, garlic powder, onion powder, and paprika. Drizzle olive oil over the chicken and rub it in evenly, then sprinkle the seasoning mixture over both sides of each thigh.
- Preheat the air fryer to 400°F (200°C) for 3-5 minutes.
- Arrange the chicken thighs skin-side down in a single layer in the air fryer basket, making sure they are not touching.
- Cook for 12 minutes at 400°F (200°C).
- Flip the chicken thighs using tongs so the skin side is facing up.
- Cook for another 8-10 minutes, until the internal temperature reaches 165°F (74°C) in the thickest part.
- While the chicken finishes cooking, melt the butter in a small microwave-safe bowl and stir in the minced garlic.
- Once the chicken is done, transfer to a serving plate and brush each thigh generously with the garlic butter.
- Sprinkle freshly grated Parmesan cheese over the hot chicken, then top with fresh chopped parsley. Let rest for 5 minutes before serving.
Notes
Pat the chicken thoroughly dry for crispy skin. Do not overcrowd the air fryer basket. Use a meat thermometer for perfect doneness. Let the chicken rest for 5 minutes before serving. For dairy-free, use nutritional yeast and olive oil instead of parmesan and butter.
Nutrition
- Serving Size: 1 chicken thigh
- Calories: 320
- Sodium: 450
- Fat: 22
- Saturated Fat: 8
- Carbohydrates: 2
- Protein: 28
Keywords: air fryer chicken thighs, crispy chicken thighs, garlic parmesan chicken, easy chicken recipe, weeknight dinner, keto chicken, gluten-free chicken



