Love this? Save it for later!
Share the inspiration with your friends
I was at the farmers’ market last December, shivering next to a stall that sold handmade peppermint bark. The woman running it, an older lady named Gladys with the kindest eyes, watched me hover near her table for a good five minutes before she said anything. “You look like you need something warmer than candy,” she said, and handed me a small mason jar filled with something that smelled like Christmas and childhood all at once. She didn’t give me a recipe card or tell me to write anything down. She just told me how she made it, like she was telling a story about her grandkids. I stood there holding that jar, the cold biting my fingers, and I knew I had to figure out how to make it myself. Honestly, I’ve been making it every year since, and it’s become the gift I give when I don’t know what else to say.
There’s something about a mason jar filled with homemade hot cocoa mix that feels like a hug in a jar. Maybe it’s the way the layers look, all those rich browns and whites stacked up like a sweet little landscape. Or maybe it’s knowing someone took the time to mix it themselves, not just grab a box off the shelf. Let me tell you, the first time I made this, I spilled cocoa powder all over my counter and spent ten minutes trying to get the lid on straight. But that first cup I made from my own mix? I closed my eyes after the first sip. It was that good.
This homemade peppermint hot cocoa mix is the kind of thing you make when you want to feel cozy without any fuss. It’s rich, it’s minty, and it comes together in about ten minutes. You probably have most of the ingredients in your pantry right now. I know I always do. It’s become my go-to for cold nights, for gifts that don’t need wrapping paper, and for those days when you just need something warm and sweet to hold onto. If you’ve never made your own hot cocoa mix before, trust me—this is the one to start with.
Why You’ll Love This Recipe
I’ve tested a lot of hot cocoa recipes over the years. Some were too sweet, some were too thin, and some just tasted like powdered sadness. This one is different. I mean it when I say this is the best version I’ve ever made, and I’ve been making it for long enough to know what works.
- Quick & Easy: This mix comes together in under ten minutes. Seriously, you can have a jar ready to go before your water even boils.
- Simple Ingredients: No fancy grocery trips needed. You likely already have milk powder, sugar, and cocoa powder in your kitchen right now.
- Perfect for Gifting: This is the ultimate homemade gift for Christmas, hostess gifts, or just because. Tie a ribbon around the jar and you’re done.
- Crowd-Pleaser: Kids and adults both go crazy for this. The peppermint adds just the right amount of freshness without being overpowering.
- Unbelievably Delicious: The texture is silky, the flavor is rich, and that peppermint kick at the end is pure magic. It’s next-level comfort food in a mug.
What makes this recipe different from all the others? It’s the balance. I spent a whole afternoon testing ratios—too much cocoa and it’s bitter, too much sugar and it’s cloying. This version hits that sweet spot where the chocolate and peppermint dance together without stepping on each other’s toes. Plus, using powdered milk instead of regular milk means you can make a cup anytime, anywhere, without worrying about your milk going bad. It’s comfort food reimagined—faster, easier, but with the same soul-soothing satisfaction that makes you close your eyes after that first sip.
What Ingredients You Will Need
This recipe uses simple, wholesome ingredients that come together to create a rich, creamy hot cocoa with a refreshing peppermint finish. Most of these are pantry staples, which is exactly what you want in a mix you can whip up anytime.
For the Hot Cocoa Mix
- 2 cups powdered milk (I prefer whole milk powder for extra creaminess, but nonfat works too)
- 1 cup powdered sugar (also called confectioners’ sugar—it dissolves instantly)
- 3/4 cup unsweetened cocoa powder (I use Dutch-process for a smoother, richer flavor, but natural cocoa works fine)
- 1/2 cup granulated sugar (this adds a bit of texture and sweetness that powdered sugar alone doesn’t give)
- 1/4 teaspoon salt (trust me on this—it makes the chocolate taste more chocolatey)
- 1/2 cup crushed peppermint candies or candy canes (about 6-8 regular-sized candy canes, crushed finely)
For Serving
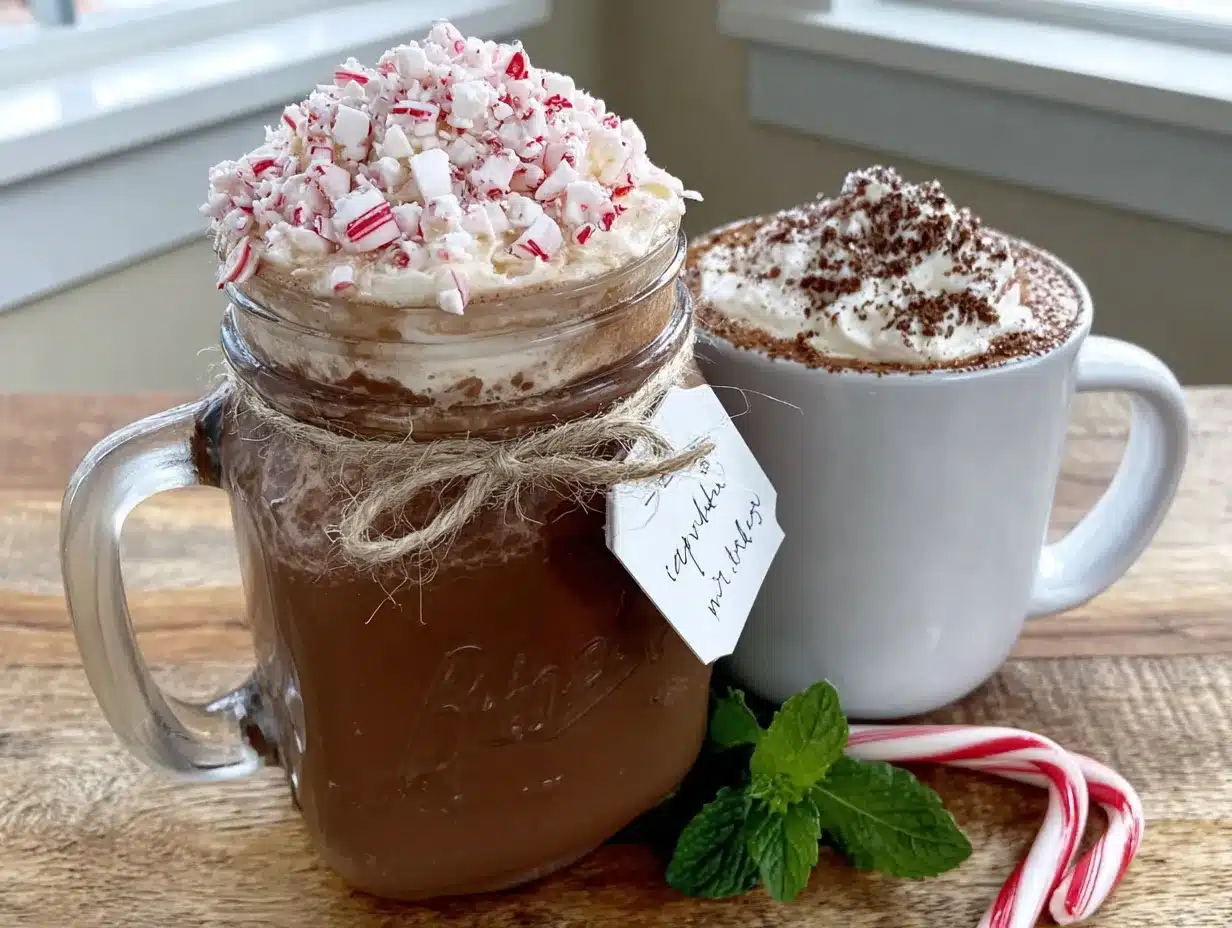
- 1/3 cup hot water or hot milk (per serving—water keeps it lighter, milk makes it extra creamy)
- Whipped cream or marshmallows (optional, but highly recommended)
- Extra crushed peppermint for garnish (because more peppermint is never a bad thing)
A few notes on ingredients: I really recommend using Dutch-process cocoa powder if you can find it. It has a smoother, less acidic taste that makes the cocoa feel more luxurious. My go-to brand is Droste, but any good quality Dutch-process cocoa will work. For the peppermint, you can use store-bought candy canes or those little starlight mints. I’ve even used crushed peppermint baking chips in a pinch, though they don’t dissolve quite as well. If you’re making this for someone who can’t have dairy, swap the powdered milk for a powdered coconut milk alternative—it works surprisingly well and adds a subtle tropical note that pairs nicely with the peppermint.
One more thing about the salt: I know it sounds weird, but don’t skip it. A tiny pinch of salt doesn’t make the cocoa salty; it actually enhances the chocolate flavor and balances the sweetness. I learned this the hard way after making a batch that was just too sweet and flat. That little bit of salt changed everything.
Equipment Needed
You don’t need much for this recipe, which is part of the beauty of it. Here’s what you’ll need:
- A large mixing bowl: Big enough to whisk everything together without making a mess. I use my grandmother’s old ceramic bowl, but any large bowl works.
- A whisk: A good whisk is key for getting the cocoa powder fully incorporated. A fork works in a pinch, but you’ll be whisking for a while.
- A fine-mesh strainer or sifter: This is optional but highly recommended. Sifting the cocoa powder and powdered sugar ensures there are no lumps in your final mix.
- Mason jars: Pint-sized (16 oz) jars are perfect for gifting. You’ll need about 3-4 jars depending on how full you fill them.
- A rolling pin or food processor: For crushing the peppermint candies. A rolling pin and a ziplock bag work great if you want to get out some aggression. A food processor is faster but creates a finer powder.
- A funnel: This makes filling the jars way less messy. I use a wide-mouth funnel I got at the dollar store.
If you don’t have a sifter, don’t stress. You can whisk the dry ingredients really well and most lumps will break up. I’ve definitely made this without sifting and it turned out just fine. The key is to be patient with the whisking.
Preparation Method
Making this homemade peppermint hot cocoa mix is almost embarrassingly easy. Here’s how to do it, step by step.
- Crush the peppermint candies. Place your candy canes or starlight mints in a sturdy ziplock bag. Seal it up, making sure to squeeze out as much air as possible. Then take a rolling pin and gently start crushing. I say gently because if you go too hard too fast, the bag can burst—I learned this the hard way and spent an hour picking minty shards off my kitchen floor. Aim for a mix of fine powder and tiny pieces. You want some texture, not just dust. Set this aside.
- Sift the dry ingredients. In your large mixing bowl, combine the powdered milk, powdered sugar, cocoa powder, granulated sugar, and salt. Use your fine-mesh strainer or sifter to sift everything together. If you don’t have a sifter, just whisk vigorously for a good minute or two. The goal is to break up any clumps so your cocoa mix is smooth and uniform. You’ll see the color even out as you mix—it should be a consistent rich brown.
- Add the crushed peppermint. Pour your crushed peppermint into the bowl with the dry ingredients. Whisk everything together until the peppermint is evenly distributed throughout the mix. You should see little flecks of red and white throughout the brown powder. This is where the magic starts to happen.
- Layer the jars (optional but pretty). If you’re making these as gifts, here’s the fun part. Using your funnel, layer the mix into your mason jars. You can do alternating layers of the cocoa mix and extra crushed peppermint for a striped effect. I like to do about 1/2 cup of mix, then a thin layer of crushed peppermint, then more mix, and so on until the jar is full. Tap the jar gently on the counter between layers to settle everything evenly.
- Seal and label. Put the lid on your jar and tighten it securely. If you’re gifting, attach a tag with the instructions: “Add 1/3 cup of mix to a mug, pour in 1 cup of hot water or milk, stir well, and enjoy.” You can also add a note about topping with whipped cream or marshmallows.
- Make a cup for yourself. Because you deserve it. Scoop about 1/3 cup of the mix into a mug. Heat up 1 cup of water or milk until it’s steaming but not boiling. Pour it over the mix and stir until everything is dissolved. Top with whipped cream and a sprinkle of extra crushed peppermint if you’re feeling fancy. Take a sip and congratulate yourself.
A quick note on measurements: I’ve tested this with both US and metric measurements. If you’re using a scale, 1 cup of powdered milk is about 120 grams, 1 cup of powdered sugar is about 120 grams, and 3/4 cup of cocoa powder is about 75 grams. The granulated sugar comes to about 100 grams for 1/2 cup. The peppermint candies are harder to weigh precisely since they vary, but 1/2 cup of crushed candy is roughly 60-70 grams.
Cooking Tips & Techniques
I’ve made this recipe more times than I can count, and I’ve definitely made my share of mistakes along the way. Here are the things I wish someone had told me when I started.
Don’t over-crush the peppermint. I know it’s satisfying to smash those candy canes into dust, but if you make the pieces too small, they’ll dissolve completely into the cocoa and you’ll lose that lovely crunch. Aim for pieces about the size of sprinkles. You want some that are tiny and some that are a bit bigger for texture.
Toast the powdered milk for extra depth. This is a trick I picked up from a pastry chef friend. If you have a few extra minutes, spread the powdered milk on a baking sheet and toast it in a 350°F oven for about 5 minutes, just until it turns a very light golden color. Let it cool completely before mixing. This adds a nutty, caramel-like depth to the cocoa that’s absolutely incredible. I don’t do this every time, but when I’m making a batch for a special gift, it’s worth the extra step.
Watch out for humidity. Powdered milk and powdered sugar are both hygroscopic, which means they absorb moisture from the air. If you’re making this on a humid day, your mix might clump up. To prevent this, make sure all your equipment is completely dry, and store the finished mix in an airtight container. If your mix does clump, you can break up the lumps with a fork or re-sift it before using.
Double the recipe. Honestly, this is my biggest tip. The recipe as written makes about 3-4 cups of mix, which is perfect for gifting. But if you’re making it for yourself, double it. You’ll go through it faster than you think, especially on cold winter nights. I keep a big jar of it in my pantry from November through March, and I usually have to make a second batch by January.
The water vs. milk debate. I’ve tried this mix with both hot water and hot milk. Water gives you a lighter, more tea-like cocoa that lets the peppermint shine. Milk gives you a richer, creamier, more indulgent drink. There’s no wrong answer here. I personally prefer milk on a really cold night and water when I want something lighter. You do you.
Variations & Adaptations
One of the best things about this recipe is how easy it is to customize. Here are some variations I’ve tried and loved.
Dark Chocolate Peppermint Cocoa: Swap half the regular cocoa powder for dark cocoa powder. This gives the mix a deeper, more intense chocolate flavor that pairs beautifully with the peppermint. I use this version when I’m making it for adults who prefer less sweetness.
Vegan Peppermint Cocoa: Use powdered coconut milk instead of regular powdered milk, and make sure your candy canes are vegan (most are, but some use confectioner’s glaze). The coconut milk powder adds a subtle tropical note that actually works really well with the peppermint. I made this for a friend who’s vegan and she said it was the best hot cocoa she’d ever had.
Spiced Peppermint Cocoa: Add 1/2 teaspoon of cinnamon and a pinch of cayenne pepper to the dry mix. The warmth of the cinnamon and the subtle heat from the cayenne make the peppermint taste even more refreshing. It’s like a Mexican hot chocolate meets a candy cane. I was skeptical the first time I tried this, but now it’s my favorite variation.
White Chocolate Peppermint Cocoa: Replace 1/4 cup of the cocoa powder with white chocolate powder (the kind you use for white hot chocolate). This makes a lighter, creamier cocoa that’s almost like a peppermint white mocha. It’s dangerously good.
Mint Chocolate Chip Cocoa: Add 2 tablespoons of mini chocolate chips to each jar. When you make the cocoa, the chocolate chips melt slightly but don’t fully dissolve, leaving you with little pockets of melted chocolate. It’s like a chocolate chip cookie in a mug.
Serving & Storage Suggestions
This mix is incredibly versatile when it comes to serving and storing. Here’s what I’ve learned.
Serving Temperature: Serve the cocoa piping hot, but not boiling. I heat my water or milk to about 180°F, which is just below boiling. If the liquid is too hot, it can make the powdered milk taste slightly scorched. If it’s not hot enough, the mix won’t dissolve properly. Aim for that sweet spot where steam is rising but there are no bubbles.
Presentation Ideas: For a cozy night in, serve in your favorite mug with a generous dollop of whipped cream and a drizzle of chocolate syrup. For a party, set up a hot cocoa bar with bowls of marshmallows, crushed peppermint, chocolate shavings, and cinnamon sticks. Let everyone customize their own cup. It’s always a hit.
Storage Instructions: Store the mix in an airtight container at room temperature. It will keep for up to 6 months, though honestly, it never lasts that long in my house. Keep it away from direct sunlight and heat sources. If you live in a humid climate, you might want to add a silica gel packet to the container to absorb any excess moisture.
Freezer Instructions: You can actually freeze this mix! Place it in a freezer-safe airtight container and it will keep for up to a year. The texture stays the same because there’s no liquid to freeze. Just let it come to room temperature before opening to prevent condensation from getting in.
Reheating Tips: If your cocoa gets cold, just pop it in the microwave for 30 seconds or reheat it gently on the stove. Stir well before drinking. The flavors actually meld together more as it sits, so leftover cocoa can taste even better the next day.
Flavor Development: The peppermint flavor will intensify over time as the candy pieces slowly release their oils into the dry mix. I actually prefer the cocoa after it’s been sitting for a week or two. The flavors marry together and become more cohesive. So don’t be afraid to make this ahead of time.
Nutritional Information & Benefits
Let’s be real—this is a treat, not a health food. But that doesn’t mean it’s without its redeeming qualities. Here’s a rough breakdown per serving (using water, not milk).
| Nutrient | Amount Per Serving |
|---|---|
| Calories | 180-220 |
| Total Fat | 2-4g |
| Saturated Fat | 1-2g |
| Carbohydrates | 38-45g |
| Sugar | 32-38g |
| Protein | 6-8g |
| Calcium | 15-20% DV |
| Iron | 8-10% DV |
The cocoa powder is actually packed with antioxidants called flavanols, which can help reduce inflammation and improve heart health. The powdered milk provides calcium and protein, making this a more substantial drink than your average hot cocoa mix. And the peppermint? It’s been used for centuries to aid digestion and soothe upset stomachs. So while I wouldn’t call this a health drink, it’s certainly not empty calories either.
If you’re watching your sugar intake, you can reduce the sugar by half and it will still taste good—just less sweet. I’ve also made this with a sugar substitute like monk fruit sweetener, and it worked surprisingly well. Just note that the texture might be slightly different since sugar adds bulk.
Potential allergens: This recipe contains dairy (from the powdered milk). It’s gluten-free as written, but always check your candy canes to make sure they weren’t processed in a facility that handles wheat. The cocoa powder is naturally vegan and gluten-free.
Conclusion
This homemade peppermint hot cocoa mix has become a staple in my kitchen, and I honestly can’t imagine winter without it. It’s the kind of recipe that makes you feel like you’ve done something special, even though it only took ten minutes. Every time I pull out a jar to give as a gift, I think about Gladys at that farmers’ market, handing me that first jar and trusting me to figure it out on my own. That’s the thing about recipes like this—they’re not just about the ingredients. They’re about the moment someone shares something with you, and you make it your own.
I hope you’ll try this recipe and make it your own too. Maybe you’ll add a little extra peppermint, or use dark chocolate, or serve it with a cinnamon stick. That’s the beauty of homemade—you get to decide. And if you come up with a variation that blows your mind, I’d love to hear about it. Drop a comment below and tell me how it went. Share a photo of your jar on Pinterest. Tag a friend who needs a little warmth in their life right now.
Go ahead, make yourself a cup. You’ve earned it.
Frequently Asked Questions
Can I use regular milk instead of powdered milk?
This recipe is designed to be a dry mix that you store in a jar, so powdered milk is essential for the mix itself. However, when you’re ready to make a cup, you can absolutely use hot milk instead of water for a creamier drink. Just add the dry mix to a mug and pour in hot milk instead of water.
How long does the mix stay fresh?
Stored in an airtight container at room temperature, this mix will stay fresh for up to 6 months. If you freeze it, it can last up to a year. The peppermint flavor might fade slightly after a few months, so I recommend using it within 3 months for the best taste.
Can I make this without a mason jar?
Absolutely! Any airtight container works. I’ve used glass jars with clamp lids, plastic containers with snap-on lids, and even ziplock bags in a pinch. Mason jars are just the prettiest option, especially if you’re giving the mix as a gift.
My cocoa mix has lumps. What went wrong?
Lumps usually happen when the mix is exposed to humidity. Make sure all your equipment is completely dry before you start, and store the finished mix in an airtight container. If your mix already has lumps, you can break them up with a fork or re-sift the mix before using it.
Can I use chocolate chips instead of cocoa powder?
I wouldn’t recommend it. Chocolate chips contain cocoa butter and sugar, which changes the texture and storage requirements of the mix. Cocoa powder is the right choice here because it dissolves easily and stays shelf-stable. If you want a richer chocolate flavor, use Dutch-process cocoa powder or add a tablespoon of dark cocoa powder to the mix.
Pin This Recipe!
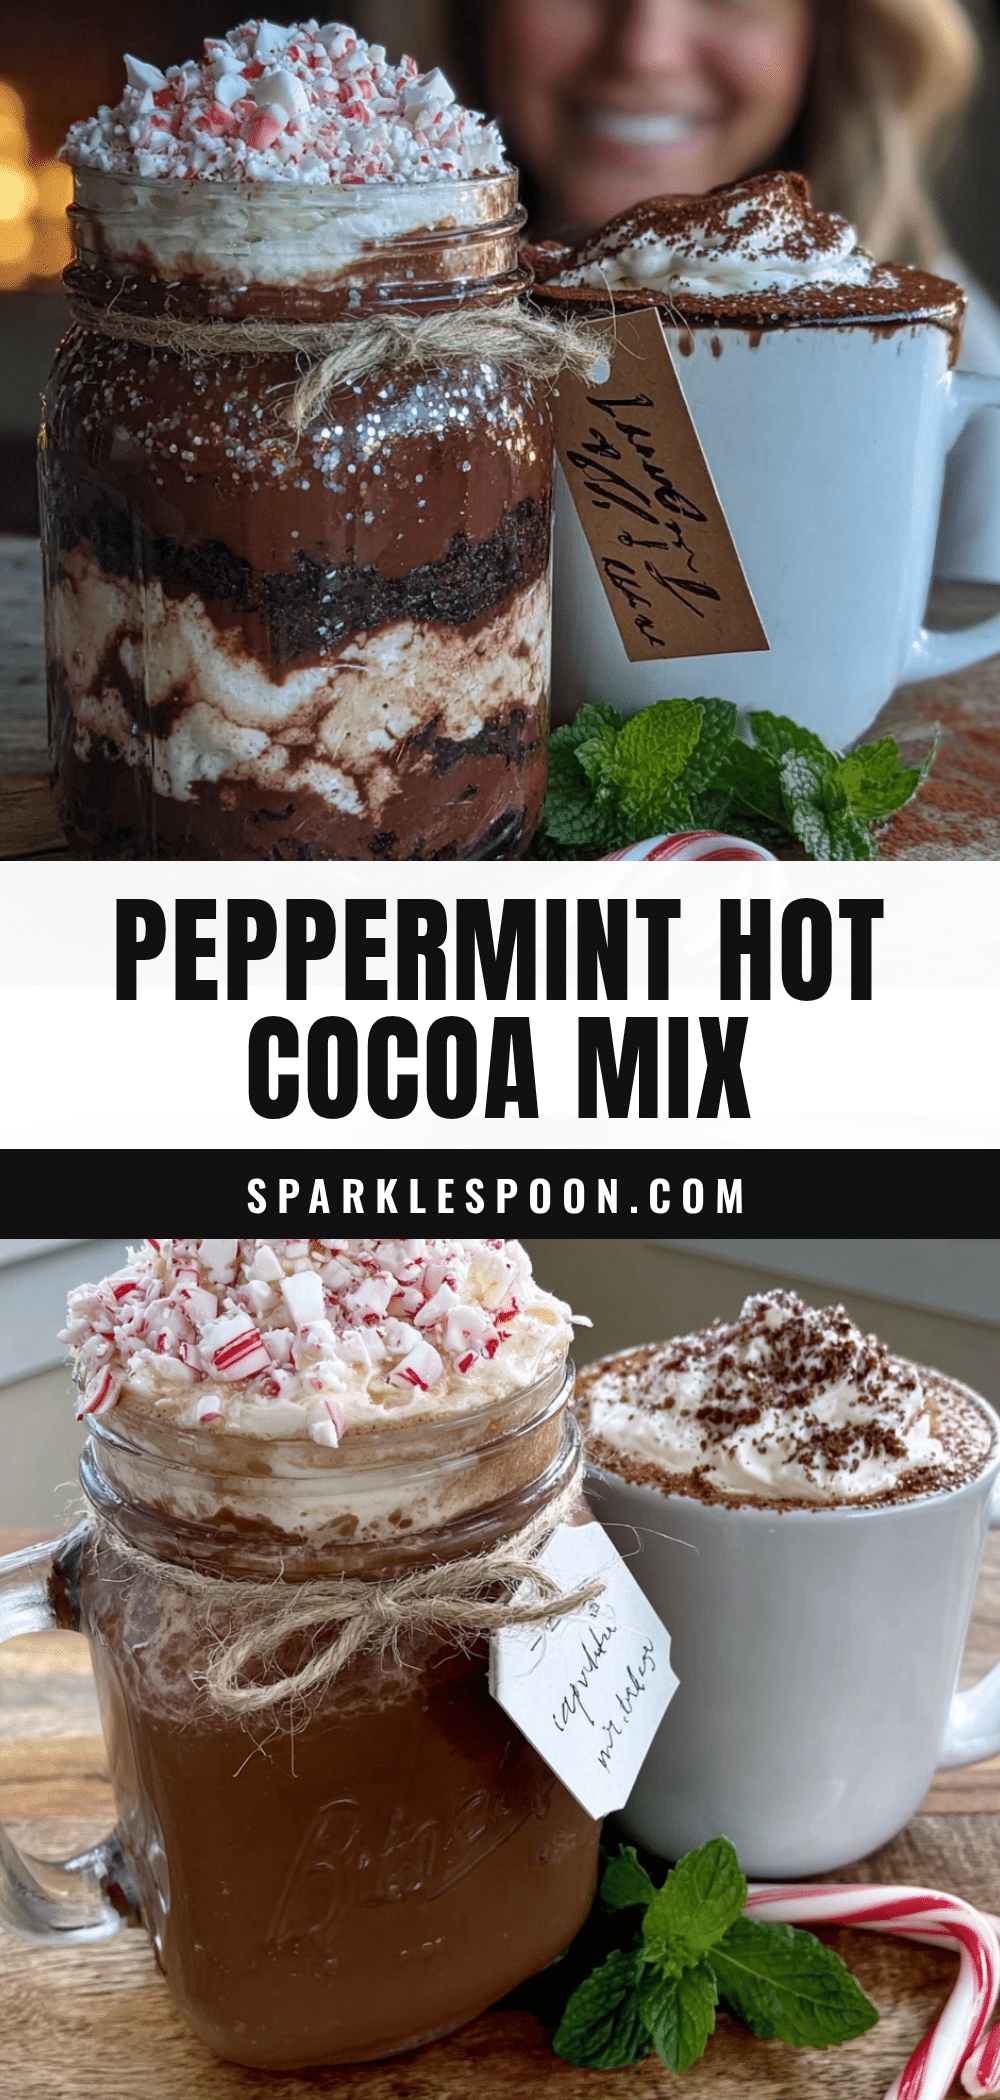
Homemade Peppermint Hot Cocoa Mix in a Mason Jar

This homemade peppermint hot cocoa mix is rich, minty, and comes together in about ten minutes. It’s the perfect cozy drink for cold nights and makes a wonderful homemade gift.
- Prep Time: 10 minutes
- Cook Time: 0 minutes
- Total Time: 10 minutes
- Yield: 4 servings 1x
- Category: Beverage
- Cuisine: American
Ingredients
- 2 cups powdered milk (whole milk powder preferred, nonfat works too)
- 1 cup powdered sugar (confectioners’ sugar)
- 3/4 cup unsweetened cocoa powder (Dutch-process preferred, natural works fine)
- 1/2 cup granulated sugar
- 1/4 teaspoon salt
- 1/2 cup crushed peppermint candies or candy canes (about 6–8 regular-sized candy canes, crushed finely)
- 1/3 cup hot water or hot milk (per serving)
- Whipped cream or marshmallows (optional, for serving)
- Extra crushed peppermint for garnish (optional)
Instructions
- Crush the peppermint candies: Place candy canes or starlight mints in a sturdy ziplock bag, seal, and crush with a rolling pin until you have a mix of fine powder and tiny pieces. Set aside.
- Sift the dry ingredients: In a large mixing bowl, combine powdered milk, powdered sugar, cocoa powder, granulated sugar, and salt. Sift together or whisk vigorously until uniform and clump-free.
- Add the crushed peppermint: Pour the crushed peppermint into the bowl and whisk until evenly distributed.
- Layer the jars (optional but pretty): Using a funnel, layer the mix into mason jars. Alternate layers of cocoa mix and extra crushed peppermint for a striped effect. Tap the jar gently between layers to settle.
- Seal and label: Put the lid on the jar and tighten. If gifting, attach a tag with instructions: ‘Add 1/3 cup of mix to a mug, pour in 1 cup of hot water or milk, stir well, and enjoy.’
- Make a cup: Scoop about 1/3 cup of mix into a mug. Heat 1 cup of water or milk until steaming but not boiling. Pour over mix and stir until dissolved. Top with whipped cream and extra crushed peppermint if desired.
Notes
For extra depth, toast the powdered milk in a 350°F oven for 5 minutes until light golden, then cool completely before mixing. Store in an airtight container at room temperature for up to 6 months, or freeze for up to a year. The peppermint flavor intensifies over time. If the mix clumps due to humidity, break up lumps with a fork or re-sift.
Nutrition
- Serving Size: 1 cup prepared
- Calories: 180220
- Sugar: 3238
- Sodium: 150200
- Fat: 24
- Saturated Fat: 12
- Carbohydrates: 3845
- Fiber: 23
- Protein: 68
Keywords: peppermint hot cocoa, homemade hot cocoa mix, mason jar gift, Christmas drink, hot chocolate mix, peppermint cocoa