Love this? Save it for later!
Share the inspiration with your friends
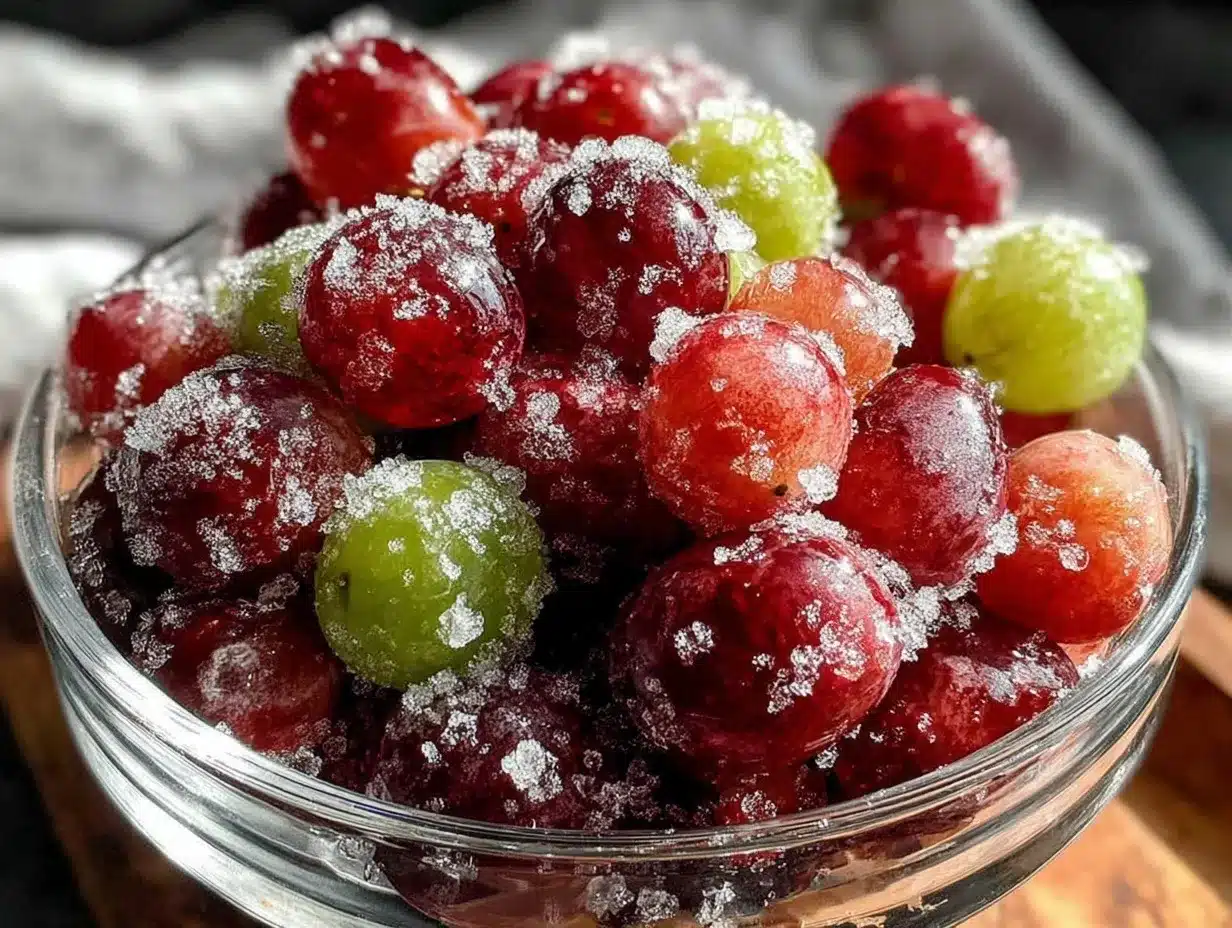
“The summer I turned twenty-five, I found myself standing in the middle of a bustling community pool, juggling a cooler full of snacks that were melting faster than I could hand them out. It was one of those scorching July afternoons when the sun felt like a relentless spotlight, and everyone was craving something cool and sweet but without the sticky mess. That’s when my neighbor, Jeff—who you wouldn’t peg for a snack guru—offered me a handful of frozen grapes he’d tossed in his cooler. Honestly, I thought, ‘Frozen grapes? Really?’ But as soon as I popped one in my mouth, I was hooked. The burst of icy sweetness was like a mini vacation for my taste buds, and the best part? No sugar crash or sticky fingers. Maybe you’ve been there too, craving a refreshing, guilt-free treat by the pool or after a long day. Since that day, healthy frozen grapes have been my go-to snack for beating the heat and staying refreshed, no fuss involved. Let me tell you why this simple recipe stuck with me and how it can become your summertime lifesaver too.”
Why You’ll Love This Recipe
When it comes to quick, healthy snacks, healthy frozen grapes are honestly a game-changer. I’ve tested this recipe countless times—whether for pool days, afternoon cravings, or even a little pick-me-up after a workout—and it always delivers that perfect cool sweetness without any hassle. Here’s why you’ll want to keep this recipe in your back pocket:
- Quick & Easy: You just need grapes and a freezer. It takes less than 10 minutes to prep, making it perfect for last-minute snack needs.
- Simple Ingredients: No complicated shopping trips. Just grab some fresh grapes—green, red, or black—and you’re set.
- Perfect for Summer: Whether you’re chilling by the pool, heading to a picnic, or want a refreshing office treat, frozen grapes fit the bill.
- Crowd-Pleaser: Kids, adults, and even picky eaters tend to love these little frozen bursts of flavor.
- Unbelievably Delicious: The icy texture combined with natural sweetness creates a snack that feels indulgent but is totally guilt-free.
This isn’t just any frozen fruit hack—freezing grapes the right way keeps them juicy inside with a satisfying crunch outside. I’ve learned that picking firm, seedless grapes and freezing them in a single layer makes all the difference. Honestly, after trying other frozen snacks that turned mushy or bland, this recipe was a refreshing reminder that simple can be spectacular. It’s like comfort food, but without the heaviness—a perfect way to cool down while staying on track with your health goals.
What Ingredients You Will Need
This recipe uses simple, wholesome ingredients to deliver bold flavor and satisfying texture without the fuss. Grapes are the star here, and choosing the right ones can make a huge difference in taste and texture.
- Seedless grapes (green, red, or black) – about 2 cups (300 grams). I prefer Thompson Seedless grapes for their consistent sweetness and firm skin, but any seedless variety works well.
- Optional: Lemon juice – 1 teaspoon, to lightly toss with grapes before freezing for a subtle tang and to help preserve color.
- Optional: Honey or agave syrup – 1 teaspoon, if you want to add a touch of extra sweetness (though the grapes are usually sweet enough on their own).
For a natural, refreshing snack, no other ingredients are necessary. These grapes are pantry staples for most, and you can find them year-round in grocery stores or farmers markets. If you’re feeling adventurous, in summer, try swapping half the grapes for frozen berries for a colorful twist. For those needing a little extra zing, a quick drizzle of fresh lime juice before freezing adds a nice pop of citrus flavor.
Equipment Needed
- Baking sheet or tray: For laying grapes out in a single layer. This helps them freeze evenly and prevents clumping.
- Parchment paper or silicone baking mat: To line the tray and keep grapes from sticking.
- Mixing bowl: To toss grapes with optional lemon juice or sweetener if desired.
- Freezer-safe container or resealable plastic bag: For storing frozen grapes once they’re solid.
If you don’t have a baking sheet, any flat tray or plate will work. I’ve even used a clean cookie sheet or a shallow glass dish. Parchment paper is my personal favorite because it’s reusable and keeps cleanup easy. For budget-friendly options, reusable silicone mats last forever and are worth the investment if you freeze fruit often. Just make sure your freezer has enough space for the tray to lie flat, which is key to avoiding grape clumps.
Preparation Method
- Wash and dry the grapes thoroughly. Rinse 2 cups (300 grams) of seedless grapes under cold water. Pat them completely dry with a clean kitchen towel or paper towels. This step is crucial because excess moisture can cause grapes to stick together once frozen.
- Optional: Toss grapes with lemon juice and sweetener. In a mixing bowl, combine grapes with 1 teaspoon of fresh lemon juice and, if you like, 1 teaspoon of honey or agave syrup. This helps brighten the flavor and preserve the grapes’ color. Give them a gentle stir to coat evenly.
- Arrange grapes on a parchment-lined baking sheet. Spread grapes out in a single layer, making sure none are touching. This prevents freezing into one big clump and makes it easier to grab a handful when you want a snack.
- Freeze grapes for 3-4 hours or until solid. Place the tray flat in the freezer. Depending on your freezer’s setting, this usually takes about 3 hours. For best texture, avoid freezing overnight to prevent grapes from becoming overly icy inside.
- Transfer frozen grapes to a freezer-safe container or resealable bag. Once frozen, pop the grapes off the baking sheet and store them in an airtight container. This keeps them fresh for up to 3 months, so you can enjoy your refreshing snack anytime.
- Serve immediately or store for later. Frozen grapes are best enjoyed straight from the freezer as a cool treat. If they soften slightly after sitting out, just pop them back in the freezer for 10-15 minutes before serving.
A quick tip I learned from experience: don’t overcrowd the tray when freezing—give those grapes breathing room! Also, if you forget to dry them well, you’ll notice clusters sticking together, which can be a bit frustrating. Lastly, if you want to make sure the grapes don’t develop freezer burn, seal the container tightly and keep the freezer temperature consistent.
Cooking Tips & Techniques
Honestly, frozen grapes are one of the easiest snacks to prepare, but a few tricks can make your batch stand out. Here are some tips I’ve picked up over time:
- Pick firm, ripe grapes: Look for grapes that are plump and free from wrinkles or soft spots. This ensures the inside stays juicy after freezing.
- Dry grapes thoroughly: This might sound obvious, but any leftover water causes grapes to stick together, making your snack less fun to eat.
- Freeze in a single layer: This is key to keeping grapes separate and easy to grab individually.
- Experiment with grape varieties: Red grapes tend to be sweeter, while green grapes offer a tart contrast. Black grapes are often richer in flavor. Mixing varieties can add visual appeal and taste variety.
- Don’t thaw before eating: Frozen grapes are best enjoyed cold and firm. If you thaw them, they lose that satisfying crunch and become mushy.
- Multitasking tip: While grapes freeze, it’s a great time to prep other snacks or drinks for your pool day or gathering, so you’re ready to relax.
I once tried freezing grapes with the stems still attached and found they froze unevenly, so I always pluck grapes off the stems first now. Also, if you want an extra layer of flavor, try rolling grapes in a pinch of cinnamon or chili powder before freezing—sounds weird, but it’s a fun twist I picked up at a local farmers market!
Variations & Adaptations
Frozen grapes are wonderfully versatile, and you can easily adapt this recipe to suit your taste or dietary needs. Here are some ideas I’ve played with:
- Herbed Frozen Grapes: Toss grapes with a little chopped fresh mint or basil before freezing for a refreshing herbal note.
- Frozen Grape Pops: Blend frozen grapes with a splash of coconut water or lemonade, pour into popsicle molds, and freeze for a frozen treat variation.
- Seasonal Fruit Mix: Combine grapes with other frozen fruits like blueberries, cherries, or sliced kiwi for a colorful, nutrient-packed snack.
- Allergen-Free Option: This recipe is naturally free from common allergens like nuts and gluten, making it safe for most diets.
- Sweetened Variation: If your grapes aren’t very sweet, a light drizzle of honey or maple syrup before freezing can add a nice touch.
Personally, I tried a batch with a sprinkle of sea salt and chili flakes once after a cookout. It was surprisingly addictive—a little sweet, a little spicy, and totally unexpected. Feel free to experiment and find what suits your palate!
Serving & Storage Suggestions
Healthy frozen grapes are best served straight from the freezer. They’re a perfect grab-and-go snack that’s naturally portion-controlled. I like to serve them in a chilled bowl or even on skewers for a fun party presentation. Pair them with light cheeses like goat cheese or fresh mozzarella for a simple summer appetizer that amazes guests.
To store, keep your frozen grapes in an airtight container or resealable freezer bag to maintain freshness and avoid freezer burn. They’ll keep well for up to three months, although I recommend enjoying them within a month for peak flavor and texture.
When reheating isn’t really a thing here, but if grapes soften a bit after sitting out, just pop them back in the freezer for 10-15 minutes and they’ll regain their firmness. Over time, the flavors mellow and become more concentrated, which can be a nice surprise if you let them sit a little longer.
Nutritional Information & Benefits
Frozen grapes make a healthy, low-calorie snack packed with vitamins and antioxidants. A typical serving (about 1 cup or 150 grams) contains roughly:
- Calories: 90
- Carbohydrates: 23g (mostly natural sugars)
- Fiber: 1.4g
- Vitamin C: 10% of daily value
- Vitamin K: 18% of daily value
They’re naturally gluten-free, dairy-free, and vegan, making them suitable for a wide range of dietary needs. Plus, grapes contain antioxidants like resveratrol, which have been linked to heart health benefits. From a wellness perspective, frozen grapes satisfy sweet cravings without added sugars or processed ingredients, making them a smart choice for mindful snacking.
Conclusion
So, if you’re looking for a refreshingly sweet, healthy frozen snack that’s effortless to prepare, this healthy frozen grapes recipe is a winner. It’s simple, naturally delicious, and perfect for warm days when you want something cool without the guilt. I love how this snack brings a little joy and chill to my afternoons, whether I’m lounging by the pool or sneaking a quick treat during work breaks. I hope you’ll make it your own—try different grape varieties or mix in flavors you love. If you do, please drop a comment and share how you customize your frozen grapes. There’s something wonderfully satisfying about a snack that’s as easy as it is tasty—here’s to keeping cool and healthy, one frozen grape at a time!
FAQs About Healthy Frozen Grapes
Can I freeze grapes with stems attached?
It’s best to remove grapes from the stems before freezing. Grapes freeze more evenly and don’t clump together as much when separated.
How long do frozen grapes last in the freezer?
Frozen grapes can be stored up to 3 months in an airtight container, but they taste best within the first month.
Are frozen grapes safe for kids?
Yes, but supervise young children to avoid choking hazards. The icy texture might be hard for toddlers to chew safely.
Can I use frozen grapes in smoothies?
Absolutely! Frozen grapes add sweetness and chill to smoothies without needing extra ice.
Do frozen grapes lose nutritional value?
Freezing preserves most nutrients, so frozen grapes retain their vitamins and antioxidants well.
Pin This Recipe!
Healthy Frozen Grapes Recipe Easy Refreshing Sweet Pool Snack Ideas
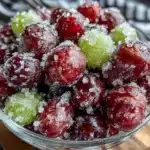
A quick and easy healthy snack of frozen seedless grapes that offers a refreshing, guilt-free treat perfect for summer and pool days.
- Prep Time: 10 minutes
- Cook Time: 3-4 hours
- Total Time: 3 hours 10 minutes
- Yield: About 2 cups (serves 4) 1x
- Category: Snack
- Cuisine: American
Ingredients
- 2 cups (300 grams) seedless grapes (green, red, or black)
- Optional: 1 teaspoon lemon juice
- Optional: 1 teaspoon honey or agave syrup
Instructions
- Wash and dry the grapes thoroughly. Rinse 2 cups (300 grams) of seedless grapes under cold water. Pat them completely dry with a clean kitchen towel or paper towels.
- Optional: Toss grapes with lemon juice and sweetener. In a mixing bowl, combine grapes with 1 teaspoon of fresh lemon juice and, if desired, 1 teaspoon of honey or agave syrup. Stir gently to coat evenly.
- Arrange grapes on a parchment-lined baking sheet in a single layer, making sure none are touching to prevent clumping.
- Freeze grapes for 3-4 hours or until solid. Place the tray flat in the freezer.
- Transfer frozen grapes to a freezer-safe container or resealable plastic bag once solid.
- Serve immediately from the freezer or store for later. If grapes soften, refreeze for 10-15 minutes before serving.
Notes
Pick firm, ripe seedless grapes and dry them thoroughly to prevent sticking. Freeze grapes in a single layer to avoid clumping. Do not thaw before eating to maintain crunch. Store in airtight container for up to 3 months, best within 1 month.
Nutrition
- Serving Size: 1 cup (about 150 gra
- Calories: 90
- Sugar: 23
- Carbohydrates: 23
- Fiber: 1.4
- Protein: 0.6
Keywords: frozen grapes, healthy snack, summer snack, pool snack, easy snack, refreshing snack, seedless grapes, frozen fruit