Love this? Save it for later!
Share the inspiration with your friends
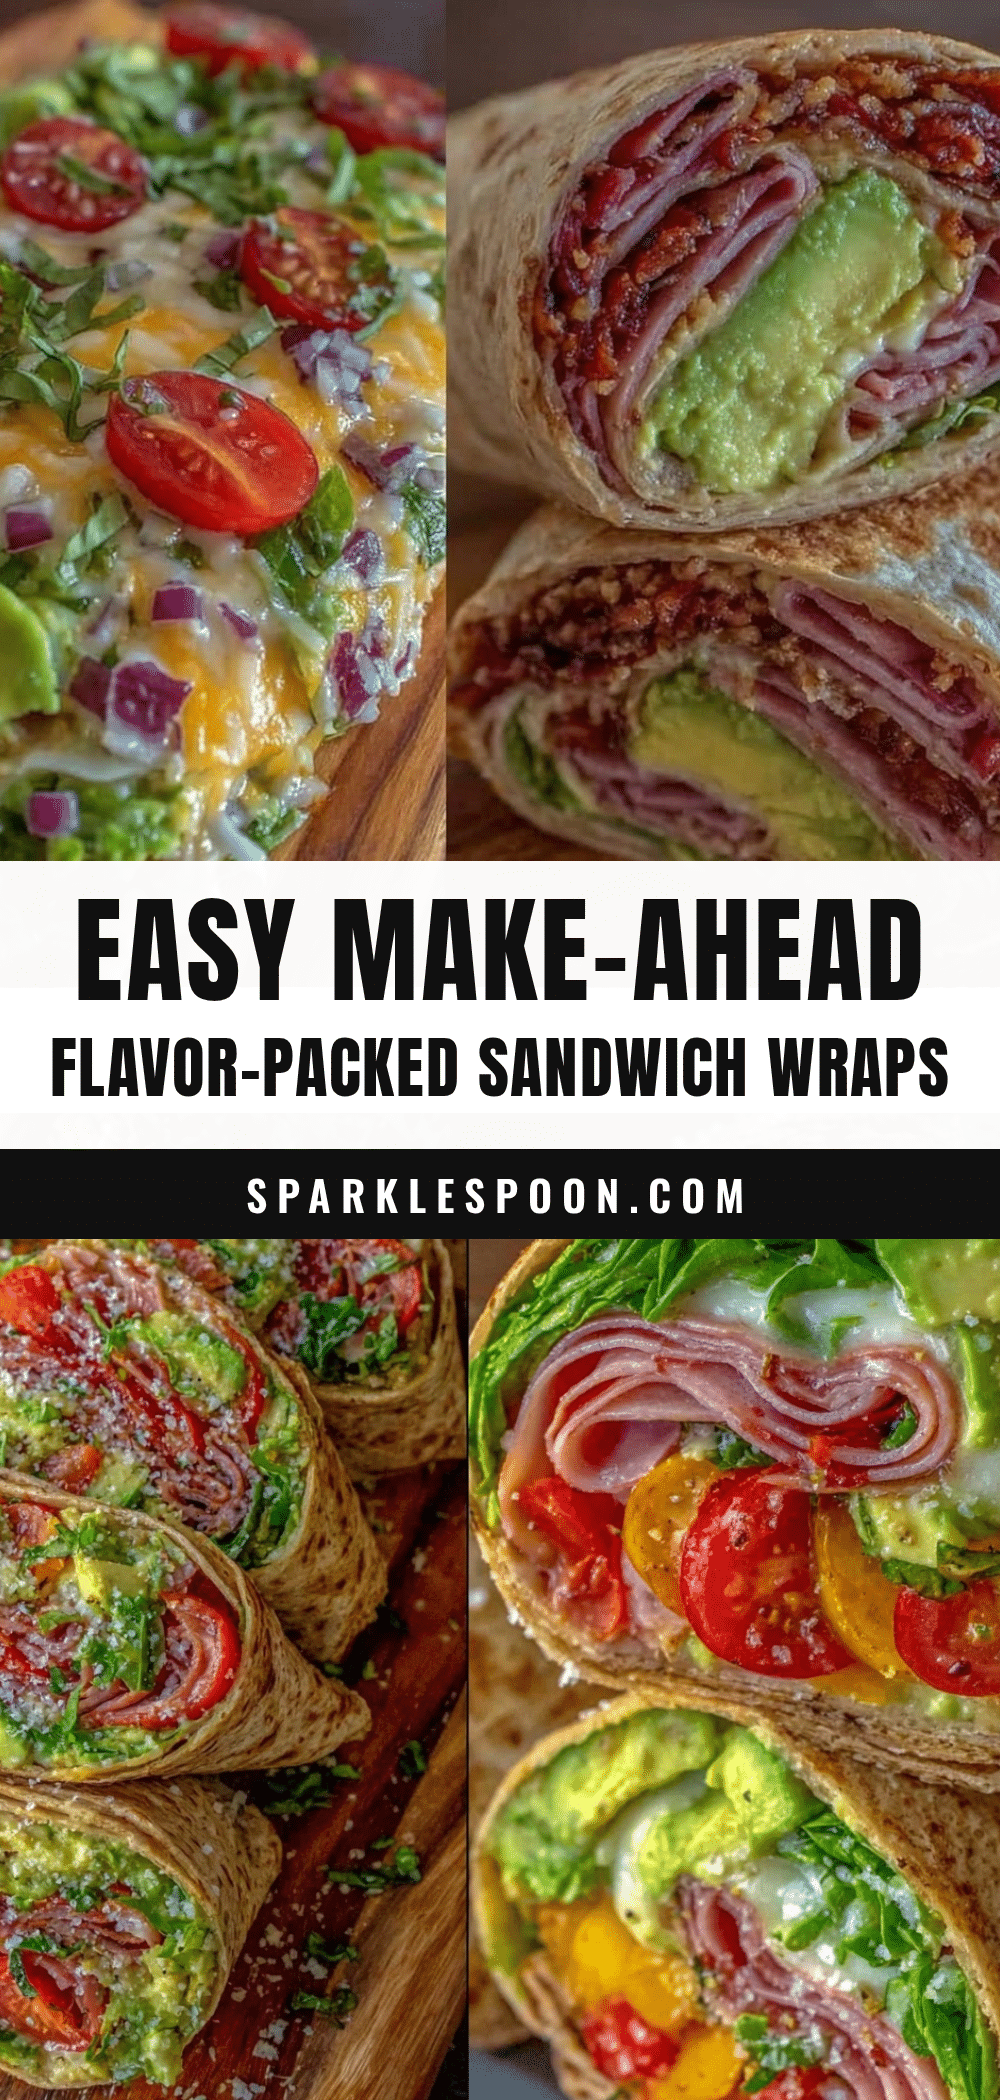
“You know that feeling when Monday morning hits and you’re scrambling to put together something edible for the week?” That was me last April, standing in my tiny kitchen with a nearly empty fridge and a to-do list a mile long. Honestly, I was tired of the usual sandwich slump— soggy bread, sad lettuce, and the inevitable lunchbox disaster by Wednesday. Then, on a whim, I tried prepping these easy make-ahead sandwich wraps, and let me tell you, they changed my whole week.
It all started after a particularly chaotic Sunday afternoon when I realized I had zero energy to cook during the workweek. I grabbed some tortillas, a few fresh veggies, and deli meat, and started layering. I wrapped them tightly, popped them in the fridge, and by Tuesday, I was skeptical if they’d still be fresh. But surprise! Each wrap tasted just as vibrant and crisp as the day I made it. That little victory felt like a secret weapon against the weekday lunch rush.
Maybe you’ve been there too—juggling work, errands, and everything in between, just hoping lunch doesn’t become another stress point. These sandwich wraps are the kind of recipe that’s forgiving, flexible, and honestly, kind of fun to eat. Plus, the way they hold together keeps your hands clean and your taste buds happy. I keep coming back to this recipe because it’s a simple, reliable way to make five days of fresh meals without standing over the stove every single day.
Why You’ll Love This Recipe
Having tested these easy make-ahead sandwich wraps countless times, I can confidently say they’re a lifesaver for busy folks. Here’s what makes this recipe stand out:
- Quick & Easy: Ready in just 20 minutes—perfect for hectic Sundays or last-minute meal prep.
- Simple Ingredients: No fancy shopping trips needed; most are pantry staples or fresh veggies you can find anywhere.
- Perfect for Meal Prep: Keeps well for five days, so you can pack lunches or grab a quick snack anytime.
- Crowd-Pleaser: Loved by kids and adults alike, these wraps suit all tastes with customizable fillings.
- Unbelievably Delicious: The combination of fresh crunch, creamy spreads, and savory proteins hits all the right notes.
This isn’t just another wrap recipe. I fine-tuned the layering technique to keep everything from getting soggy, and I’ve played around with different spreads—from tangy hummus to creamy avocado—that bring a fresh twist every time. Honestly, the balance of flavors and textures is what keeps me coming back. It’s comfort food that’s fresh, fuss-free, and ready to fuel your day without weighing you down.
What Ingredients You Will Need
This recipe calls for straightforward, fresh ingredients that come together to create a satisfying and colorful wrap. You can trust most of these to be pantry and fridge staples, but feel free to swap in what you love or have on hand.
- Wraps: Large flour tortillas or whole wheat wraps (I prefer Mission brand for their pliability and taste).
- Protein: Thinly sliced deli turkey or chicken breast (look for nitrate-free for a cleaner option), or canned chickpeas mashed for a vegetarian twist.
- Fresh Veggies: Crisp romaine lettuce leaves, thinly sliced cucumbers, shredded carrots, and bell peppers (red or yellow add a nice sweetness).
- Cheese: Sliced provolone or shredded cheddar (optional but adds creaminess and flavor).
- Spread: Creamy hummus or mayonnaise (try vegan mayo if you want dairy-free), or a light smear of ranch dressing for extra tang.
- Seasoning: Freshly cracked black pepper and a pinch of sea salt to taste.
- Extras (Optional): Sliced avocado (add right before eating to avoid browning), pickles, or a few fresh herbs like basil or cilantro for a flavor boost.
In the warmer months, swapping in sliced tomatoes or fresh cucumber ribbons adds a refreshing touch. And if you want to keep it gluten-free, corn tortillas or large lettuce leaves work beautifully as wraps. Trust me, these ingredients come together to create a wrap that’s fresh, easy to handle, and just right for those busy days ahead.
Equipment Needed
Nothing fancy here, just the basics you probably have in your kitchen already:
- A sharp chef’s knife for slicing veggies thinly and evenly.
- A cutting board sturdy enough to handle all the chopping.
- A mixing bowl if you’re mashing chickpeas or prepping any spreads.
- Plastic wrap or airtight containers for storing the wraps in the fridge.
- A spatula or butter knife for spreading hummus or mayo evenly.
If you don’t have airtight containers, I find wrapping each sandwich tightly in parchment paper before sealing in a zip-top bag does the trick. Also, using a sharp knife makes a world of difference; dull blades tend to smash the veggies instead of slicing them cleanly. I once tried prepping these with a tired old knife and ended up with a messy pile instead of neat wraps—lesson learned!
Preparation Method

- Prep Your Ingredients (10 minutes): Wash and dry all fresh veggies. Slice cucumbers and bell peppers into thin strips, shred carrots finely, and tear romaine leaves into manageable sizes.
- Lay Out Your Wrap (1 large tortilla, about 25-30 cm / 10-12 inches): Place it flat on a clean surface or plate. Spread a thin, even layer of your chosen spread (about 1-2 tablespoons). This moisture barrier helps keep the wrap from getting soggy.
- Add Protein: Layer 3-4 slices of deli turkey or chicken breast evenly, or spread about 1/2 cup of mashed chickpeas if going vegetarian.
- Layer Cheese (if using): Add 1-2 slices or a small handful of shredded cheese. The cheese acts as a binder and adds richness.
- Add Veggies: Place a handful of romaine lettuce, then layer on the sliced cucumbers, bell peppers, and shredded carrots. Aim for a good mix but don’t overload to keep rolling manageable.
- Season: Sprinkle a pinch of sea salt and freshly cracked black pepper over the veggies for a flavor boost.
- Roll It Up: Fold the sides of the tortilla gently inward, then tightly roll from one end to the other, making sure the filling is snug. The tight roll prevents unraveling and keeps everything fresh.
- Wrap for Storage: Tightly wrap each sandwich in plastic wrap or parchment paper. Store in an airtight container or zip-top bag in the fridge.
- Serving: When ready to eat, slice each wrap diagonally in half for easy handling. If adding avocado, slice and place inside right before eating to avoid browning.
These steps usually take me about 20 minutes for five wraps, which is pretty manageable on a Sunday afternoon. A quick tip: if you find the wraps a bit stiff to roll, a few seconds in the microwave wrapped in a damp paper towel softens them up nicely before assembling.
Cooking Tips & Techniques
When it comes to making these easy make-ahead sandwich wraps, a few tricks make all the difference:
- Keep It Dry: Pat your veggies dry after washing. Excess moisture is the enemy of a fresh wrap—it’ll make your tortillas soggy fast.
- Spread Strategically: The spread isn’t just for flavor; it’s a moisture barrier. A thin, even layer of hummus or mayo helps lock in freshness and prevents sogginess.
- Layer Order Matters: Putting protein and cheese next to the spread creates a seal around the veggies, protecting them from dampening the wrap.
- Roll Tightly: Don’t be shy with the roll! A snug wrap holds together better and makes for easier eating. If you mess up, just unroll and try again—practice makes perfect.
- Store Smart: Individually wrapping each sandwich keeps flavors from mingling and prevents drying out. I learned the hard way when I stacked them without wrapping, and everything stuck together in one sad clump.
- Timing: These wraps hold up well for up to five days, but the fresher the veggies, the better the texture. Plan your shopping accordingly.
Honestly, the first time I made these, I forgot to dry the lettuce and ended up with a soggy mess by day three. Now I always double-check my prep, and the difference is night and day.
Variations & Adaptations
One of the best things about these sandwich wraps is how easy they are to customize. Here are a few ideas I’ve played with:
- Vegetarian Version: Swap deli meats for a hearty mix of mashed chickpeas, diced roasted veggies, and a smear of pesto for an herbaceous punch.
- Low-Carb Option: Use large butter lettuce leaves or collard greens as wraps instead of tortillas to reduce carbs and add a fresh crunch.
- Spicy Twist: Add sliced jalapeños and swap mayo for chipotle aioli to give your wraps a smoky heat.
- Seasonal Swaps: In autumn, roasted sweet potatoes and cranberry sauce make a cozy filling, while summer calls for fresh cucumber and tomato slices.
- Gluten-Free: Corn tortillas or gluten-free wraps work well, just handle gently to avoid tearing.
I personally love the spicy chipotle version for a midweek pick-me-up—it has just enough kick to keep things interesting without overwhelming the fresh flavors. Feel free to mix and match based on what’s in your fridge or what mood you’re in!
Serving & Storage Suggestions
These sandwich wraps are fantastic cold straight from the fridge, making them perfect for lunches on the go. Serve them with a side of crunchy pickles or a small salad for a balanced meal.
If you prefer a warm wrap, pop it in a panini press or grill pan for 2-3 minutes per side until the cheese melts and the wrap is golden and crisp. Just be sure to unwrap them before heating!
To store, keep each wrap tightly wrapped in plastic or parchment paper inside an airtight container in the fridge. They’ll stay fresh up to 5 days, though the veggies are at their peak in the first 3.
When reheating, a quick 30-second zap in the microwave softens the wrap without drying it out. Avoid overheating, or you risk losing that fresh crunch.
Over time, the flavors meld beautifully without getting mushy, so these wraps make great grab-and-go meals that feel anything but boring.
Nutritional Information & Benefits
Each sandwich wrap provides a balanced mix of protein, fiber, and fresh vegetables, making it a wholesome meal option. Depending on your exact ingredients, you can expect roughly 300-400 calories per wrap.
Key benefits include:
- Lean Protein: Turkey or chicken breast offers a low-fat protein source to keep you full.
- Fiber & Vitamins: Fresh veggies like romaine, carrots, and bell peppers contribute fiber, vitamins A and C, and antioxidants.
- Healthy Fats: Adding avocado or using hummus introduces heart-healthy fats.
- Low Sugar & Refined Carbs: Using whole wheat or gluten-free wraps can reduce glycemic load.
As always, be mindful of any allergens like gluten, dairy, or nuts in your spreads and cheeses. I often make a dairy-free version with hummus and avocado for friends with sensitivities, and it’s just as good!
Conclusion
These easy make-ahead sandwich wraps have become a weekday staple for good reason. They’re simple, customizable, and keep well throughout the busy week—no more last-minute lunch scrambling or soggy sandwiches. I love how they make meal prep feel manageable rather than a chore, and honestly, they taste fresh and satisfying every single time.
Give yourself the gift of stress-free lunches by trying this recipe and making it your own. Maybe you’ll find your favorite combo or add a personal twist that turns it into a classic. I’d love to hear how you adapt these wraps to fit your taste, so please share your versions or questions in the comments below!
Here’s to five days of fresh, tasty meals that keep your week moving smoothly and your appetite happy.
FAQs
Can I freeze these sandwich wraps for longer storage?
Freezing is not recommended as it usually makes the wraps soggy when thawed. For best results, keep them refrigerated and consume within five days.
What’s the best way to keep the wraps from getting soggy?
Use a thin layer of spread as a moisture barrier and make sure your veggies are dry before assembling. Also, wrap each sandwich tightly to keep air out.
Can I use gluten-free or low-carb wraps?
Absolutely! Corn tortillas, lettuce leaves, or specialty gluten-free wraps work well. Just handle them gently to avoid tearing during rolling.
How do I add avocado without it browning in advance?
Add avocado slices right before eating or toss them with a bit of lemon juice to slow browning if prepping ahead.
Is this recipe suitable for vegetarians?
Yes, swap the deli meat for mashed chickpeas, roasted veggies, or plant-based deli slices for a vegetarian-friendly version.
Pin This Recipe!
Easy Make-Ahead Sandwich Wraps for 5 Days of Fresh and Tasty Meals

These easy make-ahead sandwich wraps are perfect for busy weekdays, keeping fresh and tasty for up to five days. They are quick to prepare, customizable, and ideal for meal prep.
- Prep Time: 10 minutes
- Cook Time: 0 minutes
- Total Time: 20 minutes
- Yield: 5 wraps
- Category: Main Course
- Cuisine: American
Ingredients
- Large flour tortillas or whole wheat wraps (about 10-12 inches)
- Thinly sliced deli turkey or chicken breast (nitrate-free preferred) or 1/2 cup mashed canned chickpeas for vegetarian option
- Crisp romaine lettuce leaves
- Thinly sliced cucumbers
- Shredded carrots
- Sliced bell peppers (red or yellow)
- Sliced provolone or shredded cheddar cheese (optional)
- Creamy hummus or mayonnaise (vegan mayo for dairy-free option) or ranch dressing
- Freshly cracked black pepper
- Pinch of sea salt
- Optional extras: sliced avocado (add before eating), pickles, fresh herbs like basil or cilantro
Instructions
- Wash and dry all fresh veggies. Slice cucumbers and bell peppers into thin strips, shred carrots finely, and tear romaine leaves into manageable sizes.
- Place one large tortilla flat on a clean surface or plate. Spread a thin, even layer (1-2 tablespoons) of your chosen spread to act as a moisture barrier.
- Layer 3-4 slices of deli turkey or chicken breast evenly, or spread about 1/2 cup of mashed chickpeas if vegetarian.
- Add 1-2 slices or a small handful of shredded cheese if using.
- Place a handful of romaine lettuce, then layer on the sliced cucumbers, bell peppers, and shredded carrots. Avoid overloading to keep rolling manageable.
- Sprinkle a pinch of sea salt and freshly cracked black pepper over the veggies.
- Fold the sides of the tortilla gently inward, then tightly roll from one end to the other, ensuring the filling is snug to prevent unraveling.
- Wrap each sandwich tightly in plastic wrap or parchment paper. Store in an airtight container or zip-top bag in the fridge.
- When ready to eat, slice each wrap diagonally in half. Add sliced avocado inside right before eating to avoid browning.
Notes
[‘Pat veggies dry after washing to prevent soggy wraps.’, ‘Use a thin, even layer of spread as a moisture barrier to keep wraps fresh.’, ‘Layer protein and cheese next to the spread to seal veggies and prevent dampening.’, ‘Roll wraps tightly to hold fillings together and keep fresh.’, ‘Individually wrap each sandwich to prevent drying out and flavor mingling.’, ‘Wraps keep well up to 5 days in the fridge; veggies are freshest in the first 3 days.’, ‘If wraps are stiff, soften them by microwaving wrapped in a damp paper towel for a few seconds before assembling.’, ‘Add avocado slices just before eating to avoid browning.’, ‘Freezing is not recommended as it causes sogginess.’]
Nutrition
- Serving Size: 1 wrap
- Calories: 350
- Sugar: 4
- Sodium: 600
- Fat: 12
- Saturated Fat: 3
- Carbohydrates: 35
- Fiber: 5
- Protein: 20
Keywords: make-ahead wraps, sandwich wraps, meal prep, easy lunch, healthy wraps, turkey wraps, vegetarian wraps, quick meals