Love this? Save it for later!
Share the inspiration with your friends
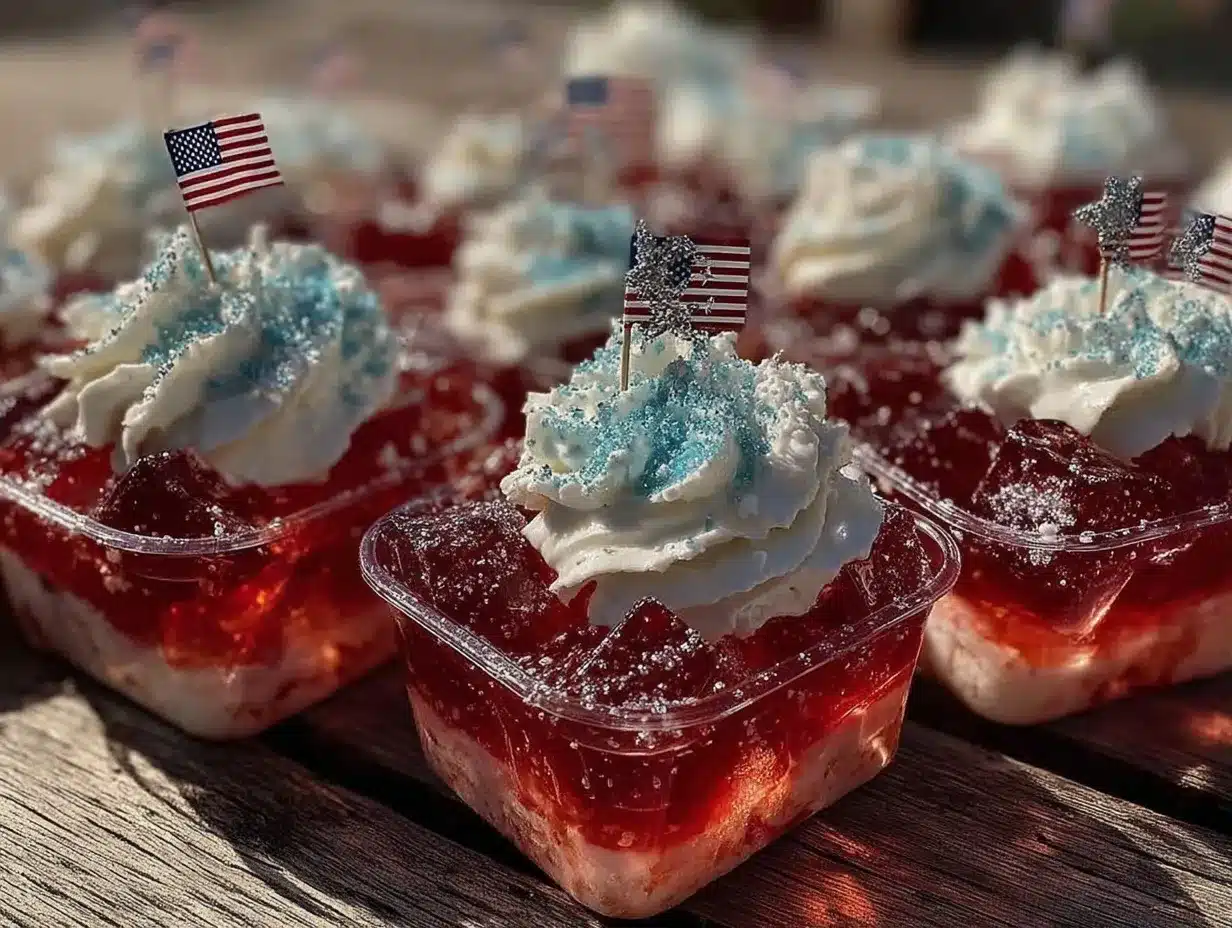
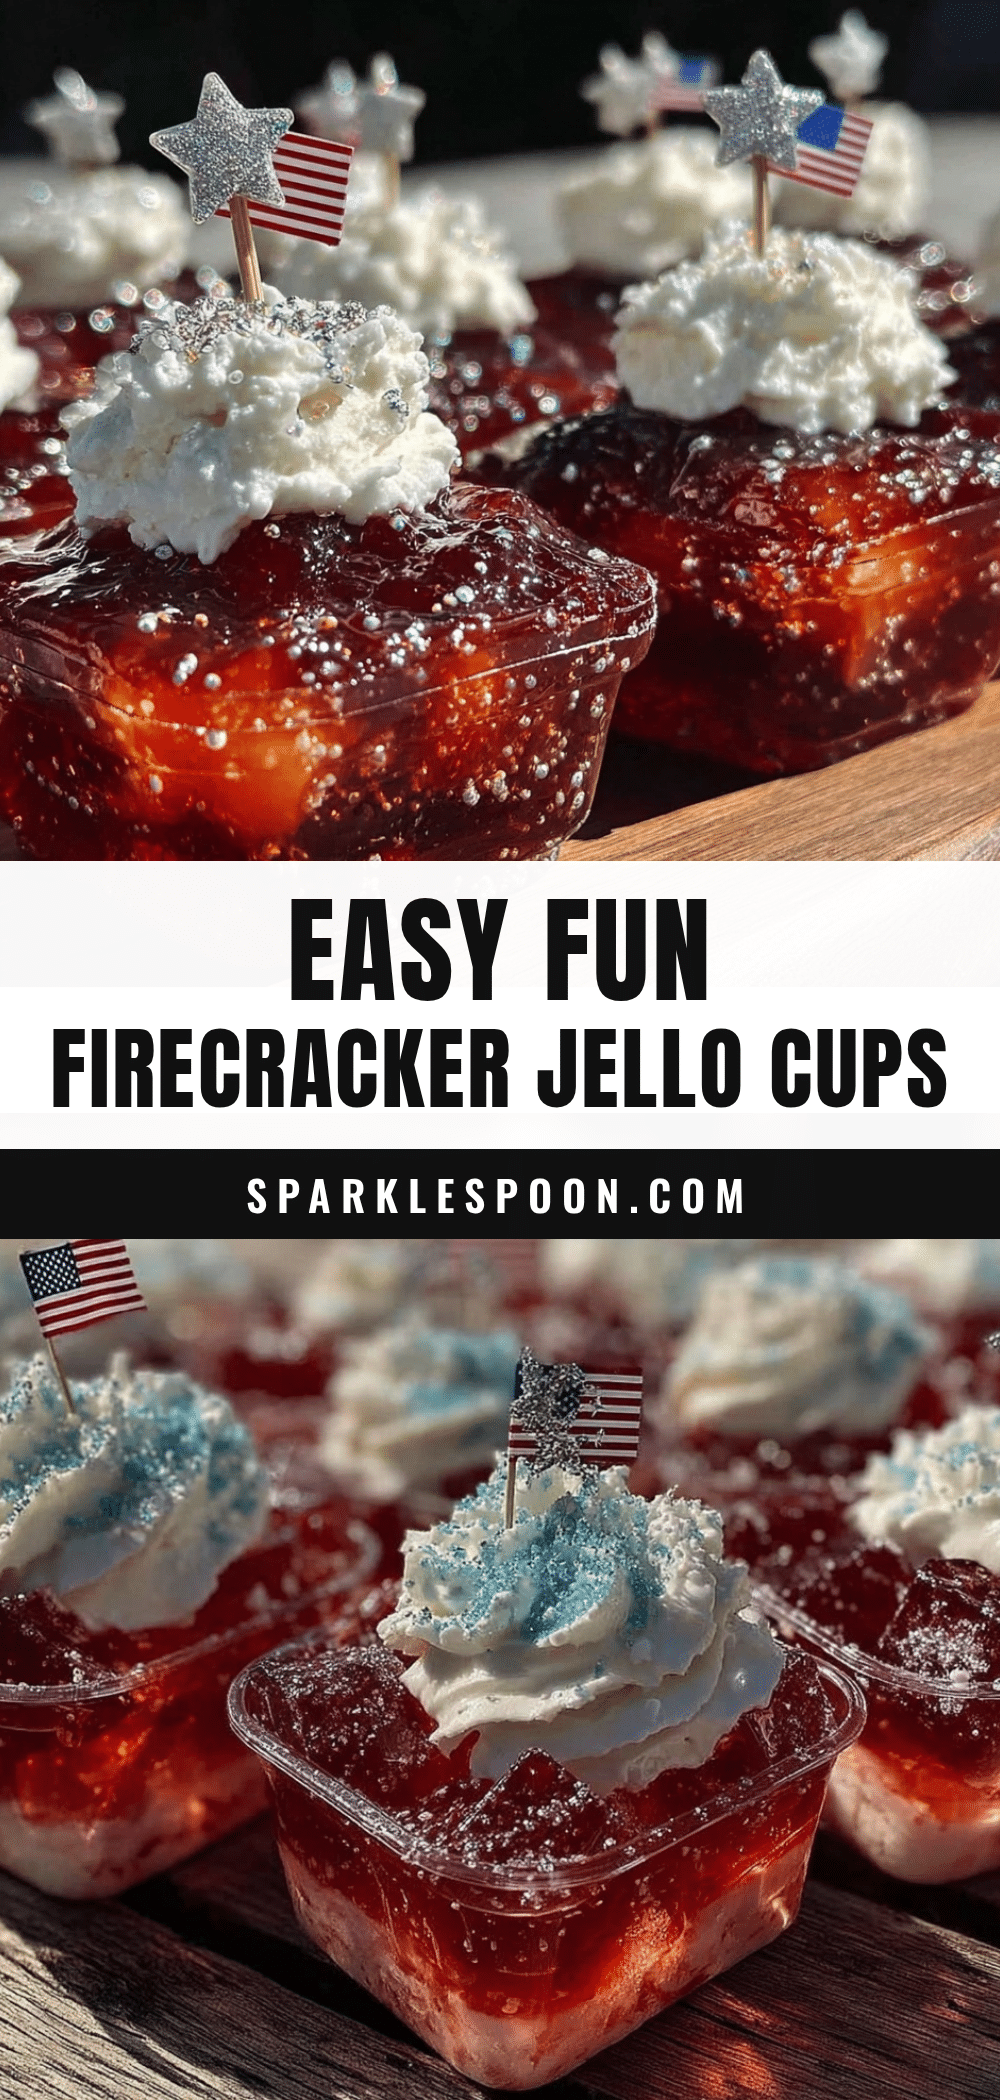
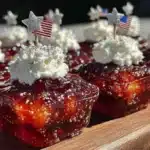
“Mom, can we make something cool for the picnic tomorrow?” my youngest asked me one Thursday afternoon, eyes wide with that hopeful sparkle only kids have. Honestly, I wasn’t sure what to whip up on such short notice, but then I remembered a quirky little recipe I once scribbled down on a crumpled napkin at a summer block party. It wasn’t fancy or complicated—just colorful, easy, and perfect for kids. That’s how these Easy Firecracker Jello Cups came to life in my kitchen, with red, white, and blue layers that looked like tiny edible fireworks.
Let me tell you, making these jello cups was a bit of a mess at first (I totally forgot to set out the cups before starting!), but the kids loved every step—especially the part where we layered the jello and whipped cream like a festive mountain of fun. Maybe you’ve been there, trying to find a quick treat that’s both kid-friendly and eye-catching for a party or holiday. This recipe absolutely fits the bill.
What stuck with me is how these colorful cups bring that instant smile and sense of celebration, no matter the occasion. Whether it’s a backyard party, a school function, or just a fun weekend snack, these Firecracker Jello Cups are surprisingly simple yet wildly satisfying. I keep making them because they’re the kind of nostalgic treat that makes you pause, enjoy the moment, and maybe sneak a spoonful or two yourself. Let me walk you through how to make these fun and festive treats that kids will ask for again and again.
Why You’ll Love This Recipe
After testing this recipe multiple times (and yes, sampling way more than I should admit), I can confidently say it’s one of the easiest ways to add a burst of color and fun to any kids’ gathering. Here’s why this recipe is a winner:
- Quick & Easy: Comes together in under 30 minutes, making it perfect for last-minute celebrations or busy afternoons.
- Simple Ingredients: No hunting for fancy items—just classic jello flavors and a bit of whipped cream, staples you probably have in your pantry.
- Perfect for Parties: Great for 4th of July, birthday parties, or any festive occasion where kids want something sweet and exciting.
- Crowd-Pleaser: Kids love the bright colors and layers, while adults appreciate the nostalgic charm.
- Unbelievably Delicious: The combination of sweet jello and creamy layers creates a fun texture that keeps everyone coming back for more.
This isn’t just any jello cup recipe. What sets it apart is the layering technique that creates a vibrant, firecracker-inspired effect without the fuss. Plus, using real whipped cream instead of artificial toppings adds a fresh, creamy touch that feels homemade and special. Honestly, it’s the kind of treat that makes you close your eyes after the first bite and smile, remembering simpler, joyful times.
What Ingredients You Will Need
This recipe uses simple, wholesome ingredients to deliver bold color and fun texture without any fuss. Most of these are pantry staples, and substitutions are easy if you’re managing allergies or preferences.
- Red Jello Mix (1 package, 3 oz) – classic strawberry or cherry flavor works best; I prefer Jell-O brand for consistent taste and texture.
- Blue Jello Mix (1 package, 3 oz) – blueberry or berry blue flavor; Knox Blueberry Jello is a favorite around here.
- Boiling Water (2 cups total) – used to dissolve the jello powders.
- Cold Water (1 cup total) – to chill the jello before setting.
- Whipped Cream (1 cup) – fresh homemade or store-bought; fresh whipped cream adds a rich, fluffy texture, but the aerosol cans work fine too.
- Clear Plastic Cups (small-sized) – about 8 to 10 cups; perfect for layering and easy serving.
- Optional: Fresh berries for garnish – small blueberries and sliced strawberries add a fresh touch on top.
If you want a dairy-free version, swap the whipped cream for coconut whipped cream or a non-dairy topping. For a sugar-free option, there are sugar-free jello mixes available, which works fine though the texture might be slightly different.
Equipment Needed
- Mixing Bowls: Two medium-sized bowls to prepare the red and blue jello separately.
- Measuring Cups: For accurate water measurements—essential for perfect jello texture.
- Whisk or Spoon: To stir and dissolve the jello powders completely.
- Clear Plastic Cups or Small Glasses: For serving and layering the jello.
- Refrigerator Space: To chill the jello layers until set.
If you don’t have clear plastic cups, small mason jars or glass dessert dishes work great and add a classy touch. I’ve found that using a small ladle or measuring cup with a spout helps pour the jello neatly, avoiding messy layers. For whipped cream, a hand mixer makes fresh whipping faster, but a whisk works in a pinch.
Preparation Method
- Prepare the Red Jello: In a medium bowl, dissolve one package of red jello powder in 1 cup (240 ml) boiling water. Stir well for about 2 minutes until fully dissolved.
- Add Cold Water: Pour in ½ cup (120 ml) cold water, stir gently, and let the mixture cool for about 10 minutes at room temperature.
- Pour Red Layer: Carefully pour the red jello into your clear cups until they’re about one-third full. Place the cups in the refrigerator and chill for at least 30 minutes, or until firm.
- Prepare the Blue Jello: While the red layer sets, dissolve the blue jello powder in 1 cup (240 ml) boiling water in another bowl. Stir for 2 minutes, add ½ cup (120 ml) cold water, and cool at room temperature for 10 minutes.
- Add the Whipped Cream Layer: Once the red jello is firm, spoon or pipe a generous layer (~2 tablespoons) of whipped cream over it, spreading gently to avoid mixing. This white layer is the ‘sparkle’ in your firecracker!
- Pour Blue Jello Layer: Carefully add the blue jello over the whipped cream layer, filling the cups to the top. Return to the refrigerator and chill for another 30 minutes or until set.
- Final Touch: Top each cup with a small dollop of whipped cream and optionally garnish with berries for a fresh look.
Tip: When pouring layers, tilt the cups slightly or pour slowly over the back of a spoon to keep layers distinct. If any jello starts to mix, just let it set and it still tastes fantastic!
Cooking Tips & Techniques
Getting those neat layers can be a little tricky, but I’ve learned a few tricks along the way. First, patience is key—don’t rush the chilling process or layers might blend together. You want each layer to be firm enough to hold the next.
When mixing jello powders, always use boiling water to dissolve completely, or you’ll end up with grainy texture. Stir gently but thoroughly for smooth consistency.
Another tip: if you’re short on time, chill the cups in the freezer for 10-15 minutes instead of the fridge, but watch carefully so the jello doesn’t freeze solid.
Whipped cream works best when it’s slightly chilled before layering. If it gets too warm, it can melt into the jello and ruin those crisp lines.
One time, I accidentally poured the blue layer too soon, and the colors blended into a purple mess—lesson learned! Now I always double-check firmness with a gentle touch before adding the next layer.
If you want to make these ahead, keep them refrigerated and add the final whipped cream topping just before serving to maintain the best texture.
Variations & Adaptations
Want to mix things up? Here are some fun and easy tweaks to try:
- Flavor Swaps: Use lime or lemon jello instead of blue for a green-white-red patriotic theme that’s just as festive.
- Layered Yogurt: Replace the whipped cream with sweetened Greek yogurt for a tangy, protein-packed twist kids might love.
- Mini Firecracker Pops: Pour the layered jello into popsicle molds, insert sticks, and freeze for a cool summer snack.
- Allergen-Friendly: Use agar-agar powder instead of gelatin for a vegetarian-friendly version, adjusting setting times accordingly.
Personally, I once made a tropical version using pineapple and coconut jello with coconut whipped cream. It was a hit at our beach-themed party and a nice change of pace.
Serving & Storage Suggestions
These Easy Firecracker Jello Cups are best served chilled, straight from the fridge. They make a colorful addition to any kids’ party table and pair well with simple finger foods like mini sandwiches or fruit skewers.
If you’re planning to store leftovers, cover the cups with plastic wrap to prevent fridge odors. They’ll keep well for up to 3 days. Avoid freezing the cups after assembling, as the texture changes noticeably.
When reheating isn’t an option here, but letting the jello sit for a few hours allows the flavors to meld beautifully, especially if you’ve added fresh fruit on top. Just add the whipped cream garnish right before serving to keep things fresh.
Nutritional Information & Benefits
Each serving of these jello cups is a low-calorie treat, roughly 120-150 calories depending on the whipped cream used. Jello provides hydration and a bit of protein from gelatin, which can support joint health.
Using fresh whipped cream instead of sugary toppings keeps the fat content moderate and adds a creamy richness that feels indulgent without going overboard. For kids, it’s a fun way to enjoy a sweet treat without the heaviness of cakes or cookies.
This recipe is naturally gluten-free and can easily be adapted for dairy-free diets by swapping whipped cream with coconut alternatives.
Conclusion
Honestly, these Easy Firecracker Jello Cups have become a go-to for me whenever I want a fuss-free, fun, and colorful treat that kids actually enjoy making and eating. The layers of red, white, and blue bring a festive vibe that’s perfect for celebrations or just brightening up an ordinary day.
Feel free to make this recipe your own—switch flavors, experiment with toppings, or turn it into popsicles. I love how this simple treat sparks joy and creates little moments of happiness around the table. If you give it a try, I’d love to hear how your kids reacted or what creative spins you added!
Go ahead, grab those ingredients, and make some magic happen in your kitchen today.
FAQs
Can I make these jello cups ahead of time?
Yes! Prepare the layers in advance and store them covered in the refrigerator for up to 3 days. Add the whipped cream topping just before serving for best texture.
What if I don’t have clear cups for layering?
Small glass jars, clear dessert bowls, or even small ramekins work well. The key is to see the layers, but any container will do if you want a surprise inside!
Can I use sugar-free jello mixes?
Absolutely. Sugar-free jello works fine, but the texture might be slightly different—sometimes a bit firmer or less sweet.
How do I keep the layers from mixing?
Make sure each layer is completely set before adding the next one. Pour gently over the back of a spoon or tilt the cup to slow the pour and avoid mixing.
Is there a dairy-free option for the whipped cream?
Yes, you can use coconut whipped cream or other non-dairy whipped toppings to keep it dairy-free while still maintaining that creamy layer.
Pin This Recipe!
Easy Firecracker Jello Cups
A fun and festive layered jello cup recipe with red, white, and blue colors perfect for kids’ parties and celebrations. Quick to prepare and visually appealing, these cups combine sweet jello with creamy whipped cream layers.
- Prep Time: 15 minutes
- Cook Time: 1 hour
- Total Time: 1 hour 15 minutes
- Yield: 8 to 10 servings 1x
- Category: Dessert
- Cuisine: American
Ingredients
- 1 package (3 oz) Red Jello Mix (strawberry or cherry flavor)
- 1 package (3 oz) Blue Jello Mix (blueberry or berry blue flavor)
- 2 cups boiling water (divided)
- 1 cup cold water (divided)
- 1 cup whipped cream (fresh homemade or store-bought)
- 8 to 10 small clear plastic cups
- Optional: fresh berries for garnish (small blueberries and sliced strawberries)
Instructions
- In a medium bowl, dissolve one package of red jello powder in 1 cup boiling water. Stir well for about 2 minutes until fully dissolved.
- Add ½ cup cold water to the red jello mixture, stir gently, and let cool for about 10 minutes at room temperature.
- Pour the red jello into clear cups until about one-third full. Refrigerate for at least 30 minutes or until firm.
- In another bowl, dissolve the blue jello powder in 1 cup boiling water. Stir for 2 minutes, add ½ cup cold water, and cool at room temperature for 10 minutes.
- Once the red jello is firm, spoon or pipe about 2 tablespoons of whipped cream over it, spreading gently to avoid mixing.
- Carefully pour the blue jello over the whipped cream layer, filling the cups to the top. Refrigerate for another 30 minutes or until set.
- Top each cup with a small dollop of whipped cream and optionally garnish with fresh berries.
Notes
Use a spoon or ladle with a spout to pour jello layers slowly and keep them distinct. Chill whipped cream slightly before layering to prevent melting. For dairy-free, substitute whipped cream with coconut whipped cream. Sugar-free jello mixes can be used but may alter texture. Store covered in refrigerator up to 3 days; add whipped cream topping just before serving.
Nutrition
- Serving Size: 1 small cup
- Calories: 135
- Sugar: 16
- Sodium: 90
- Fat: 7
- Saturated Fat: 4
- Carbohydrates: 18
- Protein: 1
Keywords: jello cups, firecracker jello, kids dessert, layered jello, party treats, easy jello recipe, festive dessert