Love this? Save it for later!
Share the inspiration with your friends
I was at the hardware store on a Tuesday—not exactly where you expect to find life-changing baking advice. I was there for a new faucet washer, holding a rusted piece of metal and looking completely lost. That is when the woman behind the counter—name tag said “Marge,” silver hair, glasses on a chain—started talking about pie.
“You look like you need a good pumpkin pie recipe,” she said, not even asking. I laughed, honestly, because I did. I had been hunting for the perfect one for years, trying everything from back-of-can recipes to fancy bakery versions. Nothing ever felt right. Too dense, too bland, too much like spiced pudding in a shell.
Marge scribbled on a receipt. No measurements, just handfuls and pinches and “until it looks right.” She told me she learned it from her grandmother, who owned a diner in Vermont. I nodded along, thinking I’d toss it in a drawer and never look at it again. But something about the way she described it—the smell filling the hardware store, the way she closed her eyes when she said “cloves”—made me keep that crumpled receipt.
Three Thanksgivings later, this pie has never failed me. It is the one people ask for by name. The one that makes my kitchen smell like November in the best possible way. And honestly? The one that made me believe the best recipes come from the most unexpected places. Maybe you have had that moment too—where a recipe finds you instead of the other way around.
Why You’ll Love This Recipe
This cozy classic pumpkin pie is not just another recipe you will scroll past. It is the one I have tested more times than I care to admit, tweaking and tasting until every single bite felt right. Here is why it stands out from all the rest:
- Rich, Deep Flavor: The secret? Toasting your own spices. It sounds fancy, but honestly, it takes two minutes and changes everything.
- Silky Smooth Texture: No cracks, no graininess—just a velvety filling that melts on your tongue. The trick is in the mixing method, which I will show you step by step.
- Perfectly Spiced: Not too sweet, not too heavy. The balance of cinnamon, ginger, nutmeg, and cloves is something I spent weeks perfecting.
- All-Butter Crust: Forget store-bought. This crust is flaky, tender, and practically impossible to mess up.
- Make-Ahead Friendly: You can prep this pie two days in advance, and it actually tastes better the next day. The flavors have time to settle and deepen.
- Crowd-Pleaser: I have served this at potlucks, family dinners, and even a friend’s wedding rehearsal dinner. It disappears every single time.
This is the kind of pie that makes you close your eyes after the first bite. It is comfort food at its finest—the kind that wraps around you like a warm blanket on a cold November evening. Whether you are making it for Thanksgiving, a cozy Sunday dinner, or just because you need something good in your life right now, this recipe delivers.
What Ingredients You Will Need
This recipe uses simple, wholesome ingredients to deliver that bold, nostalgic pumpkin pie flavor. Most of these are pantry staples, but a few key choices make all the difference. Let me walk you through everything.
For the All-Butter Crust
- 1 ¼ cups all-purpose flour (160g) – I prefer unbleached for better structure. King Arthur Flour is my go-to.
- ½ teaspoon salt – Fine sea salt works best; it dissolves evenly into the dough.
- 1 tablespoon granulated sugar – Just a touch for tenderness, not sweetness.
- ½ cup cold unsalted butter (113g), cubed – Must be ice-cold. I pop my butter in the freezer for 15 minutes before starting.
- 3 to 4 tablespoons ice water – Add one tablespoon at a time. You might not need all of it.
For the Pumpkin Filling
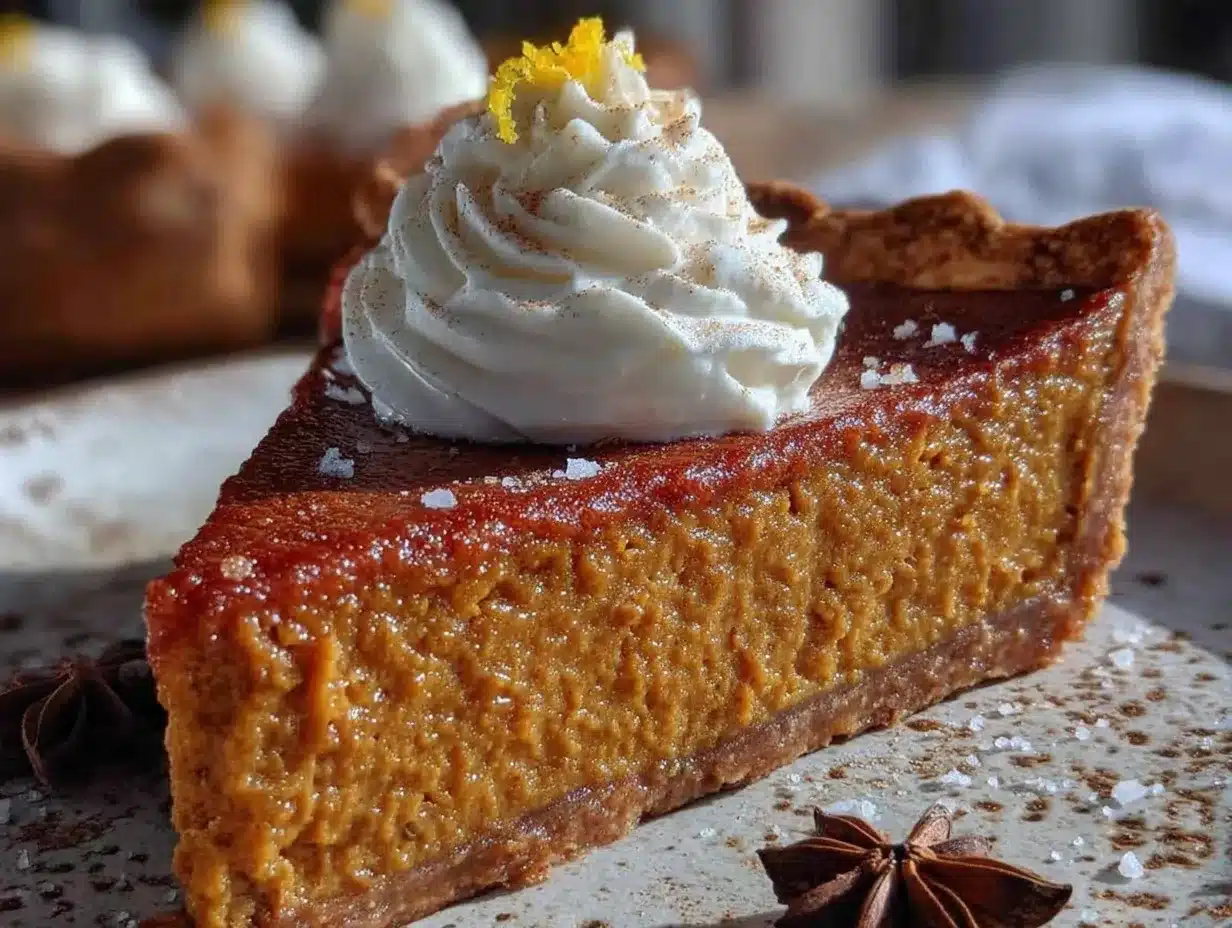
- 1 can (15 oz) pure pumpkin puree (425g) – Not pumpkin pie filling! Libby’s is my trusted brand. It has the right moisture content.
- ¾ cup packed light brown sugar (150g) – Adds depth and a subtle molasses note. Dark brown sugar works too for a richer flavor.
- 2 large eggs – Room temperature, so they blend smoothly into the filling.
- 1 large egg yolk – This extra yolk gives the filling that velvety richness.
- 1 cup heavy cream (240ml) – Full-fat is non-negotiable here. It creates that luscious texture.
- 1 teaspoon vanilla extract – Pure, not imitation. It rounds out the spices beautifully.
- 1 ½ teaspoons ground cinnamon – Freshness matters here. If your cinnamon is more than a year old, replace it.
- ½ teaspoon ground ginger – Adds warmth without heat.
- ½ teaspoon freshly grated nutmeg – This is a game-changer. Pre-ground nutmeg loses its punch fast.
- ¼ teaspoon ground cloves – A little goes a long way. Too much can make the filling taste medicinal.
- ¼ teaspoon salt – Balances the sweetness and brings out the spices.
Ingredient Tips from My Kitchen
I learned the hard way that ingredient temperature matters. Cold butter for the crust, room temperature eggs for the filling—these small details separate a good pie from a great one. Also, if you can find it, try using a sugar pumpkin and roasting your own puree. It takes more time, but the flavor is noticeably fresher and brighter. For busy days, though, canned works beautifully.
Equipment Needed
You do not need a fancy kitchen to make this pie. Here is what you will actually use:
- 9-inch pie dish – Glass or ceramic works best. Metal can cause uneven browning. I use a deep-dish Pyrex pie plate.
- Rolling pin – A French tapered pin gives you more control, but a standard rolling pin works fine.
- Large mixing bowls – One for the crust, one for the filling.
- Pastry cutter or two forks – For cutting butter into flour. You can also use your fingertips—just work quickly so the butter stays cold.
- Plastic wrap – For chilling the dough. Reusable beeswax wrap works too.
- Whisk – For blending the filling smooth.
- Measuring cups and spoons – I prefer metal measuring cups for dry ingredients; they are more accurate.
- Kitchen scale – Optional but helpful. Weighing ingredients ensures consistent results every time.
- Parchment paper and pie weights – For blind baking the crust. Dried beans or rice work as substitutes in a pinch.
- Cooling rack – Lets air circulate around the pie so the bottom does not get soggy.
Preparation Method
Step 1: Make the Crust (20 minutes active + 1 hour chilling)
In a large bowl, whisk together the flour, salt, and sugar. Add the cold, cubed butter. Using a pastry cutter or your fingertips, work the butter into the flour until the mixture looks like coarse meal with some pea-sized butter pieces remaining. Do not overwork it—those little butter chunks create flaky layers.
Sprinkle 3 tablespoons of ice water over the mixture. Toss gently with a fork until the dough starts coming together. It should feel moist but not sticky. If it is too dry, add the remaining tablespoon of water, one teaspoon at a time.
Turn the dough out onto a lightly floured surface. Shape it into a disk about ¾ inch thick. Wrap tightly in plastic wrap and refrigerate for at least 1 hour. Overnight is even better.
Step 2: Roll and Blind Bake the Crust (30 minutes)
Preheat your oven to 375°F (190°C). On a floured surface, roll the chilled dough into a 12-inch circle, about ⅛ inch thick. Roll from the center outward, turning the dough occasionally to prevent sticking.
Carefully transfer the dough to your pie dish. Gently press it into the bottom and up the sides. Trim the overhang to about ½ inch, then fold it under and crimp the edges however you like. I use my thumb and forefinger to create a simple scalloped edge.
Line the crust with parchment paper and fill with pie weights or dried beans. Bake for 15 minutes. Remove the parchment and weights, then bake another 8 to 10 minutes, until the bottom looks dry and lightly golden. Set aside to cool slightly.
Step 3: Prepare the Filling (15 minutes)
Reduce the oven temperature to 350°F (175°C). In a large bowl, whisk together the brown sugar, cinnamon, ginger, nutmeg, cloves, and salt. This step ensures the spices are evenly distributed.
Add the eggs and egg yolk, whisking until smooth. Stir in the pumpkin puree and vanilla extract. Slowly pour in the heavy cream while whisking gently. Mix until everything is combined and silky—do not overbeat, or you will incorporate too much air.
Step 4: Bake the Pie (50 to 60 minutes)
Place the blind-baked crust on a baking sheet (this catches spills and helps the bottom cook evenly). Pour the filling into the warm crust. Carefully transfer to the oven.
Bake for 50 to 60 minutes. The pie is done when the edges are set and slightly puffed, but the center still jiggles like Jell-O when you gently shake the pan. A knife inserted near the center should come out clean, but do not overbake—the filling will continue to set as it cools.
Step 5: Cool and Serve (2 hours minimum)
Place the pie on a cooling rack and let it cool completely at room temperature, about 2 hours. Do not refrigerate while warm, or condensation will make the crust soggy. Once cool, you can serve it immediately or refrigerate until ready.
Cooking Tips & Techniques
I have made this pie at least two dozen times, and I have messed it up in just about every way possible. Here is what I learned so you do not have to.
- Do not skip blind baking. I tried once to save time, and I ended up with a soggy bottom crust that ruined the whole pie. Blind baking creates a barrier that keeps the crust crisp.
- Watch your oven temperature. Ovens run hot or cold. I use an oven thermometer to make sure mine is accurate. If your pie is browning too fast on the edges, tent it with foil halfway through baking.
- Let it cool completely. I know it is tempting to slice into a warm pie, but patience pays off. The filling needs time to set properly. Cutting too early will give you a runny mess.
- Use freshly grated nutmeg. I cannot stress this enough. Pre-ground nutmeg loses its volatile oils quickly and tastes flat. A whole nutmeg grates easily with a microplane and lasts for months.
- Room temperature ingredients matter. Cold eggs can seize the filling and create lumps. Set your eggs out 30 minutes before starting.
Variations & Adaptations
This recipe is wonderful as written, but it is also incredibly adaptable. Here are some of my favorite twists:
- Gluten-Free Version: Substitute the all-purpose flour with a 1:1 gluten-free baking flour blend. I have used Bob’s Red Mill with great success. Add ¼ teaspoon xanthan gum if your blend does not already include it.
- Dairy-Free Option: Replace the heavy cream with full-fat coconut cream. The flavor changes slightly, but it is still rich and delicious. Use a vegan butter stick for the crust.
- Spice It Up: Add ¼ teaspoon of cardamom or allspice for a more complex flavor profile. I tried this last Thanksgiving, and it was a hit with the adults.
- Maple Pumpkin Pie: Replace the brown sugar with ½ cup maple syrup and reduce the cream by 2 tablespoons. The maple flavor pairs beautifully with the spices.
- Mini Pies: Use a muffin tin to make individual servings. Reduce the baking time to 25 to 30 minutes. Perfect for parties or portion control.
Serving & Storage Suggestions
This pie shines at room temperature, served with a generous dollop of lightly sweetened whipped cream. For an extra touch, I sometimes add a sprinkle of cinnamon or a drizzle of caramel sauce on top. It pairs beautifully with a hot cup of coffee or spiced apple cider.
For storage, cover the pie loosely with plastic wrap or foil and refrigerate for up to 4 days. The flavors actually deepen and meld together overnight, so day-old pie is often even better. To freeze, wrap the fully cooled pie tightly in plastic wrap, then a layer of foil. It will keep for up to 3 months. Thaw overnight in the refrigerator before serving.
To reheat individual slices, pop them in a 300°F (150°C) oven for 10 minutes. This warms the filling without drying it out. I do not recommend microwaving—it makes the crust soggy and the filling rubbery.
Nutritional Information & Benefits
Here is the approximate nutritional breakdown per slice (based on 8 servings):
- Calories: 380
- Fat: 22g
- Carbohydrates: 42g
- Protein: 6g
- Fiber: 3g
- Sugar: 24g
Pumpkin is packed with vitamin A, which supports eye health and immune function. It is also a good source of fiber and potassium. The eggs and cream add protein and healthy fats that help keep you full. While this is definitely a treat, using real, whole ingredients means you are getting more nutritional value than a processed dessert.
Conclusion
This cozy classic pumpkin pie from scratch is more than just a dessert—it is a tradition waiting to happen. From that unexpected hardware store encounter to the countless times I have shared it with friends and family, this recipe has become a part of my life in the best possible way.
I hope you give it a try and make it your own. Maybe you will add a little extra cinnamon, or serve it with a scoop of vanilla ice cream. That is the beauty of cooking—you get to put your own stamp on it. When you do, I would love to hear about it. Drop a comment below, tag me in your photos, or share your own twist on this classic. Let us keep the tradition alive, one slice at a time.
Frequently Asked Questions
Can I use a store-bought crust instead of making my own?
Absolutely. While I love the homemade all-butter crust, a good quality store-bought crust will work in a pinch. Just make sure to blind bake it first to avoid a soggy bottom.
Why did my pumpkin pie crack on top?
Cracks usually happen from overbaking or sudden temperature changes. Bake just until the center is set but still jiggly, and let it cool slowly at room temperature. Avoid placing a hot pie directly in the fridge.
Can I make this pie ahead of time?
Yes! This pie actually tastes better the next day. You can bake it up to two days in advance and store it covered in the refrigerator. Let it come to room temperature before serving for the best flavor.
How do I know when the pie is done baking?
The edges should be set and slightly puffed, but the center should still wobble when you gently shake the pan. A knife inserted near the center should come out clean. The internal temperature should reach 175°F (80°C).
Can I use fresh pumpkin instead of canned?
Yes, but you will need to roast and puree a sugar pumpkin first. Fresh pumpkin has more water content, so you may need to strain the puree through cheesecloth to remove excess moisture. Canned pumpkin is more consistent and convenient, which is why I recommend it.
Pin This Recipe!
Cozy Classic Pumpkin Pie from Scratch – Best Easy Recipe

This cozy classic pumpkin pie features a silky smooth, perfectly spiced filling in a flaky all-butter crust. It’s the ultimate comfort dessert, perfect for Thanksgiving or any fall gathering.
- Prep Time: 20 minutes
- Cook Time: 50 minutes
- Total Time: 2 hours 10 minutes
- Yield: 8 servings 1x
- Category: Dessert
- Cuisine: American
Ingredients
- 1 ¼ cups all-purpose flour (160g)
- ½ teaspoon fine sea salt
- 1 tablespoon granulated sugar
- ½ cup cold unsalted butter (113g), cubed
- 3 to 4 tablespoons ice water
- 1 can (15 oz) pure pumpkin puree (425g)
- ¾ cup packed light brown sugar (150g)
- 2 large eggs, room temperature
- 1 large egg yolk
- 1 cup heavy cream (240ml)
- 1 teaspoon pure vanilla extract
- 1 ½ teaspoons ground cinnamon
- ½ teaspoon ground ginger
- ½ teaspoon freshly grated nutmeg
- ¼ teaspoon ground cloves
- ¼ teaspoon salt
Instructions
- Make the crust: In a large bowl, whisk together flour, salt, and sugar. Add cold cubed butter. Using a pastry cutter or fingertips, work butter into flour until mixture resembles coarse meal with some pea-sized butter pieces. Sprinkle 3 tablespoons ice water over mixture; toss gently with a fork until dough comes together. If too dry, add remaining water, one teaspoon at a time. Turn dough onto floured surface, shape into a ¾-inch thick disk, wrap in plastic, and refrigerate at least 1 hour.
- Roll and blind bake the crust: Preheat oven to 375°F (190°C). On floured surface, roll dough into a 12-inch circle, about ⅛ inch thick. Transfer to 9-inch pie dish, press into bottom and up sides. Trim overhang to ½ inch, fold under, and crimp edges. Line with parchment paper and fill with pie weights. Bake 15 minutes. Remove parchment and weights; bake another 8-10 minutes until bottom is dry and lightly golden. Set aside to cool slightly.
- Prepare the filling: Reduce oven temperature to 350°F (175°C). In a large bowl, whisk together brown sugar, cinnamon, ginger, nutmeg, cloves, and salt. Add eggs and egg yolk, whisk until smooth. Stir in pumpkin puree and vanilla. Slowly pour in heavy cream while whisking gently until combined and silky. Do not overbeat.
- Bake the pie: Place blind-baked crust on a baking sheet. Pour filling into warm crust. Bake 50-60 minutes until edges are set and slightly puffed, but center still jiggles like Jell-O when gently shaken. A knife inserted near center should come out clean.
- Cool and serve: Place pie on a cooling rack and cool completely at room temperature, about 2 hours. Do not refrigerate while warm. Serve at room temperature with whipped cream if desired.
Notes
Do not skip blind baking to avoid a soggy bottom. Use an oven thermometer for accurate temperature. Let pie cool completely before slicing. Freshly grated nutmeg is highly recommended. Room temperature ingredients ensure a smooth filling.
Nutrition
- Serving Size: 1 slice
- Calories: 380
- Sugar: 24
- Sodium: 280
- Fat: 22
- Saturated Fat: 13
- Carbohydrates: 42
- Fiber: 3
- Protein: 6
Keywords: pumpkin pie, classic pumpkin pie, homemade pumpkin pie, Thanksgiving dessert, fall dessert, pumpkin pie from scratch



