Love this? Save it for later!
Share the inspiration with your friends
My neighbor Jen wasn’t trying to make anything special that Tuesday afternoon. I’d stopped by to borrow a cup of sugar—cliché, I know—and the sight of her kitchen counter hit me before I even made it past the front door. Little white blobs with crooked chocolate eyes were staring up at me from a cooling rack, and the smell of vanilla was so thick you could practically taste it. Jen was on the phone, gesturing wildly with a piping bag like it was no big deal, while her four-year-old carefully placed chocolate chips on what I’d later learn were ghost faces. She wasn’t running a bakery or trying to win a Halloween contest. She was just making Tuesday better for her kid. I stood there, sugar completely forgotten, watching her swirl buttercream like it was the most ordinary thing in the world. Honestly, it was one of those moments where you realize the best recipes don’t come from fancy blogs or cookbooks—they come from people who don’t even realize they’re doing something magical. Maybe you’ve been there, standing in someone else’s kitchen, thinking, “I need to learn how to do that.” Well, that day, I did. And now, I’m passing it on to you.
Why You’ll Love This Recipe
These ghost cupcakes aren’t just adorable—they’re the kind of recipe that makes you look like a rockstar parent without breaking a sweat. I’ve tested this exact method at least half a dozen times, tweaking the buttercream consistency and the ghost placement until everything felt just right. Here’s why this recipe has earned a permanent spot in my Halloween rotation:
- Super Simple Ingredients: You probably have everything in your pantry right now. No specialty baking mixes or hard-to-find candy—just basic stuff you already trust.
- Kid-Approved Activity: My niece helped me pipe the ghosts last weekend, and she didn’t lose interest once. The decorating part is forgiving enough for little hands, which is rare in baking.
- Budget-Friendly Fun: A box of cupcakes and a stick of butter go a long way. You’re feeding a crowd without spending a fortune—perfect for class parties or family gatherings.
- Customizable for Any Occasion: Swap the ghost faces for pumpkins or bats, and suddenly it’s a Thanksgiving treat. The base recipe is versatile like that.
- Guaranteed Crowd-Pleaser: Kids go wild for the cute factor, and adults appreciate that it’s not overly sweet. The vanilla buttercream swirl is the kind of thing that makes people close their eyes after the first bite.
What makes this recipe different from every other ghost cupcake out there is the technique. Instead of fighting with fondant or melting chocolate for hours, you’re using a simple buttercream swirl that naturally forms the ghost shape. It’s genius in its simplicity, and honestly, it’s the kind of trick you’ll use for years.
What Ingredients You Will Need
This recipe uses simple, wholesome ingredients to deliver bold flavor and satisfying texture without the fuss. Most of these are pantry staples, so you probably won’t need a special trip to the store.
For the Cupcakes
- 1 box vanilla cake mix (I prefer Betty Crocker or Duncan Hines for consistent results)
- 3 large eggs, room temperature (cold eggs can make the batter lumpy)
- 1/2 cup vegetable oil (adds moisture without altering flavor)
- 1 cup water (or milk for a richer crumb)
- 1 teaspoon vanilla extract (pure, not imitation, for deeper flavor)
For the Vanilla Buttercream Swirl
- 1 cup unsalted butter, softened (I recommend Land O’Lakes for consistent texture)
- 4 cups powdered sugar, sifted (sifting prevents lumps in the swirl)
- 2 teaspoons vanilla extract (yes, double the vanilla—trust me on this)
- 2-3 tablespoons heavy cream (or whole milk if that’s what you have)
- Pinch of salt (balances the sweetness)
For the Ghost Decoration
- 1/2 cup mini chocolate chips (for the eyes and mouth)
- Optional: white sanding sugar or coconut flakes (for a snowy ghost effect)
- Black decorating gel (for extra detail on the faces, if desired)
Ingredient Selection Tip: For the best buttercream texture, make sure your butter is truly softened—not melted, not cold. Leave it on the counter for about an hour before you start. If you’re in a hurry, cut it into small cubes and let it sit for 20 minutes.
Substitution Guidance: Need a dairy-free version? Use vegan butter and coconut cream in the buttercream. The texture will be slightly different, but the ghosts will still look adorable. For gluten-free cupcakes, swap the cake mix for a gluten-free vanilla variety—just follow the box instructions for best results.
Equipment Needed
- Muffin tin (standard 12-cup size)
- Paper cupcake liners (white ones show off the ghosts best)
- Large mixing bowl (for the cupcake batter)
- Stand mixer or hand mixer (for the buttercream—you can whisk by hand, but your arm will thank you later)
- Piping bag with a large round tip (Ateco 808 or Wilton 1A work perfectly)
- Cooling rack (wire rack for even cooling)
- Offset spatula (for smoothing, though a butter knife works in a pinch)
- Small bowl (for chocolate chips during decorating)
Budget-Friendly Alternative: No piping bag? No problem. Use a zip-top plastic bag and snip off a corner. The ghosts will look slightly more rustic, but that adds to their charm. I’ve done it that way more times than I care to admit.
Preparation Method
- Preheat your oven to 350°F (175°C). Line your muffin tin with paper liners. This seems obvious, but I’ve forgotten to line the tin before and spent twenty minutes chiseling cupcakes out of the pan. Learn from my mistakes.
- Make the cupcake batter. In a large bowl, combine the cake mix, eggs, oil, water, and vanilla extract. Mix on low speed for about 30 seconds, then increase to medium for 2 minutes. The batter should be smooth and slightly thick—if it looks lumpy, keep mixing. Scrape down the sides of the bowl halfway through.
- Fill the cupcake liners. Use a cookie scoop or a spoon to fill each liner about two-thirds full. Don’t overfill, or your cupcakes will mushroom over the edges. I usually aim for about 3 tablespoons of batter per cup.
- Bake for 18-22 minutes. The cupcakes are done when a toothpick inserted in the center comes out clean or with a few moist crumbs. Every oven runs differently, so start checking at 18 minutes. The tops should be golden and spring back when lightly touched.
- Cool completely. Let the cupcakes sit in the pan for 5 minutes, then transfer them to a wire rack. This is crucial—if you try to frost warm cupcakes, your buttercream will turn into a melty mess. I usually let them cool for at least an hour.
- Make the vanilla buttercream. While the cupcakes cool, beat the softened butter in a stand mixer on medium speed for 2-3 minutes until it’s pale and fluffy. Add the sifted powdered sugar one cup at a time, mixing on low speed to avoid a sugar cloud. Add the vanilla extract, heavy cream, and salt, then beat on medium-high for 3-4 minutes until the frosting is light and airy. If it seems too stiff, add another tablespoon of cream. Too soft? Add a little more powdered sugar.
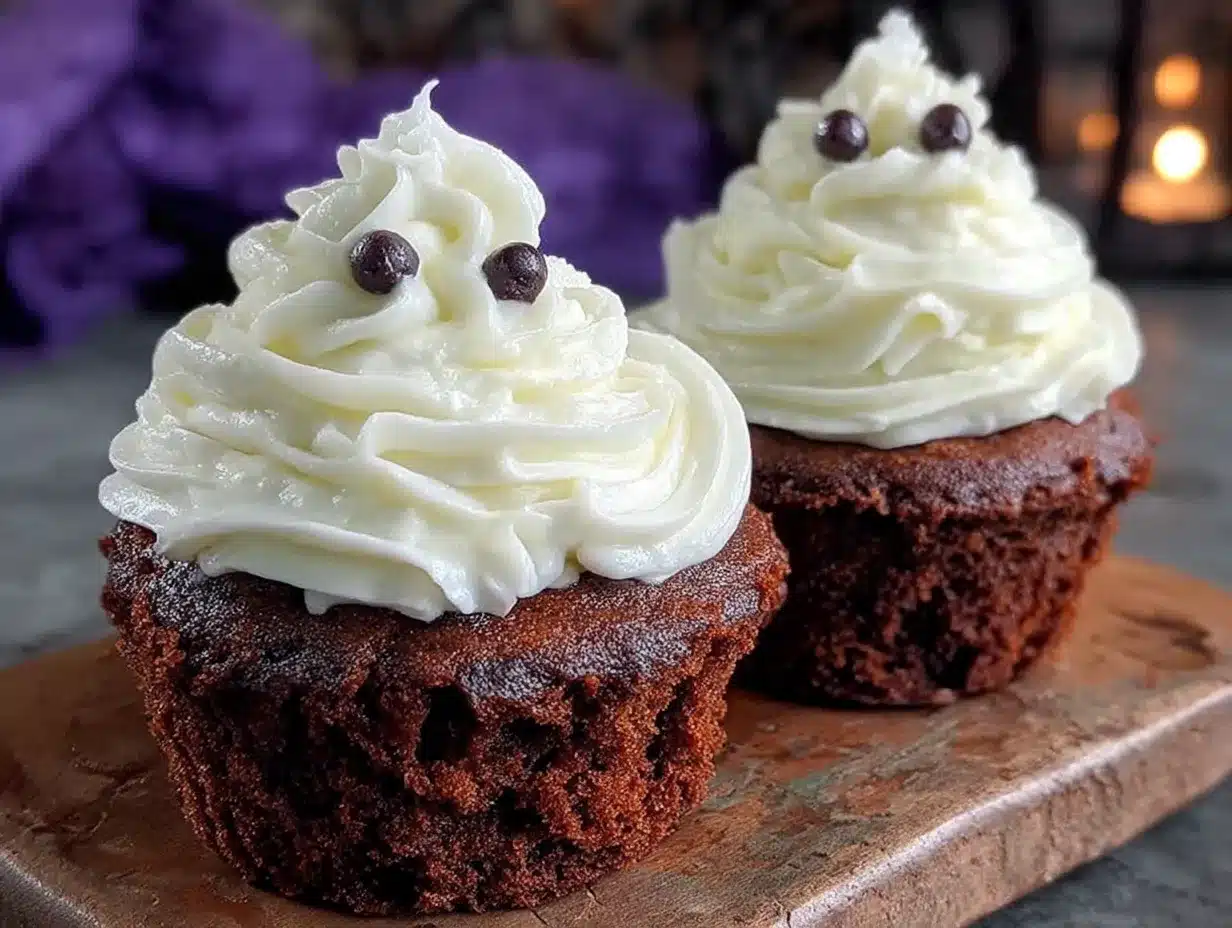
- Pipe the ghost swirls. Fit your piping bag with the large round tip and fill it with buttercream. Hold the bag straight up over each cupcake, about half an inch above the surface. Apply steady pressure and let the frosting pile up in a tall swirl—don’t move the bag, just let it build upward. When you’ve got a nice mound about 1.5 inches tall, stop squeezing and pull the bag straight up. You should have a soft, rounded peak that looks like a ghost’s head.
- Add the ghost faces. While the buttercream is still soft, gently press two mini chocolate chips into the frosting for eyes and one or two for a mouth. You can make the ghosts happy, spooky, or silly—my nephew always makes his look surprised. If the chocolate chips don’t stick, press them in a little deeper.
- Optional finishing touches. Sprinkle a tiny bit of white sanding sugar or coconut flakes over the ghosts for a snowy effect. This step is totally optional, but it adds a nice texture and makes the ghosts look like they’re floating in a winter scene.
Cooking Tips & Techniques
Here’s where I share the hard-earned wisdom from my own kitchen disasters. The first time I made these, my buttercream was way too soft, and the ghosts looked more like sad blobs than cheerful spirits. Learn from me.
The Buttercream Consistency Trick: Your buttercream should be stiff enough to hold its shape but soft enough to pipe easily. If you lift a spoonful and it slowly slides off, you’re in the right zone. If it plops off in a lump, add a splash of cream. If it runs like soup, add more powdered sugar and chill it for 10 minutes.
Don’t Overmix the Batter: I know I said to mix for 2 minutes, but if you go longer, the gluten develops and your cupcakes become tough. Set a timer if you have to. Overmixing is the number one reason homemade box-mix cupcakes turn out rubbery.
The Piping Bag Angle: Hold the bag at a 90-degree angle to the cupcake. If you tilt it, the ghost will lean to one side and look like it’s had a rough night. Steady hands, steady ghosts.
Work in Batches: If you’re making a double batch, only decorate a few cupcakes at a time. The buttercream can start to crust over if it sits too long, and the chocolate chips won’t stick as well. I usually pipe four ghosts, add their faces, then move on to the next four.
Timing Strategy: Bake the cupcakes a day ahead if you’re short on time. Store them in an airtight container at room temperature, then frost and decorate the next day. The cupcakes actually taste better the next day—the flavors have time to meld together.
Variations & Adaptations
One of the best things about this recipe is how easy it is to change up. Here are a few variations I’ve tried and loved:
- Chocolate Ghost Cupcakes: Swap the vanilla cake mix for chocolate. The dark cake makes the white ghost frosting pop even more. My kids call them “spooky chocolate clouds.”
- Pumpkin Spice Ghosts: Add 1 teaspoon pumpkin pie spice to the cake batter and use cream cheese frosting instead of vanilla buttercream. The warm spices pair beautifully with the sweet ghost faces.
- Mini Ghost Bites: Use a mini muffin tin and pipe smaller ghosts. These are perfect for classroom parties where you need a lot of treats without overwhelming the kids. Bake mini cupcakes for 10-12 minutes.
- Dairy-Free Version: Use vegan butter, plant-based milk in the batter, and coconut cream in the frosting. The texture is slightly different, but the ghosts still look adorable. I’ve made these for a friend’s dairy-free kiddo, and they disappeared in minutes.
- Gluten-Free Option: Swap the cake mix for a gluten-free vanilla variety. Just be careful not to overmix, as gluten-free batters can get gummy. I like King Arthur Flour’s gluten-free mix for this recipe.
Serving & Storage Suggestions
These ghost cupcakes are best served at room temperature, which means you can set them out about 30 minutes before your party starts. The buttercream softens slightly, making each bite melt in your mouth. I like to arrange them on a white platter or cake stand to show off the ghosts—the contrast is striking.
Storage Instructions: Keep any leftover cupcakes in an airtight container at room temperature for up to 3 days. If you stack them, place a sheet of wax paper between layers to protect the ghost faces. Don’t refrigerate them—the buttercream can absorb fridge smells and the texture changes.
Freezer Tips: You can freeze the unfrosted cupcakes for up to 3 months. Wrap each one tightly in plastic wrap, then place them in a freezer bag. When you’re ready to decorate, thaw them at room temperature for about an hour, then pipe the ghosts. The frosting doesn’t freeze well, so always make it fresh.
Reheating Note: If you’re serving these the next day, pop them in a 300°F (150°C) oven for 3-4 minutes to revive the fresh-baked taste. Just watch the buttercream—it can melt if you leave them too long.
Flavor Development: Honestly, these cupcakes taste even better on day two. The vanilla flavor deepens, and the texture becomes more tender. If you can resist eating them all on day one, your patience will be rewarded.
Nutritional Information & Benefits
Let’s be real—these are cupcakes, not health food. But I still like to know what I’m eating, and you probably do too. Here’s the estimated nutrition per ghost cupcake (based on 12 servings):
- Calories: 380
- Fat: 18g
- Carbohydrates: 52g
- Protein: 3g
- Sugar: 38g
Health Highlights: The butter in the frosting provides a small amount of vitamin A, and the eggs in the cupcakes offer protein. If you use milk instead of water in the batter, you’ll get a little calcium boost. But honestly, these are a treat—enjoy them for what they are.
Dietary Considerations: This recipe contains gluten, dairy, and eggs. For allergen-friendly versions, check the variations section above. I always recommend labeling your treats if you’re bringing them to a shared event—you never know who has allergies.
Conclusion
These ghost cupcakes have become a Halloween tradition in my house, and I think they deserve a spot in yours too. They’re simple enough to make on a busy weeknight, fun enough to get the kids involved, and adorable enough to impress at any party. The vanilla buttercream swirl is the kind of thing that feels fancy but is secretly easy—and that’s my favorite kind of recipe.
I hope you give these a try and make them your own. Maybe your ghosts will be happy, maybe they’ll be spooky, maybe they’ll look like they’ve seen a ghost themselves (been there, done that). That’s the beauty of this recipe—it’s forgiving, it’s fun, and it tastes amazing no matter what.
If you make these, I’d love to hear about it. Drop a comment below and tell me how your ghosts turned out. Did your kids help? Did you try a variation? Share your photos and tag me—I’m always looking for new ideas. Happy baking, and may your ghosts always be perfectly swirled!
Frequently Asked Questions
Can I use homemade vanilla cake instead of a box mix?
Absolutely. If you have a favorite vanilla cake recipe, use it. Just make sure the cupcakes are completely cool before frosting. The box mix is a time-saver, but homemade works beautifully too.
How do I prevent my buttercream from being too runny?
Make sure your butter is softened but not melted. If your kitchen is warm, chill the bowl and beaters for 10 minutes before starting. Add powdered sugar slowly until the frosting holds its shape.
Can I make these cupcakes ahead of time for a party?
Yes! Bake the cupcakes up to 2 days in advance and store them in an airtight container. Frost and decorate them the day of the party for the freshest look. The buttercream is best when freshly made.
My chocolate chips keep falling off the ghosts. What am I doing wrong?
Press the chips into the buttercream while it’s still soft. If the frosting has started to crust, gently warm the back of each chip with your finger for a few seconds before pressing it in. The warmth helps it stick.
Can I freeze the decorated cupcakes?
I don’t recommend it. The buttercream can separate when thawed, and the chocolate chips might slide off. Freeze the unfrosted cupcakes instead, then decorate when you’re ready to serve.
Pin This Recipe!
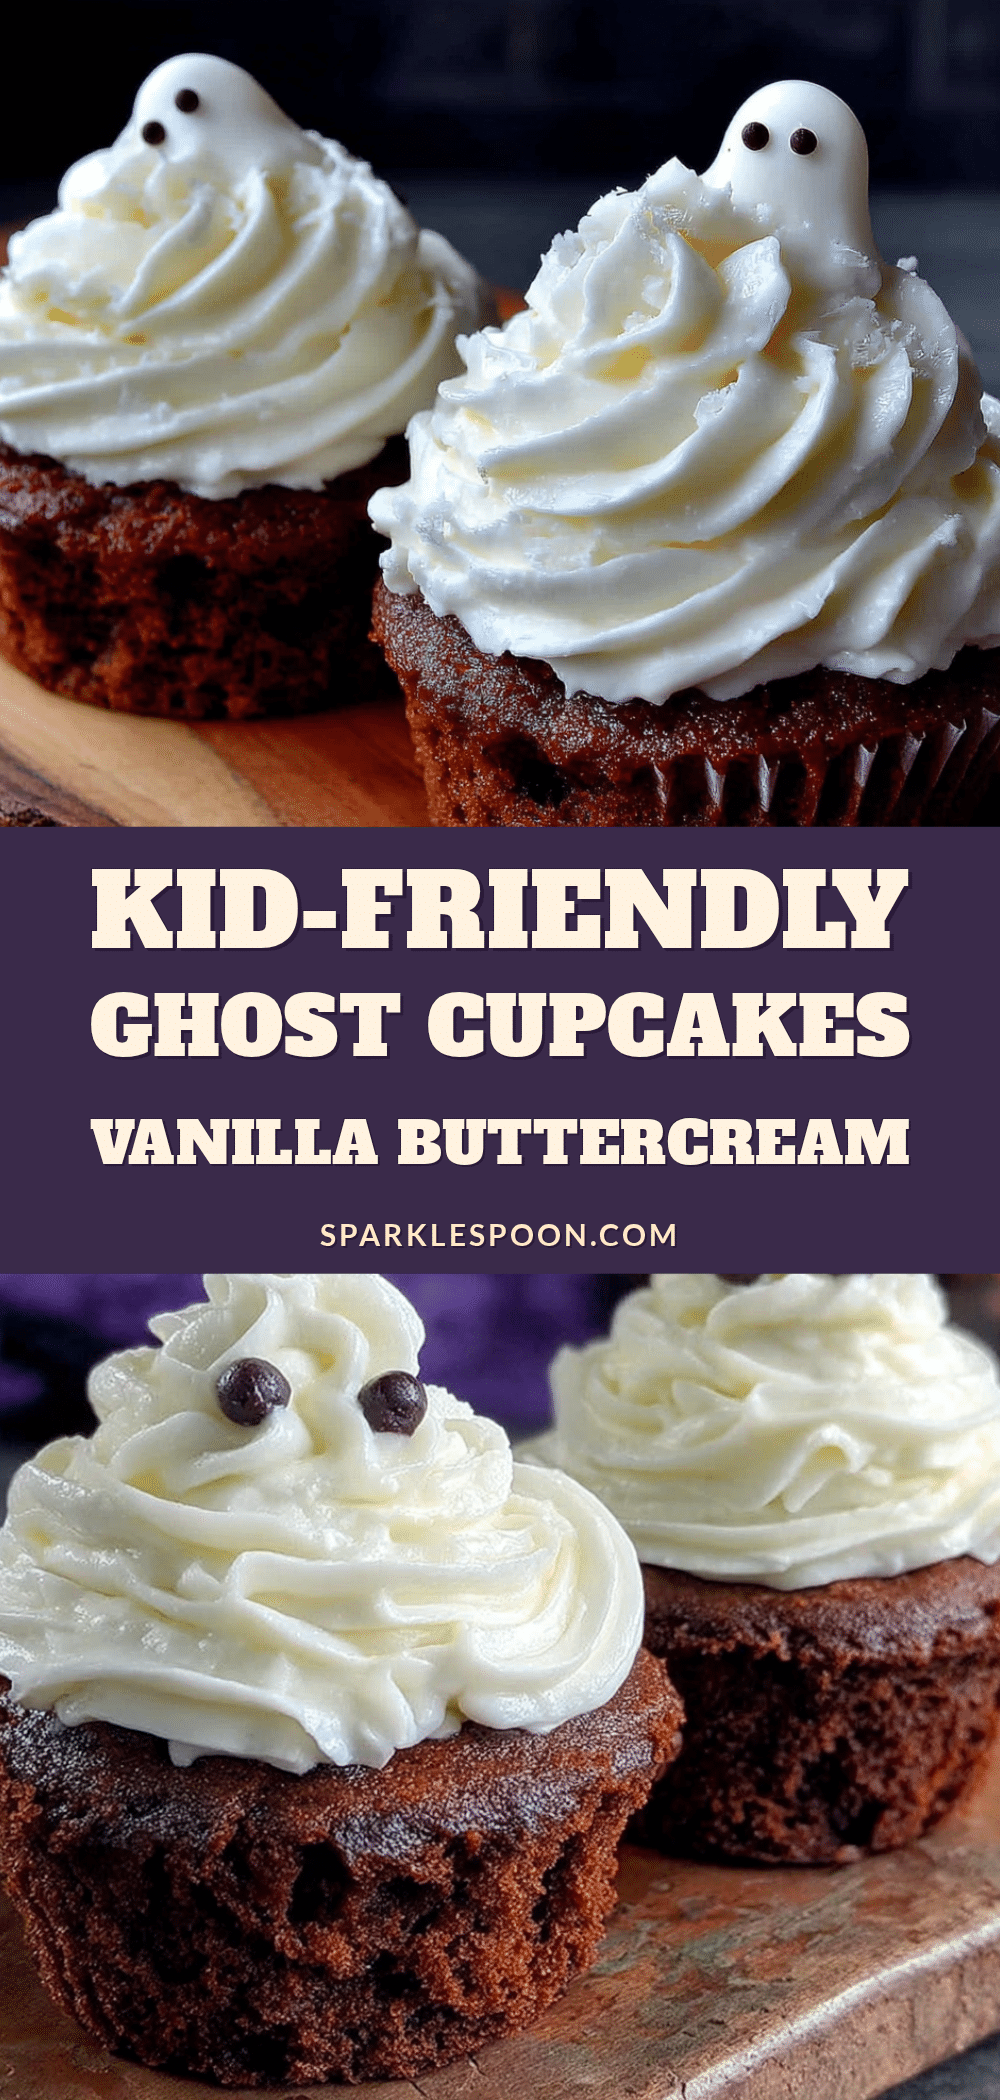
Kid-Friendly Ghost Cupcakes with Easy Vanilla Swirl
Adorable ghost cupcakes with a simple vanilla buttercream swirl that naturally forms the ghost shape. Perfect for Halloween parties, these treats are kid-approved, budget-friendly, and easy to make with basic pantry ingredients.
- Prep Time: 20 minutes
- Cook Time: 20 minutes
- Total Time: 1 hour 40 minutes (includes cooling)
- Yield: 12 servings 1x
- Category: Dessert
- Cuisine: American
Ingredients
- 1 box vanilla cake mix (Betty Crocker or Duncan Hines)
- 3 large eggs, room temperature
- 1/2 cup vegetable oil
- 1 cup water (or milk for a richer crumb)
- 1 teaspoon vanilla extract (pure)
- 1 cup unsalted butter, softened
- 4 cups powdered sugar, sifted
- 2 teaspoons vanilla extract
- 2–3 tablespoons heavy cream (or whole milk)
- Pinch of salt
- 1/2 cup mini chocolate chips
- Optional: white sanding sugar or coconut flakes
- Optional: black decorating gel
Instructions
- Preheat your oven to 350°F (175°C). Line your muffin tin with paper liners.
- Make the cupcake batter: In a large bowl, combine the cake mix, eggs, oil, water, and vanilla extract. Mix on low speed for about 30 seconds, then increase to medium for 2 minutes until smooth and slightly thick.
- Fill the cupcake liners about two-thirds full (about 3 tablespoons per cup).
- Bake for 18-22 minutes, until a toothpick inserted in the center comes out clean or with a few moist crumbs. Let cool in the pan for 5 minutes, then transfer to a wire rack to cool completely (at least 1 hour).
- Make the vanilla buttercream: Beat the softened butter in a stand mixer on medium speed for 2-3 minutes until pale and fluffy. Add the sifted powdered sugar one cup at a time, mixing on low. Add the vanilla extract, heavy cream, and salt, then beat on medium-high for 3-4 minutes until light and airy.
- Pipe the ghost swirls: Fit a piping bag with a large round tip and fill with buttercream. Hold the bag straight up over each cupcake, about half an inch above the surface. Apply steady pressure and let the frosting pile up in a tall swirl without moving the bag. When you have a mound about 1.5 inches tall, stop squeezing and pull the bag straight up.
- Add the ghost faces: While the buttercream is still soft, gently press two mini chocolate chips into the frosting for eyes and one or two for a mouth.
- Optional: Sprinkle white sanding sugar or coconut flakes over the ghosts for a snowy effect.
Notes
For best buttercream texture, ensure butter is truly softened (not melted or cold). If buttercream is too soft, add more powdered sugar and chill for 10 minutes. If too stiff, add a splash of cream. Work in batches when decorating to prevent buttercream from crusting. Cupcakes can be baked a day ahead and stored in an airtight container at room temperature.
Nutrition
- Serving Size: 1 cupcake
- Calories: 380
- Sugar: 38
- Fat: 18
- Carbohydrates: 52
- Protein: 3
Keywords: ghost cupcakes, Halloween cupcakes, vanilla cupcakes, buttercream ghosts, kid-friendly Halloween treats, easy Halloween dessert



