Love this? Save it for later!
Share the inspiration with your friends
My neighbor wasn’t trying to impress me. I’d stopped by to borrow a ladder—ours had mysteriously vanished after a garage sale—and this scent hit me before I even got to the screen door. It was warm, a little bit cocoa-y, but not like any chocolate cake I’d ever smelled. There was something else in there, something almost floral, and I stood there on her porch like an absolute weirdo, just breathing it in.
When she finally opened the door, she was holding two cupcake tins, one in each hand, wearing oven mitts that had seen better days. “Oh, these?” she said when I asked about the smell. “Just some black velvet cupcakes for the bake sale. Nothing fancy.” Nothing fancy. Let me tell you, that woman could not have been more wrong. I took one home with me—she practically forced it into my hand—and I bit into it while standing in my own kitchen, still holding the borrowed ladder. The cake was the softest, most tender thing I’d ever eaten. Dark, but not heavy. Rich, but not sweet in that cloying way some chocolate cupcakes get. And the frosting. That orange buttercream was like a little burst of sunshine on top of all that deep, dark flavor.
I asked for the recipe, obviously. She shrugged and scribbled it down on a scrap of envelope. Her handwriting was terrible. I had to call her twice to clarify the measurements. But honestly? That messy envelope is one of my most treasured kitchen possessions now. Maybe you’ve been there—you taste something and you just know it’s going to become a staple in your own kitchen. These Perfect Black Velvet Cupcakes with Orange Buttercream are that recipe for me. They’re the ones I make when I want to feel like I’ve got my act together, even when I absolutely do not.
Why You’ll Love This Recipe
I’ve tested this recipe more times than I care to admit. I’ve made it with different cocoa powders, different types of food coloring, different ratios of butter to oil. I’ve even tried it with Greek yogurt instead of buttermilk (don’t do it, by the way—the texture gets all wrong). What I’m saying is, this version is the one. It’s been tested by a very stubborn home cook who refuses to settle for “good enough.”
- Deep, Rich Flavor: The black cocoa powder gives these cupcakes a flavor that’s almost like Oreo cookies, but better. It’s complex and a little bit mysterious.
- Perfectly Moist: The combination of oil and buttermilk means these cupcakes stay soft for days. I’m not kidding—day three, and they’re still gorgeous.
- That Orange Twist: The orange buttercream isn’t just decoration. It cuts through the richness of the cake and makes every bite feel balanced and bright.
- Simple Ingredients: Nothing weird here. No specialty flours or hard-to-find extracts. You can find everything at a regular grocery store.
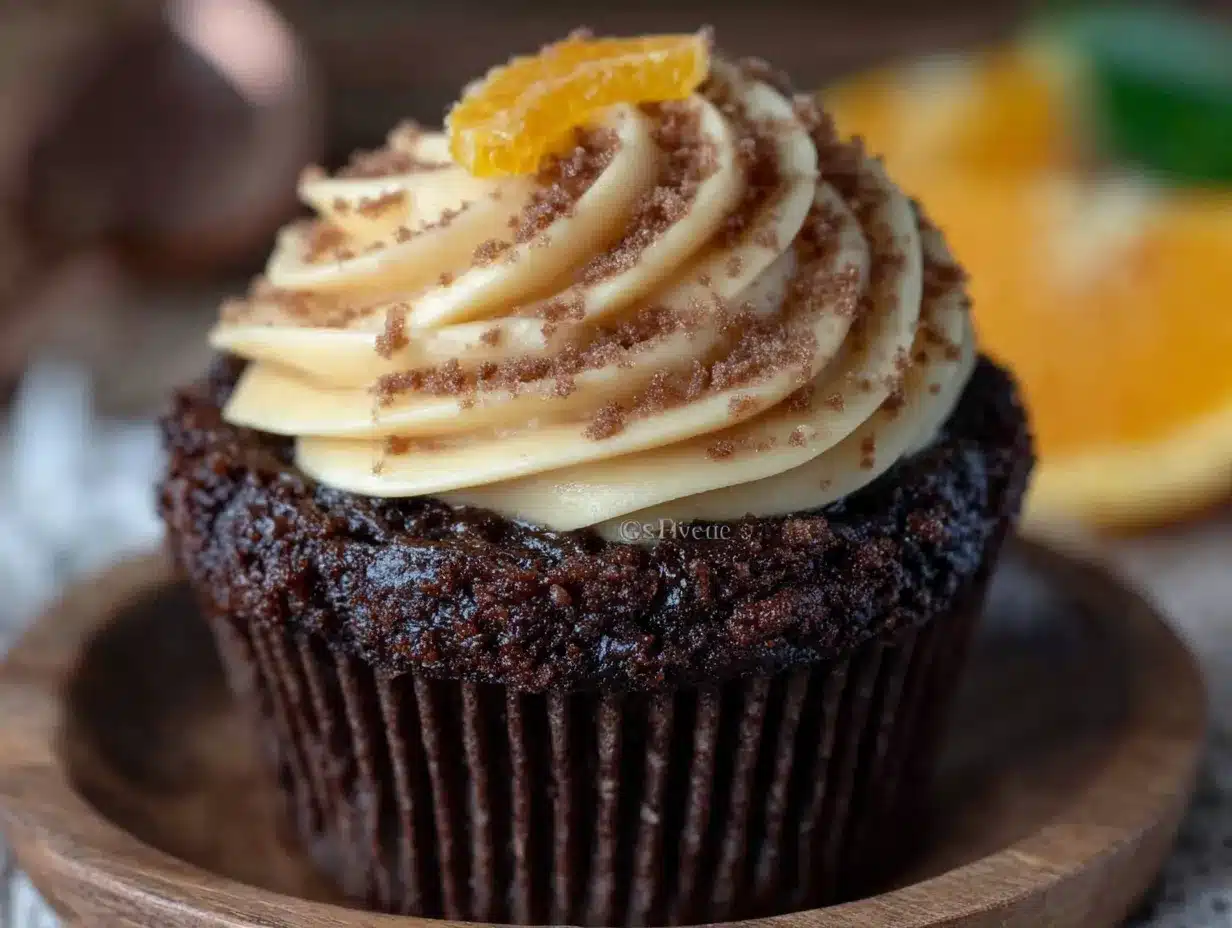
- Stunning Presentation: The contrast between the black cupcake and the orange frosting is genuinely beautiful. People will think you went to pastry school.
- Crowd-Pleaser: I’ve brought these to potlucks, birthday parties, and casual get-togethers. They disappear every single time. Kids love the color, adults love the flavor.
This isn’t just another chocolate cupcake recipe. The black cocoa powder gives it a unique flavor profile that’s hard to find in homemade baking, and the orange buttercream adds a fresh, unexpected element. It’s the kind of combination that makes people stop and say, “Wait, what’s in this?” in the best possible way.
What Ingredients You Will Need
This recipe uses simple, everyday ingredients, but each one plays a specific role in creating that perfect texture and flavor. Don’t be tempted to skip or swap too much—trust me, I’ve tried.
For the Black Velvet Cupcakes
- All-purpose flour, 1 ½ cups (190g) – Provides structure without making the cupcakes tough. Spoon and level it into your measuring cup for accuracy.
- Black cocoa powder, ½ cup (50g) – This is the star. It’s different from regular Dutch-process cocoa. It’s darker, less acidic, and has that signature Oreo-like taste. I prefer the brand King Arthur Flour for this, but any black cocoa will work.
- Baking soda, 1 teaspoon – Helps the cupcakes rise and creates a tender crumb.
- Salt, ½ teaspoon – Balances the sweetness and enhances the chocolate flavor.
- Granulated sugar, 1 cup (200g) – Adds sweetness and helps with moisture retention.
- Vegetable oil, ½ cup (120ml) – Keeps the cupcakes moist even after a day or two. Use a neutral oil like canola or grapeseed.
- Large eggs, 2, room temperature – Room temperature eggs incorporate better into the batter, creating a more even texture.
- Buttermilk, 1 cup (240ml), room temperature – The acid in buttermilk reacts with the baking soda for a beautiful rise. It also adds tanginess that complements the black cocoa.
- Vanilla extract, 2 teaspoons – Adds warmth and depth. Use pure vanilla extract if you can.
- White vinegar, 1 teaspoon – This sounds weird, I know. But the vinegar reacts with the baking soda to create an extra-light texture. You won’t taste it, I promise.
- Black gel food coloring, 1-2 teaspoons – Liquid food coloring won’t give you that deep, dramatic black color. Gel is the way to go. Start with 1 teaspoon and add more if needed.
For the Orange Buttercream
- Unsalted butter, 1 cup (226g), softened – Make sure it’s truly soft, not just cool. Leave it out on the counter for at least an hour.
- Powdered sugar, 3-4 cups (360-480g) – Start with 3 cups and add more if you want a stiffer frosting.
- Fresh orange zest, 2 tablespoons – This is non-negotiable. The zest holds all the aromatic oils that give the buttercream its bright flavor.
- Fresh orange juice, 2-3 tablespoons – Adds flavor and helps thin the frosting to the perfect piping consistency.
- Vanilla extract, 1 teaspoon – Rounds out the citrus flavor.
- Salt, a pinch – Just a tiny pinch to balance the sweetness.
Equipment Needed
- Muffin tin (standard 12-cup) – A light-colored metal pan works best for even baking.
- Paper cupcake liners – Use white or black liners for the best visual contrast.
- Two large mixing bowls – One for dry ingredients, one for wet.
- Whisk – For mixing dry ingredients evenly.
- Hand mixer or stand mixer – A hand mixer is totally fine, but a stand mixer makes the buttercream easier.
- Rubber spatula – For scraping down the bowl and folding ingredients.
- Cooling rack – Essential for cooling cupcakes evenly and preventing soggy bottoms.
- Piping bag and star tip – A 1M or 2D tip creates beautiful swirls. If you don’t have a piping bag, a zip-top bag with the corner snipped off works in a pinch.
- Microplane or fine grater – For zesting the orange. A box grater works, but a microplane gives you finer zest that blends into the buttercream better.
Preparation Method
- Preheat your oven to 350°F (175°C). Line your muffin tin with 12 paper liners. This is a good time to set your butter out for the frosting too, so it can start softening.
- Whisk the dry ingredients together. In a large bowl, whisk together the flour, black cocoa powder, baking soda, and salt. Make sure there are no lumps—black cocoa can be a bit stubborn. If you see clumps, sift it. I’ve learned this the hard way.
- Mix the wet ingredients. In a separate bowl, whisk together the sugar, vegetable oil, and eggs until smooth and slightly thickened. Add the buttermilk, vanilla extract, and vinegar, and whisk until everything is combined. The mixture will look a little thin—that’s okay.
- Combine wet and dry. Pour the wet ingredients into the dry ingredients. Gently fold them together with a rubber spatula until just combined. Do not overmix! A few small lumps are fine. Overmixing will make the cupcakes tough.
- Add the food coloring. Stir in the black gel food coloring. Start with 1 teaspoon. The batter will look gray at first. Add more coloring, ½ teaspoon at a time, until you’re happy with the color. Keep in mind that the color deepens slightly as the cupcakes bake.
- Fill the liners. Divide the batter evenly among the 12 liners. I use a cookie scoop for this—it’s less messy and gives you even portions. Each liner should be about ⅔ full.
- Bake. Bake for 18-22 minutes, or until a toothpick inserted into the center of a cupcake comes out clean or with a few moist crumbs. The tops should spring back when lightly touched. Start checking at 18 minutes—ovens vary.
- Cool completely. Let the cupcakes cool in the pan for 5 minutes, then transfer them to a wire rack to cool completely. Do not frost them while they’re still warm, or the buttercream will melt into a sad, soupy mess.
- Make the orange buttercream. While the cupcakes are cooling, make the frosting. In a large bowl, beat the softened butter with a hand mixer or stand mixer fitted with the paddle attachment until it’s smooth and creamy, about 2 minutes. Add the orange zest and beat for another 30 seconds.
- Add the powdered sugar. Gradually add the powdered sugar, 1 cup at a time, beating on low speed after each addition. The mixture will look dry and crumbly at first—don’t panic. That’s normal.
- Add the liquid. Add the orange juice one tablespoon at a time, beating on medium speed after each. Add the vanilla extract and the pinch of salt. Keep beating until the frosting is light, fluffy, and spreadable. If it’s too thick, add another teaspoon of orange juice. If it’s too thin, add a little more powdered sugar.
- Frost the cupcakes. Once the cupcakes are completely cool, pipe or spread the buttercream onto them. I like a tall swirl with a star tip, but a simple swoop with an offset spatula looks beautiful too.
Cooking Tips & Techniques
Let me save you from some mistakes I’ve already made. First, the food coloring situation. I once tried to use regular liquid food coloring because that’s all I had in the house. The result was a sad, grayish-brown cupcake that looked nothing like black velvet. Gel coloring is non-negotiable here. It’s more concentrated, so you use less, and it doesn’t thin out your batter.
Another thing—don’t overmix the batter. I know I said this already, but I’m saying it again because I’ve ruined batches this way. When you overmix, you develop the gluten in the flour, and your cupcakes end up dense and rubbery instead of tender and soft. Mix until you can’t see any more dry flour, then stop. Walk away. Seriously.
For the buttercream, the temperature of your butter matters more than you think. If it’s too cold, you’ll get lumpy frosting. If it’s too warm, the frosting will be greasy and won’t hold its shape. You want it to be cool room temperature—about 65-68°F. If you press your finger into it, it should leave an indent without feeling squishy or oily.
One more thing: zest your oranges before you juice them. This sounds obvious, but I’ve juiced an orange and then realized I needed the zest, and trying to zest a limp, juiced orange is a nightmare. Do yourself a favor and zest first.
Variations & Adaptations
These cupcakes are pretty perfect as-is, but I get it—sometimes you want to play around. Here are a few variations I’ve tried and loved.
- Dairy-Free Version: Swap the buttermilk for a dairy-free buttermilk alternative (1 cup of unsweetened almond or oat milk mixed with 1 tablespoon of lemon juice, let sit for 5 minutes). Use a plant-based butter for the frosting. I’ve done this for a friend with a dairy allergy, and honestly, the texture was still fantastic.
- Gluten-Free Option: Substitute the all-purpose flour with a 1:1 gluten-free baking flour blend. Make sure it contains xanthan gum. The cupcakes will be a tiny bit more delicate, but they’ll still taste incredible.
- Different Citrus Buttercream: Instead of orange, try lemon, lime, or even grapefruit zest and juice. Each one gives the frosting a completely different personality. Lime is especially good—it’s bright and a little tart.
- Chocolate Orange Buttercream: Add 2 tablespoons of sifted black cocoa powder to the buttercream along with the powdered sugar. It turns the frosting a beautiful grayish color and adds another layer of chocolate flavor.
- Halloween Version: Use orange and black sprinkles on top, or tint half the buttercream with orange gel food coloring and create a two-tone swirl. These are perfect for Halloween parties.
Serving & Storage Suggestions
These cupcakes are best served at room temperature. If you’ve refrigerated them, let them sit out for about 30 minutes before serving—the cake will be more tender and the buttercream will be softer and more flavorful.
For storage, place the frosted cupcakes in an airtight container and keep them in the refrigerator for up to 4 days. I like to put a piece of wax paper between the lid and the frosting to prevent any smudging. If you’re stacking them, use a layer of wax paper between the tiers.
You can also freeze these cupcakes, unfrosted, for up to 3 months. Wrap each one tightly in plastic wrap, then place them in a freezer-safe bag. When you’re ready to serve, thaw them in the refrigerator overnight, bring them to room temperature, and then frost them. I’ve done this for holiday baking, and it’s a lifesaver.
As for what to serve with them? A cold glass of milk is the classic choice. But a cup of black coffee or a hot cup of tea works beautifully too. The bitterness of the coffee plays off the sweetness of the cupcake in a really lovely way.
Nutritional Information & Benefits
Let’s be real—these are cupcakes, not health food. But that doesn’t mean they can’t fit into a balanced life. One cupcake (with frosting) comes in at roughly 380-420 calories, depending on how generous you are with the frosting. They have about 18g of fat, 55g of carbohydrates, and 4g of protein.
On the plus side, black cocoa powder is rich in antioxidants—more so than regular cocoa powder because it’s less processed. The oranges in the buttercream provide a small dose of vitamin C. And honestly, there’s something to be said for the mental health benefits of treating yourself to something beautiful and delicious. Baking can be a form of self-care, and sharing these cupcakes with people you love? That’s good for the soul.
If you’re watching your sugar intake, you can reduce the sugar in the cupcake batter to ¾ cup without affecting the texture too much. The frosting is harder to adjust, but you can use a lighter hand when piping it on.
Conclusion
These Perfect Black Velvet Cupcakes with Orange Buttercream are the kind of recipe that makes you look like a baking hero without requiring you to actually be one. They’re dramatic and beautiful, but they’re also forgiving and approachable. The first time I made them, I forgot to add the vinegar. They still turned out pretty good. That’s the kind of recipe this is—it wants you to succeed.
I hope you make these for a birthday, a holiday, or just a random Tuesday that needs a little brightening up. I hope you eat one while it’s still slightly warm from the oven, even though you know you should wait. And I hope you share them with someone who makes you happy. Because that’s really what baking is about, isn’t it?
If you try this recipe, I’d love to hear about it. Leave a comment below and let me know how they turned out. Did you try a different citrus? Did you add sprinkles? Did your neighbor borrow a ladder and end up with a batch of cupcakes? Tell me everything.
Frequently Asked Questions
Can I use regular cocoa powder instead of black cocoa powder?
You can, but the results will be different. Regular cocoa powder will give you a standard chocolate cupcake, not a black velvet one. The color will be brown, not black, and the flavor won’t have that distinctive Oreo-like quality. If you can’t find black cocoa, try using a mix of ¼ cup Dutch-process cocoa and ¼ cup regular unsweetened cocoa for a darker result.
Why do my cupcakes look gray instead of black?
This usually happens when you haven’t used enough gel food coloring, or you used liquid coloring instead. Black cocoa powder on its own produces a very dark brown, not a true black. The gel coloring is what pushes it over the edge into black territory. Start with 1 teaspoon and add more until you’re happy with the shade.
Can I make these cupcakes ahead of time?
Absolutely. You can bake the cupcakes up to two days in advance and store them in an airtight container at room temperature. Wait to frost them until the day you’re serving them for the best presentation. You can also make the buttercream up to a week ahead and keep it in the refrigerator. Just let it come to room temperature and re-whip it before using.
My buttercream turned out greasy. What went wrong?
This usually happens when the butter is too warm. If your kitchen is hot or your butter was overly soft, the buttercream can break and look greasy. Try refrigerating the frosting for 10-15 minutes, then re-whipping it. If that doesn’t work, you can try beating in a tablespoon of cold butter to help it re-emulsify.
Can I make this recipe into a cake instead of cupcakes?
Yes! Grease and flour two 8-inch round cake pans and divide the batter evenly between them. Bake at 350°F for 25-30 minutes, or until a toothpick comes out clean. You’ll want to double the buttercream recipe to have enough for filling and frosting the layers. The cake version is stunning for birthdays or special occasions.
Pin This Recipe!
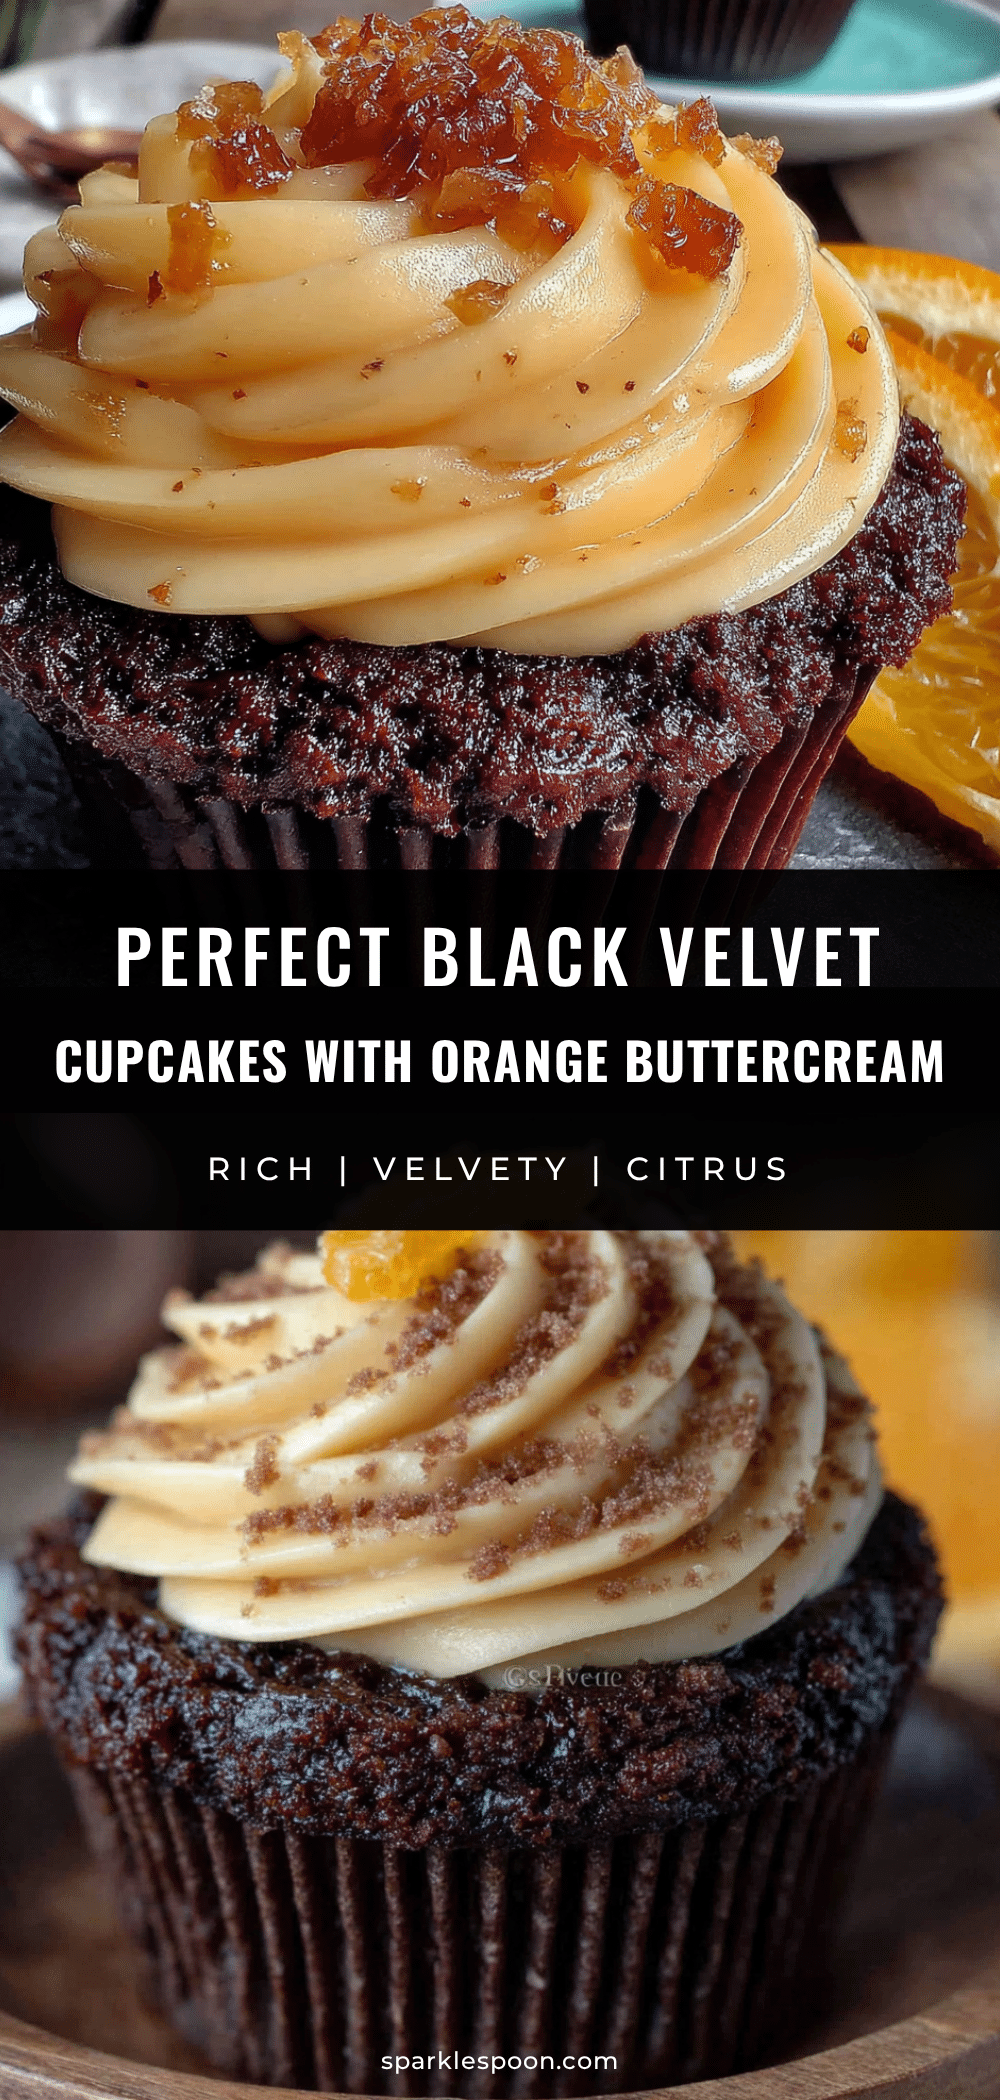
Perfect Black Velvet Cupcakes with Orange Buttercream
These black velvet cupcakes are incredibly moist and tender with a deep, Oreo-like flavor from black cocoa powder, topped with a bright and creamy orange buttercream that perfectly balances the richness.
- Prep Time: 20 minutes
- Cook Time: 20 minutes
- Total Time: 40 minutes
- Yield: 12 cupcakes 1x
- Category: Dessert
- Cuisine: American
Ingredients
- 1 ½ cups (190g) all-purpose flour
- ½ cup (50g) black cocoa powder
- 1 teaspoon baking soda
- ½ teaspoon salt
- 1 cup (200g) granulated sugar
- ½ cup (120ml) vegetable oil
- 2 large eggs, room temperature
- 1 cup (240ml) buttermilk, room temperature
- 2 teaspoons vanilla extract
- 1 teaspoon white vinegar
- 1–2 teaspoons black gel food coloring
- 1 cup (226g) unsalted butter, softened
- 3–4 cups (360-480g) powdered sugar
- 2 tablespoons fresh orange zest
- 2–3 tablespoons fresh orange juice
- 1 teaspoon vanilla extract
- Pinch of salt
Instructions
- Preheat your oven to 350°F (175°C). Line a 12-cup muffin tin with paper liners.
- In a large bowl, whisk together the flour, black cocoa powder, baking soda, and salt until no lumps remain.
- In a separate bowl, whisk together the sugar, vegetable oil, and eggs until smooth and slightly thickened. Add the buttermilk, vanilla extract, and vinegar, and whisk until combined.
- Pour the wet ingredients into the dry ingredients. Gently fold together with a rubber spatula until just combined. Do not overmix.
- Stir in the black gel food coloring, starting with 1 teaspoon and adding more until the desired color is reached.
- Divide the batter evenly among the 12 liners, filling each about ⅔ full.
- Bake for 18-22 minutes, or until a toothpick inserted into the center comes out clean or with a few moist crumbs. Cool in the pan for 5 minutes, then transfer to a wire rack to cool completely.
- For the buttercream: In a large bowl, beat the softened butter until smooth and creamy, about 2 minutes. Add the orange zest and beat for 30 seconds.
- Gradually add the powdered sugar, 1 cup at a time, beating on low speed after each addition.
- Add the orange juice 1 tablespoon at a time, beating on medium speed. Add the vanilla extract and pinch of salt. Beat until light, fluffy, and spreadable.
- Once the cupcakes are completely cool, pipe or spread the buttercream onto them.
Notes
Use black gel food coloring for the deepest color; liquid coloring will not work. Do not overmix the batter to avoid dense cupcakes. For the buttercream, ensure butter is at cool room temperature (65-68°F) to prevent greasy frosting. Zest oranges before juicing.
Nutrition
- Serving Size: 1 cupcake
- Calories: 400
- Sugar: 40
- Sodium: 220
- Fat: 18
- Saturated Fat: 8
- Carbohydrates: 55
- Fiber: 2
- Protein: 4
Keywords: black velvet cupcakes, orange buttercream, chocolate cupcakes, black cocoa, homemade cupcakes, easy dessert



