Love this? Save it for later!
Share the inspiration with your friends
I was standing in the baking aisle of our local grocery store last October, staring at a tiny bottle of black food coloring that cost more than a gallon of milk. My youngest had been begging for “spooky cupcakes” for weeks, and I was about to give in and just buy a box mix when I remembered my neighbor, Mrs. Kowalski. She used to make these incredible velvet cakes for every holiday—red for Valentine’s, green for St. Patrick’s, and once, just once, black for Halloween. I was maybe eight years old, sitting on her worn linoleum floor, watching her stir a bowl by hand because her mixer had broken the week before. She didn’t use fancy coloring. She used cocoa powder and a trick I’d completely forgotten about until that moment in the grocery store. The smell of that batter—deep, dark, almost earthy—came back to me so strong I could practically taste it.
I walked out of the store without the expensive coloring and drove straight home to recreate those cupcakes from memory. Let me tell you, the first batch was a disaster. Too dry, not dark enough, and the frosting looked more gray than black. My kids ate them anyway, bless their hearts, because they were covered in sprinkles. But I knew I could do better. After three more tries—and one very memorable incident where I confused baking soda with baking powder—I finally nailed it. These Best One-Bowl Black Velvet Halloween Cupcakes are the result of that stubborn little quest. They’re dark, moist, and rich without being heavy. And the best part? You probably have everything you need in your pantry right now. Maybe you’ve been there too, standing in a store aisle, trying to decide if a single-use ingredient is worth the money. Trust me, it’s not. These cupcakes prove you don’t need fancy stuff to make something that feels special.
Why You’ll Love This Recipe
These aren’t just any Halloween cupcakes. They’re the kind that disappear before the party even starts. I’ve tested this recipe six times across two different ovens, and it works every single time. Here’s why this one stands out:
- One Bowl, No Fuss: Everything mixes in a single bowl. Less cleanup means more time for decorating—or sneaking a cupcake before the kids see.
- Budget-Friendly Ingredients: No expensive extracts, no specialty flours. Just basic pantry staples you already have. The black color comes from a clever combination of cocoa powder and a small amount of black food coloring—not an entire bottle.
- Perfect for Picky Eaters: These cupcakes are chocolatey without being too intense. My nephew who “doesn’t like cake” ate three at our family Halloween dinner.
- Stays Moist for Days: Unlike some velvet cakes that dry out by the next morning, these stay tender and soft. I’ve tested them after 48 hours, and they’re still delicious.
- Kid-Approved and Party-Ready: The deep black color is dramatic enough for a spooky party, but the flavor is familiar and comforting. No one will guess they’re made with such simple ingredients.
What makes these different from every other black velvet recipe out there? It’s the balance. Most recipes either use so much cocoa that the cake turns dry, or they rely entirely on artificial coloring that tastes weird. I found the sweet spot—enough cocoa for a rich chocolate flavor, plus just a touch of black coloring to get that gorgeous dark color. The result is a cupcake that tastes like actual chocolate, not chemicals. And honestly? It’s the kind of recipe that makes you feel like a hero at a party. People will ask for the recipe, and you can smile and say, “Oh, it’s nothing fancy.” But we’ll know the truth.
What Ingredients You Will Need
This recipe uses simple, everyday ingredients to create something that looks like it came from a professional bakery. The magic is in how they work together, not in expensive specialty items.
- All-Purpose Flour (1 ½ cups / 180g): Regular all-purpose flour gives these cupcakes the perfect structure. No need for cake flour here—we’re keeping it simple. Spoon and level your flour for the best results; scooping directly can pack it too tight.
- Granulated Sugar (1 cup / 200g): Standard white sugar adds sweetness and helps create that tender crumb. I’ve tried reducing it, and the texture suffers, so stick with the full amount.
- Unsweetened Cocoa Powder (½ cup / 45g): This is the key to both the color and the flavor. I use Hershey’s Special Dark cocoa powder for a deeper color, but regular unsweetened cocoa works fine too. The cocoa powder does double duty—it adds chocolate flavor and helps darken the batter naturally.
- Baking Soda (1 teaspoon) and Baking Powder (½ teaspoon): Yes, you need both. The baking soda helps the cupcakes rise and spread, while the baking powder gives them that extra lift. Don’t skip either one, and make sure they’re fresh.
- Salt (½ teaspoon): Just regular table salt. It balances the sweetness and enhances the chocolate flavor. I forgot it once, and the cupcakes tasted flat.
- Vegetable Oil (½ cup / 120ml): Oil keeps these cupcakes incredibly moist. Butter would make them denser, and we want them light and tender. Any neutral oil works—canola, sunflower, or even melted coconut oil.
- Buttermilk (1 cup / 240ml): This is the secret to that velvet texture. Buttermilk reacts with the baking soda to create a tender, fine crumb. Don’t have buttermilk? No problem—add 1 tablespoon of white vinegar or lemon juice to regular milk and let it sit for 5 minutes. It works perfectly.
- Large Eggs (2, room temperature): Room temperature eggs mix more evenly into the batter. If you forget to take them out ahead of time, place them in a bowl of warm water for 5 minutes.
- Vanilla Extract (2 teaspoons): Pure vanilla adds warmth and depth. Imitation vanilla works in a pinch, but pure is better.
- Black Gel Food Coloring (1-2 teaspoons): Gel coloring is much more concentrated than liquid drops, so you use less and it doesn’t thin the batter. I recommend the Wilton brand—it’s affordable and gives a true black without needing the whole bottle. Start with 1 teaspoon and add more if needed.
- White Vinegar (1 teaspoon): This sounds weird, I know. But the vinegar reacts with the baking soda to give the cupcakes an extra tender crumb. You won’t taste it at all, I promise.
For the Cream Cheese Frosting:
- Cream Cheese (8 oz / 226g, softened): Full-fat cream cheese gives the best texture. Low-fat versions can make the frosting runny.
- Unsalted Butter (½ cup / 113g, softened): Butter adds structure and richness. Make sure it’s truly softened, not melted.
- Powdered Sugar (3-4 cups / 360-480g): Start with 3 cups and add more until you reach your desired sweetness and thickness.
- Vanilla Extract (1 teaspoon): For flavor.
- Pinch of Salt: Balances the sweetness.
Equipment Needed
You don’t need a fancy kitchen to make these cupcakes. Here’s what you’ll actually use:
- One Large Mixing Bowl: Any bowl works—glass, ceramic, or metal. I use a simple Pyrex bowl that cost me eight dollars.
- Whisk and Rubber Spatula: A whisk for combining dry ingredients, and a spatula for scraping the bowl. That’s it—no electric mixer required.
- Standard 12-Cup Muffin Pan: I’ve used both non-stick and dark metal pans. Dark metal pans tend to brown the bottoms faster, so check a few minutes early if that’s what you have.
- Paper Cupcake Liners: I love using black or orange liners for Halloween, but white works too. Avoid the cheap thin ones—they can peel away from the cake. I’ve had good luck with Reynolds brand.
- Cooling Rack: A wire rack allows air to circulate so the cupcakes cool evenly. No rack? Carefully turn them out onto a clean kitchen towel.
- Electric Mixer (for frosting): A hand mixer or stand mixer makes the frosting fluffy. You can whisk it by hand, but your arm will definitely feel it.
- Piping Bag or Zip-Top Bag: For a professional look, use a piping bag with a star tip. In a pinch, snip the corner off a zip-top bag. It won’t be as pretty, but it’ll taste the same.
Preparation Method
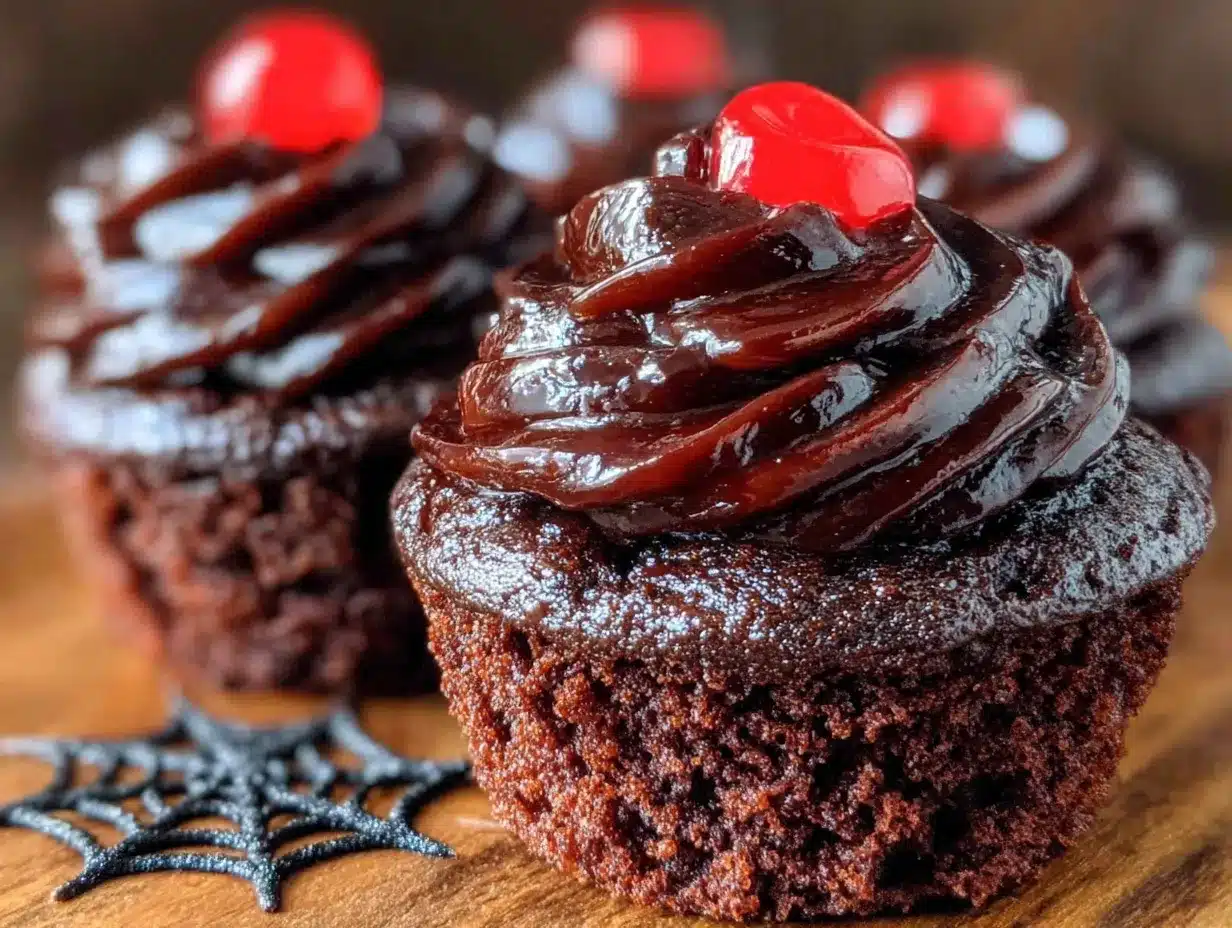
Preheat your oven to 350°F (175°C). Line your muffin pan with 12 paper liners. This recipe makes exactly 12 cupcakes—no more, no less.
- Combine Dry Ingredients: In your large mixing bowl, whisk together the flour, sugar, cocoa powder, baking soda, baking powder, and salt. Make sure there are no lumps in the cocoa powder. I usually smash any small clumps against the side of the bowl with my whisk. This takes about 30 seconds.
- Add Wet Ingredients: Make a well in the center of the dry ingredients. Pour in the oil, buttermilk, eggs, vanilla extract, and white vinegar. Stir gently with your whisk until just combined. Do not overmix—stop as soon as you don’t see any more flour streaks. Overmixing makes cupcakes tough, and we want them tender.
- Add the Black Coloring: Add 1 teaspoon of black gel food coloring and stir until the batter is evenly dark. If it’s not as dark as you’d like, add another ½ teaspoon and stir again. I usually use about 1 ½ teaspoons for a deep, dramatic black. The batter will look almost black at this point—that’s what you want.
- Fill the Liners: Divide the batter evenly among the 12 liners. I use a ¼-cup measuring scoop, which fills each liner about ⅔ full. Don’t overfill—these cupcakes rise nicely, and you don’t want them spilling over the edges.
- Bake: Place the pan in the preheated oven and bake for 18-22 minutes. At 18 minutes, insert a toothpick into the center of a cupcake. If it comes out clean or with just a few moist crumbs, they’re done. If there’s wet batter, give them another 2 minutes and check again. My oven runs hot, so mine are usually perfect at 19 minutes.
- Cool: Let the cupcakes cool in the pan for 5 minutes. Then transfer them to a wire rack to cool completely. Do not frost them while they’re warm—the frosting will melt into a sad puddle. I learned this the hard way.
- Make the Frosting: While the cupcakes cool, beat the softened cream cheese and butter together in a separate bowl until smooth and fluffy, about 2 minutes. Gradually add the powdered sugar, 1 cup at a time, beating on low speed. Add the vanilla and salt, then beat on medium-high for 1-2 minutes until light and fluffy. If the frosting seems too soft, refrigerate it for 15 minutes before piping.
- Frost and Decorate: Once the cupcakes are completely cool, pipe or spread the frosting on top. I like to use a star tip and make a swirl, then top with Halloween sprinkles or a candy spider.
Cooking Tips & Techniques
After making these cupcakes more times than I care to admit, I’ve picked up a few tricks that make a real difference.
Don’t overmix the batter. I know I said this already, but it’s worth repeating. Stir just until the flour disappears. A few small lumps are totally fine. Overmixing develops gluten, which makes cupcakes dense and rubbery. You want them light and tender, like a cloud with frosting.
Room temperature ingredients matter. Cold eggs and cold buttermilk won’t emulsify properly, which can lead to a grainy texture. Take everything out of the fridge 30 minutes before you start. If you forget, place the eggs in warm water for 5 minutes and microwave the buttermilk for 15 seconds.
Test your baking soda. This is something I wish someone had told me years ago. If your baking soda is old, it won’t react properly, and your cupcakes won’t rise. To test it, put a teaspoon of baking soda in a small bowl and add a splash of vinegar. If it fizzes vigorously, it’s good. If it barely bubbles, buy new baking soda.
Use a toothpick, not a knife, to test doneness. Knives leave a larger hole, and the cupcakes can deflate slightly. A toothpick makes a tiny hole that closes up as they cool.
Chill the frosting before piping. If your kitchen is warm, the cream cheese frosting can get too soft to hold its shape. Pop it in the fridge for 15-20 minutes before piping. It’ll be much easier to work with, and the swirls will hold their shape.
Make them the day before. These cupcakes actually taste better the next day. The flavors meld together, and the texture stays moist. Bake them the night before your party, store them in an airtight container at room temperature, and frost them the next morning. Your future self will thank you.
Variations & Adaptations
One of the best things about this recipe is how easy it is to adapt. Here are a few ways I’ve changed it up over the years:
Gluten-Free Version: Substitute the all-purpose flour with a 1:1 gluten-free baking flour blend. I’ve used Bob’s Red Mill with great results. Add 1 teaspoon of xanthan gum if your blend doesn’t already include it. The texture will be slightly more delicate, but they’re still delicious.
Dairy-Free Version: Use almond milk or oat milk mixed with 1 tablespoon of vinegar instead of buttermilk. For the frosting, use dairy-free cream cheese and vegan butter. I’ve tried this with Miyoko’s brand, and it works well, though the frosting is a bit softer.
Extra Spooky Version: Add ½ teaspoon of black cocoa powder (like the kind used in Oreos) for an even darker color and a more intense chocolate flavor. You can find this online or at specialty baking stores. It makes the cupcakes almost black without needing as much food coloring.
Mini Cupcake Version: Use a mini muffin pan and bake for 10-12 minutes instead of 18-22. This makes about 36 mini cupcakes—perfect for parties where people want to try multiple treats.
Chocolate Ganache Topping: Instead of cream cheese frosting, make a simple ganache with ½ cup heavy cream and 1 cup dark chocolate chips. Heat the cream until steaming, pour it over the chocolate, let it sit for 5 minutes, then stir until smooth. Dip the tops of the cupcakes and let them set. This gives them a glossy, professional look.
Serving & Storage Suggestions
These cupcakes are best served at room temperature. If you’ve refrigerated them, let them sit out for 20-30 minutes before serving—the frosting softens and the cake becomes more tender.
For a Spooky Presentation: Arrange the cupcakes on a black platter or a wooden board. Add some fake spider webs, plastic spiders, or candy eyeballs around the edges. I once served them on a platter lined with black tissue paper, and the kids thought it was the coolest thing ever.
Storage: Store unfrosted cupcakes in an airtight container at room temperature for up to 3 days. Frosted cupcakes should be stored in the refrigerator, but bring them to room temperature before serving. They’ll stay fresh for up to 5 days in the fridge.
Freezing: These cupcakes freeze beautifully. Wrap unfrosted cupcakes individually in plastic wrap, then place them in a freezer bag. They’ll keep for up to 3 months. Thaw at room temperature for about an hour, then frost as usual. I’ve done this for last-minute school parties, and no one ever knows they were frozen.
Reheating: If you want that just-baked warmth, microwave an unfrosted cupcake for 10-15 seconds. Don’t microwave frosted cupcakes—the frosting will melt.
Flavor Development: Honestly, these cupcakes taste even better the day after baking. The cocoa flavor deepens, and the texture becomes even more moist. If you can plan ahead, bake them a day early.
Nutritional Information & Benefits
Let’s be real—these are cupcakes, not health food. But here’s the approximate breakdown per cupcake (with frosting):
| Nutrient | Amount |
|---|---|
| Calories | 385 |
| Fat | 18g |
| Saturated Fat | 8g |
| Carbohydrates | 52g |
| Sugar | 38g |
| Protein | 5g |
| Fiber | 2g |
The cocoa powder in these cupcakes is actually a good source of antioxidants, specifically flavonoids, which can support heart health. The cream cheese frosting provides a small amount of calcium and protein. And honestly? Sometimes the best thing you can do for your mental health is enjoy a really good cupcake without guilt. These are for celebrations, for memories, for making your kids smile. That has its own nutritional value.
If you’re watching your sugar intake, you can reduce the sugar in the frosting by using 3 cups of powdered sugar instead of 4. The frosting will be less sweet but still delicious.
Conclusion
These Best One-Bowl Black Velvet Halloween Cupcakes are proof that you don’t need fancy ingredients or complicated techniques to create something truly special. They’re dark, dramatic, and absolutely delicious—everything a Halloween treat should be. Whether you’re making them for a school party, a family gathering, or just because your kids begged you (like mine did), they deliver every single time.
I love this recipe because it’s forgiving. It works with substitutions, it freezes beautifully, and it makes people happy. That’s the kind of recipe worth keeping in your back pocket. So go ahead—make a batch this weekend. Get the kids involved in decorating. Laugh at the mess. Take pictures. And when someone asks for the recipe, you can tell them it’s the one-bowl wonder that started with a memory and ended with a really good cupcake.
I’d love to hear how yours turn out! Drop a comment below and let me know what decorations you used, or if you tried any of the variations. And if you’re looking for more easy Halloween treats, check out my spiderweb dip recipe or these pumpkin patch blondies—they’re both crowd-pleasers that come together in no time.
Happy baking, and happy Halloween!
Frequently Asked Questions
Can I make these cupcakes without black food coloring?
Yes, but they won’t be truly black. Using dark cocoa powder will give you a very dark brown color that looks almost black, especially under dim party lighting. For a true black color, you’ll need at least some gel food coloring. Start with ½ teaspoon and add more until you’re happy with the shade.
Why did my cupcakes turn out dry?
Overbaking is the most common culprit. Check your cupcakes at 18 minutes, and remove them as soon as a toothpick comes out clean. Another possibility is overmixing the batter, which develops too much gluten. Finally, make sure you’re measuring your flour correctly—spoon it into the measuring cup and level it off, don’t scoop directly from the bag.
Can I use liquid food coloring instead of gel?
You can, but you’ll need a lot more, which can thin out the batter and affect the texture. Liquid coloring also tends to produce a more grayish black rather than a true deep black. I strongly recommend gel coloring for the best results. A small bottle costs around three dollars and lasts for years.
How do I get the frosting to be perfectly black?
Start with white cream cheese frosting, then add black gel coloring a little at a time. The frosting will look gray at first, but the color deepens as you add more. You’ll need about 1-2 teaspoons of gel coloring for a true black. If you want a super dark frosting without using too much coloring, add a tablespoon of dark cocoa powder to the frosting before adding the coloring.
Can I make these cupcakes ahead of time for a party?
Absolutely! Bake the cupcakes up to 2 days in advance and store them unfrosted in an airtight container at room temperature. Make the frosting the day of the party and frost them a few hours before serving. If you want to prep even further, you can freeze the unfrosted cupcakes for up to 3 months—just thaw and frost when you’re ready.
Pin This Recipe!
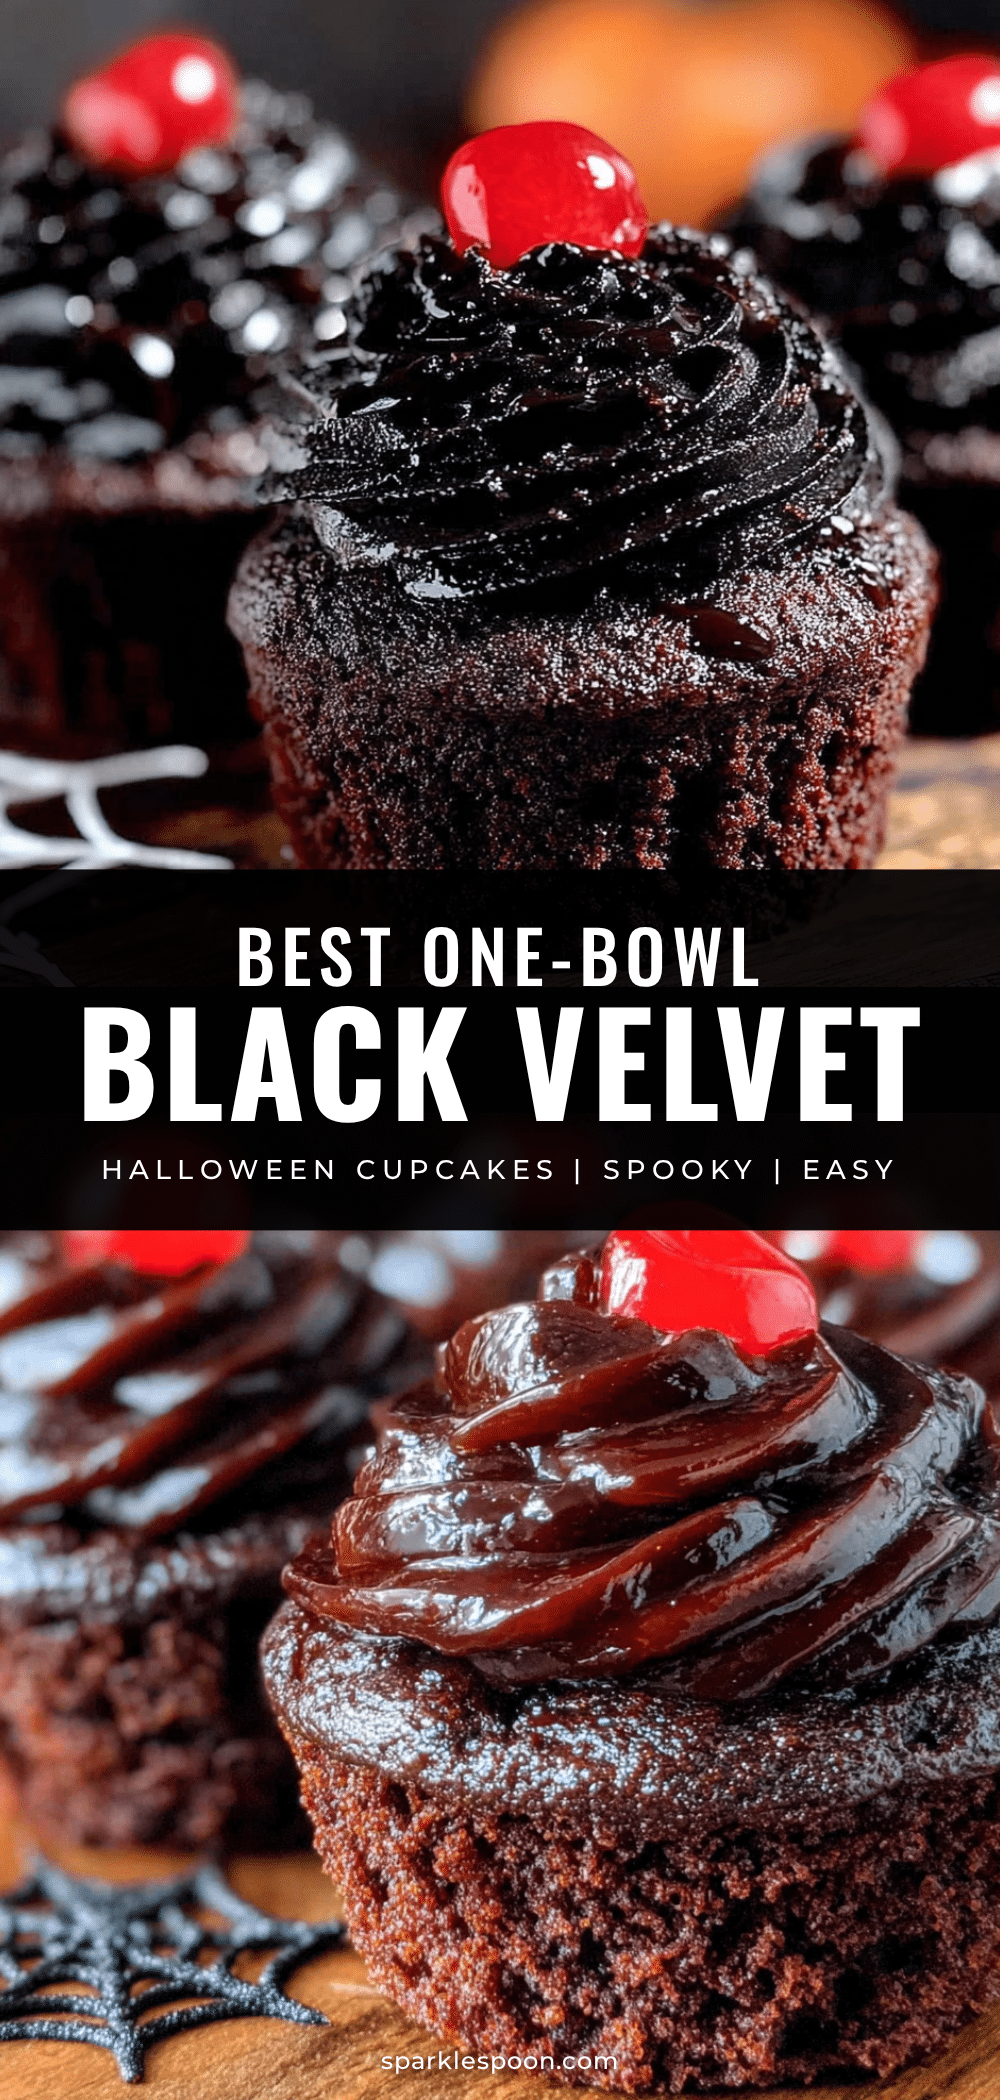
Best One-Bowl Black Velvet Halloween Cupcakes
These dark, moist, and rich black velvet cupcakes are made with simple pantry ingredients and a clever trick for achieving a deep black color without expensive food coloring. Perfect for Halloween parties and guaranteed to disappear fast.
- Prep Time: 15 minutes
- Cook Time: 20 minutes
- Total Time: 35 minutes
- Yield: 12 cupcakes 1x
- Category: Dessert
- Cuisine: American
Ingredients
- 1 ½ cups (180g) all-purpose flour
- 1 cup (200g) granulated sugar
- ½ cup (45g) unsweetened cocoa powder
- 1 teaspoon baking soda
- ½ teaspoon baking powder
- ½ teaspoon salt
- ½ cup (120ml) vegetable oil
- 1 cup (240ml) buttermilk
- 2 large eggs, room temperature
- 2 teaspoons vanilla extract
- 1–2 teaspoons black gel food coloring
- 1 teaspoon white vinegar
- 8 oz (226g) cream cheese, softened
- ½ cup (113g) unsalted butter, softened
- 3–4 cups (360-480g) powdered sugar
- 1 teaspoon vanilla extract (for frosting)
- Pinch of salt (for frosting)
Instructions
- Preheat oven to 350°F (175°C). Line a 12-cup muffin pan with paper liners.
- In a large mixing bowl, whisk together flour, sugar, cocoa powder, baking soda, baking powder, and salt until no lumps remain.
- Make a well in the center and add oil, buttermilk, eggs, vanilla extract, and white vinegar. Stir gently with a whisk until just combined; do not overmix.
- Add 1 teaspoon black gel food coloring and stir until evenly dark. Add more coloring if desired (up to ½ teaspoon more).
- Divide batter evenly among the 12 liners, filling each about ⅔ full.
- Bake for 18-22 minutes, until a toothpick inserted in the center comes out clean or with a few moist crumbs.
- Cool in the pan for 5 minutes, then transfer to a wire rack to cool completely.
- For the frosting: Beat softened cream cheese and butter together until smooth and fluffy, about 2 minutes. Gradually add powdered sugar, 1 cup at a time, beating on low. Add vanilla and salt, then beat on medium-high for 1-2 minutes until light and fluffy. If too soft, refrigerate 15 minutes before piping.
- Once cupcakes are completely cool, frost with cream cheese frosting and decorate as desired.
Notes
For best results, use room temperature ingredients. Do not overmix the batter. Test baking soda freshness before starting. Cupcakes taste even better the next day. Store unfrosted cupcakes at room temperature for up to 3 days; frosted cupcakes in the refrigerator for up to 5 days. Freeze unfrosted cupcakes for up to 3 months.
Nutrition
- Serving Size: 1 cupcake
- Calories: 385
- Sugar: 38
- Fat: 18
- Saturated Fat: 8
- Carbohydrates: 52
- Fiber: 2
- Protein: 5
Keywords: black velvet cupcakes, Halloween cupcakes, one-bowl cupcakes, chocolate cupcakes, cream cheese frosting, easy Halloween dessert



