Love this? Save it for later!
Share the inspiration with your friends
My nephew, Leo, asked why I couldn’t just carve the peppers before stuffing them. I was in the middle of explaining the structural integrity of a bell pepper during baking—how the filling would dry out, how the pepper would collapse—when I stopped. I had absolutely no good reason. I just assumed it wouldn’t work.
So, on a whim, I handed him a paring knife. He carved three tiny triangles for eyes and a wobbly, lopsided smile into an orange bell pepper. I stuffed it, baked it, and braced for a mushy disaster. What came out of the oven was honestly the most charming dinner I had made all season. The pepper held its shape perfectly, the filling stayed moist, and the face darkened just enough to look like a grinning little jack-o-lantern. Leo took one bite and said, “See? I told you.”
That moment changed how I think about weeknight dinners in October. These Cozy Jack-O-Lantern Stuffed Bell Peppers are not just a novelty—they are a genuinely satisfying meal that happens to look like it came out of a Halloween storybook. The filling is savory, cheesy, and packed with fall flavors like seasoned ground meat, rice, and a touch of smoky paprika. The peppers themselves become edible bowls that you can actually eat, and the faces make everyone at the table smile, even on a rough Tuesday.
I have made these at least a dozen times since that night. They have become the unofficial start to my Halloween season. Maybe you have been there—trying to make a holiday feel special without spending hours in the kitchen. These peppers are the answer. They take about 15 minutes to prep, and the rest is just oven time. Honestly, letting Leo be wrong about something was the best thing that could have happened to my dinner rotation.
Why You’ll Love This Recipe
I have tested this recipe about seven times to get the pepper-to-filling ratio just right. Too much rice and it falls apart. Too little cheese and it feels dry. This version has been approved by my picky nephew, my neighbor who hates onions (she never noticed them), and a friend who usually avoids ground meat. Here is why it works so well:
- Quick & Easy: You only need about 15 minutes of active prep. The oven does the rest. Perfect for busy weeknights when you still want something that feels special.
- Simple Ingredients: Ground beef or turkey, rice, canned tomatoes, cheese, and bell peppers. Nothing weird. You probably have most of it already.
- Perfect for Halloween: These are not just for kids. Adults love them too. They make a great dinner before trick-or-treating or a fun centerpiece for a fall potluck.
- Crowd-Pleaser: I have served these to a group of skeptical adults, and they disappeared within minutes. The faces make everyone happy, and the taste keeps them coming back.
- Unbelievably Delicious: The peppers soften just enough to be tender but still hold their shape. The filling is savory with a hint of smokiness, and the melted cheese on top ties it all together.
What makes this recipe different from other stuffed peppers is the carving. I know it sounds like a gimmick, but it actually changes the texture. The exposed edges of the pepper caramelize slightly, giving each bite a little charred sweetness. Plus, you get to eat a smiling face. That alone is worth the extra minute of carving.
This is comfort food with a sense of humor. It is the kind of meal that makes you forget a bad day. The warmth of the filling, the sweetness of the pepper, the little face staring up at you—it is hard not to feel better after eating one.
What Ingredients You Will Need
This recipe uses simple, wholesome ingredients that come together to create something that tastes far more complex than it is. Most of these are pantry staples, which makes this an easy last-minute dinner idea.
- 4 large orange bell peppers – Orange peppers look the most like pumpkins, but red or yellow work too. Look for peppers that are squat and round, with flat bottoms so they stand up straight. Avoid tall, narrow peppers—they tip over in the baking dish.
- 1 pound ground beef (85/15) – Ground beef gives the filling richness. You can also use ground turkey or chicken. If using turkey, add a tablespoon of olive oil to keep it moist. I prefer grass-fed beef from a local butcher, but any good quality ground meat works.
- 1 cup cooked rice – White rice is classic, but brown rice or quinoa works too. Leftover rice from takeout is perfect. Just make sure it is fully cooked before mixing it in.
- 1 small yellow onion, diced – Onion adds sweetness and depth. If you are sensitive to onions, grate it instead of dicing—it melts into the filling.
- 2 cloves garlic, minced – Fresh garlic is best, but jarred minced garlic works in a pinch. Use about 1 teaspoon.
- 1 can (14.5 oz) diced tomatoes, drained – Fire-roasted tomatoes add a smoky flavor that complements the paprika. Drain them well so the filling is not too wet.
- 1 cup shredded cheddar cheese, divided – Sharp cheddar adds a tangy kick. You can also use Monterey Jack or a Mexican blend. Reserve half for topping.
- 1 teaspoon smoked paprika – This is the secret ingredient. It gives the filling a warm, smoky flavor that makes it taste like it cooked for hours.
- 1 teaspoon dried oregano – Oregano adds an earthy, slightly bitter note that balances the sweetness of the peppers.
- 1/2 teaspoon salt – Adjust to taste. I use fine sea salt.
- 1/4 teaspoon black pepper – Freshly ground is always better, but pre-ground works.
- 1 tablespoon olive oil – For sautéing the onion and garlic.
- Fresh parsley or chives for garnish (optional) – A little green on top makes the orange peppers pop even more.
Ingredient Tips: For the best texture, do not overcook the rice before mixing it in. It should be tender but still have a little bite. If you are using frozen bell peppers, thaw them completely and pat them dry before carving—otherwise they release too much water during baking.
Equipment Needed
You do not need anything fancy for this recipe. Here is what I use:
- Large baking dish (9×13 inch) – A glass or ceramic dish works best. Metal pans can react with the tomatoes and give a slight metallic taste.
- Sharp paring knife – This is essential for carving the faces. A small serrated knife also works well. I use a cheap one from the grocery store, and it does the job fine.
- Cutting board – Preferably one with a groove to catch juices. Bell peppers can be messy.
- Large skillet – For browning the meat and sautéing the onions. A non-stick skillet makes cleanup easier.
- Mixing bowl – For combining the filling ingredients.
- Wooden spoon or spatula – For stirring the filling.
- Measuring cups and spoons – For accuracy, especially with the spices.
- Small spoon – For scooping out the pepper seeds and membranes. A melon baller works great too.
Budget Tip: If you do not have a 9×13 dish, use a cast iron skillet or even a rimmed baking sheet. Just make sure the peppers are snug so they do not tip over.
Preparation Method
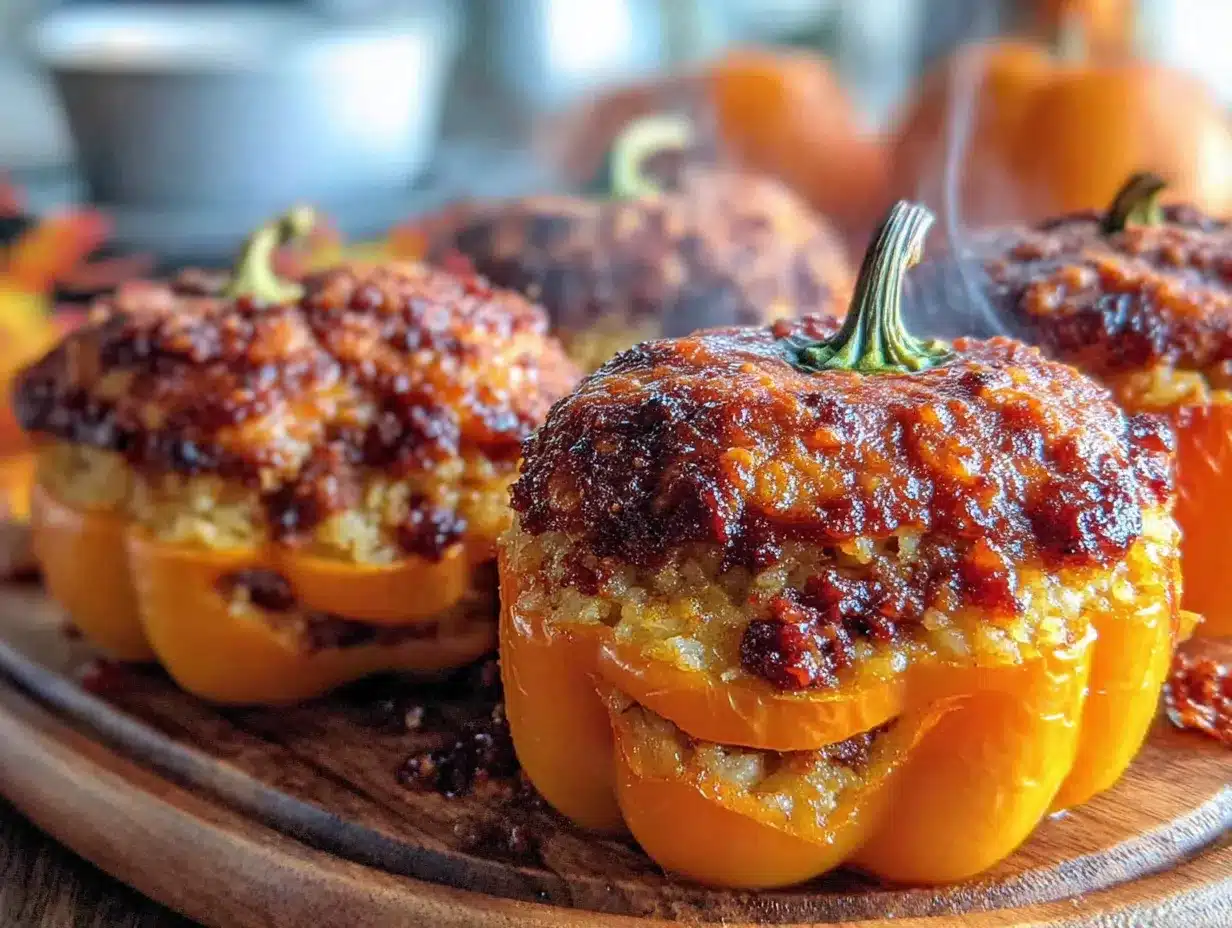
This recipe comes together in about 45 minutes total. Here is the step-by-step process:
- Preheat the oven to 375°F (190°C). While it heats, prepare the peppers.
- Carve the peppers. Wash and dry the bell peppers. Using a sharp paring knife, cut a small circle around the stem on top of each pepper. Lift off the “lid” and set it aside. Scoop out the seeds and white membranes with a small spoon. Now, carve a jack-o-lantern face into one side of each pepper. Start with simple triangles for eyes and a zigzag or curved line for a mouth. Do not carve too deep—just through the skin and a thin layer of flesh. If you cut all the way through, the filling might leak. Place the carved peppers and their lids in the baking dish, cut side up.
- Cook the filling. Heat the olive oil in a large skillet over medium heat. Add the diced onion and cook for 3-4 minutes until translucent. Add the minced garlic and cook for 30 seconds until fragrant. Add the ground beef and cook, breaking it up with a wooden spoon, until browned, about 5-6 minutes. Drain off any excess fat.
- Season the meat. Stir in the smoked paprika, dried oregano, salt, and black pepper. Cook for 1 minute until the spices are fragrant. Add the drained diced tomatoes and cooked rice. Stir everything together and cook for 2-3 minutes until heated through. Remove from heat.
- Add the cheese. Stir in 1/2 cup of the shredded cheddar cheese until melted. Taste the filling and adjust salt or pepper if needed.
- Stuff the peppers. Spoon the filling into each carved pepper, packing it gently but firmly. Do not overfill—leave about 1/4 inch of space at the top. Place the “lids” back on top of each pepper. They will not fit perfectly because of the filling, and that is fine.
- Top with cheese. Sprinkle the remaining 1/2 cup of cheddar cheese over the tops of the peppers, including the lids. The cheese will melt and create a golden crust.
- Bake. Cover the baking dish with foil and bake for 25 minutes. Remove the foil and bake for another 10-15 minutes, until the peppers are tender and the cheese is bubbly and slightly browned. The peppers should be easily pierced with a fork but still hold their shape.
- Rest and serve. Let the peppers rest in the dish for 5 minutes before serving. This allows the filling to set slightly. Garnish with fresh parsley or chives if desired. Serve warm.
Sensory Cues: When you remove the foil, you should see the cheese bubbling and the pepper skins looking slightly wrinkled. The smell is incredible—smoky, savory, and a little sweet. The faces will have darkened slightly, giving them a toasted, friendly appearance.
Cooking Tips & Techniques
I have made a few mistakes with these peppers so you do not have to. Here is what I learned:
- Do not overstuff. I once crammed so much filling into a pepper that it split open during baking. Leave a little room at the top. The rice expands slightly as it heats.
- Carve carefully. The first time I made these, I cut the mouth too wide and the filling spilled out. Keep the cuts small—you can always make them bigger, but you cannot undo a cut.
- Use a sharp knife. A dull knife will crush the pepper walls instead of slicing through them. A sharp paring knife makes clean cuts and prevents tearing.
- Blot the peppers dry. After washing, pat them dry with a paper towel. Wet peppers release steam during baking, which can make the faces droop.
- Par-bake if you are in a hurry. If you want softer peppers, place them in the microwave for 2 minutes before stuffing. This softens them slightly and reduces baking time by 10 minutes.
- Keep the lids on. The lids trap steam and keep the filling moist. If they fall off during baking, just put them back on.
- Double the recipe. These freeze beautifully. Make a double batch and freeze half for a busy weeknight. Just thaw in the fridge overnight and reheat in the oven.
Variations & Adaptations
This recipe is flexible. Here are some ways to make it your own:
- Vegetarian Version: Replace the ground meat with 1 cup of cooked lentils or a 15-ounce can of black beans, drained and rinsed. Add an extra 1/2 cup of rice to bulk it up. The lentils give a similar texture to ground meat.
- Spicy Twist: Add 1/2 teaspoon of cayenne pepper or a diced jalapeño to the filling. You can also use pepper jack cheese instead of cheddar for extra heat.
- Mexican-Inspired: Swap the oregano for cumin and add a handful of corn kernels. Top with salsa and sour cream instead of parsley.
- Low-Carb Option: Replace the rice with cauliflower rice. Cook it first to remove excess moisture, then mix it in. The texture is slightly different but still delicious.
- Cheese-Free: Omit the cheese entirely or use a dairy-free alternative. The filling is still flavorful without it. Just add an extra tablespoon of olive oil to keep it moist.
- Different Protein: Ground pork or Italian sausage works wonderfully. If using sausage, reduce the salt since sausage is already seasoned.
I once made a version with ground lamb and a pinch of cinnamon. It was incredible—like a stuffed pepper crossed with a Greek meatball. Do not be afraid to experiment.
Serving & Storage Suggestions
These peppers are best served warm, straight from the oven. The cheese should be stretchy and the peppers tender but not mushy. Here is how to serve and store them:
- Serving Temperature: Let them rest for 5 minutes after baking. This prevents burns and allows the flavors to settle. Serve on a plate with a small knife and fork.
- Presentation: Arrange the peppers on a platter with the faces facing outward. Garnish with fresh parsley or chives for a pop of green. For a Halloween party, place them on a bed of black beans or dark leafy greens to mimic a spooky garden.
- Complementary Dishes: Serve with a simple green salad or roasted broccoli. A side of crusty bread is great for soaking up any extra juices. For a heartier meal, pair with creamy Tuscan chicken soup for a cozy fall dinner spread.
- Beverage Pairing: A light red wine like Pinot Noir or a pumpkin ale works beautifully. For a non-alcoholic option, try apple cider or sparkling water with a slice of orange.
- Storage: Store leftover peppers in an airtight container in the refrigerator for up to 4 days. The flavors meld together overnight, making them even better the next day.
- Freezing: Wrap each pepper individually in plastic wrap, then place them in a freezer bag. They freeze well for up to 3 months. Thaw in the fridge overnight before reheating.
- Reheating: Reheat in the oven at 350°F (175°C) for 15-20 minutes, or in the microwave for 2-3 minutes. The microwave is faster, but the oven keeps the peppers firmer. If reheating from frozen, add 10 minutes to the oven time.
- Flavor Development: The peppers actually taste better the next day. The spices have time to meld, and the pepper softens slightly. I often make a batch on Sunday and eat them for lunch all week.
Nutritional Information & Benefits
Here is an approximate nutritional breakdown per serving (one stuffed pepper):
- Calories: 420
- Protein: 28g
- Fat: 22g
- Carbohydrates: 28g
- Fiber: 5g
- Sugar: 8g
- Sodium: 680mg
Health Benefits: Bell peppers are packed with vitamin C—one pepper provides more than 100% of your daily needs. They also contain vitamin A, which is great for eye health. The ground beef provides iron and B12, while the rice offers energy-sustaining carbohydrates. This is a balanced meal that keeps you full for hours.
Dietary Considerations: This recipe is naturally gluten-free if you use certified gluten-free rice. It is also nut-free and egg-free. For a lower-sodium option, use no-salt-added canned tomatoes and reduce the added salt.
Allergens: Contains dairy (cheese). To make it dairy-free, omit the cheese or use a plant-based alternative.
I love that this meal feels indulgent but is actually pretty wholesome. It is the kind of dinner that satisfies a craving without leaving you feeling heavy.
Conclusion
These Cozy Jack-O-Lantern Stuffed Bell Peppers are proof that dinner can be both practical and playful. They come together quickly, use simple ingredients, and somehow manage to make everyone at the table smile—even on a stressful weeknight. The carved faces are not just a gimmick; they actually improve the texture by letting the edges caramelize. And honestly, eating a smiling pepper is just more fun.
I hope you try this recipe and make it your own. Maybe you will use ground turkey instead of beef, or add a pinch of chili powder for heat. Maybe you will carve a spooky face with a jagged mouth. Whatever you do, do not overthink it. The first time I made these, I was sure they would fail. They did not. Sometimes the best recipes come from letting someone else take the lead.
If you make these, I would love to hear about it. Leave a comment below and tell me what faces you carved, or share a photo on Pinterest. Tag me so I can see your creations. And if you have a picky eater at home, these peppers might just be the trick to turning dinner into a treat.
Happy cooking, and happy Halloween!
Frequently Asked Questions
Can I make these ahead of time?
Yes! Assemble the peppers up to 24 hours in advance. Store them in the baking dish covered with plastic wrap in the refrigerator. When ready to bake, let them sit at room temperature for 15 minutes, then bake as directed. You may need to add 5-10 minutes to the baking time since they start cold.
Can I use other colors of bell peppers?
Absolutely. Orange peppers look the most like pumpkins, but red, yellow, or even green work. Green peppers have a slightly more bitter flavor, so you might want to add a pinch of sugar to the filling to balance it. Red peppers are sweeter and milder.
How do I prevent the peppers from tipping over?
Choose peppers with flat, even bottoms. If they are wobbly, slice a thin sliver off the bottom to create a flat surface. Just be careful not to cut through the pepper wall. You can also nestle them in the baking dish so they support each other.
Can I use a different type of cheese?
Yes! Monterey Jack, mozzarella, or a Mexican blend all work well. For a sharper flavor, try aged cheddar or Gruyère. If you want a dairy-free option, use a plant-based shredded cheese that melts well.
How do I reheat frozen stuffed peppers?
Thaw the peppers in the refrigerator overnight. Place them in a baking dish, cover with foil, and reheat at 350°F (175°C) for 20-25 minutes, or until heated through. You can also microwave them on high for 3-4 minutes, but the texture will be softer.
Pin This Recipe!
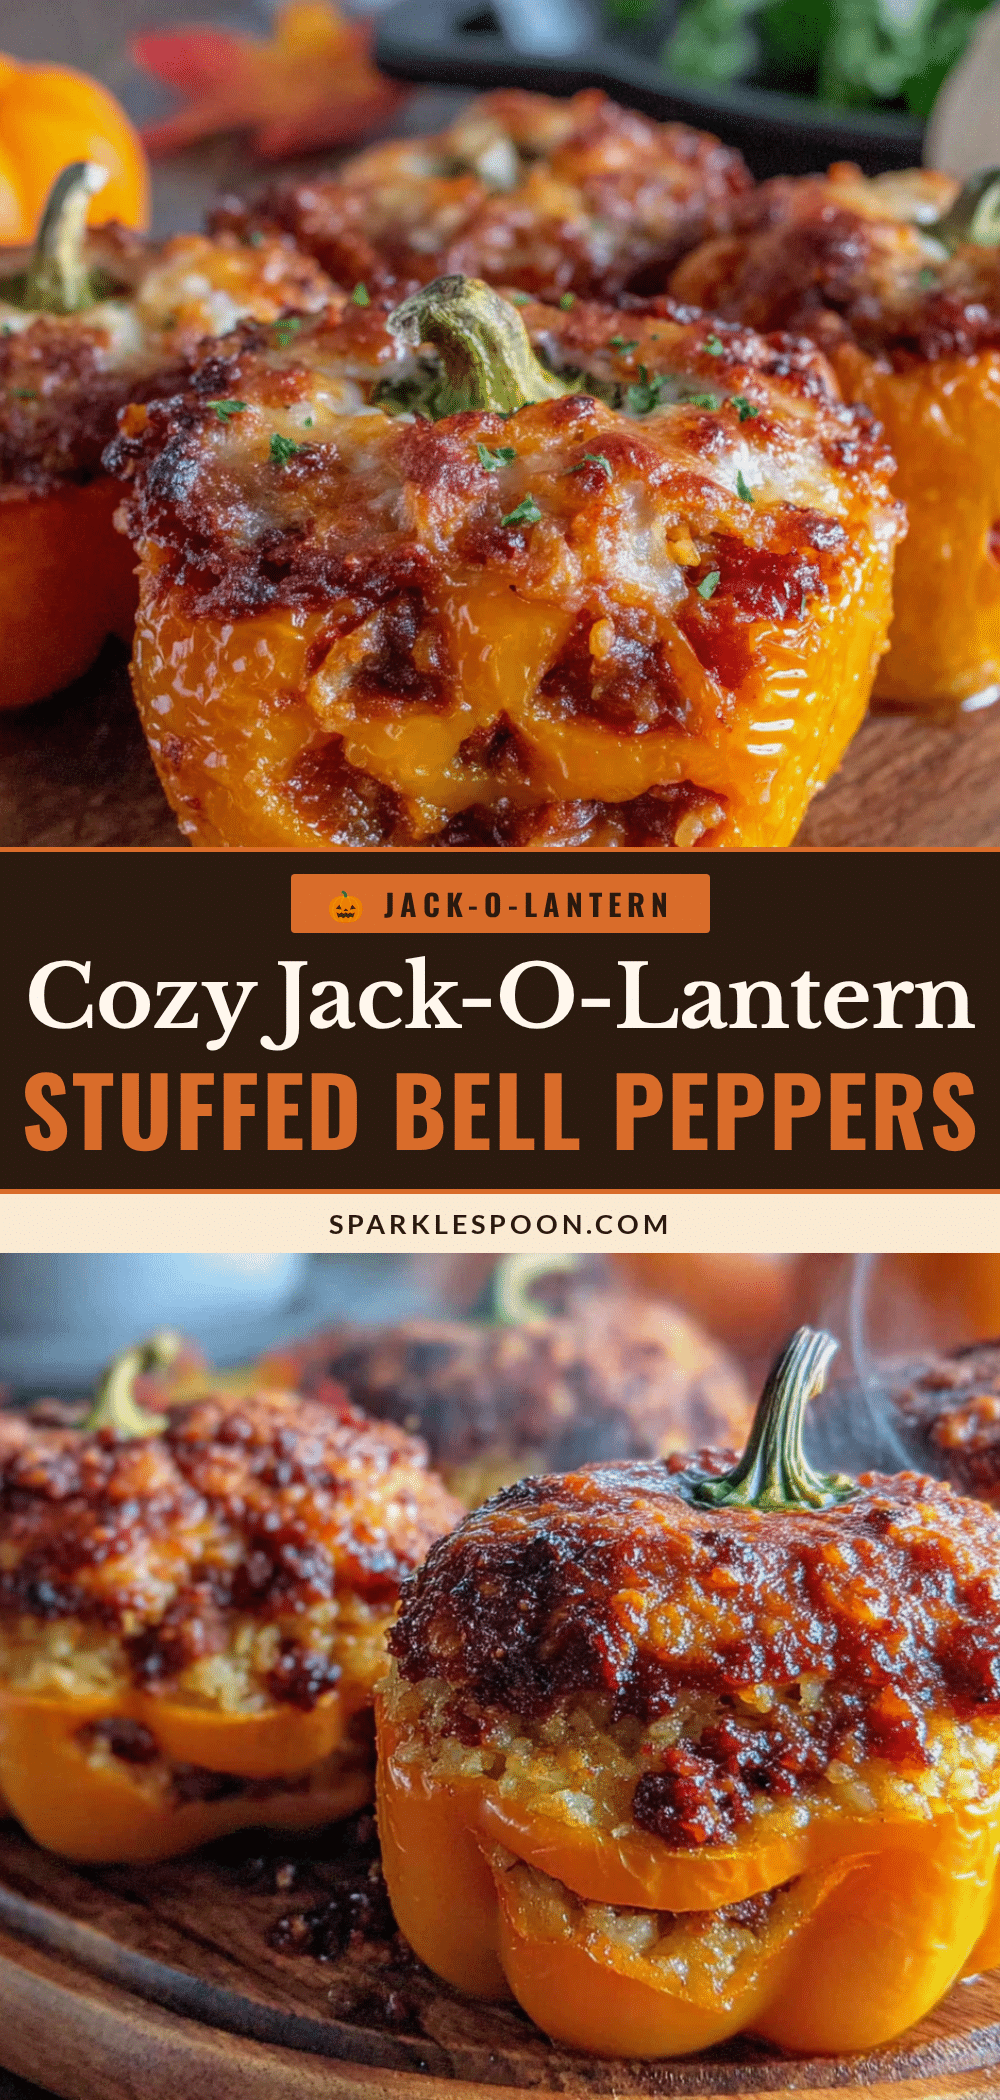
Cozy Jack-O-Lantern Stuffed Bell Peppers: Easy Fall Dinner

These savory stuffed bell peppers are carved with jack-o-lantern faces for a fun Halloween twist. Filled with seasoned ground meat, rice, and cheese, they make a delicious and playful weeknight dinner.
- Prep Time: 15 minutes
- Cook Time: 35 minutes
- Total Time: 50 minutes
- Yield: 4 servings 1x
- Category: Main Course
- Cuisine: American
Ingredients
- 4 large orange bell peppers
- 1 pound ground beef (85/15)
- 1 cup cooked rice
- 1 small yellow onion, diced
- 2 cloves garlic, minced
- 1 can (14.5 oz) diced tomatoes, drained
- 1 cup shredded cheddar cheese, divided
- 1 teaspoon smoked paprika
- 1 teaspoon dried oregano
- 1/2 teaspoon salt
- 1/4 teaspoon black pepper
- 1 tablespoon olive oil
- Fresh parsley or chives for garnish (optional)
Instructions
- Preheat the oven to 375°F (190°C).
- Wash and dry the bell peppers. Using a sharp paring knife, cut a small circle around the stem on top of each pepper. Lift off the ‘lid’ and set aside. Scoop out the seeds and white membranes with a small spoon. Carve a jack-o-lantern face into one side of each pepper, cutting just through the skin and a thin layer of flesh. Place the carved peppers and their lids in a 9×13-inch baking dish, cut side up.
- Heat the olive oil in a large skillet over medium heat. Add the diced onion and cook for 3-4 minutes until translucent. Add the minced garlic and cook for 30 seconds until fragrant. Add the ground beef and cook, breaking it up with a wooden spoon, until browned, about 5-6 minutes. Drain off any excess fat.
- Stir in the smoked paprika, dried oregano, salt, and black pepper. Cook for 1 minute until fragrant. Add the drained diced tomatoes and cooked rice. Stir together and cook for 2-3 minutes until heated through. Remove from heat.
- Stir in 1/2 cup of the shredded cheddar cheese until melted. Taste and adjust seasoning if needed.
- Spoon the filling into each carved pepper, packing gently but firmly, leaving about 1/4 inch of space at the top. Place the lids back on top.
- Sprinkle the remaining 1/2 cup of cheddar cheese over the tops of the peppers, including the lids.
- Cover the baking dish with foil and bake for 25 minutes. Remove the foil and bake for another 10-15 minutes, until the peppers are tender and the cheese is bubbly and slightly browned.
- Let the peppers rest in the dish for 5 minutes before serving. Garnish with fresh parsley or chives if desired. Serve warm.
Notes
Do not overstuff the peppers; leave a little room at the top. Carve carefully to avoid cutting all the way through. Blot peppers dry after washing to prevent droopy faces. For softer peppers, microwave for 2 minutes before stuffing. These freeze well for up to 3 months.
Nutrition
- Serving Size: 1 stuffed pepper
- Calories: 420
- Sugar: 8
- Sodium: 680
- Fat: 22
- Saturated Fat: 10
- Carbohydrates: 28
- Fiber: 5
- Protein: 28
Keywords: stuffed bell peppers, jack-o-lantern peppers, Halloween dinner, fall dinner, ground beef stuffed peppers, cheesy stuffed peppers



