Love this? Save it for later!
Share the inspiration with your friends
My neighbor asked why I couldn’t just toast the bread in the oven instead of leaving it out for two days. I started to explain why that wouldn’t work — then stopped. Honestly, I had no good reason. I was just repeating what I’d always been told about stale bread for stuffing. So I tried it her way, mostly to prove a point I was suddenly unsure of.
That was last Tuesday night, and let me tell you — I’ve never been happier to be wrong. The bread got perfectly dry in about 15 minutes. It even developed a little extra color around the edges that made the final dish look better. I mean, I’d been planning my stuffing days in advance for years, and here was someone casually solving a problem I didn’t know I had.
The whole experience got me thinking about what else in my stuffing routine could be faster. That’s how this quick brown butter sage stuffing with sourdough came together. It’s the kind of recipe that respects your time without asking you to compromise on flavor. Maybe you’ve been there — staring down a holiday menu, wondering how you’ll fit everything in. This one changes the game.
The nutty brown butter, the earthy sage, the chewy sourdough — it all comes together in about 30 minutes. No overnight drying, no complicated steps, just honest food that tastes like you spent hours on it. I keep making it because it proved me wrong in the best way possible.
Why You’ll Love This Recipe
This isn’t just another stuffing recipe. It’s the one that makes you wonder why you ever stressed about holiday sides. I’ve tested this version at least a dozen times, tweaking the brown butter timing and the bread-to-broth ratio until it was just right.
- Quick & Easy : From start to table in about 30 minutes. Perfect for weeknights when you want comfort food fast.
- Simple Ingredients : You probably have most of this in your kitchen right now. No specialty trips required.
- Perfect for Weeknights : Who says stuffing is only for holidays? This version is weeknight-friendly and completely satisfying.
- Crowd-Pleaser : Even picky eaters go back for seconds. The brown butter adds a richness that feels indulgent.
- Unbelievably Delicious : The combination of crispy sourdough edges and tender, herb-infused centers is pure comfort.
What makes this recipe different is the technique. Toasting the bread in the oven with a little butter before adding the broth gives you those perfect crispy edges that don’t get soggy. It’s a small step that makes a huge difference — the kind of trick you learn from making this dish more times than you can count.
This stuffing is comfort food reimagined. It’s faster, yes, but it also has that soul-soothing satisfaction that makes you close your eyes after the first bite. Perfect for impressing guests without stress, or turning a simple Tuesday dinner into something memorable.
What Ingredients You Will Need
This recipe uses simple, wholesome ingredients that work together to create something greater than the sum of their parts. Most of these are pantry staples, but a few deserve a little extra attention.
For the Stuffing Base
- Sourdough bread, cut into 1-inch cubes (about 8 cups) — Day-old or fresh, it doesn’t matter. We’ll toast it anyway. I prefer a rustic loaf from the bakery section for better texture.
- Unsalted butter, 6 tablespoons — We’re browning this, so use a light-colored pan so you can see the color change clearly.
- Fresh sage leaves, 1/4 cup finely chopped — Dried sage works in a pinch, but fresh gives you that aromatic punch that makes this dish special.
- Yellow onion, 1 medium, diced — About 1 cup. Sweet onion works too if that’s what you have.
- Celery stalks, 3, diced — The crunch factor. Don’t skip these.
- Garlic cloves, 3, minced — Fresh only. The jarred stuff won’t give you the same depth.
- Chicken or vegetable broth, 2 cups — Low-sodium so you control the salt. I like Swanson’s for chicken or Pacific Foods for vegetable.
- Egg, 1 large — This binds everything together. Room temperature if you remember.
For Seasoning

- Kosher salt, 1 teaspoon — Diamond Crystal is my go-to. If using table salt, reduce to 3/4 teaspoon.
- Black pepper, 1/2 teaspoon, freshly ground — Pre-ground is fine, but fresh makes a difference here.
- Fresh thyme, 1 teaspoon, chopped — Or 1/2 teaspoon dried.
- Fresh rosemary, 1 teaspoon, chopped — Go easy — rosemary can overpower quickly.
For substitutions, use gluten-free sourdough if needed. Swap the butter with a high-quality vegan butter for a dairy-free version. The broth should match your dietary needs — chicken for traditional, vegetable for vegetarian.
I recommend using a good-quality sourdough from a local bakery if you can. The tanginess adds a layer of flavor that plain white bread just can’t match. Look for a loaf that feels heavy for its size — that means good density.
Equipment Needed
You don’t need much for this recipe, which is part of the appeal. Here’s what you’ll want to have on hand:
- Large rimmed baking sheet — For toasting the bread cubes. A half-sheet pan works perfectly.
- Large skillet or sauté pan — I use a 12-inch stainless steel pan for browning the butter. Light-colored metal helps you see the color change.
- Medium mixing bowl — For whisking the broth and egg together.
- Large mixing bowl — For combining everything. You want room to toss without spilling.
- 9×13-inch baking dish — Glass or ceramic works best. Metal can react with the acidity in the broth.
- Sharp knife and cutting board — For dicing the bread and vegetables.
- Wooden spoon or silicone spatula — For stirring the brown butter. Wood won’t scratch your pan.
If you don’t have a baking sheet, a large oven-safe skillet works for toasting the bread. No 9×13 dish? Use a 10-inch cast iron skillet instead. I’ve done it both ways, and the cast iron actually gives you crispier edges.
Budget tip: You don’t need expensive equipment here. My favorite baking sheet cost $12 at a restaurant supply store. It’s been going strong for five years.
Preparation Method
Let’s get cooking. This comes together fast, so have everything prepped before you start.
- Preheat your oven to 400°F (200°C). While it’s heating, spread the sourdough cubes on your baking sheet in a single layer. Toast for 8-10 minutes, stirring halfway through. You want them golden and dry, not hard. They should feel crisp on the outside but still have a little give when you squeeze one.
- While the bread toasts, start the brown butter. Add the 6 tablespoons of butter to your skillet over medium heat. Swirl the pan occasionally as it melts. The butter will foam up, then settle down. Watch closely — this happens fast. When you see golden-brown specks forming at the bottom and it smells nutty and amazing, about 3-4 minutes, remove it from the heat immediately. Stir in the chopped sage — it will sizzle and become fragrant. Pour the browned butter and sage into a small bowl to stop the cooking.
- In the same skillet (don’t wash it — there’s flavor left behind), add a drizzle of olive oil over medium heat. Toss in the diced onion and celery. Cook for 5-6 minutes, stirring occasionally, until the onion is translucent and the celery has softened. Add the minced garlic and cook for 30 seconds until fragrant. Season with a pinch of salt and pepper.
- In your medium mixing bowl, whisk together the broth and egg until fully combined. The egg helps bind the stuffing so it holds together when you serve it. Set this aside for a moment.
- In your large mixing bowl, combine the toasted bread cubes and the cooked onion-celery mixture. Pour the brown butter and sage over everything. Toss gently with your hands or a spatula to distribute evenly. The bread should look glossy but not saturated.
- Pour the broth-egg mixture over the bread mixture in an even stream. Toss gently again. Let it sit for 2-3 minutes so the bread can absorb the liquid. You want it moist but not swimming. If it looks dry, add a splash more broth. If it looks wet, don’t panic — the bread will absorb more as it bakes.
- Transfer the mixture to your greased 9×13 baking dish. Spread it evenly. Bake at 375°F (190°C) for 20-25 minutes, until the top is golden brown and crispy. The edges should be darker and the center should be set. Let it rest for 5 minutes before serving.
A note from my own kitchen: I once forgot to add the egg. The stuffing still tasted great, but it fell apart on the plate. Don’t skip it unless you’re okay with a more crumbly texture.
Cooking Tips & Techniques
Here’s what I’ve learned from making this quick brown butter sage stuffing more times than I can count.
Don’t rush the brown butter. This is the make-or-break moment. If you pull it too early, you miss the nutty flavor. Too late, and it burns. Watch for the foam to subside and the specks to appear. Swirl the pan constantly in the last minute. I’ve burned three batches learning this — you only need to learn it once.
Toast the bread properly. The goal is dry, not hard. If you over-toast, the bread won’t absorb the broth and you’ll end up with crunchy stuffing. Under-toast, and it gets mushy. Aim for that sweet spot where the edges are golden but the centers are still slightly soft.
Season in layers. Salt the vegetables as they cook, not just at the end. This builds flavor from the ground up. Same with the brown butter — the sage releases its oils into the hot butter, so that flavor carries through the whole dish.
Let it rest after baking. I know you’re hungry, but those 5 minutes matter. The stuffing sets up and becomes easier to serve. Plus, the residual heat finishes cooking the center without drying out the edges.
Multitask like a pro. While the bread toasts, start the brown butter. While the vegetables cook, whisk the broth and egg. The whole process takes about 30 minutes, and there’s never a moment where you’re just standing around.
Variations & Adaptations
This recipe is flexible. Here are a few ways to make it your own.
Add Some Protein
Cooked and crumbled Italian sausage adds a savory punch. Brown it in the skillet before cooking the vegetables, then set it aside and add it back with the bread. I did this for a friend who claimed she didn’t like stuffing — she ate half the pan.
Make It Vegetarian
Use vegetable broth instead of chicken. Add a cup of sautéed mushrooms for an earthy, umami boost. Cremini or shiitake work beautifully. The mushrooms also add moisture that helps balance the bread.
Go Gluten-Free
Use a good-quality gluten-free sourdough or your favorite GF bread. Toast it a minute or two longer since GF bread tends to be more delicate. The rest of the recipe stays the same.
Add Some Sweetness
A handful of dried cranberries or chopped dried apricots adds a pop of sweetness that plays beautifully against the savory brown butter and sage. Add them with the bread cubes. My sister-in-law insists this is the only way to make stuffing.
Make It Ahead
Assemble the stuffing in the baking dish, cover it, and refrigerate for up to 24 hours. Add 10 minutes to the baking time if starting from cold. This is a lifesaver for busy weeknights or holiday meal prep.
Serving & Storage Suggestions
Serve this stuffing hot from the oven, right when the top is golden and crispy. It pairs beautifully with roasted chicken, pork chops, or a simple green salad if you’re keeping it light. For a complete weeknight meal, I love it alongside a simple roasted chicken and steamed green beans.
Leftovers keep well in the refrigerator for up to 4 days. Store in an airtight container. The flavors actually meld together overnight, so day-two stuffing is often even better. To reheat, spread it on a baking sheet and warm at 350°F for 10 minutes. The oven restores the crispy edges better than the microwave.
You can freeze this stuffing for up to 3 months. Assemble it completely but don’t bake it. Wrap the dish tightly in foil and then plastic wrap. To serve, thaw overnight in the refrigerator and bake as directed, adding 10-15 minutes. I’ve done this for last-minute dinner guests, and nobody guessed it was from the freezer.
If you’re serving a crowd, this recipe doubles easily. Use two baking dishes or one large roasting pan. Just increase the baking time by 5-10 minutes and check for doneness in the center.
Nutritional Information & Benefits
Here’s the nutritional breakdown per serving (based on 8 servings):
| Nutrient | Amount |
|---|---|
| Calories | 285 |
| Total Fat | 12g |
| Saturated Fat | 7g |
| Cholesterol | 45mg |
| Sodium | 520mg |
| Total Carbohydrates | 34g |
| Dietary Fiber | 2g |
| Sugars | 4g |
| Protein | 8g |
This stuffing offers more than just comfort. Sourdough bread is easier to digest than regular bread thanks to the fermentation process. Sage has anti-inflammatory properties and adds antioxidants. The brown butter provides vitamin A and healthy fats that help your body absorb fat-soluble vitamins from other foods.
For those watching their sodium, use low-sodium broth and reduce the added salt. You can also cut the butter to 4 tablespoons, though you’ll lose some of that brown butter magic. This recipe is not gluten-free as written, but the GF variation works well.
Conclusion
This quick brown butter sage stuffing with sourdough has become my go-to for exactly the reason my neighbor showed me — sometimes the easiest way is the best way. It’s proof that you don’t need complicated techniques or hours of prep to make something truly satisfying.
I love that this recipe respects your time while still delivering that deep, nutty, herbaceous flavor that makes stuffing feel special. Whether it’s a Tuesday night or a holiday gathering, it fits right in. The brown butter adds richness, the sage brings earthiness, and the sourdough gives you that perfect chewy texture.
I’d love to hear how it turns out for you. Did you add your own twist? Find a new favorite variation? Drop a comment below and share your experience. And if you’re looking for more quick weeknight sides, check out our easy roasted vegetables or simple garlic mashed potatoes. Happy cooking!
Frequently Asked Questions
Can I use dried sage instead of fresh?
Yes, but use half the amount. Dried sage is more concentrated. Add it to the brown butter after cooking, off the heat, so it doesn’t burn.
What if I don’t have sourdough bread?
Any sturdy bread works. French bread, ciabatta, or even a good country loaf are great substitutes. Avoid soft sandwich bread — it gets too mushy.
Can I make this stuffing in a slow cooker?
Absolutely. Prepare the stuffing as directed, then transfer it to a greased slow cooker. Cook on low for 2-3 hours. The top won’t get crispy, so you can broil it for 2-3 minutes at the end if you want that texture.
How do I know when the brown butter is done?
Look for golden-brown specks at the bottom of the pan and a nutty, toasty aroma. The butter will foam, then the foam will subside. That’s your window — about 30 seconds before it burns.
Can I add nuts to this stuffing?
Yes! Toasted pecans or walnuts add wonderful crunch. Add 1/2 cup with the bread cubes. Toast them first in a dry pan for 3-4 minutes to bring out their flavor.
Pin This Recipe!
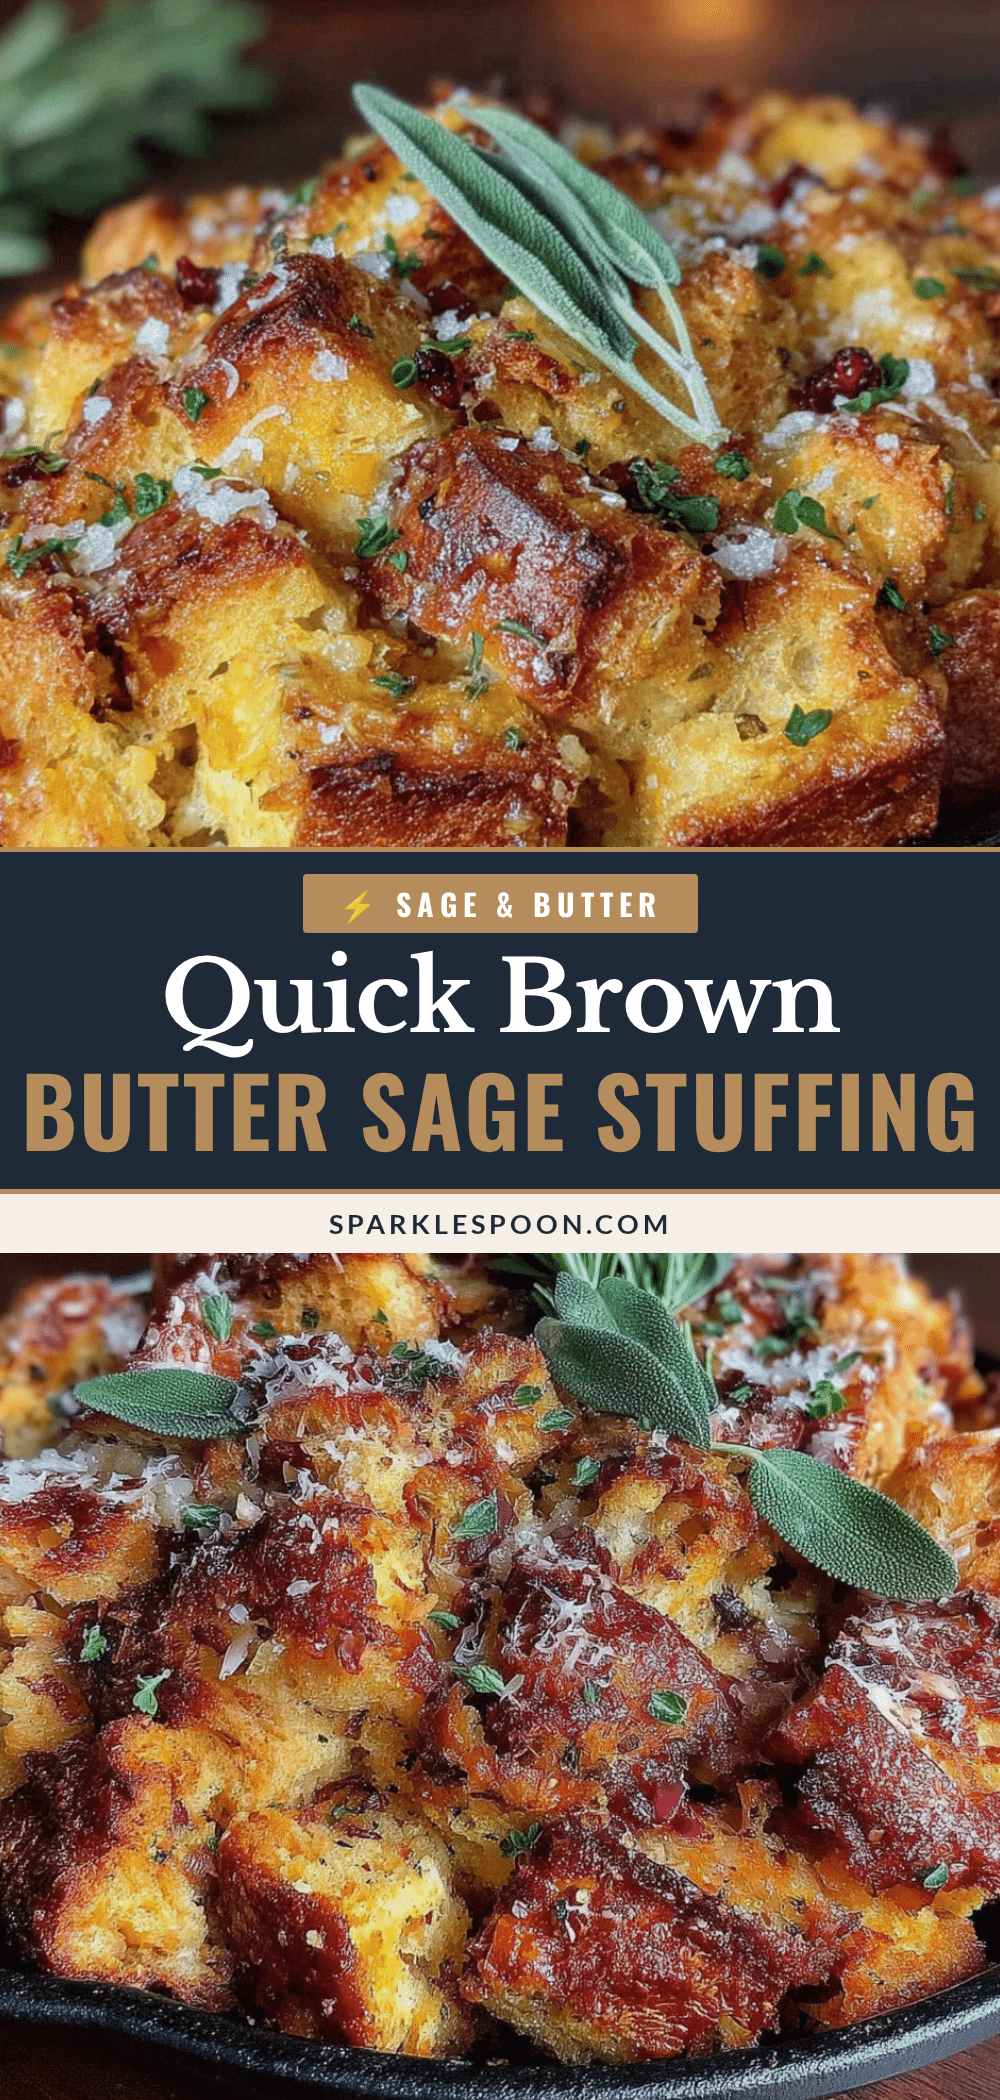
Easy Brown Butter Sage Stuffing with Sourdough

This quick brown butter sage stuffing with sourdough comes together in about 30 minutes. No overnight drying, no complicated steps, just honest food that tastes like you spent hours on it.
- Prep Time: 10 minutes
- Cook Time: 30 minutes
- Total Time: 40 minutes
- Yield: 8 servings 1x
- Category: Side Dish
- Cuisine: American
Ingredients
- 8 cups sourdough bread, cut into 1-inch cubes
- 6 tablespoons unsalted butter
- 1/4 cup fresh sage leaves, finely chopped
- 1 medium yellow onion, diced (about 1 cup)
- 3 celery stalks, diced
- 3 garlic cloves, minced
- 2 cups low-sodium chicken or vegetable broth
- 1 large egg
- 1 teaspoon kosher salt (or 3/4 teaspoon table salt)
- 1/2 teaspoon freshly ground black pepper
- 1 teaspoon fresh thyme, chopped (or 1/2 teaspoon dried)
- 1 teaspoon fresh rosemary, chopped
Instructions
- Preheat your oven to 400°F (200°C). Spread the sourdough cubes on a baking sheet in a single layer. Toast for 8-10 minutes, stirring halfway through, until golden and dry but not hard.
- While the bread toasts, start the brown butter. Add the 6 tablespoons of butter to a skillet over medium heat. Swirl the pan occasionally as it melts. When golden-brown specks form at the bottom and it smells nutty, about 3-4 minutes, remove from heat immediately. Stir in the chopped sage, then pour into a small bowl to stop cooking.
- In the same skillet, add a drizzle of olive oil over medium heat. Cook the diced onion and celery for 5-6 minutes until onion is translucent and celery has softened. Add the minced garlic and cook for 30 seconds until fragrant. Season with a pinch of salt and pepper.
- In a medium mixing bowl, whisk together the broth and egg until fully combined.
- In a large mixing bowl, combine the toasted bread cubes and the cooked onion-celery mixture. Pour the brown butter and sage over everything. Toss gently to distribute evenly.
- Pour the broth-egg mixture over the bread mixture in an even stream. Toss gently again. Let it sit for 2-3 minutes so the bread can absorb the liquid.
- Transfer the mixture to a greased 9×13-inch baking dish. Spread evenly. Bake at 375°F (190°C) for 20-25 minutes, until the top is golden brown and crispy. Let rest for 5 minutes before serving.
Notes
Don’t skip the egg—it helps bind the stuffing. For a dairy-free version, use vegan butter. For gluten-free, use gluten-free sourdough. To make ahead, assemble in the dish, cover, and refrigerate up to 24 hours; add 10 minutes to baking time. Leftovers keep in the fridge for up to 4 days or freeze for up to 3 months.
Nutrition
- Serving Size: 1 serving
- Calories: 285
- Sugar: 4
- Sodium: 520
- Fat: 12
- Saturated Fat: 7
- Carbohydrates: 34
- Fiber: 2
- Protein: 8
Keywords: stuffing, brown butter, sage, sourdough, quick, easy, holiday side dish, weeknight dinner



