Love this? Save it for later!
Share the inspiration with your friends
This was supposed to be a layered peanut butter cheesecake. I had it all planned out—a graham cracker crust, a no-bake cream cheese filling, the whole nine yards. But somewhere between the grocery store and my kitchen on a sweltering Tuesday afternoon in July, my brain just… short-circuited. I grabbed a box of Oreos instead of graham crackers, realized I was out of cream cheese when I got home, and I was already sticky with sweat and frankly, not in the mood for a baking project that required any more effort. I was this close to just calling it a day and having a bowl of cereal for dinner. But then I looked at the Oreos, the peanut butter in the pantry, and the heavy cream in the fridge, and thought, “Well, what if I just… didn’t follow the plan?” What came out of that frantic, hot mess of an afternoon was nothing like the cheesecake I intended. It was better. It was this icebox cake—creamy, crunchy, ridiculously indulgent, and so simple it barely qualifies as a recipe. It was the kind of happy accident that makes you wonder why you ever tried so hard in the first place. Honestly, I almost didn’t share it because I felt a little guilty that something this lazy could taste this good. But then I made it for a potluck the next weekend, and a friend I barely knew asked me for the recipe before she’d even finished her first slice. So here we are. Maybe you’ve been there—standing in a hot kitchen, everything going wrong, wondering if dinner is even worth the trouble. Trust me on this one. It is.
Why You’ll Love This Recipe
Let’s be real for a second. Summer is for lazy days, not complicated baking projects. This no-bake peanut butter Oreo icebox cake is the perfect solution for those hot afternoons when you want something impressive but can’t stand the thought of turning on the oven. I’ve tested this recipe more times than I’d like to admit (my neighbors have become very happy taste-testers), and here’s why it keeps winning me over:
- No Oven Required: We’re not heating up the house. This is a true no-bake dessert that comes together in the cool of your kitchen.
- Simple Ingredients: You probably have most of these in your pantry right now. No weird specialty items or trips to three different stores.
- Perfect for Summer Gatherings: This is the dessert you bring to a barbecue, a potluck, or a backyard dinner party. It travels well and feeds a crowd.
- Crowd-Pleaser: I’ve served this to kids, adults, picky eaters, and dessert snobs. Every single person goes back for seconds.
- Make-Ahead Magic: It actually gets better after a day in the fridge. You can make it a day ahead and just pull it out when you’re ready to serve.
- Unbelievably Delicious: The combination of creamy peanut butter mousse, crunchy Oreo cookies, and that rich chocolate-peanut butter glaze is pure comfort food magic.
What makes this recipe different from every other icebox cake out there? It’s the texture. Instead of just layering cookies and pudding, we’re making a light, airy peanut butter mousse that soaks into the Oreos just enough to soften them without turning them into mush. The result is this perfect cross between a cake and a trifle—every slice has those beautiful layers that look like you spent hours on them, when really, the hardest part is waiting for it to chill.
What Ingredients You Will Need
This recipe uses simple, pantry-friendly ingredients to create something that tastes surprisingly luxurious. The magic is in how they come together. Here’s what you’ll need:
- For the Peanut Butter Mousse:
- 2 cups heavy whipping cream (cold) – This is what gives the mousse its light, dreamy texture. Don’t skimp on the chill time.
- 1 cup creamy peanut butter – I prefer Skippy or Jif for this. Natural peanut butter that separates can sometimes make the mousse grainy, so stick with the regular stuff here.
- 1 cup powdered sugar – This sweetens the mousse and helps stabilize it.
- 8 oz cream cheese, softened – This adds a slight tanginess and structure. Make sure it’s at room temperature so it blends smoothly.
- 1 teaspoon vanilla extract – Just a little to round out the flavors.
- A pinch of salt – Peanut butter loves salt. Don’t skip this.
- For the Layers:
- 1 (14.3 oz) package Oreo cookies (regular, not Double Stuf) – You’ll use the whole cookies, not just the wafers. The cream filling adds sweetness and structure.
- For the Chocolate-Peanut Butter Glaze:
- 1/2 cup semi-sweet chocolate chips – I like Ghirardelli for a smooth melt.
- 1/4 cup creamy peanut butter – Yes, more peanut butter. We’re committed here.
- 1/4 cup heavy cream – This thins the glaze to the perfect pourable consistency.
- Optional Garnishes:
- Crushed Oreo cookies – For sprinkling on top.
- Chopped peanuts – Adds a nice crunch.
- Flaky sea salt – That sweet-salty combo is unbeatable.
A quick note on substitutions: If you’re dairy-free, you can use a coconut cream-based whipped cream and dairy-free cream cheese. The texture will be a little different, but it still works beautifully. For a gluten-free version, use gluten-free chocolate sandwich cookies.
Equipment Needed
You don’t need a lot of fancy equipment for this recipe, which is part of its charm. Here’s what you’ll need:
- 9×13-inch baking dish – This is the perfect size for the layers. Glass or ceramic works best so you can see the beautiful stripes.
- Electric hand mixer or stand mixer – You need this to whip the cream and cream cheese. A whisk and some serious arm strength could work, but I wouldn’t recommend it.
- Large mixing bowl – For the mousse.
- Medium mixing bowl – For the glaze.
- Spatula – For spreading the mousse evenly.
- Measuring cups and spoons – Precision matters here.
- Plastic wrap – For covering the dish while it chills.
If you don’t have a 9×13 dish, you can use a 9-inch square dish and just have thicker layers. The chilling time might need to be a little longer. I’ve also made this in a trifle bowl for a more dramatic presentation—just layer the cookies and mousse in the bowl and let it set.
Preparation Method
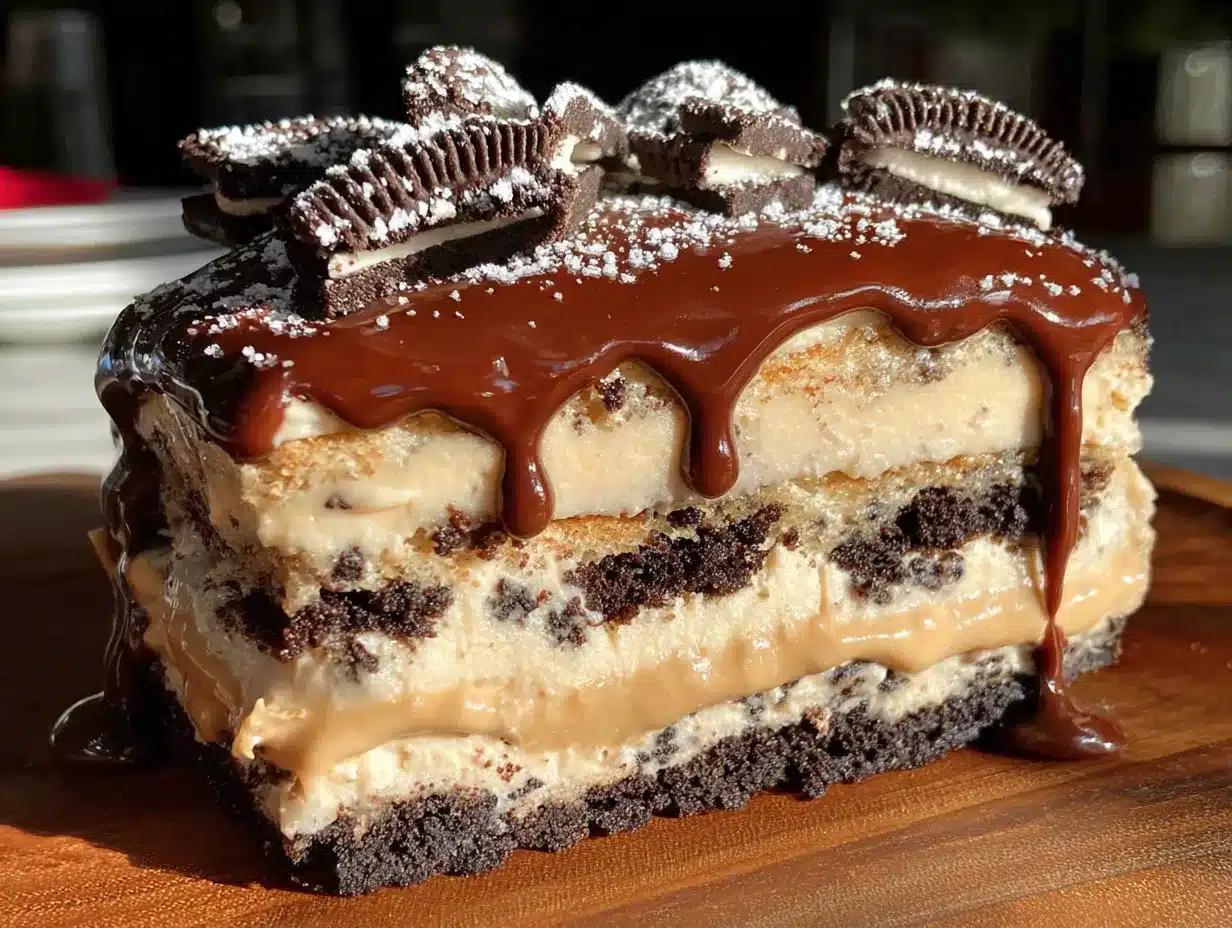
This recipe comes together in about 20 minutes of active work. The rest is just waiting—which is the hardest part!
- Make the Peanut Butter Mousse: In a large mixing bowl, beat the softened cream cheese with an electric mixer until it’s smooth and creamy, about 2 minutes. Add the peanut butter and beat until combined. It will be thick and a little sticky—that’s normal. Add the powdered sugar, vanilla extract, and salt, and beat until smooth. Set this aside.
- Whip the Cream: In a separate large bowl (or the bowl of your stand mixer), pour in the cold heavy whipping cream. Beat on medium-high speed until stiff peaks form. This takes about 3-4 minutes. You want the cream to be thick enough that it holds its shape when you lift the beaters. Be careful not to over-whip it, or you’ll end up with butter!
- Fold It Together: Take about a third of the whipped cream and fold it into the peanut butter mixture to lighten it up. This first fold will be a little messy, but keep going gently. Once it’s mostly combined, add the rest of the whipped cream and fold until you have a smooth, uniform mousse. It should be light, fluffy, and the color of a peanut butter cup.
- Layer the Cake: Now for the fun part. Spread a thin, even layer of the mousse (about 1/2 cup) on the bottom of your 9×13 dish. This helps the first layer of cookies stick. Arrange a single layer of Oreo cookies on top of the mousse. You’ll need about 16-18 cookies per layer, depending on how you arrange them. I like to place them in neat rows, but a little overlap is fine.
- Keep Layering: Spread about 1 1/2 cups of the mousse over the cookies, using a spatula to spread it evenly to the edges. Add another layer of Oreos. Repeat this process until you’ve used all the mousse and cookies. You should end with a layer of mousse on top. For a standard 9×13 dish, you’ll get about 3 layers of cookies and 4 layers of mousse.
- Chill the Cake: Cover the dish tightly with plastic wrap and refrigerate for at least 6 hours, but overnight is better. This is crucial—the cookies need time to soften and absorb the mousse. The cake will be sliceable and perfect after 8-12 hours.
- Make the Glaze: About 30 minutes before you’re ready to serve, make the glaze. In a small saucepan over low heat, combine the chocolate chips, peanut butter, and heavy cream. Stir constantly until the chocolate is melted and the mixture is smooth. Remove from heat and let it cool for 5-10 minutes. It should be pourable but not hot.
- Finish and Serve: Pour the glaze over the top of the chilled cake, spreading it evenly with a spatula. Sprinkle with crushed Oreos, chopped peanuts, and a pinch of flaky sea salt if you’re feeling fancy. Let it sit for 10 minutes so the glaze sets slightly, then slice and serve.
A few notes from my kitchen: If your mousse seems too soft after folding, don’t panic. Just pop it in the fridge for 15-20 minutes to firm up before layering. Also, if you’re in a hurry, you can skip the glaze and just dust the top with cocoa powder or crushed cookies. It’s still delicious.
Cooking Tips & Techniques
I’ve made this cake about a dozen times now, and I’ve learned a few things the hard way. Let me save you some trouble.
Don’t Over-Whip the Cream. I know I said this already, but it’s worth repeating. Over-whipped cream turns into butter, and nobody wants butter mousse. Stop as soon as you see stiff peaks that hold their shape. If you’re nervous, whip it a little less—soft peaks are better than butter.
Let the Cream Cheese Soften. Cold cream cheese will leave you with lumpy mousse. Take it out of the fridge at least 30 minutes before you start. If you forget, you can microwave it in 10-second bursts until it’s soft, but be careful not to melt it.
Use Regular Oreos. I tried this with Double Stuf once, and the extra cream filling made the layers too sweet and a little unstable. The regular Oreos have the perfect ratio of cookie to cream for this recipe.
Be Patient with Chilling. This is the hardest part. I know you want to eat it right away, but the magic happens in the fridge. The cookies need time to absorb the moisture from the mousse and soften into that cake-like texture. Six hours is the minimum, but overnight is where the real transformation happens.
Slice with a Sharp Knife. Use a long, sharp knife and wipe it clean between slices. This gives you those beautiful, Instagram-worthy layers. A warm knife (run it under hot water and dry it) works even better.
One mistake I made early on was using a metal pan instead of glass. The metal conducts cold faster, which is fine, but the glass dish lets you see the layers, which is half the fun. Plus, it’s easier to serve from a glass dish without scratching the bottom.
Variations & Adaptations
This recipe is incredibly forgiving and easy to customize. Here are a few ways I’ve made it my own:
- Chocolate Lover’s Version: Swap the peanut butter in the mousse for Nutella or a chocolate-hazelnut spread. Use chocolate wafer cookies instead of Oreos. It’s like a giant, no-bake chocolate tart.
- Berry Swirl: Swirl in a layer of raspberry or strawberry jam between the mousse and cookies. The tart fruit cuts through the richness beautifully. I did this for a Fourth of July party, and it was a hit.
- Vegan & Dairy-Free: Use coconut cream (the solid part from a can of full-fat coconut milk) instead of heavy cream, and dairy-free cream cheese. Use vegan chocolate sandwich cookies. The texture is a little less fluffy, but it’s still amazing.
- Spicy Kick: Add a pinch of cayenne pepper or a dash of cinnamon to the mousse. That sweet-heat combo is addictive.
- Individual Servings: Instead of a big dish, layer the cookies and mousse in small jars or glasses. These are perfect for picnics or for portion control (if that’s your thing).
My personal favorite variation? I once added a layer of sliced bananas between the cookies and mousse. It turned into a peanut butter banana icebox cake that was so good, I almost didn’t share it. Almost.
Serving & Storage Suggestions
This cake is best served cold, straight from the fridge. The texture is perfect when it’s firm but not frozen. I like to let it sit at room temperature for about 10 minutes before slicing—it makes the mousse a little softer and the glaze a little shinier.
For a beautiful presentation, garnish with a few whole Oreos, a drizzle of extra peanut butter, and a sprinkle of flaky sea salt. It looks like something from a fancy bakery, but you know the secret.
Storage: Cover the dish tightly with plastic wrap or transfer leftovers to an airtight container. The cake will keep in the refrigerator for up to 5 days. Honestly, it gets better on day two, when the flavors have had time to meld. By day three or four, the cookies are very soft, almost like a pudding cake. Some people prefer it that way.
Freezing: You can freeze this cake! Assemble it completely, including the glaze, and freeze it for up to 3 months. Thaw it in the refrigerator overnight before serving. The texture might be a little softer after freezing, but it’s still delicious.
Reheating: This is a cold dessert, so no reheating needed. But if you want a warm glaze, you can heat a little extra glaze and drizzle it over individual slices.
Nutritional Information & Benefits
Let’s be honest—this is a dessert, not a health food. But I believe in enjoying treats in moderation, and this one is worth every bite. Here’s a rough estimate per serving (based on 12 servings):
Calories: Approximately 480 | Fat: 32g | Carbohydrates: 42g | Protein: 10g | Sugar: 28g | Sodium: 320mg
Health Highlights: The peanut butter provides a good amount of protein and healthy fats, which can help keep you full and satisfied. The heavy cream and cream cheese add calcium. And the dark chocolate in the glaze is a source of antioxidants. So, you know, it’s practically a health food. (I’m kidding, but it’s the thought that counts.)
Dietary Considerations: This recipe is not gluten-free or dairy-free as written, but I’ve included substitution options above. It is vegetarian-friendly. If you have a peanut allergy, you can use sunflower seed butter or almond butter instead—just note that the flavor will change.
I personally love that this dessert feels indulgent without being overly complicated. It’s the kind of thing you can make for a special occasion or just because it’s Tuesday. Life’s too short to skip dessert.
Conclusion
This no-bake peanut butter Oreo icebox cake is everything I want in a summer dessert: easy, impressive, and absolutely delicious. It came from a mistake, but it’s become one of my most-requested recipes. Every time I bring it to a gathering, someone asks for the recipe, and I get to watch their face light up when I say, “It’s just Oreos and peanut butter mousse. That’s it.”
I hope you give this recipe a try. Don’t be afraid to make it your own—add a swirl of jam, swap the cookies, or just leave it exactly as written. The beauty of a no-bake dessert is that it’s forgiving. You can’t really mess it up, and even if you do, it’ll probably still taste amazing.
So go ahead. Grab a box of Oreos, a jar of peanut butter, and get layering. Your summer self will thank you. And when you make it—because I know you will—come back and let me know how it turned out. I’d love to hear about your own happy accidents in the kitchen.
Frequently Asked Questions
Can I use natural peanut butter for this recipe?
I don’t recommend it. Natural peanut butter that separates can make the mousse grainy and less stable. Stick with a processed peanut butter like Skippy or Jif for the best texture.
How long does this cake need to chill?
At least 6 hours, but overnight is best. The cookies need time to soften and absorb the moisture from the mousse. If you’re in a rush, 4 hours will work, but the texture won’t be as perfect.
Can I use a different cookie?
Absolutely! Chocolate wafer cookies, graham crackers, or even shortbread cookies would work. Just keep in mind that different cookies absorb moisture at different rates, so you might need to adjust the chilling time.
How do I get clean slices?
Use a long, sharp knife and wipe it clean between each slice. For extra clean cuts, run the knife under hot water and dry it before slicing. This prevents the mousse from sticking to the blade.
Can I make this cake ahead of time?
Yes! This cake actually gets better after a day in the fridge. You can assemble it up to 2 days ahead and keep it covered in the refrigerator. Add the glaze just before serving for the best presentation.
Pin This Recipe!
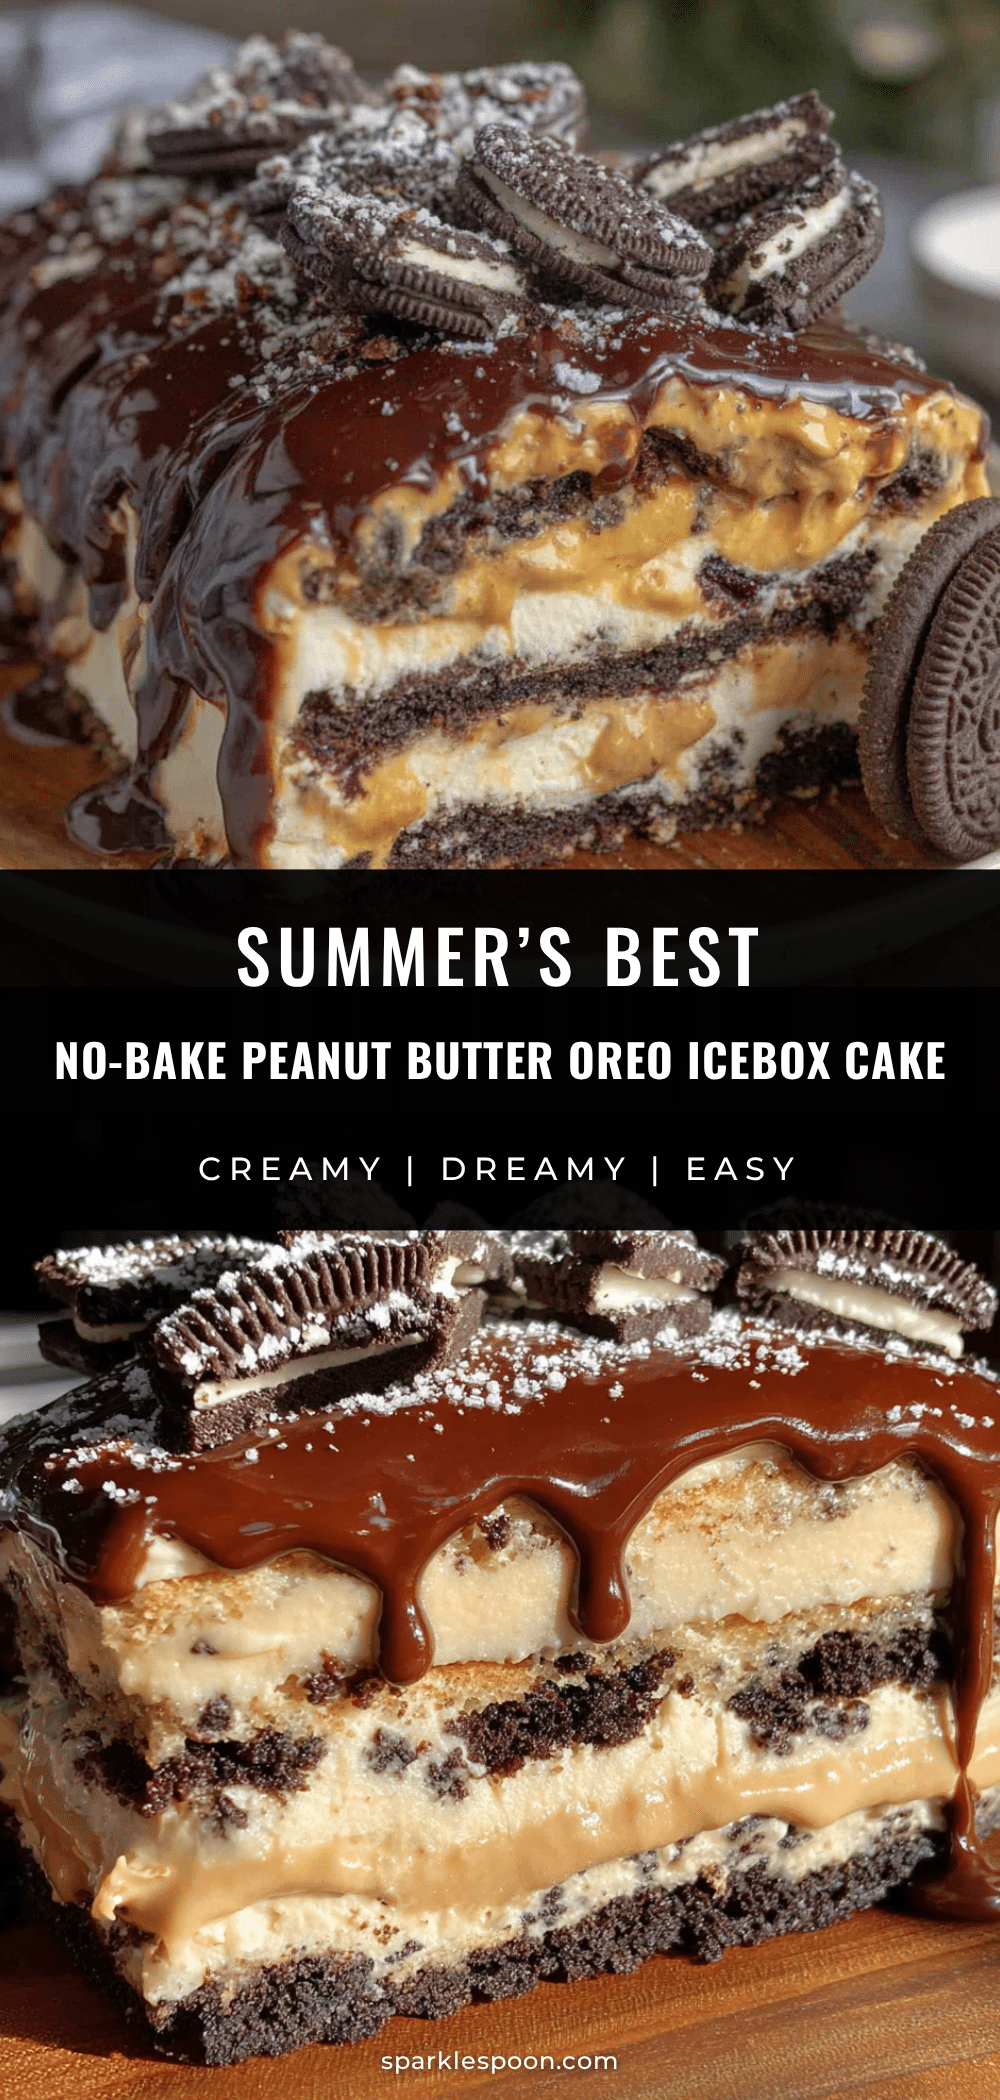
Summer’s Best No-Bake Peanut Butter Oreo Icebox Cake
A creamy, crunchy, ridiculously indulgent no-bake dessert made with layers of peanut butter mousse and Oreo cookies, topped with a chocolate-peanut butter glaze. Perfect for hot summer days when you want something impressive without turning on the oven.
- Prep Time: 20 minutes
- Cook Time: 0 minutes
- Total Time: 6 hours 20 minutes (includes chilling)
- Yield: 12 servings 1x
- Category: Dessert
- Cuisine: American
Ingredients
- 2 cups heavy whipping cream (cold)
- 1 cup creamy peanut butter (e.g., Skippy or Jif)
- 1 cup powdered sugar
- 8 oz cream cheese, softened
- 1 teaspoon vanilla extract
- A pinch of salt
- 1 (14.3 oz) package Oreo cookies (regular, not Double Stuf)
- 1/2 cup semi-sweet chocolate chips
- 1/4 cup creamy peanut butter
- 1/4 cup heavy cream
- Crushed Oreo cookies (optional garnish)
- Chopped peanuts (optional garnish)
- Flaky sea salt (optional garnish)
Instructions
- Make the Peanut Butter Mousse: In a large mixing bowl, beat the softened cream cheese with an electric mixer until smooth and creamy, about 2 minutes. Add the peanut butter and beat until combined. Add the powdered sugar, vanilla extract, and salt, and beat until smooth. Set aside.
- Whip the Cream: In a separate large bowl, pour in the cold heavy whipping cream. Beat on medium-high speed until stiff peaks form, about 3-4 minutes. Be careful not to over-whip.
- Fold It Together: Take about a third of the whipped cream and fold it into the peanut butter mixture to lighten it up. Once mostly combined, add the rest of the whipped cream and fold until you have a smooth, uniform mousse.
- Layer the Cake: Spread a thin, even layer of the mousse (about 1/2 cup) on the bottom of a 9×13-inch dish. Arrange a single layer of Oreo cookies on top (about 16-18 cookies).
- Keep Layering: Spread about 1 1/2 cups of the mousse over the cookies. Add another layer of Oreos. Repeat until you’ve used all the mousse and cookies, ending with a layer of mousse on top (about 3 layers of cookies and 4 layers of mousse).
- Chill the Cake: Cover the dish tightly with plastic wrap and refrigerate for at least 6 hours, but overnight is better.
- Make the Glaze: About 30 minutes before serving, combine the chocolate chips, 1/4 cup peanut butter, and 1/4 cup heavy cream in a small saucepan over low heat. Stir constantly until melted and smooth. Remove from heat and let cool for 5-10 minutes.
- Finish and Serve: Pour the glaze over the top of the chilled cake, spreading evenly. Sprinkle with crushed Oreos, chopped peanuts, and flaky sea salt if desired. Let sit for 10 minutes, then slice and serve.
Notes
For best results, chill overnight. Use regular Oreos, not Double Stuf. If mousse seems too soft, refrigerate for 15-20 minutes before layering. Slice with a sharp knife wiped clean between cuts for neat layers.
Nutrition
- Serving Size: 1 slice (1/12 of cak
- Calories: 480
- Sugar: 28
- Sodium: 320
- Fat: 32
- Saturated Fat: 14
- Carbohydrates: 42
- Fiber: 2
- Protein: 10
Keywords: no-bake dessert, icebox cake, peanut butter, Oreo, summer dessert, easy dessert, potluck dessert



