Love this? Save it for later!
Share the inspiration with your friends
The power went out halfway through the holiday party, and the kitchen plunged into an unexpected, heavy silence. I was standing by the counter, trying to figure out how to melt chocolate without a double boiler, when my sister-in-law, Sarah, simply walked over and turned on the small camping stove she had tucked into her purse. She didn’t offer a lecture on proper technique or explain the science of tempering. She just handed me a bag of mini marshmallows and said, “Stir this until it looks like clouds, then dump in the cocoa.”
I watched her do it with a calm, practiced ease that I had never possessed, and didn’t say anything at first. Then she smiled and told me that the best desserts are often born from emergencies. That night, surrounded by candlelight and the smell of rich, dark chocolate, we ate these bars straight from the pan with our fingers. They were messy, warm, and absolutely perfect.
The recipe arrived through our relationship, not through a formal cooking class or a Pinterest board. It was a moment of shared survival that turned into a tradition. I have adapted it slightly over the years, adding a bit more salt to cut the sweetness, but the core method remains exactly what Sarah taught me in the dark. I mean, honestly, who needs electricity when you have marshmallows and patience?
This creamy hot cocoa bomb bars with marshmallow toppings is the kind of treat that feels indulgent but is surprisingly simple to make. You know that feeling when you are looking for something that screams comfort but doesn’t require three hours of prep work? This is it. It bridges the gap between a fancy café dessert and a quick pantry staple.
I still make these every winter, even when the power stays on. They remind me of that night, of the laughter in the dark, and of how some of the best memories are made when things go a little bit wrong. Maybe you’ve been there, scrambling for a dessert idea with ten minutes to spare. If so, you are going to love this one.
Why You’ll Love This Recipe
There is a specific kind of magic that happens when chocolate and marshmallow meet, and this recipe captures it perfectly. I have tested dozens of variations over the years, from using white chocolate to trying different types of cocoa powder, and this combination is the undisputed champion. It is not just another dessert; it is a texture dream that delivers on every promise.
Here is why this recipe has earned a permanent spot in my rotation:
* **Quick & Easy**: You can have these ready in under 30 minutes. It is perfect for busy weeknights or those last-minute holiday gatherings where you need to impress without the stress.
* **Simple Ingredients**: No fancy grocery trips needed. You likely already have cocoa powder, butter, and marshmallows in your kitchen. It relies on pantry staples to deliver bold flavor.
* **Perfect for Cold Weather**: Great for cozy dinners, movie nights, or bringing to winter potlucks. The warm, gooey center is exactly what the season calls for.
* **Crowd-Pleaser**: Always gets rave reviews from kids and adults alike. The visual appeal of the melted marshmallow topping is a huge hit on social media, but the taste keeps people coming back.
* **Unbelievably Delicious**: The texture and flavor combo is next-level comfort food. The contrast between the firm chocolate base and the soft, sticky topping is addictive.
What makes this recipe different from the rest is the technique used to create the base. Instead of baking a complicated crust, we use a no-bake method that ensures a smooth, dense texture every time. Whether it is the specific ratio of butter to chocolate or the way we fold in the marshmallows, this isn’t just any version—it is the best version.
It is the kind of treat that makes you close your eyes after the first bite. It is comfort food reimagined—simpler, faster, but with the same soul-soothing satisfaction as a homemade cake. Perfect for impressing guests without stress, or turning a simple Tuesday evening into something memorable.
What Ingredients You Will Need
This recipe uses simple, wholesome ingredients to deliver bold flavor and satisfying texture without the fuss. The beauty of this dessert lies in its minimalism. You do not need a dozen exotic spices or hard-to-find items. Just a few key components that work together to create something truly special.
Here is what you will need to make these creamy hot cocoa bomb bars with marshmallow toppings:
* **Unsalted Butter**: 1 cup (2 sticks), softened. This provides the richness and helps bind the base. I recommend using high-quality European-style butter for a deeper flavor.
* **Heavy Cream**: 1/2 cup. This adds moisture and helps create that creamy, fudgy consistency in the base.
* **Dark Cocoa Powder**: 3/4 cup. Use natural or Dutch-processed, but stick to one type for consistency. Look for a rich, unsweetened cocoa powder for the best chocolate flavor.
* **Granulated Sugar**: 1 cup. This balances the bitterness of the cocoa and adds sweetness to the base.
* **Vanilla Extract**: 1 teaspoon. Adds a warm, aromatic note that enhances the chocolate.
* **Salt**: 1/2 teaspoon. Crucial for cutting the sweetness and bringing out the chocolate notes.
* **Mini Marshmallows**: 2 cups. The star of the topping. Use standard mini marshmallows for even melting.
* **White Chocolate Chips**: 1/2 cup (optional). For drizzling or mixing into the topping for extra creaminess.
* **Crushed Peppermint Candy**: 1/4 cup (optional). For a festive touch and crunch.
If you are looking for substitutions, you can use milk chocolate chips instead of white chocolate for a sweeter topping. For a dairy-free option, swap the butter and cream for coconut-based alternatives, though the texture will be slightly different. In summer, you might skip the peppermint and add some dried cherries for a tart contrast.
I personally prefer using a brand like Ghirardelli for the cocoa powder because it has a finer grind and melts more smoothly. When selecting marshmallows, ensure they are fresh; old marshmallows can become stale and chewy rather than soft and gooey.
Equipment Needed
You do not need a lot of fancy gadgets to make this recipe. A few basic kitchen tools are all you need to succeed.
* **Large Saucepan**: Essential for melting the butter, cream, and cocoa together. A heavy-bottomed pan helps prevent scorching.
* **Silicone Spatula**: Useful for stirring the mixture and scraping the sides of the pan. It is also great for folding in the marshmallows.
* **8×8 Inch Baking Pan**: This is the ideal size for these bars. Line it with parchment paper for easy removal.
* **Microplane Zester**: Optional, but great for grating white chocolate over the top for a decorative finish.
* **Mixing Bowls**: For holding ingredients and preparing toppings.
If you do not have an 8×8 pan, a 9×9 pan will work, but the bars will be thinner. You can also use a loaf pan if you want taller bars. For maintenance, always let your saucepan cool before washing it to avoid warping. Budget-friendly options include using a standard stainless steel pot instead of a high-end copper one; the result will be the same.
Preparation Method
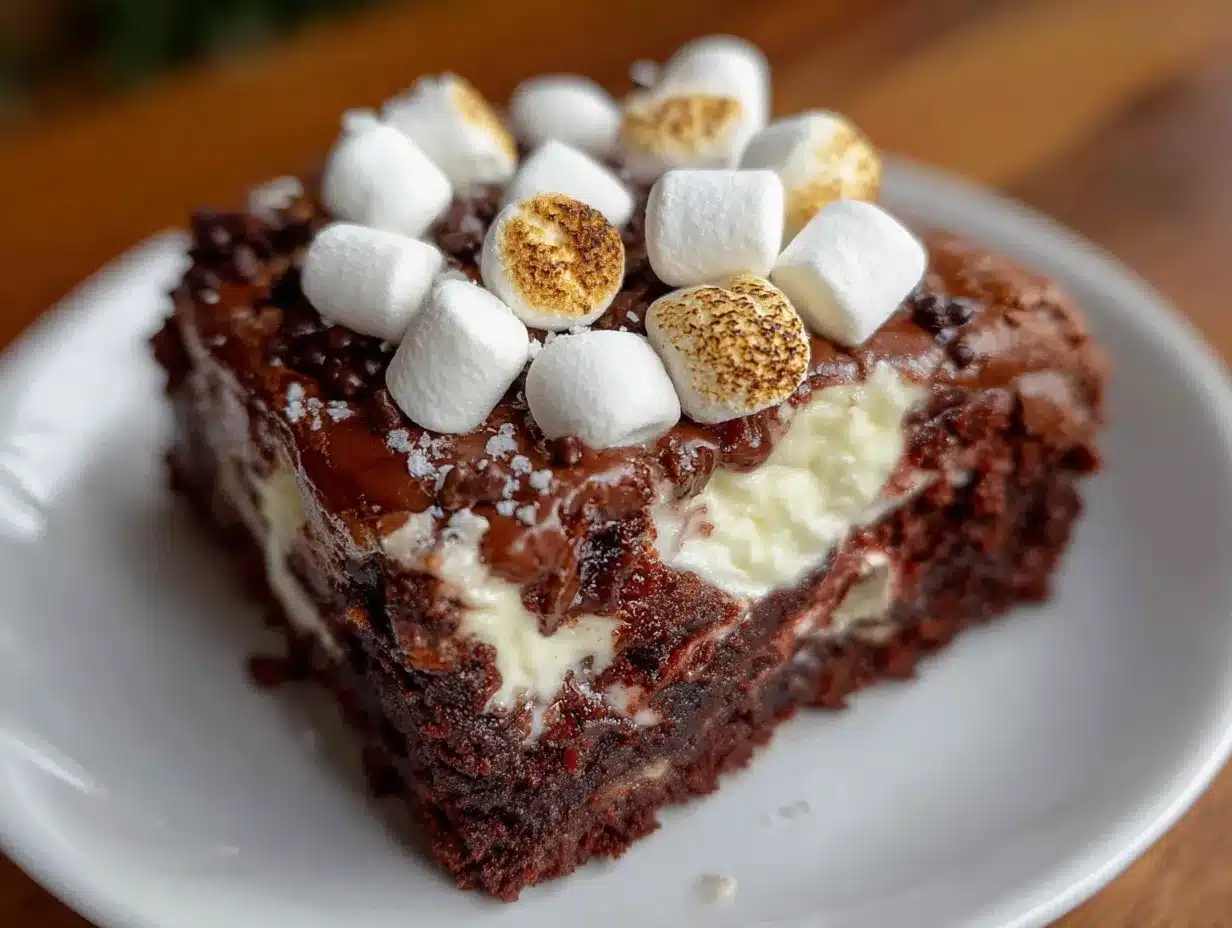
Making these bars is straightforward, but attention to detail ensures the best results. Follow these steps carefully for perfect creamy hot cocoa bomb bars with marshmallow toppings.
1. **Prepare the Pan**: Line an 8×8 inch baking pan with parchment paper, leaving an overhang on the sides. This makes it easy to lift the bars out later. Set aside.
2. **Melt the Base**: In a large saucepan over medium heat, combine the butter, heavy cream, cocoa powder, sugar, and salt. Stir constantly until the mixture comes to a gentle simmer and the cocoa is fully dissolved. This should take about 5 minutes. Do not let it boil vigorously.
3. **Remove from Heat**: Once the mixture is smooth and glossy, remove the pan from the heat. Stir in the vanilla extract.
4. **Combine with Marshmallows**: Add 1 cup of mini marshmallows to the hot chocolate mixture. Stir gently until the marshmallows are mostly melted and incorporated. The mixture will be thick and sticky.
5. **Press into Pan**: Pour the mixture into the prepared pan. Use a spatula or your hands (lightly greased) to press it down evenly. You want a firm, flat base. Let it cool for 10 minutes to set slightly.
6. **Add Topping**: Sprinkle the remaining 1 cup of mini marshmallows evenly over the base. If using white chocolate chips, sprinkle them over the marshmallows now.
7. **Melt the Topping**: Place the pan under a preheated broiler for 1-2 minutes. Watch closely! The marshmallows should puff up and turn golden brown. Alternatively, you can use a kitchen torch for more control.
8. **Cool and Set**: Let the bars cool completely at room temperature. This allows the topping to firm up slightly. Once cooled, lift the bars out of the pan using the parchment paper.
9. **Slice and Serve**: Cut into squares or bars. If using crushed peppermint, sprinkle it over the top before serving. Enjoy immediately for the warm, gooey experience.
Cooking Tips & Techniques
To ensure your bars turn out perfectly, keep these professional tips in mind. I have learned these the hard way through trial and error.
* **Control the Heat**: When melting the base, keep the heat low and steady. High heat can burn the cocoa and make the bars taste bitter. Stir frequently to ensure even heating.
* **Don’t Overmix**: Once you add the marshmallows to the base, stir just enough to incorporate them. Overmixing can deflate the mixture and make it less airy.
* **Watch the Broiler**: If you use the broiler, stay in the kitchen. Marshmallows can go from golden to burnt in seconds. If you are nervous, use a kitchen torch for a more controlled melt.
* **Cooling is Key**: Do not try to cut the bars while they are warm. They will be too soft and messy. Let them cool completely for clean cuts.
* **Storage**: Store in an airtight container at room temperature for up to 3 days. If the kitchen is hot, refrigerate them, but bring to room temperature before serving for the best texture.
I once burnt a batch because I got distracted by a phone call. Lesson learned: never leave your marshmallows unattended under the broiler. It happens to the best of us.
Variations & Adaptations
This recipe is versatile and can be adapted to suit different tastes and dietary needs.
* **Peppermint Twist**: Add crushed peppermint candy to the base before pressing it into the pan. This adds a refreshing crunch and festive flavor.
* **Nutty Version**: Fold in 1/2 cup of chopped pecans or walnuts into the base for added texture and richness.
* **Salted Caramel**: Drizzle caramel sauce over the top before adding the marshmallows. The sweet and salty combination is irresistible.
* **Dairy-Free**: Use coconut butter and coconut cream instead of dairy butter and cream. The flavor will be slightly coconutty but still delicious.
* **Gluten-Free**: This recipe is naturally gluten-free, but ensure your marshmallows and cocoa powder are certified gluten-free if you have celiac disease.
I personally love adding a layer of peanut butter cups into the base for a Snickers-inspired twist. It changes the flavor profile completely but keeps the comforting essence of the original.
Serving & Storage Suggestions
These bars are best served at room temperature, where the marshmallow topping is soft and the base is firm. Present them on a simple platter with a dusting of powdered sugar or cocoa powder for an elegant touch.
* **Complementary Dishes**: Serve with a cold glass of milk or a cup of coffee. The bitterness of the coffee pairs well with the sweet dessert.
* **Storage**: Keep in an airtight container at room temperature for up to 3 days. For longer storage, freeze the bars for up to 1 month. Thaw at room temperature before serving.
* **Reheating**: You can warm individual bars in the microwave for 10-15 seconds to melt the marshmallows further. This is a great option for a warm dessert.
* **Flavor Development**: The flavors meld together over time, so making these a day ahead can actually improve the taste.
Nutritional Information & Benefits
While these bars are a treat, they are made with simple ingredients. One bar (approx. 100g) contains about 250 calories, 15g of fat, 30g of carbohydrates, and 3g of protein.
* **Health Benefits**: Cocoa powder is rich in antioxidants, which can help improve heart health and mood.
* **Dietary Considerations**: This recipe is gluten-free. For a dairy-free version, use plant-based substitutes.
* **Allergens**: Contains dairy. Nut-free unless nuts are added.
I enjoy these as a special indulgence rather than a daily snack. Balance is key, and this recipe fits perfectly into a balanced diet when enjoyed in moderation.
Conclusion
These creamy hot cocoa bomb bars with marshmallow toppings are a testament to the beauty of simple ingredients. They are easy to make, incredibly delicious, and perfect for any occasion. I hope you try this recipe and create your own memories around it.
Feel free to customize it with your favorite add-ins or toppings. I would love to hear how you make it your own. Please leave a comment below with your variations or photos of your creation.
Thank you for reading, and happy baking!
FAQs
Can I use regular marshmallows instead of mini marshmallows?
Yes, you can, but mini marshmallows melt more evenly and quickly. If using regular marshmallows, chop them into smaller pieces for better distribution.
How do I store these bars?
Store them in an airtight container at room temperature for up to 3 days. For longer storage, freeze them for up to 1 month.
Can I make these bars ahead of time?
Yes, they are great made ahead of time. In fact, making them a day before allows the flavors to meld and the texture to set properly.
What can I substitute for heavy cream?
You can use whole milk, but the bars will be slightly less rich. For a dairy-free option, use coconut cream.
Why did my marshmallows burn?
Marshmallows burn quickly under the broiler. Make sure to watch them closely and remove the pan as soon as they are golden brown. Using a kitchen torch can also help avoid burning.
Pin This Recipe!
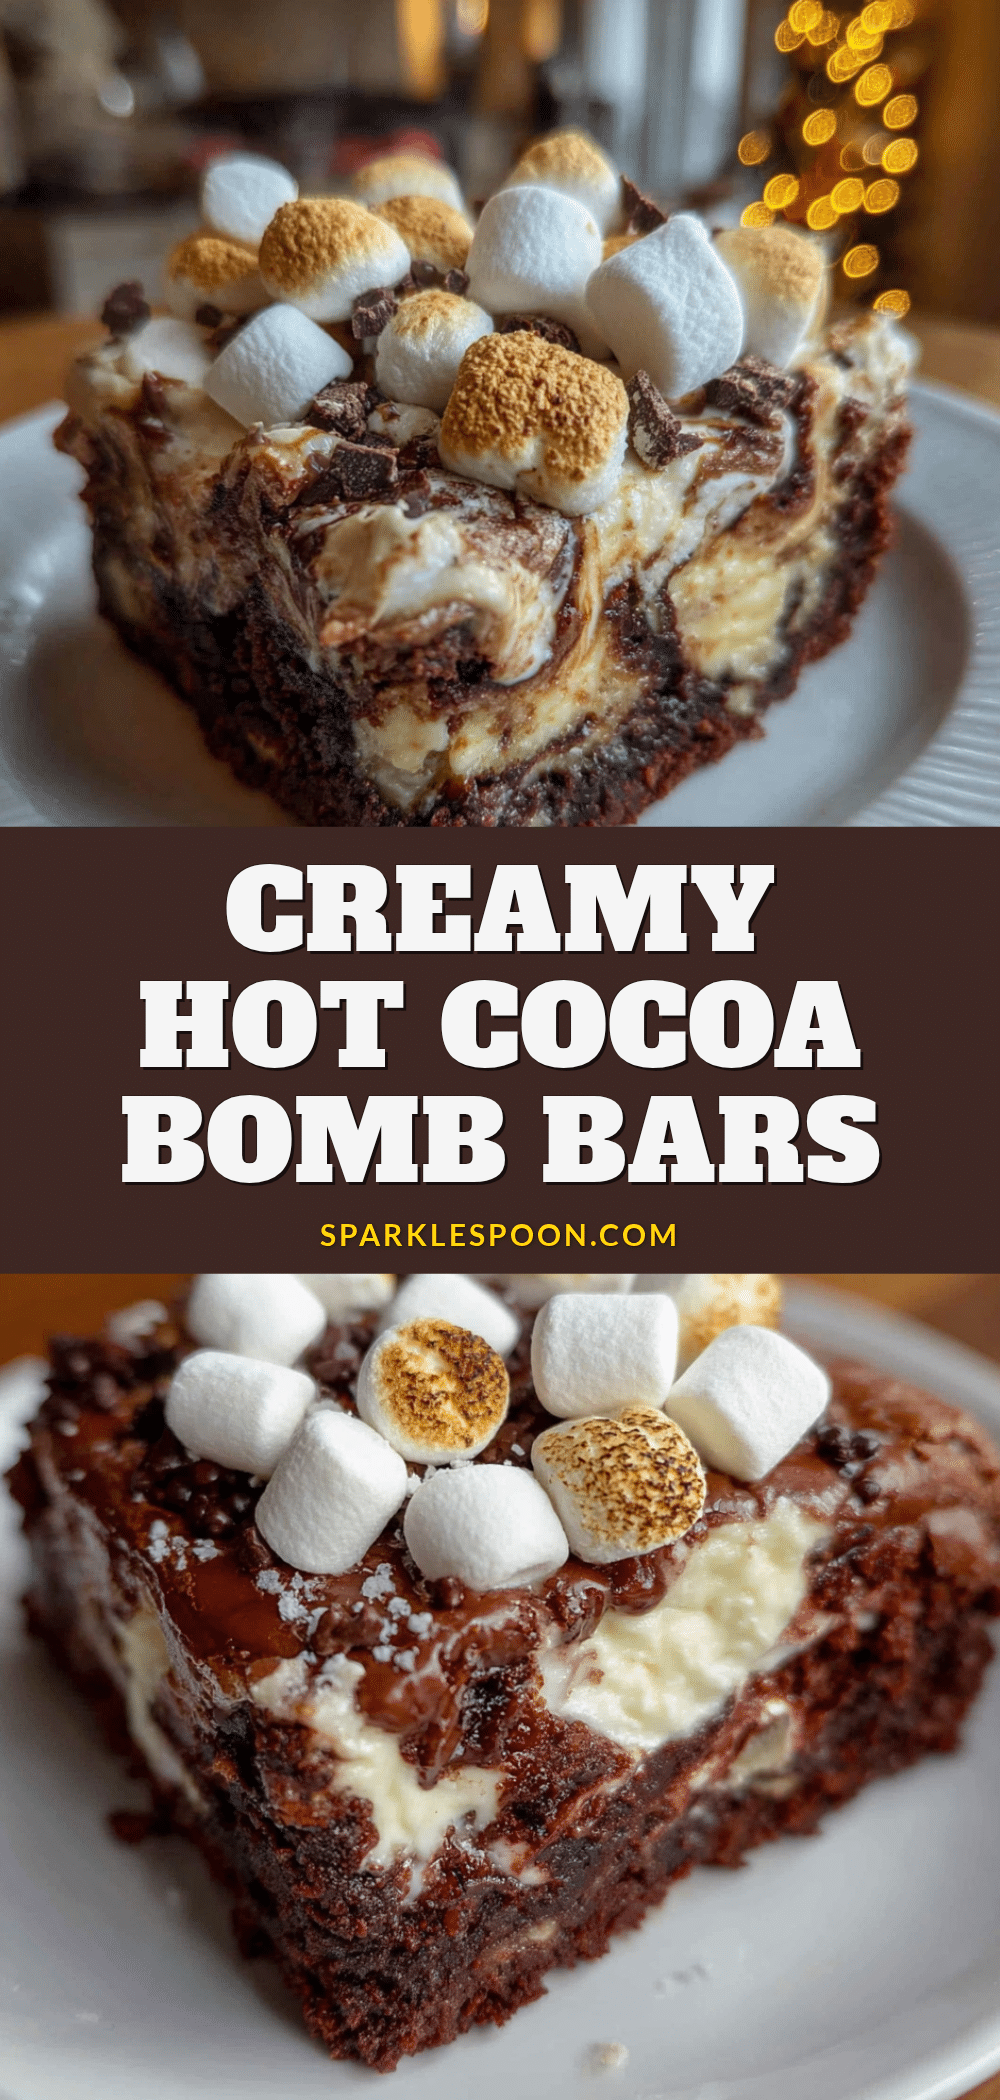
Creamy Hot Cocoa Bomb Bars: Easy Marshmallow Treat

A no-bake, comforting dessert featuring a rich dark chocolate base topped with toasted marshmallows. These bars are quick to make, using simple pantry staples for an indulgent winter treat.
- Prep Time: 10 minutes
- Cook Time: 20 minutes
- Total Time: 30 minutes
- Yield: 9 servings 1x
- Category: Dessert
- Cuisine: American
Ingredients
- 1 cup (2 sticks) unsalted butter, softened
- 1/2 cup heavy cream
- 3/4 cup dark cocoa powder
- 1 cup granulated sugar
- 1 teaspoon vanilla extract
- 1/2 teaspoon salt
- 2 cups mini marshmallows
- 1/2 cup white chocolate chips (optional)
- 1/4 cup crushed peppermint candy (optional)
Instructions
- Line an 8×8 inch baking pan with parchment paper, leaving an overhang on the sides for easy removal.
- In a large saucepan over medium heat, combine butter, heavy cream, cocoa powder, sugar, and salt.
- Stir constantly until the mixture reaches a gentle simmer and the cocoa is fully dissolved, about 5 minutes. Do not let it boil vigorously.
- Remove the pan from heat and stir in the vanilla extract.
- Add 1 cup of mini marshmallows to the hot chocolate mixture and stir gently until mostly melted and incorporated.
- Pour the mixture into the prepared pan and press down evenly to form a firm, flat base. Let cool for 10 minutes.
- Sprinkle the remaining 1 cup of mini marshmallows evenly over the base. Add white chocolate chips if using.
- Place the pan under a preheated broiler for 1-2 minutes, watching closely, until marshmallows puff up and turn golden brown. Alternatively, use a kitchen torch.
- Let the bars cool completely at room temperature to allow the topping to firm up.
- Lift the bars out of the pan using the parchment paper, slice into squares, and sprinkle with crushed peppermint if desired.
Notes
Keep heat low when melting the base to prevent burning the cocoa. Watch marshmallows closely under the broiler as they burn quickly. Bars are best stored in an airtight container at room temperature for up to 3 days. For dairy-free, substitute butter and cream with coconut-based alternatives.
Nutrition
- Serving Size: 1 bar (approx. 100g)
- Calories: 250
- Sugar: 24
- Sodium: 120
- Fat: 15
- Saturated Fat: 9
- Carbohydrates: 30
- Fiber: 2
- Protein: 3
Keywords: hot cocoa, marshmallow bars, no-bake dessert, winter treats, chocolate dessert, easy recipes, holiday baking



