Love this? Save it for later!
Share the inspiration with your friends
The office holiday cookie exchange was in forty-five minutes and I had absolutely nothing prepared. Everyone else was already posting photos of their elaborate, multi-tiered gingerbread houses and macarons dusted with edible gold. I stood in my kitchen, staring at an empty mixing bowl, while the microwave clock ticked down the seconds. My brain was racing, trying to remember if I had any baking soda left. I opened the pantry and found a single, dented can of baking powder and a bag of chocolate chips that had been sitting there since last December.
Honestly, I felt like a fraud. I’m usually the person who plans three weeks ahead, but life got in the way. I grabbed a stick of butter and let it sit on the counter, praying it would soften in time. I didn’t have time to chill the dough. I didn’t have time to make fancy decorations. I just needed something that looked good and tasted like home. I mixed everything together with a fork because I was too impatient to wash the mixer attachment. The dough was sticky and messy, and I dropped a spoonful on the floor. I picked it up and ate it before anyone saw.
I scooped uneven balls of dough onto a baking sheet and shoved them into the oven. I watched them like a hawk, terrified they would burn or spread into flat, sad pancakes. The smell that filled the apartment was suddenly overwhelming—warm vanilla and melting chocolate. It smelled like safety. It smelled like my childhood kitchen, even though I was making them alone in a city apartment.
When I pulled the tray out, they were golden brown at the edges but still soft in the middle. I let them cool on the pan for exactly two minutes, then transferred them to a wire rack. They looked rustic, maybe a little messy, but they had that perfect crackly top and chewy center. I took one to the party and set it on the table without saying much.
Two hours later, my coworker Sarah came up to me and asked for the recipe. She said they were the best thing on the table. I was stunned. I had panicked, rushed, and made a mess, yet these crispy chewy grandma’s chocolate chip cookies won the day. I keep making them because they remind me that you don’t need perfection to make something wonderful. Sometimes, you just need butter, sugar, and a little bit of panic. If you’ve ever been in that position, you know that feeling of relief when the oven timer goes off and everything turns out right.
Why You’ll Love This Recipe
This recipe isn’t just another cookie; it’s a lesson in texture. I’ve spent years testing chocolate chip cookies, trying to find that elusive balance between crisp and chew. Most recipes lean too far one way or the other. You get cookies that shatter when you bite them, or worse, cookies that are dense and cakey. This version hits the sweet spot every single time. The secret lies in the ratio of brown sugar to white sugar and the way the butter is handled.
Here is why this recipe stands out from the rest:
- Perfect Texture Balance: The edges get delightfully crispy while the center stays soft and chewy. It’s the kind of texture that makes you close your eyes after the first bite.
- Simple Ingredients: You likely have everything in your kitchen right now. No fancy flours or rare vanilla beans. Just pantry staples that you trust.
- Quick & Easy: No need to chill the dough for days. This is perfect for busy weeknights or when you have a sudden craving for something sweet.
- Crowd-Pleaser: These cookies are universally loved. Kids go crazy for the chocolate chips, and adults appreciate the subtle brown butter notes if you choose to take that step.
- Comfort Food Reimagined: It’s nostalgic but elevated. It tastes like your grandma’s kitchen but has a modern touch that keeps it fresh.
What makes this different is the attention to detail in the mixing process. I learned the hard way that overmixing develops gluten, which makes cookies tough. By mixing just until combined, you ensure a tender crumb. Also, using a mix of both white and brown sugar is crucial. The white sugar creates the crispy edges, while the brown sugar, with its molasses content, keeps the center moist and chewy. This isn’t just a cookie; it’s an experience. It’s the kind of recipe that makes your house smell amazing and brings people together. Whether you are baking for a party or just for yourself, these cookies deliver.
What Ingredients You Will Need
This recipe uses simple, wholesome ingredients to deliver bold flavor and satisfying texture without the fuss. The magic happens in how these basic components interact. You don’t need expensive specialty items, but you do need quality basics. Here is what you will need to make these crispy chewy grandma’s chocolate chip cookies.
- Unsalted Butter: 1 cup (2 sticks), softened to room temperature. Using unsalted butter allows you to control the saltiness. I recommend using a high-quality brand like Kerrygold for the best flavor.
- Granulated White Sugar: 3/4 cup. This sugar helps create those crisp, caramelized edges. Don’t skip this for all brown sugar, or the cookies will be too cakey.
- Light Brown Sugar: 1 cup, packed. Brown sugar adds moisture and a hint of molasses flavor. Dark brown sugar works too, but light is more traditional for this specific texture.
- Eggs: 2 large eggs, room temperature. Room temperature eggs emulsify better with the butter and sugar, creating a smoother dough.
- Vanilla Extract: 2 teaspoons. Use pure vanilla extract, not imitation. It makes a huge difference in the aroma and depth of flavor.
- All-Purpose Flour: 2 1/4 cups. This is the standard flour for cookies. If you want a slightly denser cookie, you can substitute 1/2 cup with bread flour, but all-purpose is safest.
- Baking Soda: 1 teaspoon. Baking soda helps the cookies spread and brown. Make sure it is fresh for best results.
- Salt: 1 teaspoon. Salt is not just for flavor; it balances the sweetness. If you use salted butter, reduce this to 1/2 teaspoon.
- Chocolate Chips: 2 cups. I prefer a mix of semi-sweet and milk chocolate chips. Using high-quality chips like Ghirardelli or Guittard ensures a rich chocolate taste.
- Flaky Sea Salt (Optional): For sprinkling on top after baking. This adds a sophisticated touch and contrasts with the sweet dough.
For the best results, make sure your butter is softened but not melted. If it’s too warm, the cookies will spread too much. If you are in a rush, you can soften butter by microwaving it in 5-second intervals, but be careful not to melt it. Also, measuring your flour correctly is important. Spoon the flour into the measuring cup and level it off. Do not scoop directly from the bag, as this packs too much flour and leads to dry cookies.
Equipment Needed
You don’t need a lot of fancy gadgets to make these cookies, but having the right tools makes the process smoother.
- Mixing Bowls: One large bowl for dry ingredients and one medium bowl for wet ingredients. A glass or stainless steel bowl is best because it doesn’t retain heat.
- Hand Mixer or Stand Mixer: While you can mix by hand, a mixer ensures the butter and sugar are creamed properly. This step is crucial for texture.
- Measuring Cups and Spoons: Accurate measurements are key in baking. Use a set of metal or plastic measuring cups for dry ingredients and liquid measuring cups for wet ones.
- Baking Sheets: Heavy-gauge aluminum baking sheets are ideal. They conduct heat evenly and prevent burning. Avoid thin, flimsy sheets that warp in the oven.
- Parchment Paper: Lining your baking sheets with parchment paper prevents sticking and makes cleanup a breeze. It also helps with even browning.
- Wire Cooling Rack: This allows air to circulate around the cookies, stopping the cooking process and preventing them from becoming soggy.
- Cookie Scoop: A medium cookie scoop (about 1.5 tablespoons) ensures uniform size. This helps the cookies bake evenly so you don’t have some burnt and some raw.
If you don’t have a mixer, you can use a wooden spoon, but it will take more arm strength. For baking sheets, if you don’t have heavy-gauge ones, rotate the pans halfway through baking to ensure even browning. A wire cooling rack is essential; placing hot cookies on a plate will steam them and make them soft in the wrong way.
Preparation Method
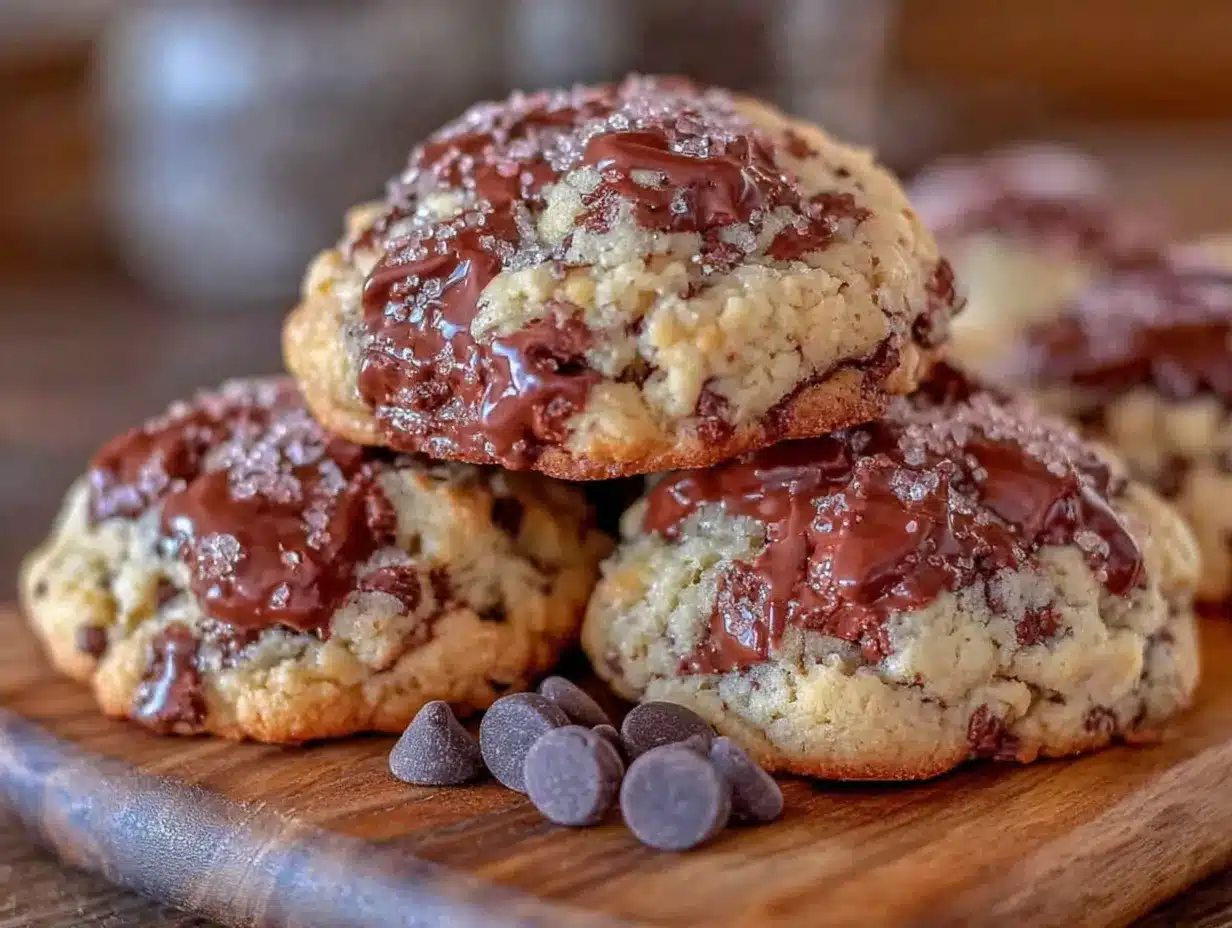
Making these crispy chewy grandma’s chocolate chip cookies is straightforward if you follow the steps carefully. Here is how to do it right.
- Preheat and Prepare: Preheat your oven to 375°F (190°C). Line two large baking sheets with parchment paper. This step is non-negotiable for easy cleanup and even baking.
- Cream the Butter and Sugars: In a large mixing bowl, beat the softened butter, granulated sugar, and brown sugar together. Use a hand mixer on medium speed for about 2-3 minutes. You want the mixture to look light, fluffy, and pale. This incorporates air, which helps the cookies rise slightly and stay chewy.
- Add Eggs and Vanilla: Add the eggs one at a time, beating well after each addition. Scrape down the sides of the bowl with a spatula to ensure everything is combined. Mix in the vanilla extract. The mixture should look smooth and glossy.
- Combine Dry Ingredients: In a separate medium bowl, whisk together the flour, baking soda, and salt. Whisking ensures the baking soda is evenly distributed, preventing bitter spots.
- Mix Wet and Dry: Gradually add the dry ingredients to the wet ingredients. Mix on low speed until just combined. Do not overmix! Stop as soon as you no longer see streaks of flour. Overmixing develops gluten, leading to tough cookies.
- Fold in Chocolate Chips: Use a spatula to gently fold in the chocolate chips. If you want a more even distribution, chop some of the chips into smaller pieces. This ensures every bite has chocolate.
- Scoop the Dough: Use a cookie scoop or spoon to drop mounds of dough onto the prepared baking sheets. Leave about 2 inches between each cookie because they will spread. If you are making larger cookies, space them 3 inches apart.
- Bake: Bake for 9-11 minutes. The cookies are done when the edges are golden brown but the centers still look slightly soft and underbaked. They will continue to cook on the hot baking sheet after you remove them from the oven.
- Cool: Let the cookies cool on the baking sheet for 5 minutes. This allows them to set. Then, transfer them to a wire cooling rack to cool completely. If you move them too soon, they might break.
Watch the cookies closely in the last few minutes. Ovens vary, so your cookies might bake faster or slower than the time listed. The visual cue of golden edges is more reliable than the timer.
Cooking Tips & Techniques
I’ve made plenty of mistakes in the kitchen, and some of them were cookie disasters. Here are some tips to help you avoid common pitfalls and ensure success.
- Butter Temperature: This is the most important factor. Your butter should be soft enough to leave an indent when you press it, but not so soft that it is greasy. If it melts, your cookies will spread too much. If it’s too hard, they won’t spread enough.
- Don’t Overmix: I once mixed my dough for five minutes because I wanted it “perfect.” The result was tough, hard cookies. Mix only until the flour disappears. It’s okay if the dough looks a little shaggy.
- Chill the Dough (Optional): While this recipe doesn’t require chilling, if you have time, chill the dough for 30 minutes. This solidifies the fat, which helps the cookies hold their shape and develop a deeper flavor.
- Rotate the Pans: If your oven has hot spots, rotate the baking sheets halfway through baking. This ensures both sides brown evenly.
- Underbake Slightly: For chewy cookies, underbake them slightly. They should look soft in the middle when you take them out. The residual heat will finish the cooking process.
- Use a Scale: For the most accurate results, use a kitchen scale to weigh your flour. Volume measurements can vary, but weight is consistent.
One of my biggest lessons was learning that “golden brown” means different things to different ovens. Learn your oven’s quirks. If your cookies burn on the bottom, try using a double layer of parchment paper or switching to a lighter colored pan.
Variations & Adaptations
While the classic chocolate chip version is timeless, you can adapt this recipe to suit your tastes or dietary needs.
- White Chocolate Macadamia: Swap the chocolate chips for white chocolate chips and macadamia nuts. This adds a tropical twist and a buttery crunch.
- Peanut Butter: Add 1/2 cup of creamy peanut butter to the dough. This adds protein and a savory-sweet flavor that pairs well with chocolate.
- Gluten-Free: Use a 1:1 gluten-free flour blend. Make sure it contains xanthan gum, or add 1/2 teaspoon to help bind the dough.
- Vegan: Use vegan butter and flax eggs (1 tablespoon ground flaxseed mixed with 3 tablespoons water per egg). The texture might be slightly different, but the flavor will still be great.
- Double Chocolate: Add 2 tablespoons of cocoa powder to the dry ingredients and use dark chocolate chips for a richer chocolate experience.
I tried making these with almond flour once, but they were too crumbly. The all-purpose flour provides the structure needed for the chewy texture. If you are experimenting, start with small batches to see how your modifications affect the outcome.
Serving & Storage Suggestions
These cookies are best served slightly warm, straight out of the oven. They pair wonderfully with a cold glass of milk or a hot cup of coffee. For a fancy touch, serve them with a scoop of vanilla ice cream or a dollop of whipped cream.
To store, keep the cookies in an airtight container at room temperature for up to one week. Place a slice of bread in the container with the cookies; the bread will stay soft and transfer moisture to the cookies, keeping them chewy. For longer storage, freeze the dough balls. Place them on a baking sheet and freeze until solid, then transfer to a freezer bag. You can bake them straight from frozen, adding 1-2 minutes to the baking time.
Reheating leftovers is easy. Warm them in the microwave for 10-15 seconds to restore that fresh-baked softness. The flavors actually develop over the first day, so they often taste even better the next day.
Nutritional Information & Benefits
While these are definitely a treat, understanding their nutritional profile can help you enjoy them mindfully. One cookie (approx. 50g) contains about 150-180 calories, depending on the size. They are a source of carbohydrates from the flour and sugars, and fats from the butter and chocolate.
The eggs provide protein, and the chocolate chips offer a small amount of antioxidants if you use dark chocolate. For those with dietary restrictions, the gluten-free adaptation makes this recipe accessible to more people. However, they are not low-carb or keto-friendly due to the high sugar and flour content. Enjoy these as an occasional indulgence. They are a comfort food that brings joy, and that emotional benefit is part of their value.
Conclusion
These crispy chewy grandma’s chocolate chip cookies are worth the effort because they deliver on every level. They are easy to make, delicious to eat, and perfect for sharing. I encourage you to try this recipe and make it your own. Add nuts, swap the chocolate, or sprinkle with sea salt. The base recipe is a solid foundation for creativity.
I love this recipe because it connects me to my past while fitting into my busy present. It’s reliable and comforting. I hope you enjoy making them as much as I do. Please share your results in the comments below! I’d love to hear how they turned out and see your variations. Don’t forget to share this recipe with friends who love baking. Happy baking!
FAQs
Why are my cookies flat?
This usually happens if the butter is too warm or melted. Make sure your butter is softened but still firm. Also, check that your baking soda is fresh, as old baking soda won’t provide enough lift.
Can I use brown butter?
Yes! Brown butter adds a nutty, deep flavor that is amazing. Let the brown butter cool completely before using it in the recipe. If it’s warm, it will melt the other ingredients and change the dough consistency.
How do I make them chewier?
Increase the ratio of brown sugar to white sugar. Brown sugar retains moisture, leading to a chewier texture. Also, slightly underbake the cookies so the centers remain soft.
Can I freeze the dough?
Absolutely. Scoop the dough onto a baking sheet and freeze until solid. Then transfer to a bag. You can bake them straight from the freezer, just add a minute or two to the bake time.
What is the best chocolate for these cookies?
I recommend using high-quality semi-sweet chocolate chips or chunks. Brands like Ghirardelli or Guittard melt beautifully and have a rich flavor. Chopping up a chocolate bar also ensures good distribution.
Pin This Recipe!
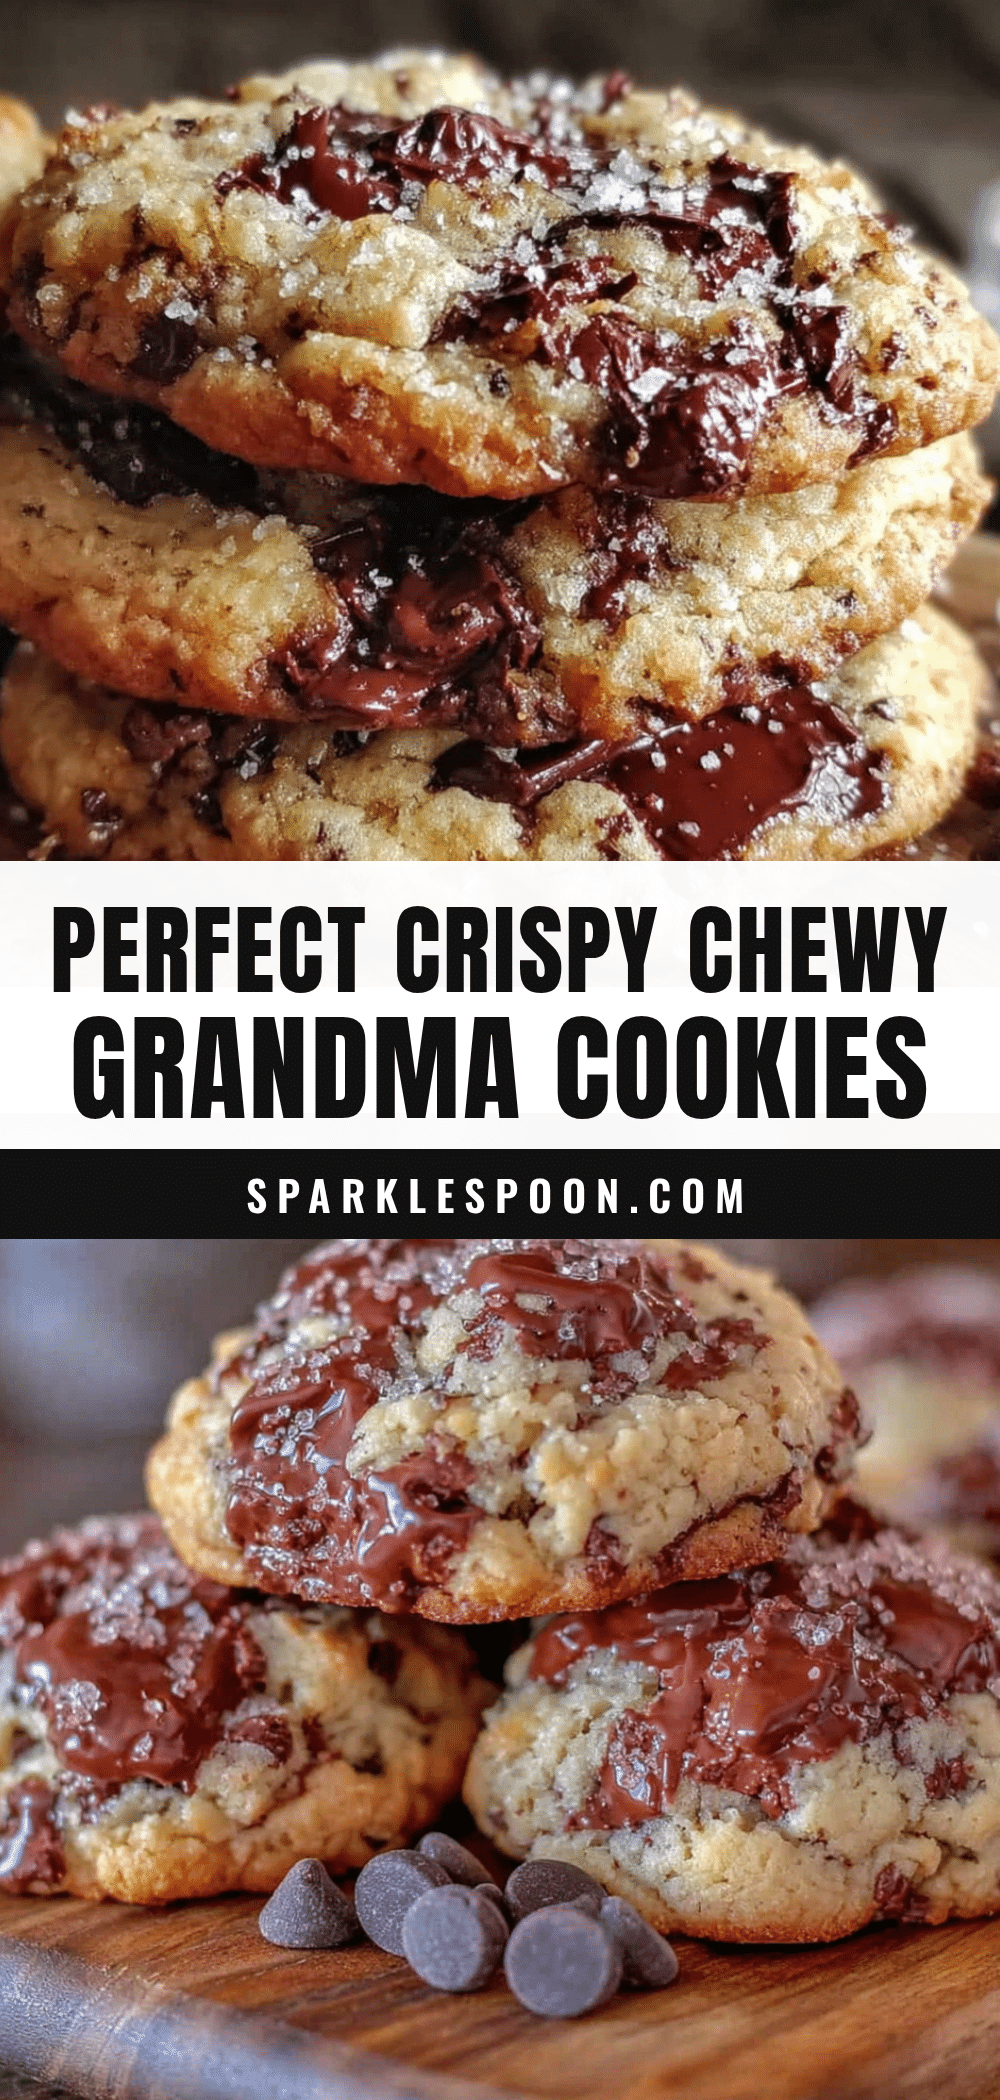
Crispy Chewy Grandmas Chocolate Chip Cookies: Best Easy Recipe
These crispy chewy grandma’s chocolate chip cookies offer the perfect balance of crisp edges and soft, chewy centers. Made with simple pantry staples, this easy recipe requires no chilling time and delivers nostalgic comfort food results.
- Prep Time: 15 minutes
- Cook Time: 11 minutes
- Total Time: 26 minutes
- Yield: Approximately 24 cookies 1x
- Category: Dessert
- Cuisine: American
Ingredients
- 1 cup (2 sticks) unsalted butter, softened to room temperature
- 3/4 cup granulated white sugar
- 1 cup light brown sugar, packed
- 2 large eggs, room temperature
- 2 teaspoons pure vanilla extract
- 2 1/4 cups all-purpose flour
- 1 teaspoon baking soda
- 1 teaspoon salt
- 2 cups chocolate chips (mix of semi-sweet and milk)
- Flaky sea salt (optional, for sprinkling on top)
Instructions
- Preheat your oven to 375°F (190°C). Line two large baking sheets with parchment paper.
- In a large mixing bowl, beat the softened butter, granulated sugar, and brown sugar together using a hand mixer on medium speed for 2-3 minutes until light, fluffy, and pale.
- Add the eggs one at a time, beating well after each addition. Scrape down the sides of the bowl with a spatula. Mix in the vanilla extract until the mixture is smooth and glossy.
- In a separate medium bowl, whisk together the flour, baking soda, and salt.
- Gradually add the dry ingredients to the wet ingredients. Mix on low speed until just combined. Do not overmix.
- Use a spatula to gently fold in the chocolate chips.
- Scoop mounds of dough onto the prepared baking sheets, leaving about 2 inches between each cookie.
- Bake for 9-11 minutes, or until the edges are golden brown but the centers still look slightly soft.
- Let the cookies cool on the baking sheet for 5 minutes to set, then transfer them to a wire cooling rack to cool completely.
Notes
Ensure butter is softened but not melted to prevent excessive spreading. Do not overmix the dough to avoid tough cookies. For chewier cookies, slightly underbake them. Store in an airtight container with a slice of bread to maintain softness. Dough can be frozen for later baking.
Nutrition
- Serving Size: 1 cookie (approx. 50
- Calories: 165
- Sugar: 15
- Sodium: 180
- Fat: 9
- Saturated Fat: 5
- Carbohydrates: 22
- Fiber: 1
- Protein: 2
Keywords: chocolate chip cookies, crispy chewy cookies, grandma's cookies, easy cookie recipe, no chill cookies, baking from scratch



