Love this? Save it for later!
Share the inspiration with your friends
Introduction
I was standing in the spice aisle of my local grocery store last October, staring at a jar of pumpkin pie spice like it held the secrets to the universe, when the scent of cinnamon from a nearby candle display hit me — and suddenly I was eight years old in my neighbor Mrs. Kowalski’s kitchen, watching her roll cookie dough in a cinnamon-sugar mixture that looked like magic dust.
Mrs. Kowalski wasn’t related to me, but she had this way of making you feel like family. She’d let me stand on a step stool beside her counter, and I’d sneak pinches of that sugary coating when she wasn’t looking. Honestly, I think she always knew. She’d just smile and hand me a warm cookie fresh from the oven, and the world felt right again.
I’d been chasing that feeling for years with regular snickerdoodles, and they were good — don’t get me wrong. But something was missing. Then, last fall, I had a half-can of pumpkin puree sitting in my fridge and a sudden, ridiculous idea. What if I combined the two? What if those soft, pillowy snickerdoodles got a fall makeover?
The first batch came out lopsided — I forgot to chill the dough and they spread into flat, sad little discs. But the flavor? That was it. That was the cozy hug I’d been looking for. It took me five more tries to get the texture right, but these cozy pumpkin snickerdoodle cookies are the result of all that trial and error. They’re the cookie version of wrapping your hands around a warm mug of cider on a crisp October afternoon.
Maybe you’ve been there — standing in your kitchen, wanting something familiar but also wanting something new. These cookies are exactly that. They taste like tradition, but they surprise you with every bite.
Why You’ll Love This Recipe
Let me tell you why these cookies have become my most-requested fall recipe. I mean, I’ve brought them to three different gatherings this season alone, and I’ve had to email the recipe to at least a dozen people. That’s not bragging — that’s just how good they are.
- Quick & Easy: From start to finish, you’re looking at about 30 minutes. The dough needs a quick chill (20 minutes in the freezer), but the active prep time is minimal. Perfect for those evenings when a cookie craving hits out of nowhere.
- Simple Ingredients: You probably have most of these in your pantry right now. Butter, sugar, flour, eggs — the usual suspects. The only “special” ingredient is pumpkin puree, and honestly, that’s pretty standard this time of year.
- Perfect for Fall Gatherings: These cookies were made for Thanksgiving dessert tables, Halloween parties, or just a random Tuesday when you need something warm and comforting. They travel well, too — I’ve packed them for road trips and they hold up beautifully.
- Crowd-Pleaser: Kids devour them. Adults sneak seconds. I watched my uncle — who “doesn’t do pumpkin” — eat three in a row without saying a word. That’s the kind of impact we’re talking about.
- Unbelievably Delicious: The texture is what gets people. These aren’t your typical snickerdoodles. The pumpkin makes them incredibly soft and tender, almost like a little cake in cookie form. And that cinnamon-sugar coating? It creates this delicate crunch that gives way to the pillowy inside. It’s next-level comfort food, honestly.
What makes these different from every other pumpkin cookie recipe out there? It’s the technique. I tested this recipe seven times to get the balance right — enough pumpkin for moisture and flavor, but not so much that the cookies turn into puddles. The chilling step is non-negotiable, and I’ll explain why later. But trust me, this isn’t just another version of pumpkin snickerdoodles. This is the best version.
These cookies make you close your eyes after the first bite. I’m not kidding. There’s something about that combination of warm spices and soft texture that just hits different. It’s comfort food reimagined — familiar enough to feel safe, but special enough to feel like an occasion.
What Ingredients You Will Need
This recipe uses simple, wholesome ingredients that come together to create something truly special. Most of these are pantry staples, especially if you do any fall baking. Let me walk you through each one and why it matters.
For the Cookies:
- Unsalted butter, softened (1 cup / 2 sticks) — I always use unsalted so I can control the salt level. Let it sit out for about 30 minutes before starting. You want it soft but not melted.
- Granulated sugar (1 cup / 200g) — Regular white sugar is perfect here. It gives the cookies structure and sweetness without any molasses flavor.
- Light brown sugar, packed (½ cup / 100g) — This is my secret weapon. The brown sugar adds moisture and a hint of caramel flavor that pairs beautifully with the pumpkin. Don’t skip it.
- Pumpkin puree (¾ cup / 170g) — Not pumpkin pie filling! Make sure you’re getting 100% pure pumpkin puree. I prefer Libby’s brand for consistent results, but store brands work fine too. Pat the puree with a paper towel to remove excess moisture — this is crucial for preventing flat cookies.
- Large egg (1, room temperature) — Room temperature eggs incorporate more evenly into the batter. If you forgot to take it out ahead of time, place it in a bowl of warm water for 5 minutes.
- Vanilla extract (2 teaspoons) — Pure vanilla extract makes a difference here. I’ve tried imitation vanilla and it just doesn’t give the same warmth.
- All-purpose flour (2 ¾ cups / 345g) — Spoon and level your flour for accuracy. Scooping directly from the bag can pack in too much flour and make your cookies dry.
- Cream of tartar (2 teaspoons) — This is what gives snickerdoodles their signature tangy flavor and chewy texture. Don’t substitute it — there’s really no replacement.
- Baking soda (1 teaspoon) — Helps the cookies rise and spread just the right amount.
- Salt (½ teaspoon) — Balances the sweetness and enhances all the flavors.
- Ground cinnamon (1 teaspoon) — Warm, familiar, essential.
- Ground nutmeg (½ teaspoon) — Freshly grated if you have it, but pre-ground works perfectly fine.
- Ground ginger (¼ teaspoon) — Adds a little warmth without being overpowering.
- Ground cloves (⅛ teaspoon) — Just a pinch. Cloves are potent, so go easy.
For the Cinnamon-Sugar Coating:
- Granulated sugar (¼ cup / 50g)
- Ground cinnamon (1 ½ tablespoons) — I like to use a cinnamon blend here. Saigon cinnamon is stronger and more aromatic, but regular works great too.
One thing I learned the hard way: don’t skip patting the pumpkin puree dry. The first time I made these, I just dumped the puree straight in, and my cookies spread into thin, crispy discs that looked more like lace than cookies. Taking those extra 30 seconds to blot the moisture makes all the difference.
Equipment Needed
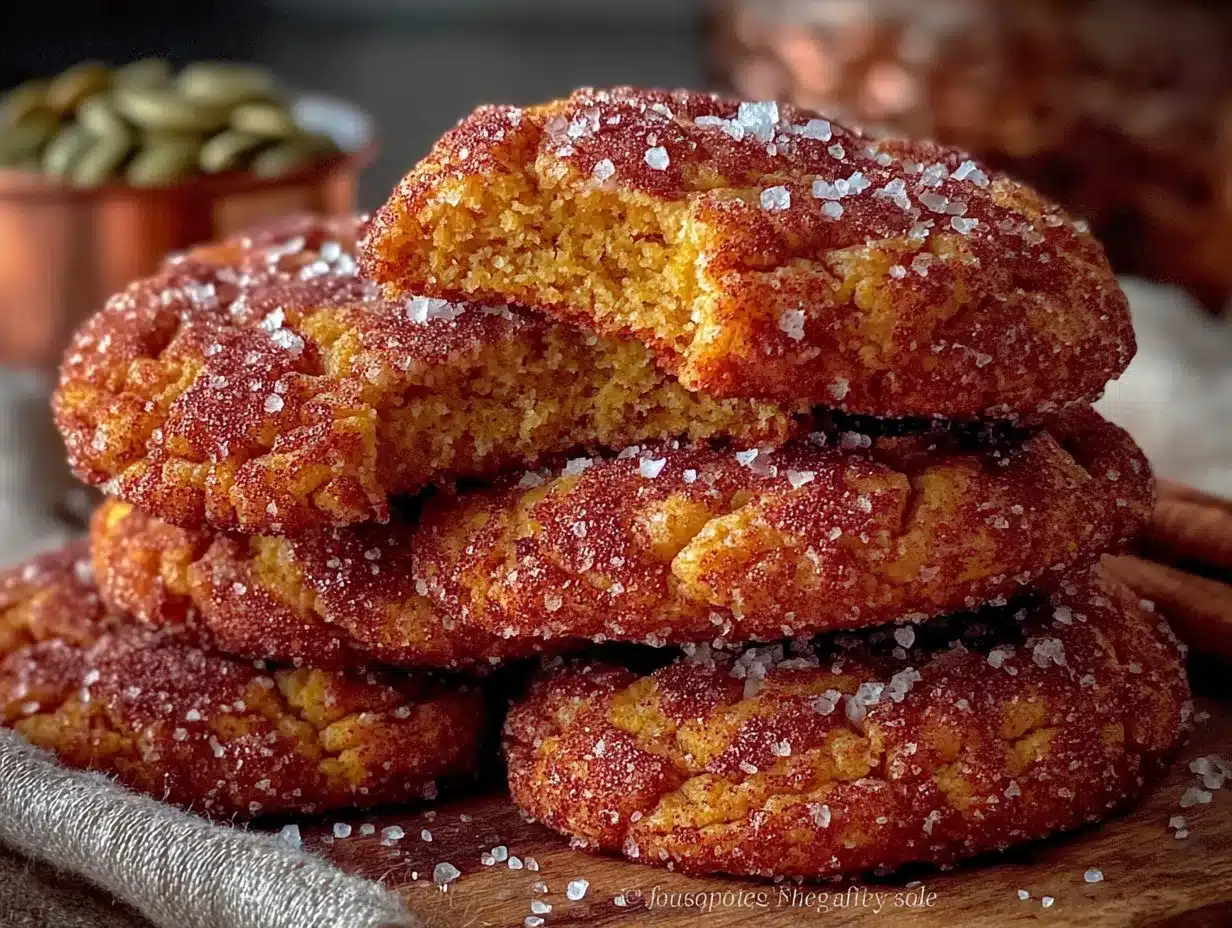
You don’t need anything fancy for these cookies. Here’s what you’ll need:
- Mixing bowls (one large, one medium) — I use glass or stainless steel. Plastic bowls can retain grease and affect your dough.
- Electric hand mixer or stand mixer — You can do this by hand with a wooden spoon, but a mixer makes creaming the butter and sugar much easier. I’ve done both, and the mixer saves about 10 minutes of arm work.
- Rubber spatula — For scraping down the sides of the bowl and folding in the flour mixture.
- Baking sheets (2) — Light-colored aluminum sheets work best. Dark sheets can cause the bottoms to brown too quickly.
- Parchment paper or silicone baking mats — Parchment is my preference because it’s disposable and gives consistent results. Silicone mats work too, but cookies might spread slightly more.
- Cookie scoop (1.5-tablespoon size) — This ensures uniform cookies that bake evenly. If you don’t have one, use a spoon and try to make each portion roughly the same size.
- Cooling rack — Letting cookies cool on the baking sheet can lead to over-baking from residual heat. A wire rack stops the cooking process at the perfect moment.
- Small bowl — For the cinnamon-sugar coating.
- Plastic wrap — For chilling the dough.
If you don’t have a mixer, don’t worry. I made these cookies by hand once when my mixer broke mid-batch, and they turned out just as good. It’s a great arm workout, honestly.
Preparation Method
Alright, let’s make some cookies. I’ve broken this down into clear steps so you can follow along without any confusion. Trust the process, especially the chilling part — it matters more than you think.
Step 1: Prepare the Pumpkin Puree (5 minutes)
Open your can of pumpkin puree and measure out ¾ cup. Spread it on a plate lined with paper towels. Place another paper towel on top and press gently to absorb excess moisture. Let it sit while you prepare the other ingredients. This step prevents your cookies from becoming too wet and spreading too much.
Step 2: Cream Butter and Sugars (3-4 minutes)
In a large mixing bowl, beat the softened butter, granulated sugar, and brown sugar together until light and fluffy. This should take about 3-4 minutes with an electric mixer on medium speed. Scrape down the sides of the bowl halfway through. The mixture should look pale and airy — that’s how you know you’ve incorporated enough air for a tender cookie.
Step 3: Add Wet Ingredients (2 minutes)
Add the pumpkin puree, egg, and vanilla extract to the butter mixture. Beat on medium speed until fully combined. The mixture might look slightly curdled at this point — that’s normal, don’t panic. It will come together once you add the dry ingredients.
Step 4: Combine Dry Ingredients (2 minutes)
In a separate medium bowl, whisk together the flour, cream of tartar, baking soda, salt, cinnamon, nutmeg, ginger, and cloves. Whisking ensures the leavening agents and spices are evenly distributed throughout the flour. Nobody wants a bite with all the baking soda in one spot.
Step 5: Mix Dry into Wet (2-3 minutes)
Gradually add the dry ingredients to the wet mixture, mixing on low speed or folding with a spatula. Mix just until the flour disappears — overmixing develops gluten and makes cookies tough. You want a soft, slightly sticky dough that holds together when pressed.
Step 6: Chill the Dough (20 minutes in freezer OR 1 hour in fridge)
Cover the bowl with plastic wrap and refrigerate for at least 1 hour, or pop it in the freezer for 20 minutes if you’re in a hurry. This step is non-negotiable. Chilling solidifies the fat in the dough, which prevents the cookies from spreading too much in the oven. The first time I skipped this, my cookies turned into flat, greasy puddles. Learn from my mistake.
Step 7: Preheat and Prepare (10 minutes)
About 10 minutes before you’re ready to bake, preheat your oven to 350°F (175°C). Line two baking sheets with parchment paper. While the oven heats, make your cinnamon-sugar coating by mixing the ¼ cup sugar and 1½ tablespoons cinnamon in a small bowl.
Step 8: Shape and Coat the Cookies (10 minutes)
Using a 1.5-tablespoon cookie scoop, portion out the dough. Roll each portion into a smooth ball between your palms. Drop each ball into the cinnamon-sugar mixture and roll around until fully coated. Place them on the prepared baking sheets, spacing them about 2 inches apart. They will spread, but not excessively if you chilled the dough properly.
Step 9: Bake (10-12 minutes)
Bake one sheet at a time in the center of the oven. Bake for 10-12 minutes, or until the edges are set and the tops look slightly cracked. The centers will look soft and puffy — that’s perfect. They will continue to set as they cool. For softer cookies, bake for 10 minutes. For slightly crisper edges, go for 12.
Step 10: Cool (10 minutes)
Let the cookies rest on the baking sheet for 5 minutes. This allows them to firm up enough to handle. Then transfer to a wire cooling rack to cool completely. The smell in your kitchen right now is absolutely intoxicating — take a moment to enjoy it.
Cooking Tips & Techniques
I’ve made these cookies so many times that I’ve learned a few tricks along the way. Let me share what I’ve discovered so you don’t have to make the same mistakes I did.
Don’t overmix the dough. I know I said this already, but it bears repeating. When you overmix, you develop gluten, and gluten makes cookies tough and chewy in a bad way. Mix until the flour just disappears, then stop. A few streaks of flour are better than overmixed dough.
Use a cookie scoop for uniform size. This isn’t just about aesthetics — uniform cookies bake evenly. If some are bigger than others, the small ones will burn while the big ones stay undercooked. A 1.5-tablespoon scoop gives you the perfect size.
Chill between batches. If you’re baking multiple sheets, keep the remaining dough in the refrigerator between batches. Warm dough spreads more, and you want consistent results across all your cookies.
Rotate your baking sheet halfway through. Ovens have hot spots. About 5 minutes into baking, rotate the sheet 180 degrees. This ensures even browning and prevents one side from getting too dark.
Test your baking soda freshness. Baking soda loses potency over time. To test if yours is still active, drop a teaspoon of it into a small amount of vinegar. If it fizzes vigorously, it’s good. If not, buy a new box. Flat baking soda means flat cookies.
Let cookies cool completely before storing. I know it’s tempting to pack them up while they’re still warm, but trapped steam creates soggy cookies. Patience, my friend. Let them cool completely on a wire rack before moving to an airtight container.
I once forgot to add the cream of tartar and ended up with cookies that tasted like sweet biscuits. Not terrible, but definitely not snickerdoodles. That tangy flavor is the whole point, so don’t skip it.
Variations & Adaptations
One of the best things about this recipe is how versatile it is. I’ve played around with different variations, and here are some of my favorites.
Gluten-Free Version: Swap the all-purpose flour with a 1:1 gluten-free baking flour blend. I’ve tested this with Bob’s Red Mill and King Arthur brands, and both work beautifully. The texture might be slightly more delicate, so handle the dough gently. No other adjustments needed.
Dairy-Free Version: Use vegan butter sticks (not tub margarine) in place of regular butter. I like Miyoko’s or Country Crock Plant Butter. Make sure it’s softened just like regular butter. The cookies will be slightly less tender but still delicious.
Spice It Up: If you love warm spices, add an extra ¼ teaspoon of ginger and a pinch of cardamom to the dough. Cardamom pairs beautifully with pumpkin and gives the cookies a slightly exotic flavor. I tried this last Thanksgiving and got so many compliments.
Pumpkin Chocolate Chip Snickerdoodles: Fold in ½ cup of semi-sweet chocolate chips after mixing the dough. The chocolate adds richness that balances the spices. My kids beg for this version constantly.
Maple Glaze Variation: For an extra-special treat, mix 1 cup powdered sugar with 2 tablespoons maple syrup and 1 tablespoon milk. Drizzle over cooled cookies. This turns them into a dessert that feels fancy enough for a holiday party.
Less Sugar Option: Reduce the granulated sugar to ¾ cup and the brown sugar to ⅓ cup. The cookies will be less sweet but still flavorful. The texture might be slightly less tender, but they’re still delicious.
Serving & Storage Suggestions
These cookies are best enjoyed slightly warm, when the centers are still soft and the cinnamon-sugar coating is at its crunchiest. But let’s be real — they’re pretty amazing at room temperature too.
Serving Temperature: Serve at room temperature or slightly warm. If you want to warm them up, pop them in a 300°F oven for 3-4 minutes. Microwaving works too, but only for 10-15 seconds — any longer and they get tough.
Presentation Ideas: Arrange on a rustic wooden board or a white platter for maximum visual appeal. Sprinkle a little extra cinnamon over the top for a finished look. They look gorgeous alongside a pile of autumn leaves or mini pumpkins.
Perfect Pairings: These cookies were made for hot beverages. Serve with a mug of spiced chai, pumpkin spice latte, or good old-fashioned hot apple cider. For a dessert spread, pair them with vanilla ice cream or a dollop of whipped cream.
Storage Instructions: Store in an airtight container at room temperature for up to 5 days. Place a piece of bread in the container to keep them soft — the cookies will absorb moisture from the bread, keeping them tender. Replace the bread every couple of days if needed.
Freezer Instructions: These cookies freeze beautifully. Place cooled cookies in a single layer in a freezer-safe container, separating layers with parchment paper. Freeze for up to 3 months. To thaw, leave them at room temperature for about 30 minutes. You can also freeze the unbaked dough balls — just place them on a baking sheet, freeze until solid, then transfer to a freezer bag. Bake from frozen, adding 2-3 minutes to the baking time.
Flavor Development: Honestly, these cookies taste even better the next day. The spices have time to meld and mellow out, creating a more complex flavor. So if you can resist eating them all on day one, you’re in for a treat on day two.
Nutritional Information & Benefits
Let’s be honest — these are cookies, not health food. But they’re made with real ingredients, and there are a few nutritional bright spots worth mentioning.
Estimated Nutritional Values (per cookie, based on 24 cookies):
- Calories: 175
- Total Fat: 8g
- Saturated Fat: 5g
- Carbohydrates: 24g
- Sugar: 14g
- Protein: 2g
- Fiber: 1g
- Sodium: 95mg
Health Benefits: Pumpkin is rich in vitamin A, which supports eye health and immune function. The cinnamon in the coating has anti-inflammatory properties and may help regulate blood sugar. Not that you’re eating these for health reasons, but it’s nice to know there’s something beneficial hiding in all that deliciousness.
Dietary Considerations: This recipe contains gluten, dairy, and eggs. For gluten-free and dairy-free options, see the variations section above. These cookies are nut-free as written, making them safe for school events and parties.
Potential Allergens: Wheat, milk, eggs. If you’re serving these at a gathering, it’s good practice to label them so guests with allergies can make informed choices.
My personal philosophy? Life is short. Eat the cookie. Everything in moderation, including moderation.
Conclusion
These cozy pumpkin snickerdoodle cookies have become my go-to fall recipe for a reason. They’re easy enough for a Tuesday night baking session but special enough for holiday gatherings. The combination of warm spices, soft texture, and that signature cinnamon-sugar coating is just unbeatable.
I love how this recipe lets you have the best of both worlds — the nostalgia of a classic snickerdoodle and the cozy comfort of pumpkin season. Every batch reminds me of Mrs. Kowalski’s kitchen, even though she never made pumpkin snickerdoodles. Funny how recipes evolve, isn’t it?
I’d love to hear how these turn out for you. Did you try any variations? Did your family love them as much as mine does? Drop a comment below and let me know. And if you make these for a holiday party, take a picture — I want to see your beautiful cookies!
Until next time, happy baking. And remember — the secret ingredient is always a little bit of patience and a whole lot of love.
Frequently Asked Questions
Can I use pumpkin pie filling instead of pumpkin puree?
No, please don’t. Pumpkin pie filling has added sugar and spices that will throw off the balance of this recipe. Always use 100% pure pumpkin puree for best results.
Why did my cookies spread too much?
This usually happens for one of three reasons: the dough wasn’t chilled long enough, the butter was too soft, or the pumpkin puree wasn’t patted dry. Make sure to follow those steps carefully for perfectly shaped cookies.
Can I make these cookies ahead of time?
Absolutely. You can prepare the dough up to 3 days in advance and keep it refrigerated. You can also freeze the baked cookies or unbaked dough balls for up to 3 months.
How do I know when the cookies are done baking?
The edges should be set and slightly golden, while the centers still look soft and puffy. They will continue to bake on the hot baking sheet after you take them out of the oven, so don’t wait for the centers to look fully done.
Can I skip the cream of tartar?
I really wouldn’t recommend it. Cream of tartar gives snickerdoodles their signature tangy flavor and chewy texture. If you absolutely must substitute, you can use 1 teaspoon of lemon juice or white vinegar, but the flavor won’t be the same.
Pin This Recipe!
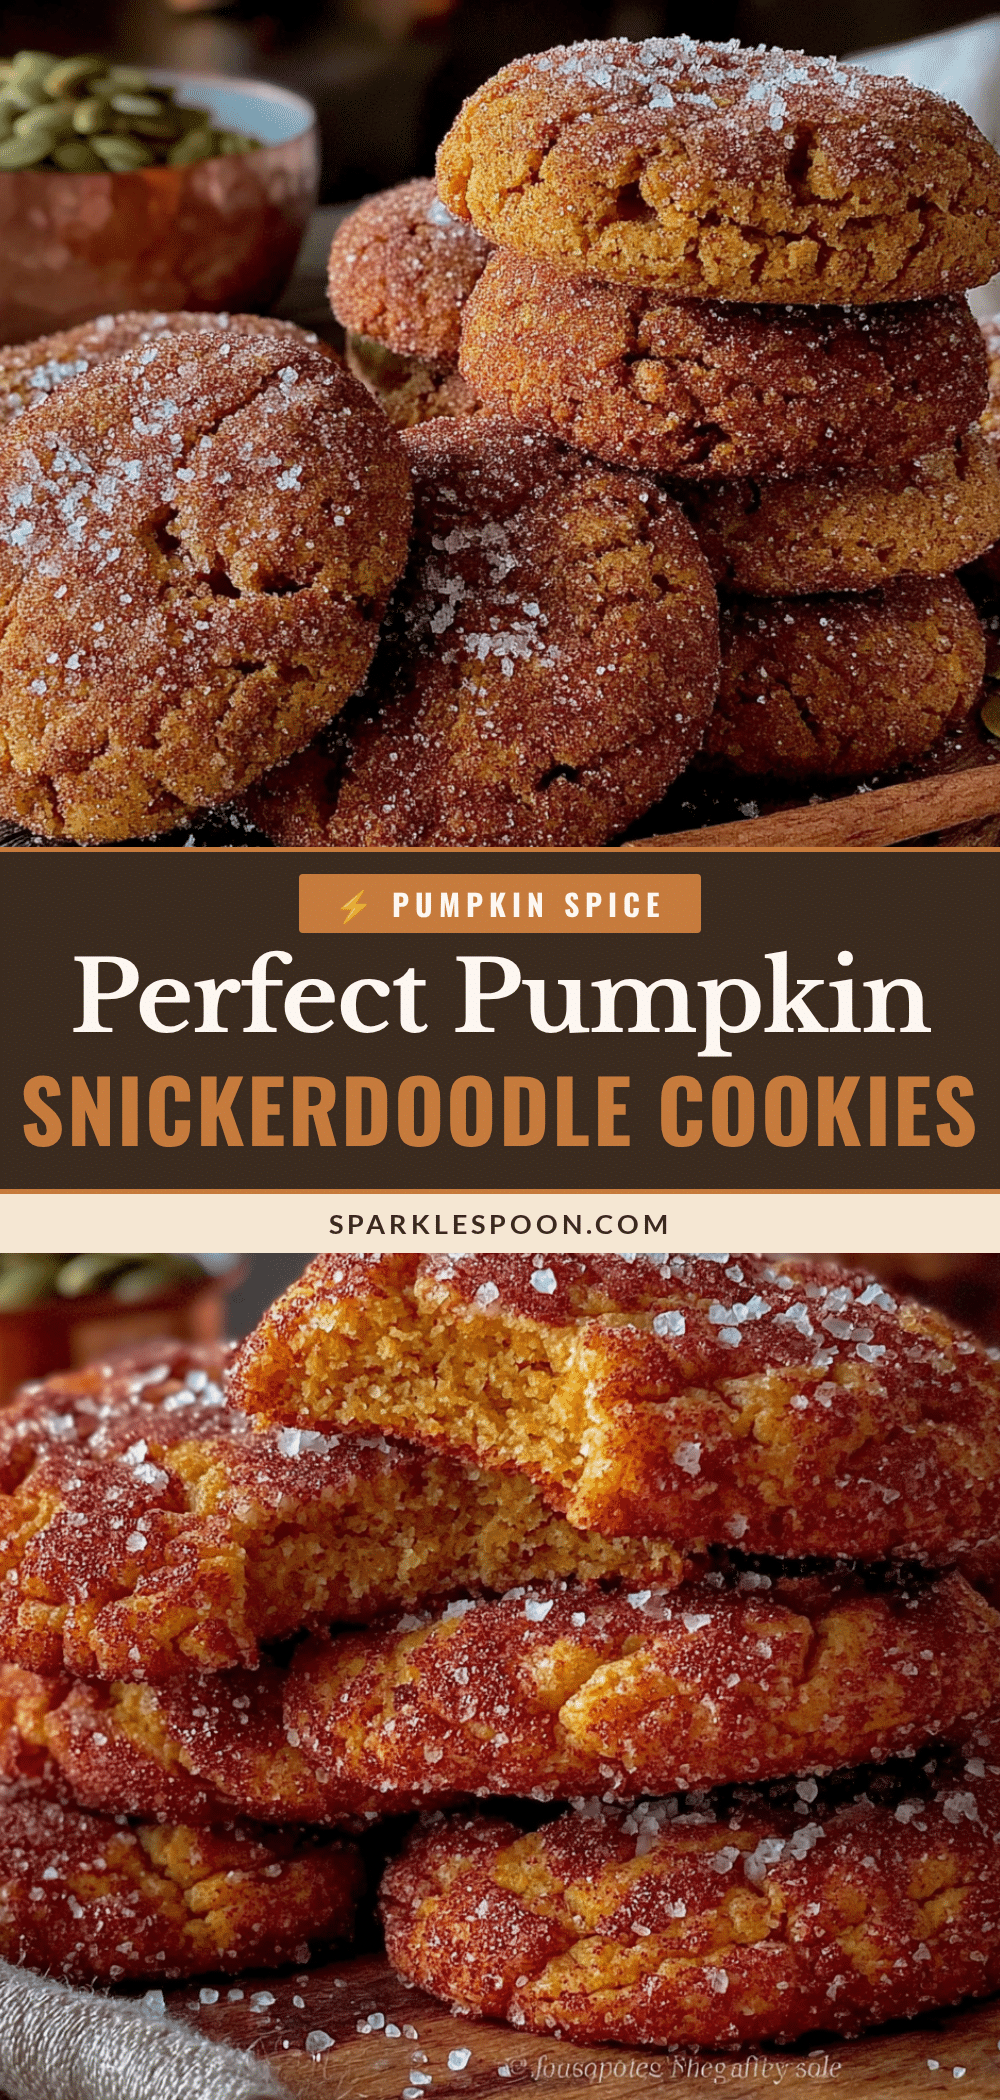
Cozy Pumpkin Snickerdoodle Cookies: Easy Fall Dessert

These soft, pillowy pumpkin snickerdoodle cookies combine the nostalgia of classic snickerdoodles with the cozy comfort of pumpkin season. With a delicate cinnamon-sugar crunch and tender, cake-like interior, they’re the perfect fall treat for any gathering.
- Prep Time: 15 minutes
- Cook Time: 12 minutes
- Total Time: 30 minutes (plus 1 hour chilling time)
- Yield: 24 servings 1x
- Category: Dessert
- Cuisine: American
Ingredients
- 1 cup (2 sticks) unsalted butter, softened
- 1 cup (200g) granulated sugar
- ½ cup (100g) light brown sugar, packed
- ¾ cup (170g) pumpkin puree (not pumpkin pie filling), patted dry
- 1 large egg, room temperature
- 2 teaspoons vanilla extract
- 2 ¾ cups (345g) all-purpose flour
- 2 teaspoons cream of tartar
- 1 teaspoon baking soda
- ½ teaspoon salt
- 1 teaspoon ground cinnamon
- ½ teaspoon ground nutmeg
- ¼ teaspoon ground ginger
- ⅛ teaspoon ground cloves
- ¼ cup (50g) granulated sugar (for coating)
- 1 ½ tablespoons ground cinnamon (for coating)
Instructions
- Prepare the pumpkin puree: Open the can of pumpkin puree and measure out ¾ cup. Spread it on a plate lined with paper towels. Place another paper towel on top and press gently to absorb excess moisture. Let it sit while you prepare the other ingredients.
- Cream butter and sugars: In a large mixing bowl, beat the softened butter, granulated sugar, and brown sugar together until light and fluffy, about 3-4 minutes with an electric mixer on medium speed. Scrape down the sides of the bowl halfway through.
- Add wet ingredients: Add the pumpkin puree, egg, and vanilla extract to the butter mixture. Beat on medium speed until fully combined. The mixture might look slightly curdled—this is normal.
- Combine dry ingredients: In a separate medium bowl, whisk together the flour, cream of tartar, baking soda, salt, cinnamon, nutmeg, ginger, and cloves.
- Mix dry into wet: Gradually add the dry ingredients to the wet mixture, mixing on low speed or folding with a spatula. Mix just until the flour disappears—do not overmix. The dough should be soft and slightly sticky.
- Chill the dough: Cover the bowl with plastic wrap and refrigerate for at least 1 hour, or freeze for 20 minutes if you’re in a hurry. This step is essential to prevent spreading.
- Preheat and prepare: About 10 minutes before baking, preheat your oven to 350°F (175°C). Line two baking sheets with parchment paper. In a small bowl, mix the ¼ cup sugar and 1½ tablespoons cinnamon for the coating.
- Shape and coat the cookies: Using a 1.5-tablespoon cookie scoop, portion out the dough. Roll each portion into a smooth ball between your palms. Drop each ball into the cinnamon-sugar mixture and roll until fully coated. Place on prepared baking sheets, spacing them about 2 inches apart.
- Bake: Bake one sheet at a time in the center of the oven for 10-12 minutes, or until the edges are set and the tops look slightly cracked. The centers will look soft and puffy.
- Cool: Let the cookies rest on the baking sheet for 5 minutes, then transfer to a wire cooling rack to cool completely.
Notes
Don’t skip patting the pumpkin puree dry—it prevents flat cookies. Chilling the dough is non-negotiable for proper texture. For softer cookies, bake for 10 minutes; for crisper edges, bake for 12. These cookies taste even better the next day as the spices meld. Store in an airtight container at room temperature for up to 5 days, or freeze for up to 3 months.
Nutrition
- Serving Size: 1 cookie
- Calories: 175
- Sugar: 14
- Sodium: 95
- Fat: 8
- Saturated Fat: 5
- Carbohydrates: 24
- Fiber: 1
- Protein: 2
Keywords: pumpkin snickerdoodle cookies, fall dessert, pumpkin cookies, snickerdoodle recipe, easy fall baking, pumpkin spice cookies



