Love this? Save it for later!
Share the inspiration with your friends
My neighbor, a retired baker named Frank, asked me why I couldn’t just skip the chilling step for my cookie dough. I started to explain the science — how the cold butter creates those perfect chewy centers, how the resting time develops flavor. Then I stopped. Honestly, I didn’t have a good answer. I’d been making cookies the same way for years because that’s what the recipes always said. So I tried it his way. No chilling. Straight from mixing bowl to oven.
The cookies spread a little more than I expected, and they weren’t as thick as my usual batch. But they were gone in about ten minutes flat, and Frank grabbed three before I could even offer. That moment taught me something important — sometimes the “wrong” way works perfectly, especially when you’re craving cookies right now.
These small-batch chocolate chip cookies are my answer to those late-night cravings when you don’t want to wait. They come together in one bowl with a spoon, no electric mixer required, and they’re ready from start to finish in about 20 minutes. You get six perfectly golden cookies with crispy edges and soft, gooey centers. No chilling, no complicated steps, no fuss. I mean, what more could you ask for on a Tuesday night when the cookie craving hits?
Why You’ll Love This Recipe
Let me tell you why this recipe has become my go-to when I need cookies fast. I’ve tested it about a dozen times to get the ratios just right, and I’m genuinely proud of how it turned out.
- Ready in 20 Minutes: From the moment you decide you want cookies to the moment you’re eating one warm, it’s about twenty minutes. That’s faster than ordering delivery.
- No Chilling Required: This is the whole point. You mix, scoop, and bake. No waiting around for dough to firm up in the fridge.
- Simple Ingredients: Butter, sugar, flour, an egg yolk, chocolate chips — you probably have everything already. No weird specialty items.
- Perfect Portion Control: Six cookies. That’s it. No giant batch tempting you for days, but enough to satisfy that craving.
- One Bowl, One Spoon: Less dishes means more time enjoying cookies. I’m all about that.
- Consistently Delicious: Every single time I make these, they turn out exactly the same. Golden edges, soft centers, melty chocolate in every bite.
What makes these different from every other cookie recipe? It’s the technique. Using melted butter and an egg yolk instead of a whole egg creates a dough that spreads beautifully without needing to chill. The butter is warm when it hits the dry ingredients, so the cookies start baking immediately. No waiting for cold dough to warm up in the oven. It’s simple food science that works every time.
These cookies are the kind that make you close your eyes after the first bite. They’re comfort food reimagined — faster, easier, but with the same soul-soothing satisfaction. Perfect for when you need a little treat without the production.
What Ingredients You Will Need
This recipe uses simple, wholesome ingredients to deliver that classic chocolate chip cookie experience without any unnecessary fuss. Here’s what you’ll need and why each one matters.
- Unsalted butter, melted (4 tablespoons / 57g): Melting the butter is key here. It eliminates the need for creaming and chilling. I use unsalted so I can control the salt level myself. Let it cool slightly after melting so it doesn’t cook the egg yolk.
- Light brown sugar, packed (3 tablespoons / 40g): Brown sugar brings moisture and that deep, caramel-like flavor. Pack it firmly into your measuring spoon for accuracy. Dark brown sugar works too, but light gives a more classic cookie taste.
- Granulated sugar (2 tablespoons / 25g): White sugar helps with spreading and gives those crispy edges. The combination of both sugars is what makes these cookies so good.
- Large egg yolk (1 yolk, about 18g): Just the yolk, not the whole egg. This gives you richness and tenderness without making the dough too wet. Save the white for scrambled eggs tomorrow.
- Vanilla extract (1/2 teaspoon): Pure vanilla makes a difference here since there aren’t many ingredients to hide behind. I prefer Nielsen-Massey, but any pure extract works fine. Skip imitation vanilla if you can.
- All-purpose flour (1/2 cup plus 1 tablespoon / 75g): Regular AP flour gives the perfect structure. Spoon it into your measuring cup and level it off — don’t scoop directly or you’ll pack in too much.
- Baking soda (1/4 teaspoon): This helps the cookies spread and brown properly. Make sure it’s fresh — test it by dropping a pinch into vinegar; if it fizzes, it’s good.
- Salt (1/4 teaspoon): Salt balances the sweetness and enhances the chocolate flavor. I use fine sea salt for even distribution.
- Semi-sweet chocolate chips (1/3 cup / 60g): Semi-sweet is my go-to because it’s not too sweet and not too bitter. Ghirardelli or Guittard are my favorites. You can also chop a chocolate bar for bigger puddles of chocolate.
For substitutions, you can use coconut oil instead of butter for a dairy-free version, though the texture will be slightly different. If you only have whole eggs, use one tablespoon of beaten egg and save the rest. Gluten-free all-purpose flour blends work well — just add an extra tablespoon of flour.
Equipment Needed
You don’t need much for this recipe, which is honestly my favorite part. Here’s what you’ll need:
- Medium mixing bowl: Any bowl works, but a wide one makes mixing easier. I use a ceramic bowl because it doesn’t slide around.
- Whisk or fork: For combining the wet ingredients. A fork works in a pinch if you don’t have a whisk.
- Rubber spatula or wooden spoon: For folding in the flour and chocolate chips. A spatula is gentler on the dough.
- Measuring cups and spoons: Accuracy matters with small batches. Use proper measuring spoons, not dinner spoons.
- Baking sheet: A standard half-sheet pan works perfectly. No need to grease it — the butter in the dough prevents sticking.
- Parchment paper or silicone baking mat: This ensures easy cleanup and prevents sticking. Parchment is cheaper, but silicone mats are reusable.
- Cookie scoop or tablespoon: For even-sized cookies. A #40 scoop (about 1.5 tablespoons) is perfect. If you don’t have one, use two spoons.
- Cooling rack: Optional but helpful for cooling cookies evenly. A plate works too.
I’ve made these with just a bowl and a spoon when I was visiting my sister’s house and didn’t have any of my usual tools. They still turned out great. Don’t let missing equipment stop you.
Preparation Method
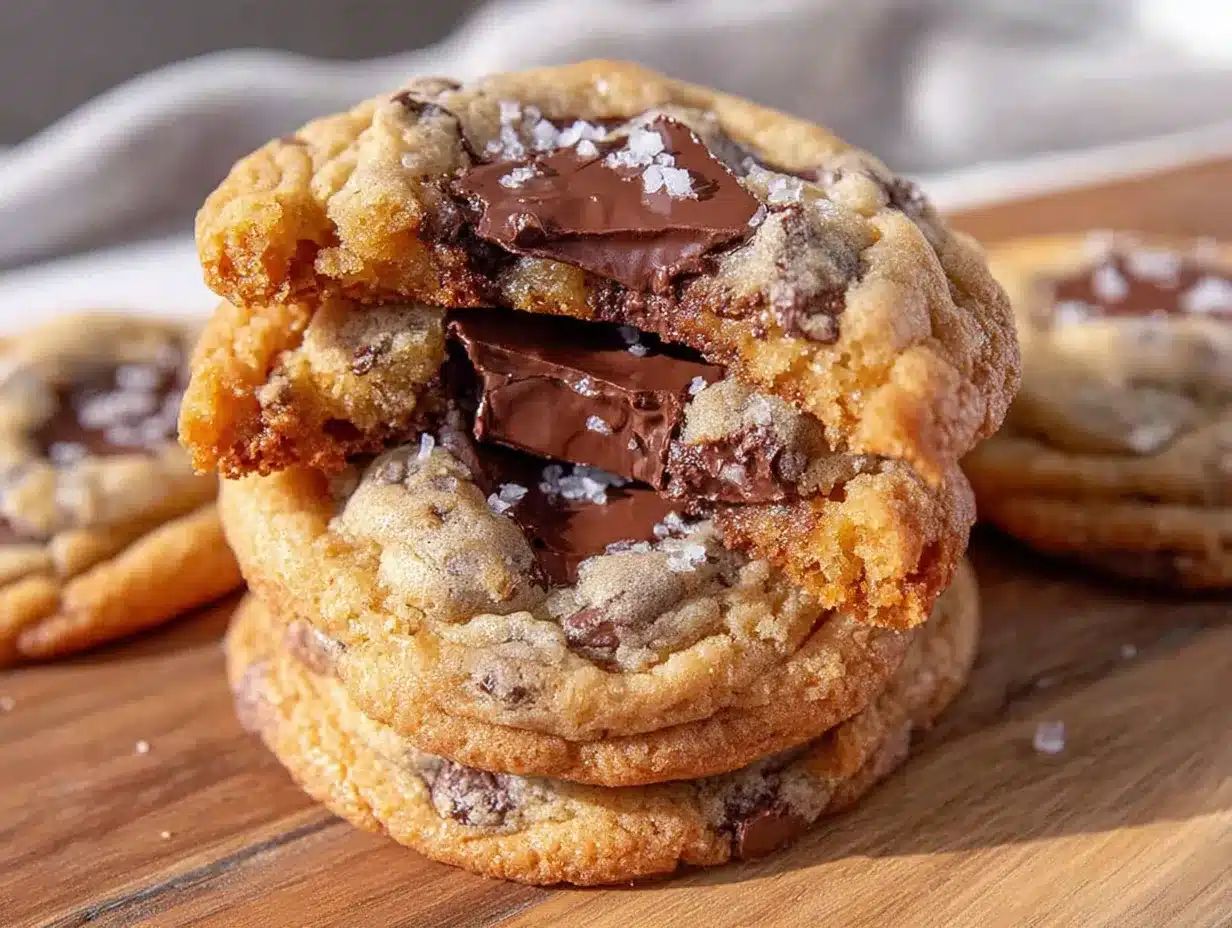
Let me walk you through this step by step. I’ve made these cookies so many times I could do it in my sleep, but I’ll share every detail so yours turn out perfect on the first try.
- Preheat your oven to 350°F (175°C). Line a baking sheet with parchment paper or a silicone mat. Getting the oven hot while you mix saves time — these cookies come together fast.
- Melt the butter. Place 4 tablespoons of butter in a microwave-safe bowl and heat in 15-second intervals until mostly melted. Stir until completely liquid. Let it cool for about 2 minutes — you want it warm, not hot. Hot butter will scramble the egg yolk, and nobody wants that.
- Combine the sugars and butter. In your medium mixing bowl, add the melted butter, 3 tablespoons brown sugar, and 2 tablespoons granulated sugar. Whisk together until smooth and slightly thickened, about 30 seconds. The mixture should look like wet sand — no sugar granules visible.
- Add the egg yolk and vanilla. Drop in the egg yolk and 1/2 teaspoon vanilla extract. Whisk vigorously for about 20 seconds until the mixture is pale, smooth, and slightly lighter in color. This is where the emulsion happens, giving you that shiny dough.
- Mix the dry ingredients separately. In a small bowl, whisk together 1/2 cup plus 1 tablespoon flour, 1/4 teaspoon baking soda, and 1/4 teaspoon salt. This ensures even distribution of the leavening agent. Trust me, nobody wants a pocket of baking soda in their cookie.
- Combine wet and dry. Add the flour mixture to the butter mixture. Fold gently with a rubber spatula or wooden spoon until just combined. Stop when you see no more white streaks. Overmixing develops gluten and makes tough cookies — we want tender ones.
- Fold in the chocolate chips. Add 1/3 cup chocolate chips and fold 3-4 times until evenly distributed. Reserve about 6 chips to press onto the tops of the cookies before baking — it makes them look bakery-worthy.
- Scoop the dough. Using a cookie scoop or tablespoon, portion the dough into 6 equal balls, about 2 tablespoons each. Place them on the prepared baking sheet, spacing about 3 inches apart. They’ll spread, so give them room.
- Press extra chips on top. Gently press those reserved chocolate chips into the tops of each dough ball. This is optional but makes every cookie look like it came from a fancy bakery.
- Bake immediately. Place the baking sheet in the preheated oven. Bake for 10-12 minutes, rotating the pan halfway through. The cookies are done when the edges are golden brown and the centers look slightly underdone and puffy. They’ll continue cooking on the hot pan after you pull them out.
- Cool on the pan. Let the cookies rest on the baking sheet for 5 minutes. This is crucial — they’re too fragile to move right away. After 5 minutes, transfer them to a cooling rack or plate.
- Enjoy warm. These are absolutely best eaten warm, about 10 minutes after they come out of the oven. The chocolate is still melty, the edges are crispy, and the centers are soft and gooey.
One more thing — if your cookies spread too much, your butter was too warm or you didn’t measure the flour correctly. If they’re too thick, your dough was overmixed or you added too much flour. Adjust next time and you’ll nail it.
Cooking Tips & Techniques
I’ve learned a few things from my cookie-making disasters over the years. Let me save you from repeating my mistakes.
Use a kitchen scale if you have one. Measuring flour by volume is notoriously inconsistent. One cup can be anywhere from 120g to 150g depending on how you scoop. For this small batch, a scale makes a huge difference. If you don’t have one, spoon the flour into your measuring cup and level it with a knife. Never scoop directly from the bag.
Don’t skip the salt. I know it seems like a small amount, but salt is what makes the chocolate flavor pop and balances the sweetness. I once forgot the salt and ended up with cookies that tasted flat and one-dimensional. Lesson learned.
Watch your oven temperature. Ovens run hot or cold — mine runs about 25°F hot, so I actually bake at 325°F. Get an oven thermometer if you’re not sure about yours. It’s a cheap fix that improves every baked good you make.
Bake one test cookie first. If you’re unsure about your dough consistency, bake just one cookie for 10 minutes and see how it spreads. You can adjust the rest of the batch if needed. This saved me when I accidentally used whole wheat flour once.
Let them cool properly. I know it’s tempting to grab a cookie right away, but those 5 minutes on the hot pan are essential. The cookies set up during this time. Move them too early and they’ll fall apart. Move them too late and they’ll stick to the parchment.
I once forgot to add the sugar entirely. I mixed everything, scooped the dough, and baked it. The cookies were pale, flat, and tasted like sad flour disks. My husband still ate two because he’s supportive. That’s the kind of mistake you only make once.
Variations & Adaptations
One of the best things about this recipe is how easy it is to change up. Here are some variations I’ve tried and loved.
Double Chocolate Chip Cookies: Replace 1 tablespoon of flour with 1 tablespoon of unsweetened cocoa powder. Use white chocolate chips or milk chocolate chips instead of semi-sweet. These are dangerously good.
Gluten-Free Version: Substitute the all-purpose flour with a good gluten-free blend like Bob’s Red Mill 1-to-1. Add an extra tablespoon of flour because gluten-free dough tends to be wetter. The texture will be slightly more cakey, but they’re still delicious.
Vegan Option: Use melted coconut oil instead of butter and a flax egg (1 tablespoon ground flaxseed mixed with 2.5 tablespoons water, let sit for 5 minutes). The cookies will be slightly thinner and chewier, but the flavor is great. Use dairy-free chocolate chips.
Add-In Variations: Swap the chocolate chips for an equal amount of chopped nuts (walnuts or pecans work wonderfully), dried cranberries, or toffee bits. My personal favorite is adding 2 tablespoons of peanut butter chips along with the chocolate — it gives that classic combo without much effort.
Spiced Cookies: Add 1/4 teaspoon of cinnamon and a pinch of nutmeg to the dry ingredients. These are perfect for fall and pair beautifully with a cup of hot apple cider.
I once made a batch with chopped dark chocolate and flaky sea salt on top. The salt crystals added this wonderful crunch and contrast that made the cookies taste incredibly sophisticated. It’s my go-to when I want to impress someone.
Serving & Storage Suggestions
These cookies are best served warm, about 10 minutes after they come out of the oven. The chocolate is still melty, the edges are perfectly crispy, and the centers are soft and tender. I like to serve them with a glass of cold milk or a hot cup of coffee. For a real treat, sandwich two cookies with a scoop of vanilla ice cream — instant ice cream sandwich.
If you’re serving these at a gathering, arrange them on a nice plate or wooden board. They look beautiful with a light dusting of powdered sugar or a sprinkle of flaky sea salt. They’re also fantastic crumbled over vanilla ice cream or yogurt for a quick dessert.
Storage: Store leftover cookies in an airtight container at room temperature for up to 3 days. Place a slice of bread in the container — the cookies will absorb moisture from the bread and stay soft. Replace the bread slice every day if needed.
Freezing: You can freeze the baked cookies for up to 3 months. Wrap them individually in plastic wrap, then place in a freezer bag. Thaw at room temperature for about 15 minutes, then warm in a 300°F oven for 5 minutes to refresh them.
Freezing the Dough: Scoop the dough into balls and place on a parchment-lined baking sheet. Freeze until solid, then transfer to a freezer bag. Bake from frozen, adding 2-3 minutes to the baking time. This is perfect for when you want just one or two cookies.
The flavors actually develop a bit after the first day — the cookies become chewier and the chocolate flavor deepens. They’re never as good as fresh from the oven, but they’re still pretty amazing.
Nutritional Information & Benefits
Here’s the approximate nutritional breakdown for one cookie (based on 6 cookies per batch):
| Nutrient | Amount per Cookie |
|---|---|
| Calories | 215 |
| Total Fat | 12g |
| Saturated Fat | 7g |
| Cholesterol | 45mg |
| Sodium | 135mg |
| Total Carbohydrates | 26g |
| Dietary Fiber | 1g |
| Sugars | 17g |
| Protein | 3g |
These cookies are a treat, not a health food, and that’s okay. Dark chocolate does contain antioxidants and can be part of a balanced diet when enjoyed in moderation. The butter provides vitamin A, and the egg yolk offers choline, which supports brain health.
If you’re watching your sugar intake, you can reduce the granulated sugar to 1 tablespoon and increase the brown sugar by 1 tablespoon. The cookies will be slightly less sweet but still delicious.
For anyone with dietary restrictions, this recipe can be adapted to be gluten-free or dairy-free as mentioned in the variations section. Always check your chocolate chips for dairy if needed — many semi-sweet chips are accidentally vegan.
Conclusion
These small-batch chocolate chip cookies have become my emergency dessert, my late-night comfort, and my go-to when I need to show someone I care without spending hours in the kitchen. They’re proof that you don’t need fancy techniques or complicated steps to make something truly delicious.
I love that this recipe is forgiving enough for beginners but satisfying enough for experienced bakers. You can customize it endlessly, make it in under 20 minutes, and end up with six perfect cookies every single time. Honestly, what’s not to love?
I’d love to hear how yours turn out. Did you try a variation? Add something unexpected? Burn them and start over? (Been there.) Drop a comment below and let me know. And if you loved these, try my crispy garlic chicken for another quick weeknight win.
Go ahead, preheat that oven. Your cookies are waiting.
Frequently Asked Questions
Can I use salted butter instead of unsalted?
Yes, just reduce the added salt to 1/8 teaspoon. The cookies will still be delicious, but they might be slightly saltier. I prefer unsalted so I can control the sodium myself.
Why did my cookies spread too much?
Your butter was likely too warm when you mixed the dough, or you didn’t measure the flour correctly. Make sure your melted butter has cooled for a couple minutes, and spoon your flour into the measuring cup rather than scooping directly.
Can I double this recipe?
Absolutely. Double all the ingredients and bake in two batches or on two baking sheets. The baking time stays the same. Just make sure to rotate the pans halfway through if baking both at once.
How do I get perfectly round cookies?
Right after the cookies come out of the oven, use a round cookie cutter or a glass slightly larger than the cookies to gently scoot them into perfect circles. Do this while they’re still warm and pliable.
Can I use a whole egg instead of just the yolk?
You can, but the cookies will be puffier and more cake-like rather than chewy. If you use a whole egg, reduce the butter to 3 tablespoons to compensate for the extra moisture. The texture will be different, but still tasty.
Pin This Recipe!
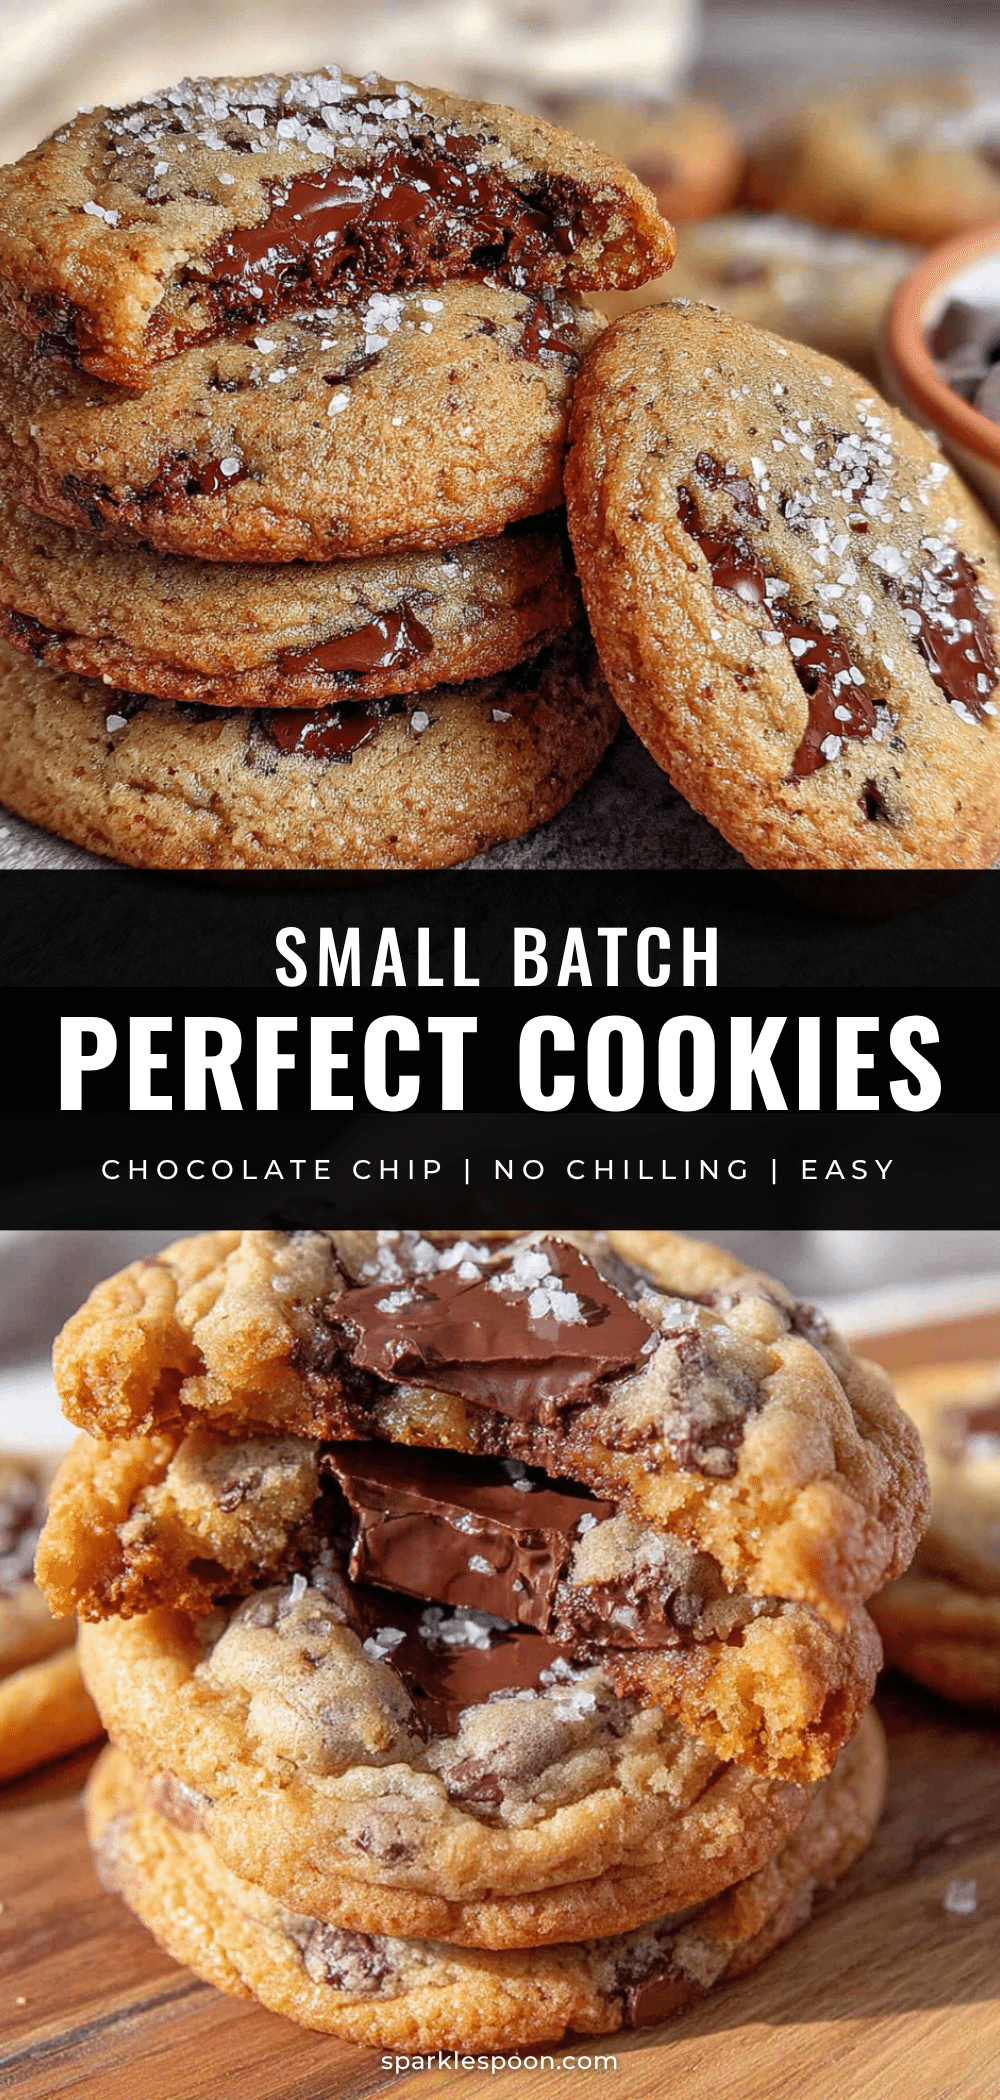
Easy Small-Batch Chocolate Chip Cookies: Ready in 20 Minutes
These small-batch chocolate chip cookies are ready in about 20 minutes with no chilling required. They yield six perfectly golden cookies with crispy edges and soft, gooey centers, using simple ingredients and one bowl.
- Prep Time: 10 minutes
- Cook Time: 10-12 minutes
- Total Time: 20 minutes
- Yield: 6 cookies 1x
- Category: Dessert
- Cuisine: American
Ingredients
- 4 tablespoons (57g) unsalted butter, melted
- 3 tablespoons (40g) light brown sugar, packed
- 2 tablespoons (25g) granulated sugar
- 1 large egg yolk (about 18g)
- 1/2 teaspoon vanilla extract
- 1/2 cup plus 1 tablespoon (75g) all-purpose flour
- 1/4 teaspoon baking soda
- 1/4 teaspoon salt
- 1/3 cup (60g) semi-sweet chocolate chips
Instructions
- Preheat your oven to 350°F (175°C). Line a baking sheet with parchment paper or a silicone mat.
- Melt the butter in a microwave-safe bowl in 15-second intervals until mostly melted. Stir until completely liquid. Let cool for about 2 minutes.
- In a medium mixing bowl, combine the melted butter, brown sugar, and granulated sugar. Whisk until smooth and slightly thickened, about 30 seconds.
- Add the egg yolk and vanilla extract. Whisk vigorously for about 20 seconds until pale, smooth, and slightly lighter in color.
- In a small bowl, whisk together the flour, baking soda, and salt.
- Add the flour mixture to the butter mixture. Fold gently with a rubber spatula or wooden spoon until just combined.
- Fold in the chocolate chips until evenly distributed. Reserve about 6 chips to press onto the tops of the cookies before baking.
- Scoop the dough into 6 equal balls, about 2 tablespoons each. Place on the prepared baking sheet, spacing about 3 inches apart.
- Gently press the reserved chocolate chips into the tops of each dough ball.
- Bake immediately for 10-12 minutes, rotating the pan halfway through. The cookies are done when the edges are golden brown and the centers look slightly underdone and puffy.
- Let the cookies rest on the baking sheet for 5 minutes, then transfer to a cooling rack or plate.
- Enjoy warm, about 10 minutes after they come out of the oven.
Notes
For best results, use a kitchen scale for accuracy. If cookies spread too much, the butter was too warm or flour was under-measured. If too thick, dough was overmixed or too much flour was added. Let cookies cool on the pan for 5 minutes before moving.
Nutrition
- Serving Size: 1 cookie
- Calories: 215
- Sugar: 17
- Sodium: 135
- Fat: 12
- Saturated Fat: 7
- Carbohydrates: 26
- Fiber: 1
- Protein: 3
Keywords: small-batch chocolate chip cookies, no chill cookies, quick cookies, easy cookies, one bowl cookies



