Love this? Save it for later!
Share the inspiration with your friends
This was supposed to be a pumpkin roll. I had the cream cheese filling ready, the powdered sugar waiting for dusting, and a brand new jelly roll pan I was excited to break in. But somewhere between the flour sifter and the mixer, I got distracted. My neighbor stopped by to borrow eggs, the dog barked at a squirrel, and I lost track of time. When I finally rolled that cake, it cracked right down the middle. Not a small crack either—a canyon. I stared at it for a good minute, honestly feeling defeated. I mean, pumpkin rolls are finicky, but this was a disaster.
So I did what any reasonable person would do. I crumbled up some gingersnaps I had in the pantry, pressed them into a pan with butter, and spread the cracked pumpkin cake pieces and cream cheese filling over the top. I baked it, hoping for the best. What came out was nothing like the plan—and better. These pumpkin cheesecake bars with gingersnap crust were born from a moment of pure kitchen chaos. The texture was creamy, the crust was perfectly spiced, and that accidental combination became my most requested dessert. Maybe you’ve been there too—when a recipe fails so hard it leads you to something even better. That’s the story behind these bars, and honestly, I haven’t made a pumpkin roll since.
Why You’ll Love This Recipe
Let me tell you why these pumpkin cheesecake bars have earned a permanent spot in my fall baking rotation. I tested this recipe six times before I got it just right—the first batch was too dense, the second needed more spice, and the third had a crust that wouldn’t hold together. So trust me when I say this version is the one.
- Quick & Easy: Comes together in under an hour with only 15 minutes of active prep time. Perfect for those days when you want something impressive without the stress.
- Simple Ingredients: No fancy grocery trips needed. You likely already have the pumpkin puree, cream cheese, and spices in your kitchen right now.
- Perfect for Fall Gatherings: Great for Thanksgiving, Friendsgiving, or any cozy autumn dinner where you want to impress without spending all day in the kitchen.
- Crowd-Pleaser: Always gets rave reviews from kids and adults alike. The gingersnap crust adds a warmth that regular graham crackers just can’t match.
- Unbelievably Delicious: The creamy cheesecake layer paired with that spiced, crunchy crust is next-level comfort food. I mean, the combination of pumpkin and ginger is basically fall in a bite.
What makes this recipe different from the rest? It’s the crust, hands down. Most pumpkin cheesecake bars use graham crackers, but gingersnaps bring a deeper, molasses-tinged flavor that perfectly complements the pumpkin. Plus, I figured out the trick to keeping the crust from getting soggy—pre-baking it for just 8 minutes makes all the difference. This isn’t just another version of pumpkin cheesecake bars. It’s the best version, born from a happy accident and perfected through trial and error.
What Ingredients You Will Need
This recipe uses simple, wholesome ingredients to deliver bold flavor and satisfying texture without the fuss. Most of these are pantry staples, especially during fall baking season.
For the Gingersnap Crust
- 2 cups gingersnap cookie crumbs (about 40 cookies, crushed finely—I recommend Nabisco or Anna’s brand for the best flavor)
- 6 tablespoons unsalted butter, melted (use salted butter and skip the added salt if that’s all you have)
- 2 tablespoons granulated sugar (optional, but adds a touch of sweetness if your gingersnaps aren’t very sweet)
- Pinch of salt (balances the sweetness and enhances the ginger spice)
For the Cheesecake Filling
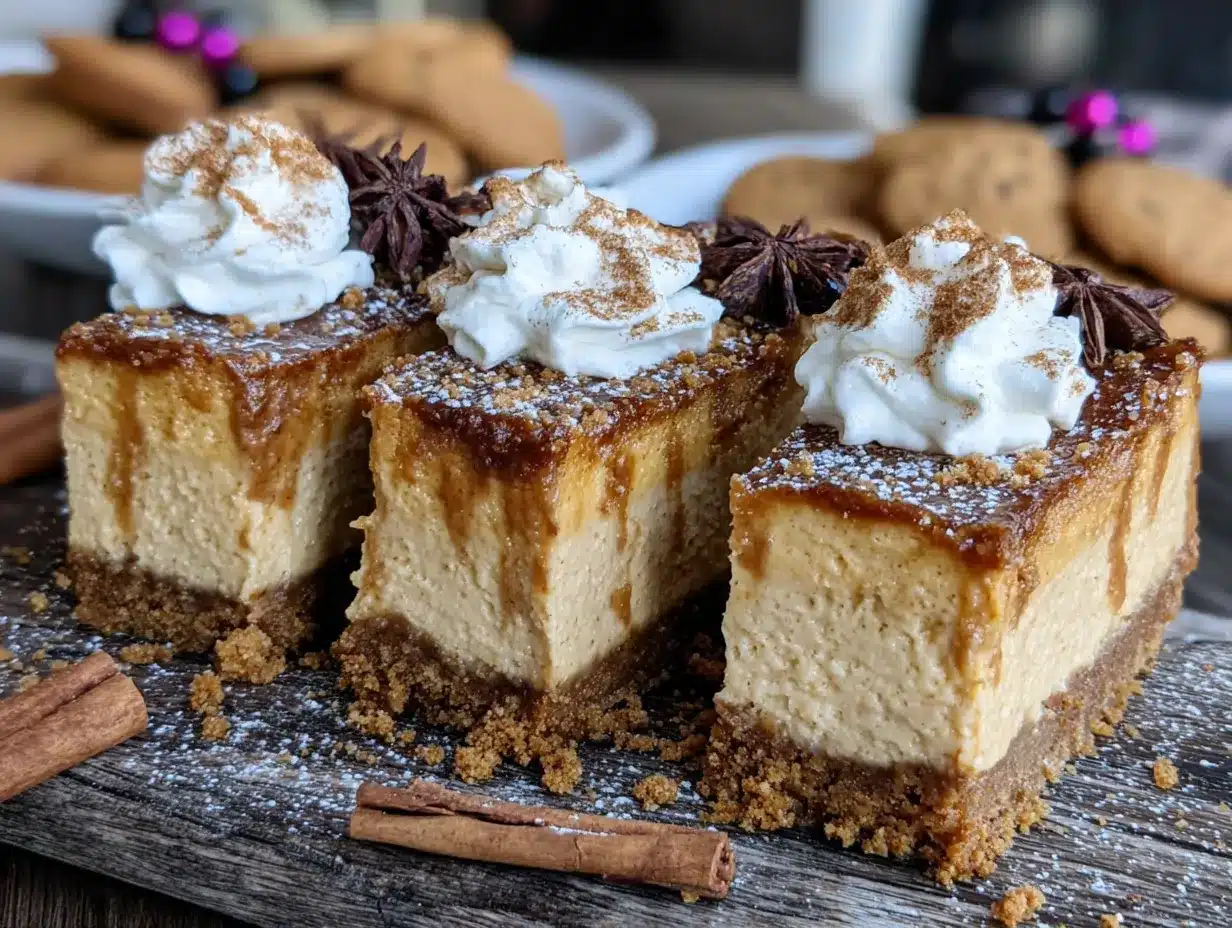
- 16 ounces cream cheese, softened (full-fat is best for creamy texture, but reduced-fat works in a pinch)
- 3/4 cup granulated sugar
- 2 large eggs, room temperature (cold eggs can make the filling lumpy)
- 1 teaspoon vanilla extract (pure vanilla extract makes a difference here)
- 1 cup pumpkin puree (not pumpkin pie filling—make sure it’s 100% pure pumpkin)
- 1 teaspoon pumpkin pie spice (or make your own with cinnamon, nutmeg, ginger, and cloves)
- 1/2 teaspoon ground cinnamon (adds warmth and depth)
- 1/4 teaspoon ground ginger (reinforces the gingersnap crust flavor)
For the Optional Topping
- 1/2 cup sour cream (for a tangy swirl on top—adds a lovely contrast)
- 1 tablespoon powdered sugar (to sweeten the sour cream swirl)
- Caramel sauce for drizzling (homemade or store-bought—I love Stonewall Kitchen’s)
Substitution Guidance: If you can’t find gingersnaps, use graham crackers and add 1/2 teaspoon ground ginger and 1/4 teaspoon ground cloves to the crust mixture. For a dairy-free version, use vegan cream cheese and coconut oil instead of butter. The texture will be slightly different but still delicious. Look for firm, small-curd cream cheese for best texture—it blends more smoothly into the filling.
Equipment Needed
You don’t need a professional kitchen to make these pumpkin cheesecake bars. Here’s what you’ll need:
- 9×9-inch baking pan (an 8×8 works too, but the bars will be slightly thicker and need a few extra minutes of baking time)
- Food processor or zip-top bag and rolling pin (for crushing the gingersnaps—I’ve used both methods, and honestly, the bag and rolling pin gives me a better workout)
- Electric mixer (handheld or stand mixer both work fine. I use my trusty KitchenAid, but a hand mixer gets the job done)
- Medium and large mixing bowls
- Rubber spatula (for scraping every last bit of cheesecake filling)
- Parchment paper (makes lifting the bars out so much easier—trust me on this)
- Measuring cups and spoons
- Sharp knife (for clean slices—run it under hot water between cuts)
If you don’t have a food processor, just place the gingersnaps in a zip-top bag and crush them with a rolling pin or even a heavy skillet. It’s a little more work, but it’s oddly satisfying. I’ve broken two wooden spoons doing this, so maybe stick with the rolling pin.
Preparation Method
Let’s get baking! Follow these steps carefully, and you’ll have perfect pumpkin cheesecake bars every time.
- Preheat and Prepare: Preheat your oven to 350°F (175°C). Line a 9×9-inch baking pan with parchment paper, leaving some overhang on two sides. This creates handles for lifting the bars out later. Lightly grease the parchment with butter or cooking spray.
- Make the Crust: In a food processor, pulse the gingersnap cookies until they become fine crumbs. You should have about 2 cups. Transfer to a medium bowl and add the melted butter, sugar, and salt. Stir with a fork until everything is evenly moistened. The mixture should look like wet sand and hold together when pressed between your fingers.
- Press and Pre-Bake: Pour the crust mixture into the prepared pan. Press it down firmly and evenly using the bottom of a measuring cup or a flat glass. I use a 1/4 cup measuring cup—it works perfectly. Bake for 8 minutes at 350°F (175°C). This pre-bake step is crucial for a crispy crust that doesn’t get soggy from the cheesecake filling. Remove from the oven and let it cool slightly while you make the filling. Lower the oven temperature to 325°F (160°C).
- Beat the Cream Cheese: In a large bowl, beat the softened cream cheese with an electric mixer on medium speed until smooth and creamy, about 2 minutes. Scrape down the sides of the bowl with a rubber spatula. Add the sugar and beat for another minute until fully incorporated and fluffy.
- Add Eggs and Vanilla: Add the eggs one at a time, beating on low speed after each addition until just combined. Don’t overmix here—too much air can cause cracks. Stir in the vanilla extract.
- Add Pumpkin and Spices: Add the pumpkin puree, pumpkin pie spice, cinnamon, and ginger. Beat on low speed until just combined. The mixture should be a beautiful orange color and smell incredible. Scrape the bowl one more time to make sure everything is evenly mixed.
- Pour and Spread: Pour the cheesecake filling over the pre-baked crust. Use a spatula to spread it evenly to the edges. Give the pan a gentle tap on the counter to release any air bubbles.
- Bake to Perfection: Bake at 325°F (160°C) for 35-40 minutes. The edges should be set and slightly puffed, but the center should still jiggle slightly when you gently shake the pan. Don’t overbake—the cheesecake will continue to set as it cools. A toothpick inserted near the center should come out with a few moist crumbs, not wet batter.
- Cool Gradually: Turn off the oven and crack the door open. Let the bars cool in the oven for 30 minutes. This gradual cooling helps prevent cracks. Then remove the pan from the oven and let it cool completely on a wire rack, about 1 hour.
- Chill for Best Results: Once cooled, cover the pan with plastic wrap and refrigerate for at least 4 hours, preferably overnight. This step is non-negotiable for clean slices and the best texture. The flavors also meld together beautifully overnight.
- Slice and Serve: Use the parchment paper handles to lift the entire block of cheesecake bars out of the pan. Place on a cutting board. For clean slices, use a sharp knife and wipe it clean between each cut. Cut into 9 or 16 bars, depending on how generous you’re feeling.
Cooking Tips & Techniques
After making these pumpkin cheesecake bars more times than I can count, I’ve learned a few things the hard way. Let me save you some trouble.
Room Temperature Ingredients Matter. I know, I used to roll my eyes at this too. But cold cream cheese creates lumps that are nearly impossible to smooth out. Leave your cream cheese and eggs on the counter for about 30 minutes before starting. If you’re in a rush, cut the cream cheese into cubes and microwave it for 10-second intervals until softened but not melted.
Don’t Overmix the Filling. This was my biggest mistake in the early days. Overmixing incorporates too much air, which leads to cracks during baking. Mix just until each ingredient is incorporated, then stop. It’s okay if there are a few tiny lumps—they’ll smooth out during baking.
Water Bath Isn’t Necessary. Unlike traditional cheesecake, these bars don’t require a water bath because they’re baked in a shallow pan. The lower oven temperature of 325°F (160°C) and the gradual cooling method are enough to prevent major cracking. But if you’re nervous, place a pan of hot water on the lower rack of the oven while baking. It adds moisture to the oven environment.
Watch the Crust. Gingersnap crusts can burn faster than graham cracker crusts because of the sugar content. Keep an eye on it during the pre-bake. You want it fragrant and slightly darker, not black around the edges. If it starts browning too quickly, tent it with foil.
Patience is a Virtue. I know you want to dig in right away, but chilling these bars for at least 4 hours is essential. I once cut into them after only 2 hours, and they were a gooey mess. The texture wasn’t right, and the slices fell apart. Trust the process—overnight chilling gives you those perfect, clean slices you see in photos.
Variations & Adaptations
One of the best things about this recipe is how easily it adapts. Here are some variations I’ve tried and loved.
Gluten-Free Version: Use gluten-free gingersnap cookies for the crust. I’ve tested this with several brands, and they all work well. Just make sure the cookies are certified gluten-free if that’s a concern. The filling is naturally gluten-free, so this is an easy swap.
Vegan Version: Replace the cream cheese with vegan cream cheese (I like Miyoko’s or Violife), use flax eggs (1 tablespoon ground flaxseed mixed with 3 tablespoons water per egg), and substitute coconut oil for the butter in the crust. The texture is slightly less dense but still creamy and delicious. I brought this version to a potluck and no one knew it was vegan until I told them.
Pumpkin Chocolate Swirl: Melt 1/4 cup of dark chocolate chips and drizzle it over the cheesecake filling before baking. Use a knife to swirl it gently into the pumpkin mixture. The chocolate adds a rich, decadent element that pairs beautifully with the ginger and pumpkin. My kids request this version every Thanksgiving.
Maple Pecan Topping: After the bars have chilled, top them with a drizzle of maple syrup and a sprinkle of toasted pecans. Toast the pecans in a dry skillet over medium heat for 3-4 minutes until fragrant—this brings out their natural oils and adds crunch. This variation is perfect for fall entertaining.
Spice It Up: Add 1/4 teaspoon of cayenne pepper or a pinch of black pepper to the filling for a subtle heat that complements the pumpkin and ginger. It sounds unusual, but trust me, that little kick makes the dessert more complex and interesting. I learned this trick from a chef friend who specializes in Southern baking.
Serving & Storage Suggestions
These pumpkin cheesecake bars are versatile enough for any occasion. Here’s how to serve and store them for the best experience.
Serving Temperature: Serve chilled or at room temperature. I prefer them straight from the fridge on a warm day, but letting them sit out for 15 minutes softens the texture and brings out the flavors more. For an extra touch, warm the bars slightly in a 300°F (150°C) oven for 5 minutes—the crust gets a little crisp again.
Presentation Ideas: Dust the tops with a light sprinkle of powdered sugar just before serving. Drizzle with caramel sauce or a simple maple glaze for a more decadent look. A dollop of fresh whipped cream and a sprinkle of cinnamon on top makes them look bakery-worthy. For holiday gatherings, arrange them on a platter with fresh cranberries and rosemary sprigs for a festive touch.
Complementary Dishes: These bars pair beautifully with a hot cup of coffee, spiced chai latte, or even a glass of cold milk. Serve them alongside other fall desserts like apple crisp or pecan pie for a dessert buffet. They also work well as a sweet ending to a heavy Thanksgiving meal—the lightness of the cheesecake is a nice contrast to rich dishes.
Storage Instructions: Store leftover bars in an airtight container in the refrigerator for up to 5 days. Place parchment paper between layers if stacking to prevent sticking. For longer storage, freeze the bars for up to 3 months. Wrap individual bars in plastic wrap, then place them in a freezer-safe bag or container. Thaw overnight in the refrigerator before serving.
Reheating Tips: These bars are best enjoyed cold or at room temperature, but if you prefer them warm, microwave individual bars for 10-15 seconds. Be careful not to overheat, or the cheesecake can become runny. The gingersnap crust stays crispier when the bars are served cold.
Flavor Development: Honestly, these bars taste even better on day two. The flavors meld together as they chill, and the texture becomes perfectly creamy. So don’t hesitate to make them a day or two ahead of time—your future self will thank you.
Nutritional Information & Benefits
While these pumpkin cheesecake bars are definitely a treat, they do offer some nutritional benefits thanks to the star ingredient—pumpkin.
Estimated Nutritional Values (per bar, based on 9 servings):
- Calories: 385
- Total Fat: 24g
- Saturated Fat: 14g
- Cholesterol: 95mg
- Sodium: 320mg
- Total Carbohydrates: 38g
- Dietary Fiber: 2g
- Sugars: 26g
- Protein: 7g
Health Benefits: Pumpkin is packed with vitamin A, which supports eye health and immune function. It’s also a good source of fiber, which aids digestion. The ginger in the crust has anti-inflammatory properties, and cinnamon can help regulate blood sugar levels. Of course, the cream cheese and butter add richness, but in moderation, this dessert can be part of a balanced diet.
Dietary Considerations: This recipe is vegetarian and can be made gluten-free and vegan with the substitutions mentioned earlier. It contains dairy, eggs, and gluten (in the gingersnaps), so be mindful of allergies. For a lower-sugar version, reduce the sugar in the filling to 1/2 cup and use sugar-free gingersnaps if available.
Personal Wellness Perspective: I believe in enjoying treats without guilt. These bars are made with real ingredients, and there’s something nourishing about sharing homemade desserts with loved ones. One bar satisfies that sweet craving without going overboard. Plus, the pumpkin adds a nutritional boost you won’t find in most desserts.
Conclusion
These pumpkin cheesecake bars with gingersnap crust are the perfect fall dessert—creamy, spiced, and incredibly satisfying. They started as a kitchen disaster and became a beloved recipe that I make every single autumn. The combination of the crunchy, molasses-tinged crust and the smooth, pumpkin-spiced cheesecake filling is honestly unbeatable.
I hope you give this recipe a try and make it your own. Maybe you’ll add extra ginger, swirl in some chocolate, or top it with pecans. That’s the beauty of baking—you can adapt and experiment until it feels like yours. Don’t be afraid to make mistakes in the kitchen either. Some of the best recipes come from happy accidents, just like this one did.
If you make these pumpkin cheesecake bars, I’d love to hear about it! Leave a comment below and let me know how they turned out. Did you try any variations? Share your photos on social media and tag me—I love seeing your creations. Happy baking, friends!
Frequently Asked Questions
Can I use pumpkin pie filling instead of pumpkin puree?
No, I don’t recommend it. Pumpkin pie filling already contains sugar and spices, which would throw off the balance of the recipe. Stick with 100% pure pumpkin puree for the best results. If you only have pumpkin pie filling on hand, reduce the sugar and spices in the filling to compensate.
Why did my cheesecake filling crack?
Cracks usually happen from overmixing the filling or overbaking. Make sure your cream cheese is fully softened, mix on low speed, and stop as soon as the ingredients are combined. Also, don’t skip the gradual cooling step—letting the bars cool in the oven with the door cracked open prevents sudden temperature changes that cause cracks.
Can I make these bars ahead of time?
Absolutely! In fact, I recommend it. These bars taste even better after chilling overnight. Make them up to 2 days in advance and store them covered in the refrigerator. They’re perfect for holiday entertaining when you want to reduce stress on the big day.
How do I get clean slices without the crust crumbling?
Use a sharp knife and wipe it clean between each cut. For the cleanest slices, chill the bars for at least 4 hours or overnight. You can also run the knife under hot water and dry it before cutting—the warmth helps the knife glide through the cheesecake without dragging.
Can I freeze these pumpkin cheesecake bars?
Yes, they freeze beautifully! Wrap individual bars tightly in plastic wrap, then place them in a freezer-safe bag or container. They’ll keep for up to 3 months. Thaw overnight in the refrigerator before serving. The texture remains creamy and delicious—just as good as fresh.
Pin This Recipe!
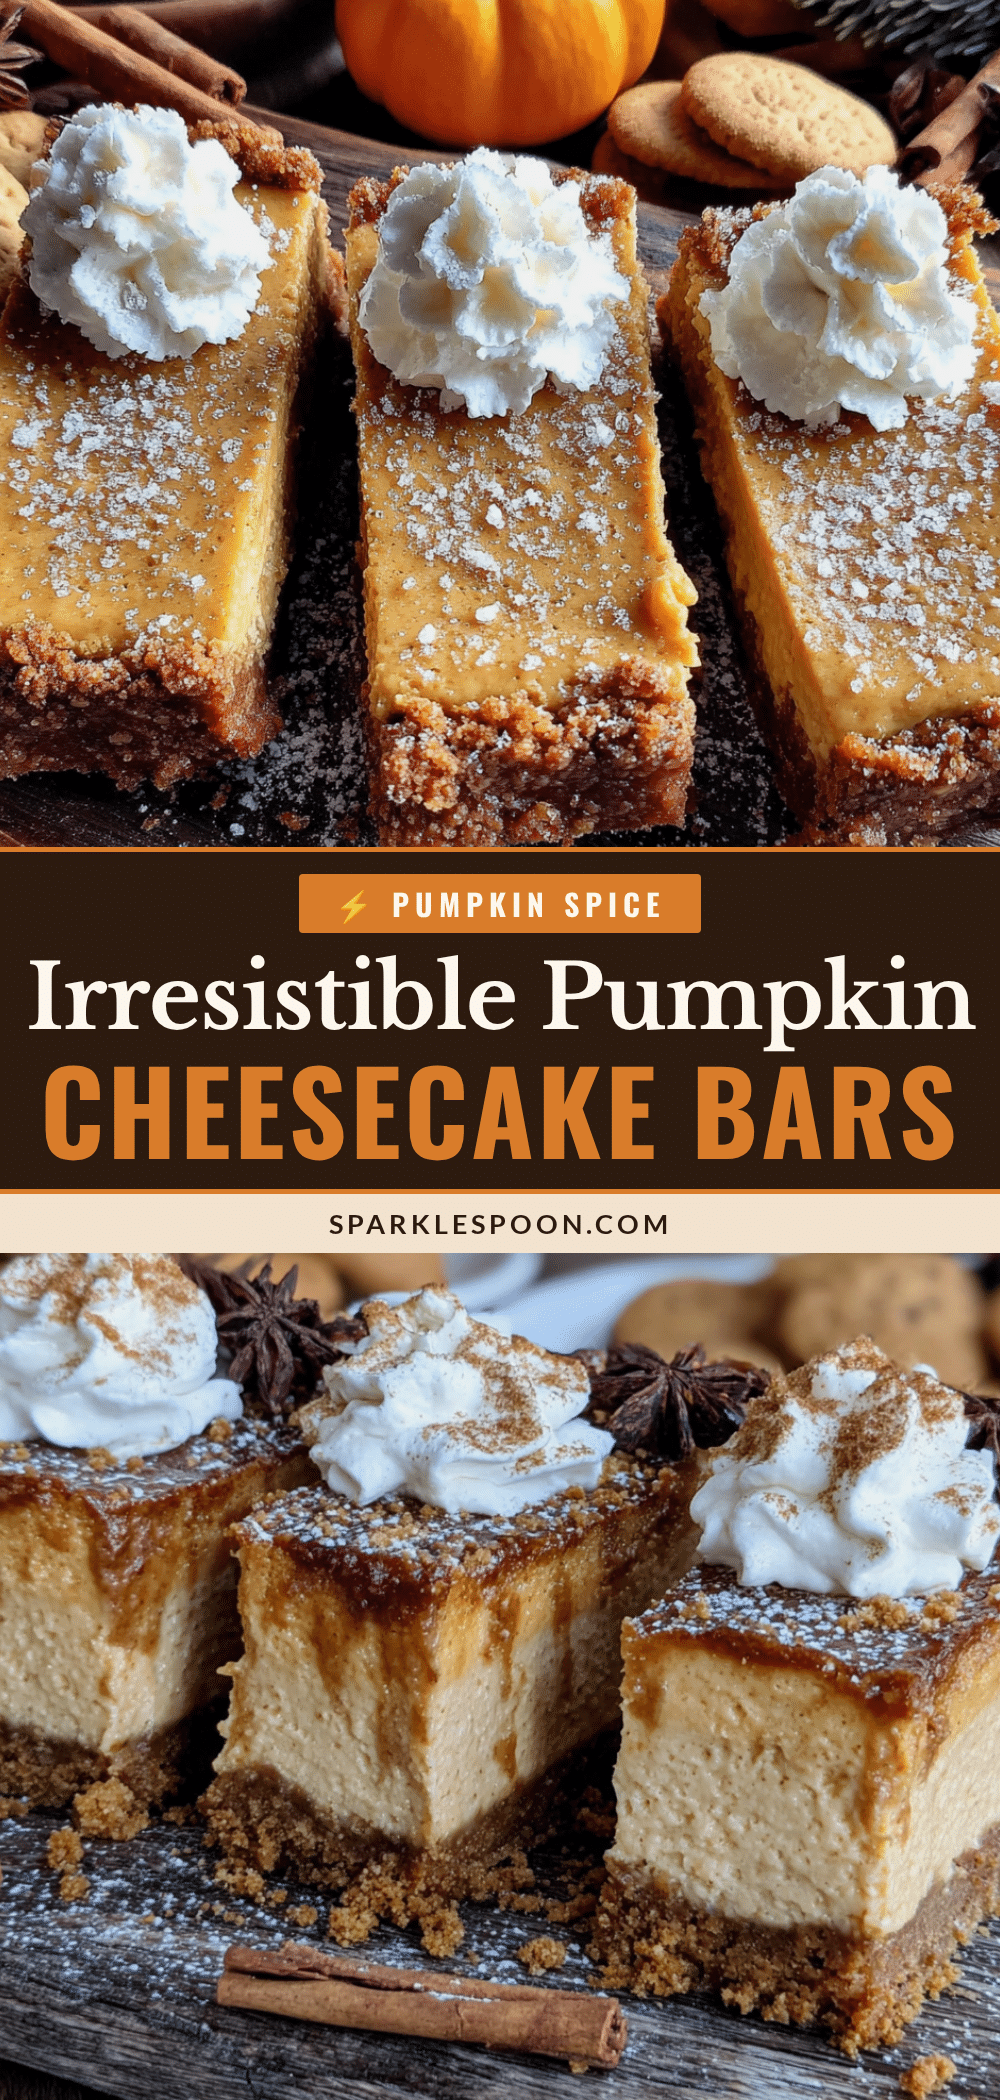
Perfect Pumpkin Cheesecake Bars: Easy Gingersnap Crust Recipe
These pumpkin cheesecake bars with a crunchy gingersnap crust are the perfect fall dessert—creamy, spiced, and incredibly satisfying. Born from a kitchen accident, this easy recipe comes together in under an hour and is always a crowd-pleaser.
- Prep Time: 15 minutes
- Cook Time: 35-40 minutes
- Total Time: 55 minutes (plus chilling time)
- Yield: 9-16 servings 1x
- Category: Dessert
- Cuisine: American
Ingredients
- 2 cups gingersnap cookie crumbs (about 40 cookies, crushed finely)
- 6 tablespoons unsalted butter, melted
- 2 tablespoons granulated sugar (optional)
- Pinch of salt
- 16 ounces cream cheese, softened
- 3/4 cup granulated sugar
- 2 large eggs, room temperature
- 1 teaspoon vanilla extract
- 1 cup pumpkin puree (not pumpkin pie filling)
- 1 teaspoon pumpkin pie spice
- 1/2 teaspoon ground cinnamon
- 1/4 teaspoon ground ginger
- 1/2 cup sour cream (for optional topping)
- 1 tablespoon powdered sugar (for optional topping)
- Caramel sauce for drizzling (optional)
Instructions
- Preheat your oven to 350°F (175°C). Line a 9×9-inch baking pan with parchment paper, leaving some overhang on two sides. Lightly grease the parchment with butter or cooking spray.
- In a food processor, pulse the gingersnap cookies until they become fine crumbs. Transfer to a medium bowl and add the melted butter, sugar, and salt. Stir with a fork until everything is evenly moistened.
- Pour the crust mixture into the prepared pan. Press it down firmly and evenly using the bottom of a measuring cup or a flat glass. Bake for 8 minutes at 350°F (175°C). Remove from the oven and let it cool slightly. Lower the oven temperature to 325°F (160°C).
- In a large bowl, beat the softened cream cheese with an electric mixer on medium speed until smooth and creamy, about 2 minutes. Scrape down the sides of the bowl. Add the sugar and beat for another minute until fully incorporated and fluffy.
- Add the eggs one at a time, beating on low speed after each addition until just combined. Stir in the vanilla extract.
- Add the pumpkin puree, pumpkin pie spice, cinnamon, and ginger. Beat on low speed until just combined. Scrape the bowl one more time.
- Pour the cheesecake filling over the pre-baked crust. Use a spatula to spread it evenly to the edges. Give the pan a gentle tap on the counter to release any air bubbles.
- Bake at 325°F (160°C) for 35-40 minutes. The edges should be set and slightly puffed, but the center should still jiggle slightly when you gently shake the pan.
- Turn off the oven and crack the door open. Let the bars cool in the oven for 30 minutes. Then remove the pan from the oven and let it cool completely on a wire rack, about 1 hour.
- Once cooled, cover the pan with plastic wrap and refrigerate for at least 4 hours, preferably overnight.
- Use the parchment paper handles to lift the entire block of cheesecake bars out of the pan. Place on a cutting board. For clean slices, use a sharp knife and wipe it clean between each cut. Cut into 9 or 16 bars.
Notes
Room temperature ingredients are key for a smooth filling. Don’t overmix the filling to avoid cracks. Pre-baking the crust prevents sogginess. Chilling for at least 4 hours (preferably overnight) is essential for clean slices and best texture.
Nutrition
- Serving Size: 1 bar (based on 9 se
- Calories: 385
- Sugar: 26
- Sodium: 320
- Fat: 24
- Saturated Fat: 14
- Carbohydrates: 38
- Fiber: 2
- Protein: 7
Keywords: pumpkin cheesecake bars, gingersnap crust, fall dessert, Thanksgiving dessert, easy cheesecake bars



