Love this? Save it for later!
Share the inspiration with your friends
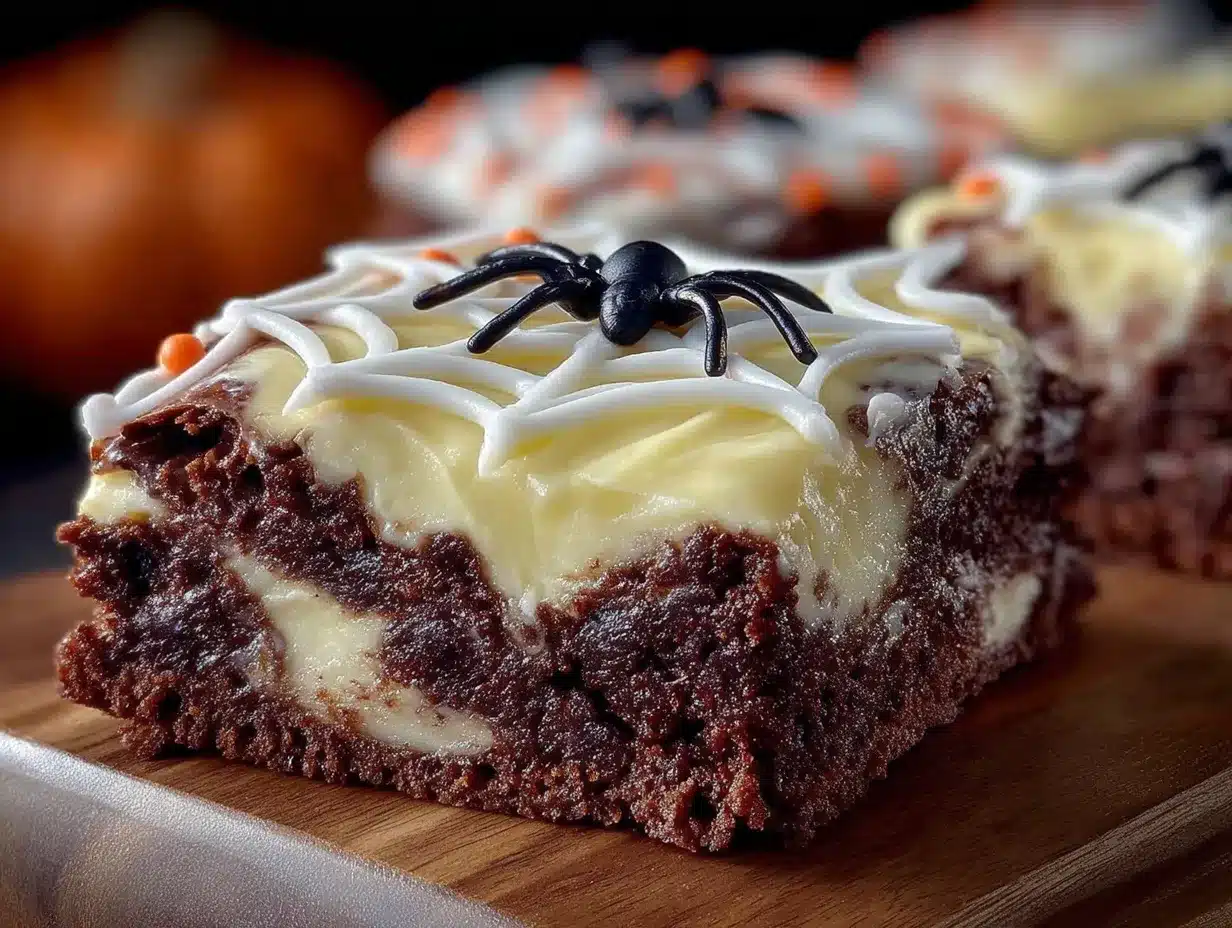
My nephew asked why I couldn’t just pipe the cream cheese mixture on top of the brownie batter before it went in the oven. I started to explain why that wouldn’t work—the layers would sink, the swirl would disappear, the whole thing would turn into a muddy mess. Then I stopped. Honestly? I had no real reason. I’d just always done it the other way, dragging a knife through after pouring. That day, I let him pipe it on top. And let me tell you, those Spooky Spiderweb Swirl Halloween Brownies came out of the oven looking like something from a bakery window.
The webs were clean, the contrast was sharp, and the brownies themselves were perfectly fudgy. I mean, I’d been making this recipe for years, thinking I had it all figured out. Turns out, a ten-year-old with a piping bag and zero patience taught me more in five minutes than I’d learned in a decade of baking. Maybe you’ve been there—stuck in your ways, convinced your method is the only method, until someone comes along and proves you wrong with a simple question.
That moment stuck with me. Not just because I was wrong, but because the brownies were genuinely the best I’d ever made. The spiderweb design held its shape, the cream cheese swirl added this tangy richness that cut through the chocolate perfectly, and the whole thing felt like a Halloween party on a plate. Now, these Spooky Spiderweb Swirl Halloween Brownies are my go-to for every October gathering. They’re the recipe I’m known for, the one friends request, the one that makes people ask, “Wait, you made these?” with genuine surprise. And every time I make them, I think about that afternoon and how sometimes the best lessons come from the people you’re supposed to be teaching.
Why You’ll Love This Recipe
These aren’t just any brownies. These Spooky Spiderweb Swirl Halloween Brownies combine a rich, fudgy chocolate base with a creamy, tangy cream cheese swirl that creates an actual spiderweb design. No special tools required—just a piping bag and a toothpick. Here’s why this recipe stands out:
- Quick & Easy: From start to finish, you’re looking at about 45 minutes. The actual hands-on time is maybe 15 minutes. Perfect for last-minute Halloween parties or when you need a dessert that looks impressive without the stress.
- Simple Ingredients: You probably have most of these in your pantry right now. Cocoa powder, sugar, butter, eggs, cream cheese—nothing fancy, nothing hard to find. No specialty baking ingredients required.
- Perfect for Halloween: The spiderweb design is instantly recognizable and always gets a reaction. Kids love it, adults love it, and it fits right in with any spooky-themed gathering.
- Crowd-Pleaser: I’ve brought these to potlucks, office parties, and family dinners. They disappear fast. The combination of rich chocolate and creamy swirl is universally loved.
- Unbelievably Delicious: The texture is what gets people. The brownie base is dense and fudgy, not cakey. The cream cheese swirl adds a tangy contrast that makes each bite interesting. It’s comfort food with a little sophistication.
What makes these different from other Halloween brownies is the technique. Piping the cream cheese mixture on top before baking creates clean, defined lines that don’t sink into the batter. The toothpick drag creates the web pattern without disturbing the structure. It’s a small tweak, but it makes all the difference. And the flavor? The cream cheese isn’t just for looks—it balances the sweetness of the brownie and adds a subtle tang that makes you want another bite.
I’ve tested this recipe more times than I can count. I’ve tried different cocoa powders, different cream cheese ratios, different swirling techniques. This version is the one that works every single time. It’s the one I make for my own Halloween parties, the one I gift to neighbors, the one that makes me feel like I’ve actually got this baking thing figured out.
What Ingredients You Will Need
This recipe uses simple, wholesome ingredients to deliver bold chocolate flavor and that signature creamy swirl. Most of these are pantry staples, but I’ve included notes on what to look for to get the best results.
For the Brownie Base
- 1/2 cup (113g) unsalted butter — melted and slightly cooled. I prefer using unsalted so I can control the salt level. If you only have salted butter, reduce the added salt by 1/4 teaspoon.
- 1 cup (200g) granulated sugar — this provides sweetness and helps create that shiny, crackly top. Don’t substitute with brown sugar here; it changes the texture.
- 2 large eggs — room temperature is best. Cold eggs can seize the melted butter and create a grainy texture. If you forget to take them out, place them in a bowl of warm water for 5 minutes.
- 1 teaspoon vanilla extract — pure vanilla extract adds depth. Imitation works in a pinch, but the flavor won’t be as rich.
- 1/3 cup (40g) unsweetened cocoa powder — I recommend using Dutch-processed cocoa for a darker, more intense chocolate flavor. Natural cocoa works too, but the color will be lighter. Ghirardelli is my go-to brand.
- 1/2 cup (65g) all-purpose flour — spoon and level it. Scooping directly from the bag packs the flour and makes the brownies cakey instead of fudgy.
- 1/4 teaspoon salt — enhances the chocolate flavor. Don’t skip it.
For the Cream Cheese Swirl
- 4 oz (113g) cream cheese — full-fat, softened to room temperature. Low-fat cream cheese has more water and can make the swirl runny. I use Philadelphia brand for consistent results.
- 1/4 cup (50g) granulated sugar — just enough to sweeten the cream cheese without making it overly sweet.
- 1 large egg yolk — adds richness and helps the swirl set properly. Save the egg white for another use or discard it.
- 1/2 teaspoon vanilla extract — rounds out the flavor.
That’s it. Eight ingredients for the brownies, four for the swirl. No fancy extracts, no special chocolate bars, no obscure baking ingredients. You can find everything at any grocery store. And if you’re short on something, substitutions are easy. Use dairy-free cream cheese for a lactose-free version, or swap the butter with coconut oil (though the flavor will change slightly).
Equipment Needed
You don’t need a professional kitchen to make these Spooky Spiderweb Swirl Halloween Brownies. Here’s what you’ll need:
- 8×8-inch baking pan — this is the ideal size for thick, fudgy brownies. A 9×9 pan works too, but the brownies will be thinner and bake faster. Adjust the baking time by 3-5 minutes.
- Parchment paper — line the pan with parchment, leaving overhang on two sides. This creates “handles” that make it easy to lift the brownies out after baking. Trust me, this saves so much hassle.
- Mixing bowls — one large bowl for the brownie batter, one medium bowl for the cream cheese swirl. Glass or stainless steel works best.
- Whisk — for combining the wet ingredients. A hand whisk is fine; no need for an electric mixer.
- Rubber spatula — for folding in the dry ingredients and scraping every last bit of batter into the pan.
- Piping bag or zip-top bag — for piping the cream cheese mixture. A piping bag with a small round tip gives you more control, but a zip-top bag with the corner snipped off works perfectly. I’ve used both, and honestly, the zip-top bag is less cleanup.
- Toothpick or skewer — for creating the spiderweb design. A toothpick is easier to maneuver, but a wooden skewer creates slightly thicker lines. Both work.
- Cooling rack — allows air to circulate around the pan and prevents the bottom from getting soggy. If you don’t have one, you can use a folded kitchen towel.
One tip: if you’re using a glass baking dish, reduce the oven temperature by 25°F. Glass retains heat differently and can over-brown the edges. I learned this the hard way after a batch of burnt edges and a smoky kitchen.
Preparation Method
Ready to make the best Spooky Spiderweb Swirl Halloween Brownies of your life? Follow these steps carefully, and you’ll have a showstopping dessert that looks like it came from a bakery.
Step 1: Preheat and Prep
Preheat your oven to 350°F (175°C). Line your 8×8-inch baking pan with parchment paper, leaving about 2 inches of overhang on two opposite sides. This creates handles for lifting the brownies out later. Lightly grease the parchment with butter or non-stick spray.
Step 2: Make the Brownie Batter
In a large microwave-safe bowl, melt the butter in 30-second intervals until fully melted. Let it cool for 2-3 minutes—you don’t want it hot enough to cook the eggs. Add the granulated sugar and whisk vigorously until combined. The mixture should look glossy and smooth.
Add the eggs one at a time, whisking well after each addition. The batter should become thick and shiny. Stir in the vanilla extract. In a separate small bowl, sift together the cocoa powder, flour, and salt. Sifting prevents lumps and ensures even distribution. Gradually fold the dry ingredients into the wet mixture using a rubber spatula. Mix just until combined—overmixing develops gluten and makes the brownies tough. Stop when you no longer see streaks of flour.
Step 3: Make the Cream Cheese Swirl
In a medium bowl, beat the softened cream cheese with an electric mixer or a sturdy whisk until smooth and creamy. Add the sugar and beat until fully incorporated. Add the egg yolk and vanilla extract, mixing until just combined. Don’t overmix—you want it smooth, not airy. Set aside.
Step 4: Assemble the Brownies
Pour the brownie batter into the prepared pan and spread it evenly with a spatula. Now for the fun part. Transfer the cream cheese mixture to a piping bag or a zip-top bag. If using a zip-top bag, snip off a small corner—about 1/4 inch wide. Pipe the cream cheese mixture in diagonal lines across the brownie batter, spacing them about 1 inch apart. Then pipe diagonal lines in the opposite direction, creating a diamond pattern.
Step 5: Create the Spiderweb
Take a toothpick or skewer and drag it through the cream cheese lines in a continuous spiral motion, starting from the center and moving outward. Wipe the toothpick clean after each full rotation to keep the lines crisp. This creates the classic spiderweb effect. Don’t over-swirl—three or four rotations is enough. Over-swirling will muddy the design.
Step 6: Bake
Place the pan in the preheated oven and bake for 28-32 minutes. The edges should be set and slightly pulling away from the sides, but the center should still look slightly underdone. A toothpick inserted into the center should come out with a few moist crumbs attached—not wet batter, but not completely clean either. Overbaking is the number one mistake people make. Fudgy brownies need that slightly underbaked center.
Step 7: Cool and Serve
Place the pan on a cooling rack and let the brownies cool completely in the pan. This takes about 1-2 hours. For cleaner slices, refrigerate the brownies for 30 minutes before cutting. Use the parchment handles to lift the entire block out of the pan, then slice into 16 squares. For the best presentation, wipe the knife clean between cuts.
Cooking Tips & Techniques
Over the years, I’ve made a lot of mistakes with these Spooky Spiderweb Swirl Halloween Brownies. Here are the lessons I learned so you don’t have to repeat them.
Don’t overmix the batter. I know it’s tempting to keep stirring until everything looks perfectly smooth, but overmixing develops gluten and makes the brownies tough and cakey. Mix just until the flour disappears. A few small lumps are fine—they’ll bake out.
Room temperature ingredients matter. Cold cream cheese won’t blend smoothly into the sugar and egg yolk—you’ll end up with lumps that ruin the swirl. Cold eggs can seize the melted butter and create a grainy texture. Take everything out of the fridge 30 minutes before you start baking. It makes a real difference.
The piping technique is key. When I first made these, I tried spooning the cream cheese mixture on top and dragging a knife through it. The result was a muddy, indistinct mess. Piping creates clean, defined lines that hold their shape during baking. Take the extra 30 seconds to use a piping bag or zip-top bag. It’s worth it.
Don’t over-swirl. I once got carried away and swirled the toothpick through the batter about ten times. The result was a brownie that looked like abstract art—not a spiderweb. Three or four rotations is plenty. Wipe the toothpick clean between each rotation to keep the lines distinct.
Watch the baking time. Every oven is different. Start checking at 25 minutes. The brownies are done when the edges are set and the center jiggles slightly when you shake the pan. A toothpick inserted near the center should come out with a few moist crumbs, not wet batter. If it comes out clean, you’ve overbaked them.
Let them cool completely. I know it’s hard to wait, but cutting warm brownies is a disaster. They crumble, the swirl smears, and you end up with a plate of delicious-looking rubble. Patience pays off. Let them cool completely in the pan, then refrigerate for 30 minutes before slicing. You’ll get clean, beautiful squares every time.
Variations & Adaptations
One of the best things about this recipe is how adaptable it is. Here are some variations I’ve tried and loved.
Peanut Butter Swirl: Swap the cream cheese for creamy peanut butter. Use the same ratio—4 ounces of peanut butter, 1/4 cup sugar, and 1 egg yolk. The result is a rich, nutty swirl that pairs beautifully with the chocolate. My nephew actually prefers this version now.
White Chocolate Spiderweb: Melt 4 ounces of white chocolate and swirl it into the brownie batter instead of cream cheese. The white chocolate creates a stark contrast against the dark brownie and adds a sweet, creamy flavor. This version is especially good for Halloween parties where you want the web to really pop.
Gluten-Free Version: Substitute the all-purpose flour with a 1:1 gluten-free baking flour blend. I’ve tested this with Bob’s Red Mill 1:1 Baking Flour, and the texture is nearly identical. Just make sure the blend contains xanthan gum for structure. No other adjustments needed.
Dairy-Free Version: Use dairy-free butter and dairy-free cream cheese. Miyoko’s Creamery makes an excellent dairy-free cream cheese that behaves similarly to the real thing. The swirl might be slightly softer, but the flavor is still fantastic.
Extra Spooky Version: Add 1/2 cup of dark chocolate chips to the brownie batter before pouring it into the pan. The melted chocolate pockets add richness and make the brownies even more indulgent. You can also sprinkle crushed candy eyes on top before baking for a truly creepy effect.
Mint Chocolate Version: Add 1/2 teaspoon of peppermint extract to the brownie batter. The cool mint flavor pairs surprisingly well with the rich chocolate and tangy cream cheese. This is my go-to version for Christmas, but it works for Halloween too.
Serving & Storage Suggestions
These Spooky Spiderweb Swirl Halloween Brownies are best served at room temperature, but they’re also delicious slightly chilled. The cream cheese swirl firms up in the fridge, giving the brownies a denser, almost cheesecake-like texture. For a truly indulgent experience, warm a brownie in the microwave for 10 seconds and top it with a scoop of vanilla ice cream. The combination of warm fudgy brownie and cold ice cream is unbeatable.
For Halloween parties, arrange the brownies on a platter and garnish with a few fake spiderwebs or plastic spiders for a fun touch. They also look great on a cake stand with some orange and black sprinkles scattered around. If you’re feeling extra creative, pipe a small spider on top of each brownie using black frosting.
To store, place the brownies in an airtight container at room temperature for up to 3 days. If you live in a humid climate, refrigerate them to prevent the cream cheese swirl from getting too soft. For longer storage, freeze the brownies for up to 3 months. Wrap each brownie individually in plastic wrap, then place them in a freezer-safe bag. Thaw at room temperature for about 30 minutes before serving. The texture remains remarkably fudgy even after freezing.
One thing I’ve noticed: these brownies actually taste better the next day. The flavors meld together, the cream cheese swirl sets up perfectly, and the brownie becomes even more fudgy. So if you’re making them for a party, bake them the day before. Your future self will thank you.
Nutritional Information & Benefits
Let’s be real—these are brownies. They’re a treat, not a health food. But that doesn’t mean they can’t have some redeeming qualities. Here’s the estimated nutritional breakdown for one brownie (based on 16 servings):
- Calories: Approximately 220
- Fat: 13g
- Carbohydrates: 25g
- Protein: 4g
- Sugar: 18g
- Fiber: 1g
Dark chocolate, in its pure form, is rich in antioxidants and can support heart health. Cocoa powder contains flavonoids that may help reduce inflammation. The cream cheese adds a small amount of protein and calcium. Of course, with the butter and sugar, this is still an indulgence—but one that’s absolutely worth it for a special occasion.
For those with dietary restrictions, this recipe contains gluten, dairy, and eggs. The gluten-free and dairy-free variations listed above are excellent alternatives. If you’re watching your sugar intake, you can reduce the sugar in the brownie base to 3/4 cup, though the texture will be slightly less fudgy. I personally believe that treats like these are meant to be enjoyed fully, not guiltily. One brownie isn’t going to derail a healthy lifestyle, but it might just make your day a little sweeter.
Conclusion
These Spooky Spiderweb Swirl Halloween Brownies are more than just a dessert—they’re a conversation starter, a party centerpiece, and a reminder that sometimes the best ideas come from the most unexpected places. That afternoon with my nephew taught me to question my own assumptions, and the result was a recipe I’ve been making ever since.
I hope you’ll give these brownies a try. Don’t be afraid to customize them to your taste—swap in peanut butter, add chocolate chips, or go all out with the candy eyes. The beauty of this recipe is that it’s forgiving, adaptable, and always impressive. Whether you’re baking for a Halloween party, a fall gathering, or just because you want something chocolatey and fun, these brownies deliver.
When you make them, I’d love to hear how they turn out. Drop a comment below and let me know if your spiderweb design held up, or if you tried one of the variations. Share a photo on social media and tag me—I love seeing your creations. And if you have a story about a time someone proved you wrong in the kitchen, I’d love to hear that too. Happy baking, and have a spooktacular Halloween!
Frequently Asked Questions
Can I use a different pan size?
Yes, but the baking time will change. A 9×9 pan will produce thinner brownies that bake in about 22-25 minutes. A 9×13 pan will produce very thin brownies that bake in about 18-20 minutes. Adjust your baking time accordingly and start checking early.
Why did my cream cheese swirl sink into the batter?
This usually happens if the cream cheese mixture is too thin or the brownie batter is too warm. Make sure your cream cheese is softened but not warm, and let the brownie batter cool slightly before adding the swirl. Also, don’t over-swirl—too much movement can cause the cream cheese to sink.
Can I make these ahead of time?
Absolutely. These brownies actually taste better the next day. Bake them up to 24 hours in advance, cool completely, and store in an airtight container at room temperature. If you’re making them more than a day ahead, refrigerate them and bring to room temperature before serving.
How do I get clean slices without the swirl smearing?
Refrigerate the brownies for at least 30 minutes before cutting. Use a sharp knife and wipe it clean between each cut. For the cleanest slices, dip the knife in hot water and dry it off before each cut. This melts through the brownie cleanly without dragging the swirl.
Can I freeze these brownies?
Yes! Wrap each brownie individually in plastic wrap, then place them in a freezer-safe bag or container. They’ll keep for up to 3 months. Thaw at room temperature for about 30 minutes before serving. They taste almost as good as fresh.
Pin This Recipe!
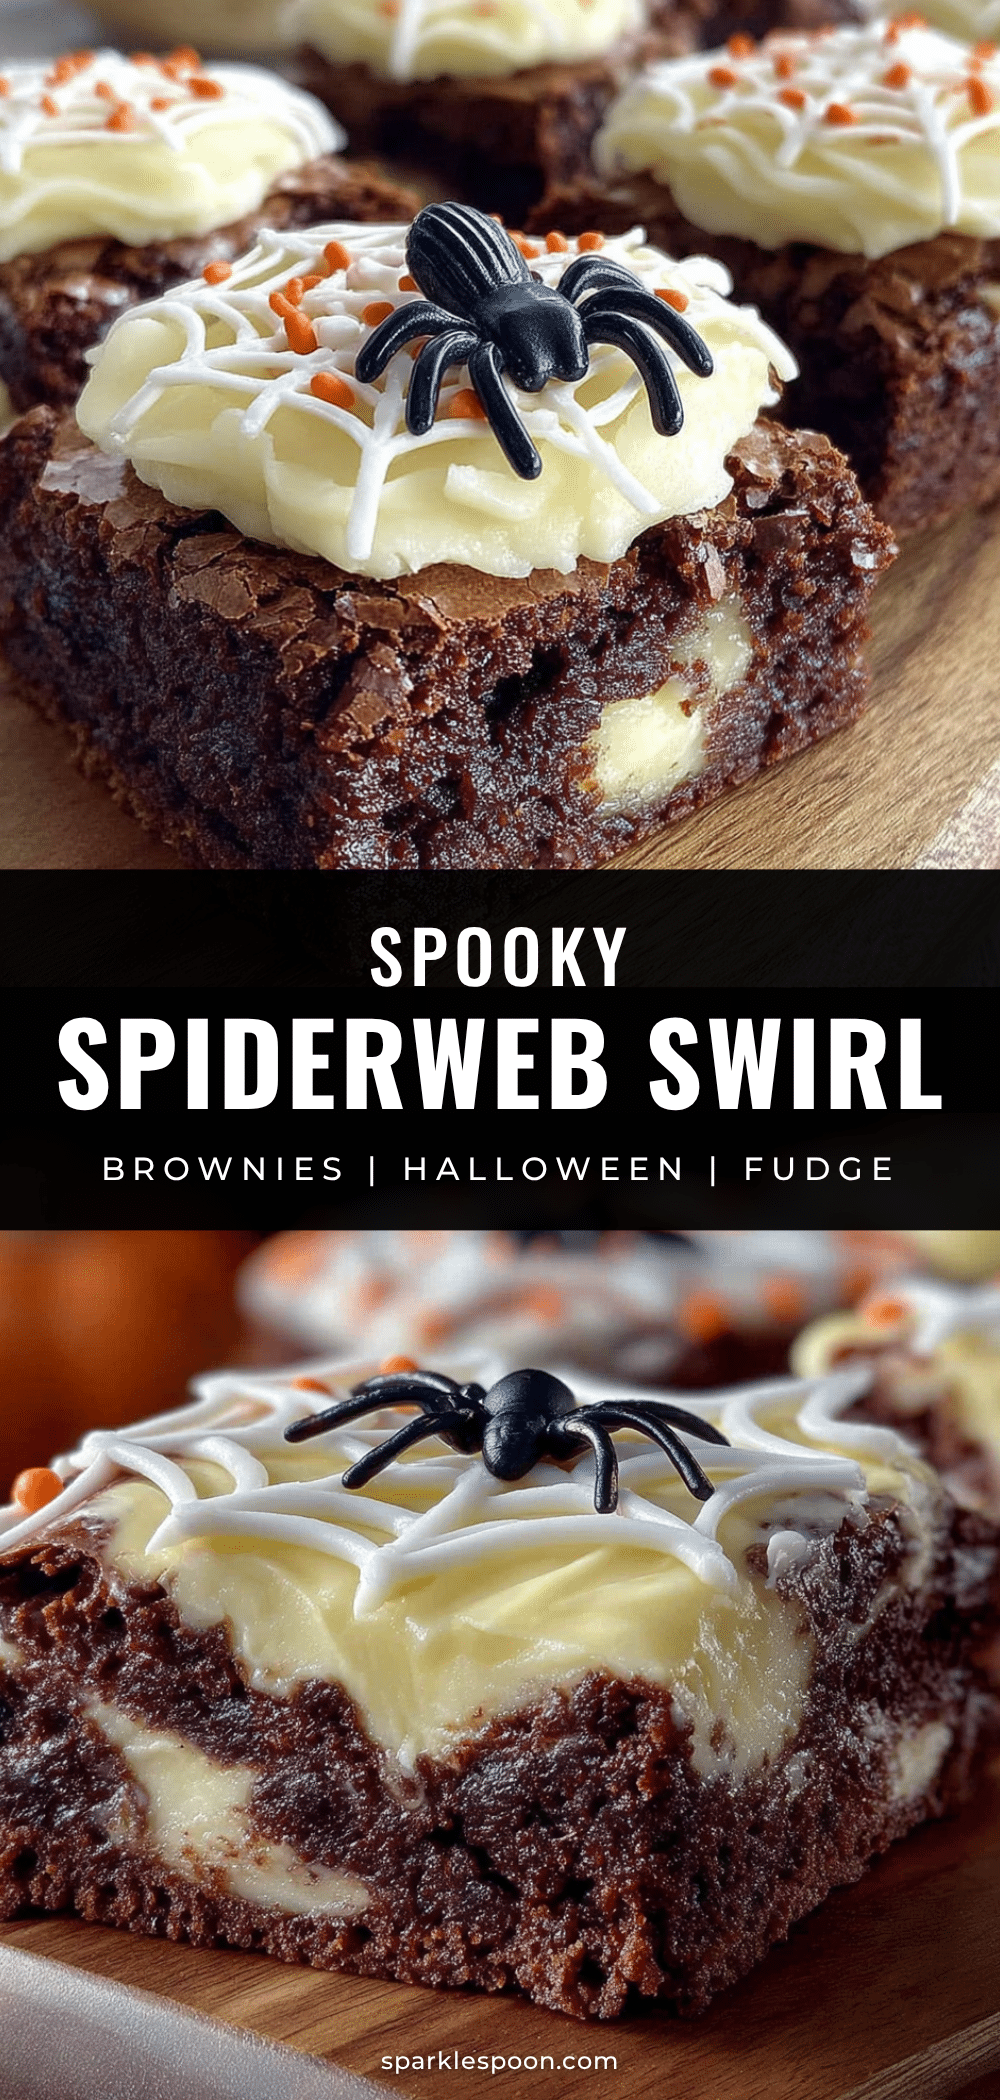
Spooky Spiderweb Swirl Halloween Brownies
Rich, fudgy brownies with a creamy cream cheese swirl that creates an actual spiderweb design. No special tools required—just a piping bag and a toothpick.
- Prep Time: 15 minutes
- Cook Time: 30 minutes
- Total Time: 45 minutes
- Yield: 16 servings 1x
- Category: Dessert
- Cuisine: American
Ingredients
- 1/2 cup (113g) unsalted butter, melted and slightly cooled
- 1 cup (200g) granulated sugar
- 2 large eggs, room temperature
- 1 teaspoon vanilla extract
- 1/3 cup (40g) unsweetened cocoa powder (Dutch-processed recommended)
- 1/2 cup (65g) all-purpose flour, spooned and leveled
- 1/4 teaspoon salt
- 4 oz (113g) cream cheese, softened to room temperature
- 1/4 cup (50g) granulated sugar
- 1 large egg yolk
- 1/2 teaspoon vanilla extract
Instructions
- Preheat oven to 350°F (175°C). Line an 8×8-inch baking pan with parchment paper, leaving overhang on two sides. Lightly grease the parchment.
- In a large microwave-safe bowl, melt butter in 30-second intervals. Let cool 2-3 minutes. Add sugar and whisk until glossy and smooth.
- Add eggs one at a time, whisking well after each addition. Stir in vanilla extract.
- In a separate bowl, sift together cocoa powder, flour, and salt. Gradually fold dry ingredients into wet mixture using a rubber spatula until just combined.
- In a medium bowl, beat softened cream cheese until smooth. Add sugar and beat until incorporated. Add egg yolk and vanilla extract, mixing until just combined.
- Pour brownie batter into prepared pan and spread evenly. Transfer cream cheese mixture to a piping bag or zip-top bag with a small corner snipped off.
- Pipe cream cheese mixture in diagonal lines across the batter, spacing about 1 inch apart. Pipe diagonal lines in the opposite direction to create a diamond pattern.
- Using a toothpick or skewer, drag through the cream cheese lines in a continuous spiral motion from center outward. Wipe toothpick clean after each rotation. Do 3-4 rotations.
- Bake for 28-32 minutes, until edges are set and center jiggles slightly. A toothpick inserted near center should come out with a few moist crumbs.
- Cool completely in pan on a cooling rack (1-2 hours). For cleaner slices, refrigerate 30 minutes before cutting. Use parchment handles to lift brownies out, then slice into 16 squares.
Notes
Don’t overmix the batter to keep brownies fudgy. Use room temperature ingredients for best results. Pipe cream cheese mixture for clean lines. Don’t over-swirl—3-4 rotations is enough. Start checking brownies at 25 minutes to avoid overbaking. Let cool completely before cutting for clean slices. Brownies taste even better the next day.
Nutrition
- Serving Size: 1 brownie
- Calories: 220
- Sugar: 18
- Fat: 13
- Carbohydrates: 25
- Fiber: 1
- Protein: 4
Keywords: Halloween brownies, spiderweb brownies, cream cheese swirl brownies, fudgy brownies, Halloween dessert, spooky brownies



