Love this? Save it for later!
Share the inspiration with your friends
You know that feeling when you walk into someone’s house and the smell just stops you in your tracks? That happened to me last Tuesday when I stopped by my neighbor, Carol’s, to return a casserole dish she’d loaned me months ago. I’d been meaning to give it back for weeks—honestly, it was starting to feel like it was mine. But the second she cracked the door, this warm, sweet, almost caramelized scent wrapped around me like a hug. I didn’t even make it past the entryway before I blurted out, “What is that?”
Carol just shrugged. She wasn’t trying to impress anyone. She wasn’t hosting a brunch or a book club. She was just wearing an old t-shirt, barefoot, with a smear of flour on her cheek. “Oh, just some banana bread,” she said, like it was nothing. Like she hadn’t just created the single most intoxicating aroma I’d ever encountered in a residential kitchen. She gestured for me to come in, and I watched her pull a single loaf pan out of the oven. It was perfect. Golden brown, cracked right down the middle, and smelling like pure comfort.
She told me she makes it when the bananas on her counter start looking sad. “It’s the easiest thing,” she said, tossing a dirty bowl into the sink. “One bowl, no mixer, and you probably have everything already.” I mean, maybe you’ve been there—standing in a friend’s kitchen, watching them do something that seems so simple, yet you know you’re going to obsess over it for weeks. That was me. I begged her for the recipe, and she scribbled it on a torn piece of mail. I’ve made it every week since. It’s not just banana bread. It’s the banana bread that makes you close your eyes after the first bite.
Why You’ll Love This Recipe
Let me tell you why this easy one-bowl banana bread recipe has become my absolute go-to. I’ve tested it maybe a dozen times now, tweaking the flour ratio and the baking time until it was just right. I’m not a professional chef, but I’ve learned a thing or two from my fair share of baking disasters. This version is foolproof.
- Quick & Easy: This comes together in about 10 minutes of active prep. No stand mixer, no sifting, no fuss. It’s perfect for those moments when you need a homemade treat but don’t have the energy for a big production.
- Simple Ingredients: You likely have everything in your pantry right now. Overripe bananas, flour, sugar, eggs, butter—that’s it. No fancy extracts or specialty flours required.
- Perfect for Any Occasion: Great for a lazy Sunday morning, a last-minute hostess gift, or a midnight snack when you’re craving something sweet but not too heavy.
- Crowd-Pleaser: I’ve brought this to potlucks and family dinners, and it always disappears. Kids love it, adults fight over the end pieces, and everyone asks for the recipe.
- Unbelievably Delicious: The texture is what gets me every time. It’s incredibly moist without being gummy, with a tender crumb and a slightly crispy, caramelized crust. The flavor is deep and banana-forward, not at all artificial.
What makes this recipe different from the rest? It’s the method. Instead of creaming butter and sugar, we use melted butter. This makes the bread incredibly moist and eliminates the need for a mixer. Plus, we use a little trick—baking the bread at a slightly higher temperature for the first ten minutes—to get that gorgeous, domed top. This isn’t just another banana bread recipe. It’s the one that will ruin all others for you.
This is comfort food at its finest. It’s the kind of treat that makes you feel like everything is going to be okay. It’s perfect for using up those spotty bananas, impressing guests without stress, or just turning a regular Tuesday into something a little bit special. Honestly, it’s soul-soothing satisfaction in a loaf pan.
What Ingredients You Will Need
This recipe uses simple, wholesome ingredients to deliver bold flavor and a perfect texture. You’ll be amazed at how such a short list can create something so delicious. Most of these are pantry staples, making this the perfect recipe for a spontaneous bake.
- 2 to 3 ripe bananas, mashed (about 1 cup or 240g). The riper, the better! Look for bananas with lots of brown spots—they’re sweeter and easier to mash. I’ve even used completely black bananas; they work perfectly.
- 1/3 cup (75g) unsalted butter, melted (adds richness and moisture). I prefer using unsalted butter so I can control the salt level. If you only have salted butter, just reduce the added salt by 1/4 teaspoon.
- 3/4 cup (150g) granulated sugar. This gives the bread its sweetness and helps create that beautiful golden crust. You can reduce it to 1/2 cup if you prefer a less sweet bread, or if your bananas are very ripe.
- 1 large egg, at room temperature. A room-temperature egg incorporates more easily into the melted butter, creating a smoother batter. If you’re in a rush, place the egg in a bowl of warm water for 5 minutes.
- 1 teaspoon vanilla extract. This enhances the banana flavor beautifully. Use pure vanilla extract if you have it—the flavor is much deeper than imitation.
- 1 1/2 cups (190g) all-purpose flour. I recommend unbleached all-purpose flour for the best texture. For a gluten-free option, you can substitute a good 1:1 gluten-free baking flour blend.
- 1 teaspoon baking soda. This is our leavening agent. Make sure it’s fresh—check the expiration date! If your baking soda is old, your bread won’t rise properly.
- 1/4 teaspoon salt. Salt balances the sweetness and enhances all the flavors. Don’t skip it!
- Optional mix-ins: 1/2 cup (60g) chopped walnuts or 1/2 cup (90g) chocolate chips. I’m partial to dark chocolate chips myself—they add little pockets of melty goodness.
When choosing your bananas, look for ones that are soft and heavily speckled with brown. They should be easy to mash with a fork. If your bananas aren’t ripe enough, you can place them (unpeeled) on a baking sheet in a 300°F (150°C) oven for 15-20 minutes until the skins turn black. Let them cool before mashing. For the butter, I typically use Plugrá or Kerrygold for their higher fat content, but any unsalted butter will work beautifully.
Equipment Needed
The beauty of this easy one-bowl banana bread recipe is that it requires very little equipment. You don’t need a stand mixer or any fancy gadgets. Here’s what you’ll need:
- One large mixing bowl. That’s it! I use a standard 4-quart glass bowl. It’s big enough to mash the bananas and mix everything without making a mess.
- A 9×5-inch loaf pan. This is the standard size for banana bread. If you use an 8×4-inch pan, you’ll need to increase the baking time by 5-10 minutes. I have an old, scratched-up metal one that I love—it conducts heat really evenly.
- A fork or potato masher for mashing the bananas. A fork works perfectly, but a potato masher makes it even faster.
- A wooden spoon or rubber spatula for mixing. I prefer a sturdy rubber spatula because it gets the sides of the bowl clean.
- Parchment paper. This is optional but highly recommended. Lining the pan with parchment paper makes it incredibly easy to lift the bread out after it cools. You can also just grease the pan well with butter or non-stick spray.
- Measuring cups and spoons. For accuracy, especially with the baking soda. I have a set of stainless steel ones that have lasted for years.
- A cooling rack. This allows air to circulate around the bread, preventing the bottom from getting soggy. If you don’t have one, you can carefully balance the pan on two upside-down ramekins.
That’s it! No mixer, no sifter, no special tools. This is truly a one-bowl wonder. If you don’t have a loaf pan, you can bake this in an 8×8-inch square pan, but reduce the baking time to 35-40 minutes.
Preparation Method
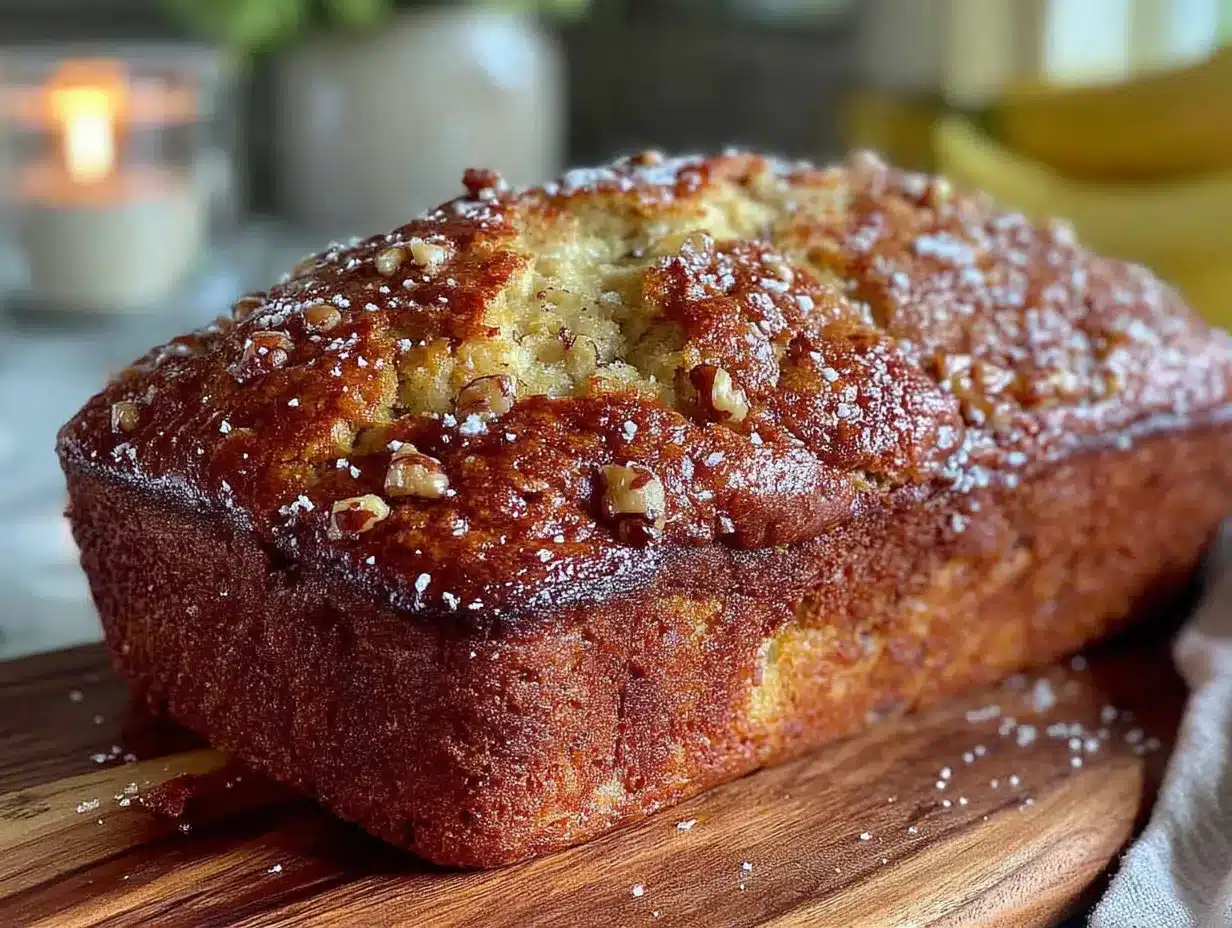
Alright, let’s get baking! This is so simple, you’ll have the batter ready before the oven even finishes preheating. Follow these steps, and you’ll have the best banana bread of your life.
- Preheat your oven to 350°F (175°C). While it’s heating, grease a 9×5-inch loaf pan with butter or non-stick spray. For extra insurance, cut a strip of parchment paper to fit the bottom and long sides of the pan, leaving an overhang on each side. This makes lifting the bread out a breeze.
- Mash the bananas. In your large mixing bowl, add the 2-3 ripe bananas. Use a fork or potato masher to mash them until they’re mostly smooth. I like to leave a few small lumps for texture—it reminds you that there’s real fruit in there! You should have about 1 cup of mashed banana.
- Add the wet ingredients. To the mashed bananas, add the 1/3 cup of melted butter, 3/4 cup of sugar, 1 egg, and 1 teaspoon of vanilla extract. Stir everything together with your wooden spoon or spatula until it’s well combined. The mixture will look a little grainy from the sugar, and that’s perfectly fine.
- Add the dry ingredients. Sprinkle the 1 1/2 cups of flour, 1 teaspoon of baking soda, and 1/4 teaspoon of salt right on top of the wet mixture. Now, here’s the important part: stir just until the flour disappears. Do not overmix! Overmixing develops the gluten in the flour, which can make your banana bread tough and dense. A few small streaks of flour are okay. If you’re adding walnuts or chocolate chips, fold them in now with a few gentle strokes.
- Pour the batter into the prepared pan. Use your spatula to scrape every last bit of batter into the pan. Spread it out evenly. For that classic bakery-style crack down the middle, you can press a thin slice of cold butter lengthwise down the center of the batter. It’s a little trick I learned from Carol.
- Bake for 55-65 minutes. Place the pan in the center of the oven and bake until a toothpick inserted into the center comes out clean or with just a few moist crumbs. The top should be a deep golden brown. If the top is browning too quickly after 40 minutes, tent the pan loosely with aluminum foil.
- Cool in the pan. Once baked, place the pan on a cooling rack and let the bread cool in the pan for about 10 minutes. This allows it to set and makes it easier to remove.
- Remove and cool completely. After 10 minutes, run a knife around the edges of the pan if you didn’t use parchment. Lift the bread out using the parchment overhang (or carefully turn it out onto the rack). Let it cool completely on the rack before slicing. I know it’s tempting, but slicing into warm banana bread can make it crumble. Patience, my friend!
Cooking Tips & Techniques
Over the years, I’ve learned a few things the hard way. Here are my best tips for banana bread success, straight from my own kitchen failures.
The number one mistake: overmixing. I can’t stress this enough. When I first started baking, I would beat the batter until it was perfectly smooth and silky. The result? A tough, rubbery loaf that was more brick than bread. The gluten in the flour develops as you stir, so you want to mix gently and just until the ingredients are combined. A few lumps are your friend.
Use the “toothpick test” correctly. I once pulled my bread out of the oven because the toothpick came out clean, only to find a sunken, gummy center. The trick is to insert the toothpick into the very center of the loaf, not off to the side. If it comes out with wet batter, it needs more time. If it comes out with a few moist crumbs, it’s perfect.
Let your bananas get ugly. I used to think bananas were only good when they were yellow and firm. For banana bread, you want them to look almost rotten. The brown spots indicate that the starches have converted to sugar, which means more flavor and sweetness. If your bananas aren’t ripe enough, your bread will be bland and less sweet.
Room temperature ingredients matter. I know, it’s annoying. But a cold egg can seize the melted butter, creating a lumpy batter. Take the egg out of the fridge 30 minutes before you start, or submerge it in warm water for a few minutes. It makes a real difference in the texture.
Master the timing. Start checking your bread at the 50-minute mark. Every oven is different—mine runs a little hot, so my bread is usually done at 55 minutes. If you’re using a glass or dark-colored pan, your bread will bake faster, so start checking even earlier.
Variations & Adaptations
This easy one-bowl banana bread recipe is a fantastic base for experimentation. I’ve tried many variations, and here are a few of my favorites. Don’t be afraid to make it your own!
- Chocolate Chip Banana Bread: This is my personal favorite. Fold in 1/2 cup of semi-sweet or dark chocolate chips along with the flour. The chocolate melts into little pockets of richness that pair perfectly with the banana. I’ve also used white chocolate chips for a sweeter, creamier version.
- Nutty Banana Bread: Add 1/2 cup of chopped walnuts or pecans. Toast them in a dry pan over medium heat for 2-3 minutes first to bring out their flavor. The crunch adds a wonderful textural contrast to the soft bread.
- Vegan Banana Bread: This works surprisingly well! Replace the egg with a “flax egg” (1 tablespoon ground flaxseed mixed with 3 tablespoons water, let sit for 5 minutes). Use melted coconut oil or a neutral vegetable oil instead of butter. The texture will be slightly denser but still incredibly moist and delicious.
- Gluten-Free Banana Bread: Substitute the all-purpose flour with a good quality 1:1 gluten-free baking blend. I’ve had great success with the King Arthur Measure for Measure blend. Add an extra tablespoon of flour to compensate for the lack of gluten structure.
- Spiced Banana Bread: Add 1 teaspoon of ground cinnamon, 1/2 teaspoon of ground nutmeg, and a pinch of ground cloves to the flour. This gives the bread a warm, cozy flavor that’s perfect for fall. It reminds me of pumpkin bread, but with bananas.
Serving & Storage Suggestions
This banana bread is fantastic on its own, but there are a few ways to make it even more special. Here’s how I like to serve and store mine.
Serving: I prefer this bread at room temperature. The texture is at its peak, and the flavors are perfectly balanced. For an extra treat, slice a piece and toast it lightly in a pan with a little butter. The outside gets crispy while the inside stays soft and warm. It’s divine. Serve it with a pat of salted butter, a drizzle of honey, or a dollop of Greek yogurt. It’s also wonderful with a cup of coffee or a glass of cold milk.
Storage: Store leftover banana bread tightly wrapped in plastic wrap or in an airtight container at room temperature. It will stay moist and delicious for up to 4 days. Do not refrigerate it—the cold air will dry it out and make it stale faster. I’ve found that wrapping it in beeswax wrap works beautifully.
Freezing: This banana bread freezes like a dream. Let it cool completely, then wrap it tightly in a layer of plastic wrap, followed by a layer of aluminum foil. It will keep in the freezer for up to 3 months. To thaw, let it sit on the counter for a few hours or overnight in the fridge. You can even slice it before freezing, so you can pull out just one piece at a time.
Reheating: The best way to reheat a slice is in a toaster oven or a dry skillet over medium-low heat for 2-3 minutes per side. You can also microwave a slice for 15-20 seconds, but it won’t have that nice crispy exterior. The flavors actually improve after a day or two, as the banana flavor has time to meld with the other ingredients.
Nutritional Information & Benefits
While banana bread is a treat, it does have some redeeming qualities. Here’s a rough breakdown of the nutritional information per slice (based on 10 slices):
| Nutrient | Amount per Slice |
|---|---|
| Calories | ~220 |
| Total Fat | 8g |
| Saturated Fat | 5g |
| Cholesterol | 35mg |
| Sodium | 200mg |
| Total Carbohydrates | 35g |
| Dietary Fiber | 1g |
| Sugars | 18g |
| Protein | 3g |
Bananas are a great source of potassium, which is essential for heart health and muscle function. They also contain vitamin B6 and vitamin C. This recipe uses less sugar than many traditional versions, and the butter provides a source of healthy fats. If you’re looking to reduce the sugar, you can cut it down to 1/2 cup without affecting the texture too much. For a lower-fat option, you can substitute half of the butter with unsweetened applesauce, though the bread will be slightly less tender. This recipe is not suitable for those with gluten intolerance unless you use a gluten-free flour blend, and it contains dairy and eggs.
Conclusion
Honestly, this easy one-bowl banana bread recipe is more than just a recipe to me. It’s a reminder of that Tuesday afternoon in Carol’s kitchen, of the smell that made me feel instantly at home, and of the simple joy of sharing something delicious with someone. It’s the recipe I turn to when I need comfort, when I have sad bananas, or when I just want to make my house smell amazing. It’s proof that you don’t need fancy techniques or a long list of ingredients to create something truly special.
I really hope you give this a try. Don’t be afraid to make it your own—add chocolate chips, throw in some nuts, or just keep it pure and simple. The best recipes are the ones you make your own. Please come back and let me know how it turned out in the comments! Did you add any fun mix-ins? Did your family love it as much as mine does? I can’t wait to hear about your banana bread adventures. Happy baking, friend!
Frequently Asked Questions
Can I use frozen bananas for this recipe?
Absolutely! Frozen bananas are perfect for banana bread. Thaw them completely at room temperature, then drain off any excess liquid before mashing. The thawing process actually makes them even sweeter and easier to mash.
Why did my banana bread sink in the middle?
A sunken middle usually means the bread was underbaked or the oven temperature was too low. Make sure your oven is fully preheated and use the toothpick test to check for doneness. Also, overmixing the batter can cause the bread to rise too quickly and then collapse.
Can I make this recipe into muffins?
Yes! This batter makes about 12 standard muffins. Grease a muffin tin or line with paper liners. Fill each cup about 2/3 full. Bake at 350°F (175°C) for 18-22 minutes, or until a toothpick inserted into the center comes out clean.
How do I know when my bananas are ripe enough?
Look for bananas that are heavily speckled with brown spots or even mostly black. They should be soft to the touch and smell very sweet. If they’re still yellow and firm, they’re not ready yet. You can speed up the ripening process by placing them in a paper bag with an apple overnight.
Can I reduce the sugar in this recipe?
Yes, you can reduce the sugar to 1/2 cup without significantly affecting the texture. The bread will be slightly less sweet, which some people prefer. If your bananas are very ripe and sweet, you can even go down to 1/3 cup. Just keep in mind that sugar also contributes to the moistness and browning of the bread.
Pin This Recipe!
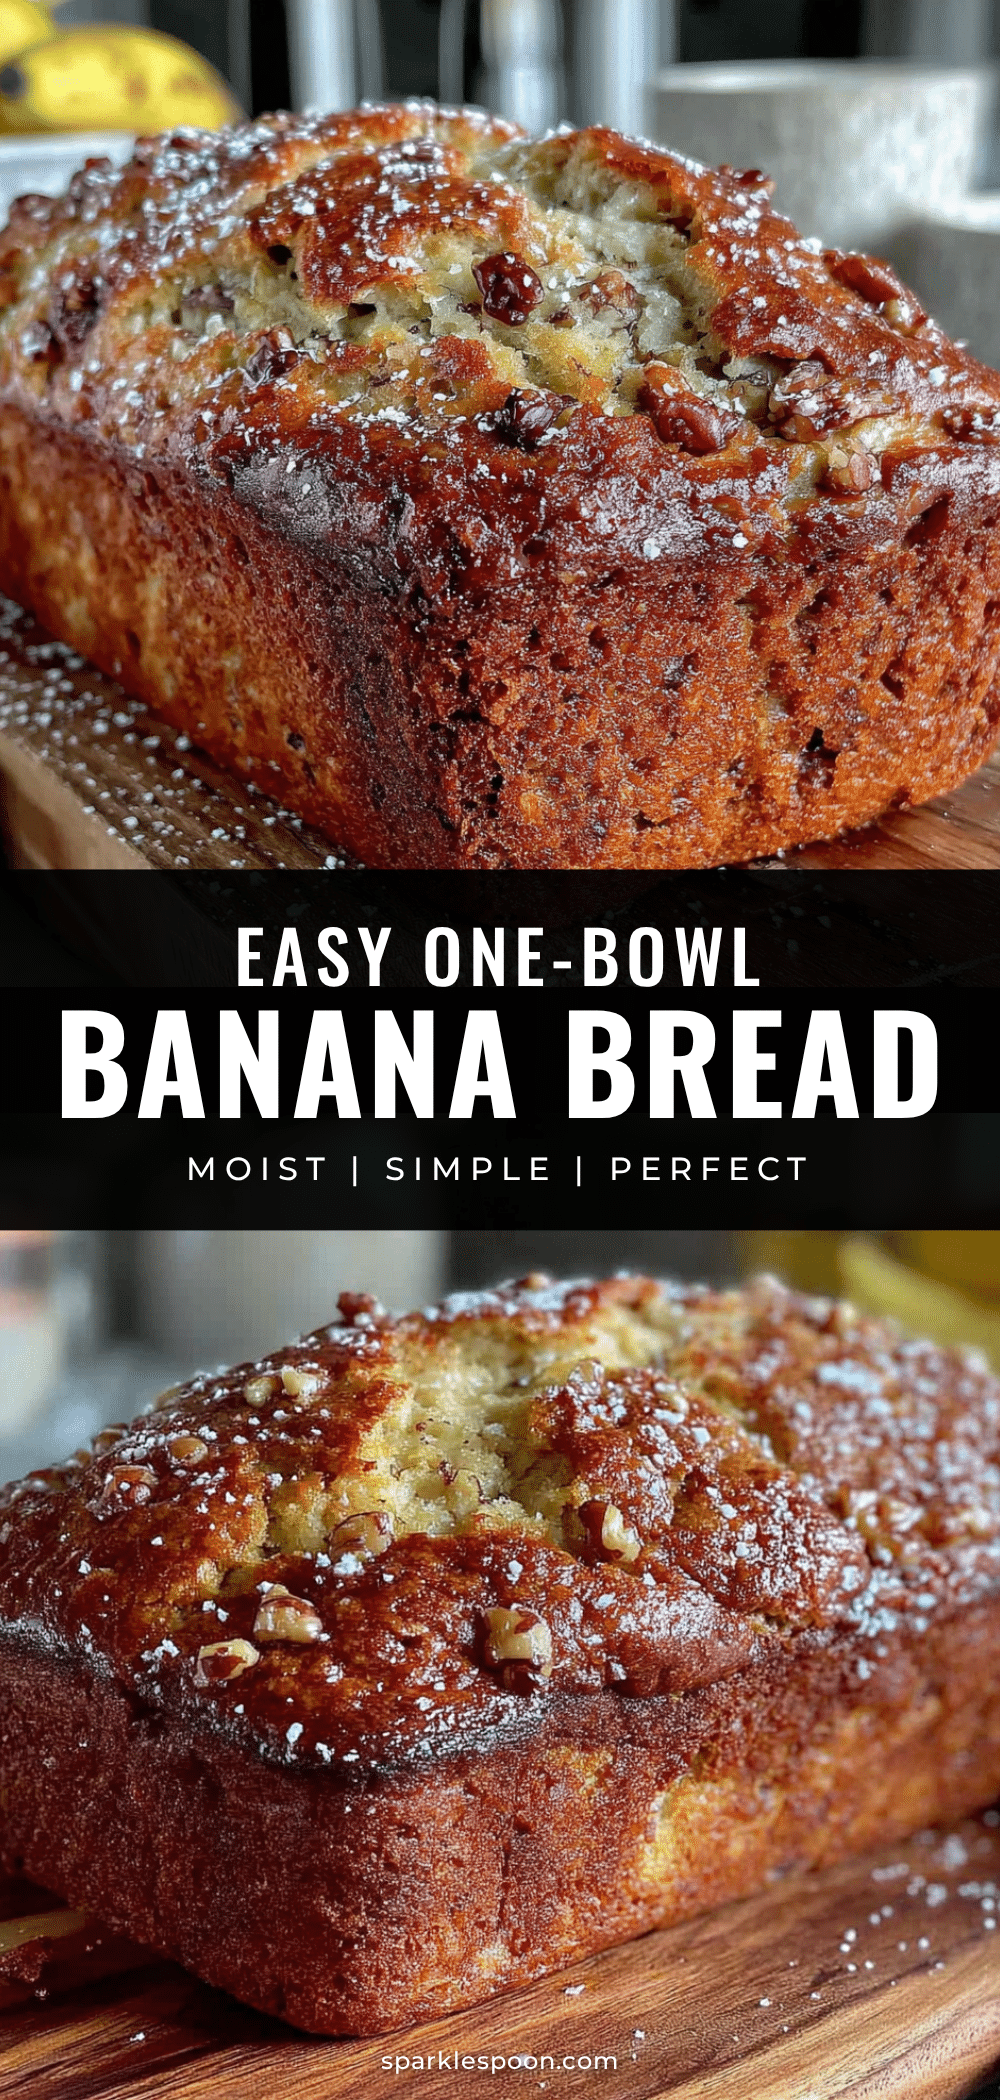
Easy One-Bowl Banana Bread Recipe: Best Homemade Treat
This easy one-bowl banana bread is incredibly moist, tender, and full of banana flavor. Made with simple ingredients and no mixer, it’s the perfect comfort food for any occasion.
- Prep Time: 10 minutes
- Cook Time: 55-65 minutes
- Total Time: 1 hour 5 minutes to 1 hour 15 minutes
- Yield: 10 servings 1x
- Category: Dessert
- Cuisine: American
Ingredients
- 2 to 3 ripe bananas, mashed (about 1 cup or 240g)
- 1/3 cup (75g) unsalted butter, melted
- 3/4 cup (150g) granulated sugar
- 1 large egg, at room temperature
- 1 teaspoon vanilla extract
- 1 1/2 cups (190g) all-purpose flour
- 1 teaspoon baking soda
- 1/4 teaspoon salt
- Optional: 1/2 cup (60g) chopped walnuts or 1/2 cup (90g) chocolate chips
Instructions
- Preheat your oven to 350°F (175°C). Grease a 9×5-inch loaf pan with butter or non-stick spray. Optionally, line with parchment paper for easy removal.
- In a large mixing bowl, mash the ripe bananas with a fork or potato masher until mostly smooth, leaving a few small lumps for texture.
- Add the melted butter, sugar, egg, and vanilla extract to the mashed bananas. Stir until well combined.
- Sprinkle the flour, baking soda, and salt over the wet mixture. Stir gently just until the flour disappears. Do not overmix. If using, fold in walnuts or chocolate chips.
- Pour the batter into the prepared loaf pan and spread evenly. For a bakery-style crack, press a thin slice of cold butter lengthwise down the center of the batter.
- Bake for 55-65 minutes, or until a toothpick inserted into the center comes out clean or with a few moist crumbs. If the top browns too quickly, tent with aluminum foil after 40 minutes.
- Let the bread cool in the pan on a cooling rack for 10 minutes.
- Remove the bread from the pan (using parchment overhang if used) and cool completely on the rack before slicing.
Notes
Use very ripe bananas with brown spots for best flavor and sweetness. Do not overmix the batter to avoid a tough loaf. For a vegan version, replace the egg with a flax egg and use melted coconut oil instead of butter. For gluten-free, use a 1:1 gluten-free baking flour blend. Store at room temperature for up to 4 days or freeze for up to 3 months.
Nutrition
- Serving Size: 1 slice
- Calories: 220
- Sugar: 18
- Sodium: 200
- Fat: 8
- Saturated Fat: 5
- Carbohydrates: 35
- Fiber: 1
- Protein: 3
Keywords: banana bread, easy banana bread, one-bowl banana bread, homemade banana bread, moist banana bread, quick bread, banana recipe



