Love this? Save it for later!
Share the inspiration with your friends
The power went out halfway through my daughter’s Halloween party last year. There I was, standing in a dim kitchen with ten hungry five-year-olds dressed as ghosts and superheroes, clutching a package of hot dogs like they were the last hope for civilization. The backup battery on my phone gave me just enough light to see what I was doing, and honestly? That’s when these mummy hot dog bites were born. Not out of some grand culinary plan, but out of pure, panicked necessity.
I remember fumbling with the crescent roll dough, my fingers slightly sticky from the butter I’d been melting for popcorn. The kids were getting restless—I could hear the stomping of little feet and the occasional shriek from the living room. I cut the dough into thin strips, wrapped them around the hot dogs haphazardly, and popped them in the oven hoping for the best. When they came out golden and slightly crooked, with little mustard dots for eyes staring back at me, I knew I’d stumbled onto something special. The kids devoured them in about four minutes flat, and I’ve been making them every Halloween since.
Maybe you’ve been there too—scrambling at the last minute for something that looks festive but doesn’t require a culinary degree. These mummy bites are that recipe. They’re the kind of thing you can throw together when the party starts in twenty minutes and you’ve forgotten to plan anything remotely spooky. I mean, let’s be real: kids don’t care if the mummy wrapping is perfect. They care that it tastes good and looks a little bit scary. These deliver on both fronts, and they’ve saved my hide more times than I can count.
Why You’ll Love This Recipe
I’ve tested these mummy hot dog bites at three different Halloween parties now, and they’ve never let me down. Here’s why I keep coming back to them:
- Quick & Easy: From fridge to table in under 25 minutes. Seriously, you can make these during a single episode of your favorite spooky show.
- Simple Ingredients: Just hot dogs, crescent roll dough, and a dab of mustard or ketchup. You probably already have everything in your kitchen right now.
- Perfect for Parties: They’re the ultimate finger food for Halloween gatherings, classroom celebrations, or even a fun family movie night.
- Crowd-Pleaser: I’ve watched picky eaters, adults, and even my neighbor who “doesn’t do processed food” sneak a second one. They’re irresistible.
- Unbelievably Cute: Let’s face it—there’s something deeply satisfying about a hot dog that looks like it just crawled out of a tomb. The kids go wild for them.
What makes these different from other Halloween snacks is the texture. The crescent roll dough gets perfectly flaky and golden while the hot dog stays juicy inside. I’ve tried using puff pastry and even homemade dough, but nothing beats the convenience and consistent results of store-bought crescent rolls. It’s not fancy, but it works every single time.
This recipe isn’t just good—it’s the kind that makes you close your eyes after the first bite. It’s comfort food reimagined for the spookiest night of the year, and it delivers that same soul-soothing satisfaction without the stress.
What Ingredients You Will Need
This recipe uses simple, everyday ingredients to create something that feels special. You won’t need to hunt down any obscure items or make a special trip to a fancy grocery store.
- Hot dogs (8 count, standard size): I prefer beef hot dogs for their richer flavor, but turkey or chicken hot dogs work great too. Look for brands like Nathan’s or Oscar Mayer for the best texture. If you’re feeding a crowd, grab the jumbo size and adjust your bake time slightly.
- Refrigerated crescent roll dough (1 can, 8 rolls): Pillsbury is my go-to brand because the dough is consistently easy to work with. Make sure it’s cold when you open it—warm dough gets sticky and hard to cut into strips.
- Yellow mustard (for eyes): This is non-negotiable for the mummy look. The bright yellow color pops against the golden dough. You can use spicy brown mustard if that’s what you have, but the color won’t be as striking.
- Ketchup (optional, for blood effects): A tiny dab adds a gory touch that older kids and adults appreciate. I sometimes skip it for younger audiences who might find it too realistic.
- Butter (1 tablespoon, melted): Brushing this on before baking gives the mummies that gorgeous golden-brown finish. Use salted butter for extra flavor.
- Sesame seeds or poppy seeds (optional, for texture): I sprinkle these on sometimes for a more “baked good” look, but they’re completely optional.
Ingredient selection tip: Look for hot dogs that are uniform in size so your mummies bake evenly. I once used a pack of mixed-length hot dogs, and the smaller ones got overcooked while the larger ones were barely warm in the center. Lesson learned!
Substitution guidance: For a gluten-free version, use gluten-free crescent roll dough (I’ve had good luck with the brand Against the Grain). For a dairy-free option, skip the butter brush or use melted vegan butter. And if you’re feeding vegetarians, veggie dogs work perfectly—just check that your crescent roll dough is plant-based.
Equipment Needed
You don’t need a fully stocked kitchen for these, which is part of their charm.
- Baking sheet (standard half-sheet size): Line it with parchment paper for easy cleanup. I’ve forgotten the parchment before, and let me tell you, scraping melted cheese and dough off a baking sheet is not how I want to spend my Halloween evening.
- Sharp knife or pizza cutter: A pizza cutter makes slicing the dough into strips infinitely easier. If you’re using a knife, make sure it’s sharp—dull blades will squish the dough.
- Pastry brush: For applying the melted butter. A silicone brush works best because it doesn’t shed bristles. I learned this the hard way when I found a rogue bristle baked into one of my mummies.
- Small bowl: For the melted butter and for mixing mustard if you’re getting fancy with the eyes.
- Toothpicks (optional): If your dough strips are being stubborn, a toothpick can help secure them in place during baking.
Budget-friendly tip: If you don’t have a pastry brush, use a folded paper towel to dab the butter on. It’s not as elegant, but it gets the job done.
Preparation Method
- Preheat your oven to 375°F (190°C). Line a baking sheet with parchment paper. While the oven heats up, take your crescent roll dough out of the fridge—you want it cold but pliable.
- Unroll the crescent roll dough onto a clean cutting board. Don’t separate the triangles yet. Instead, press the perforated seams together gently with your fingers to create one solid sheet of dough. This makes cutting strips much easier.
- Cut the dough into thin strips. Using a sharp knife or pizza cutter, slice the dough lengthwise into 8-10 strips per can. Aim for strips about 1/4 inch wide. They don’t have to be perfect—mummies are supposed to look a little messy! I’ve made strips that were all different widths, and they still turned out adorable.
- Prepare your hot dogs. Pat them dry with a paper towel. This helps the dough stick better. If your hot dogs are particularly long, you can cut them in half crosswise to make mini mummies. For standard-sized hot dogs, leave them whole.
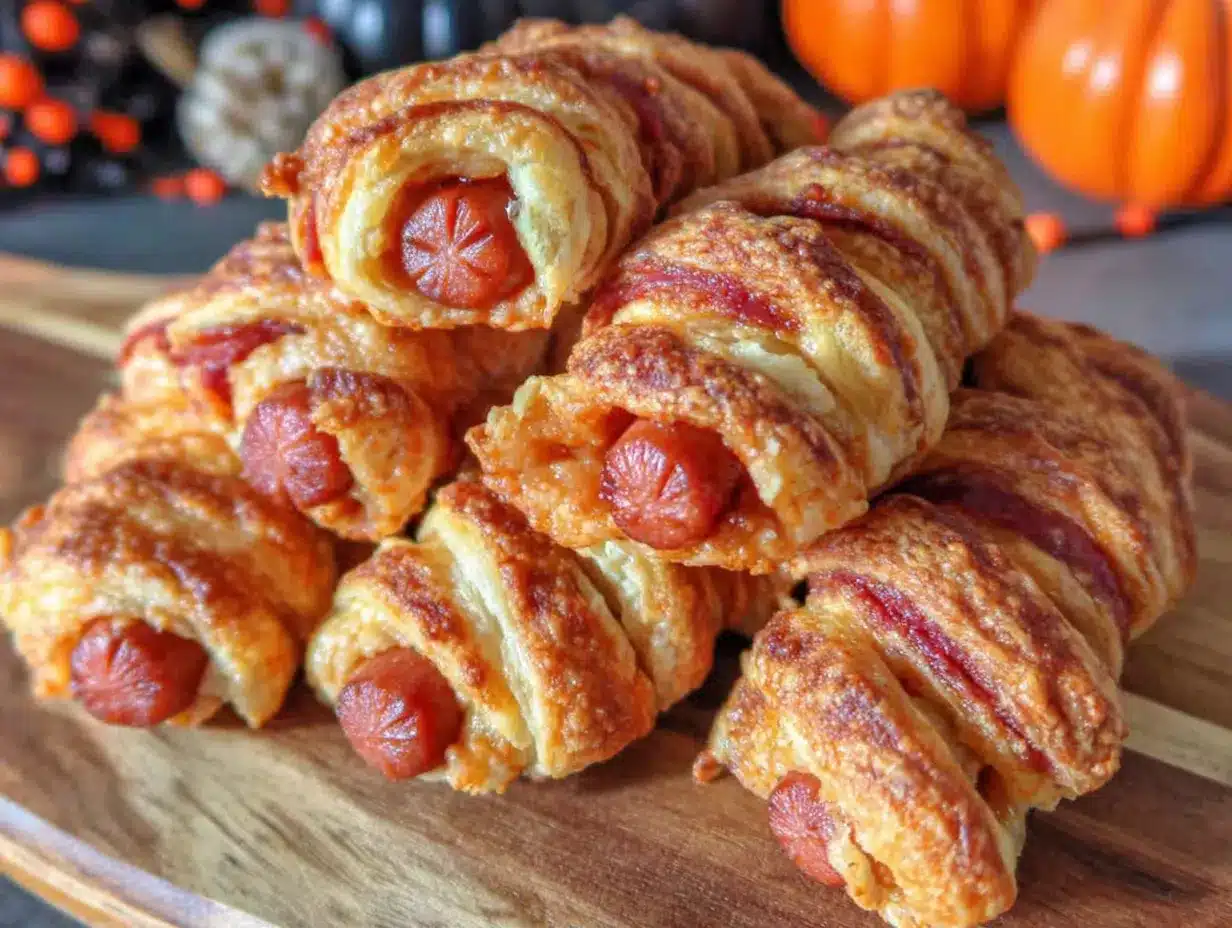
- Wrap the mummies. Take one strip of dough and wrap it around a hot dog, starting at one end and working your way to the other. Leave a small gap near the top for the “face.” Don’t wrap too tightly—the dough will expand as it bakes, and you want the mummy look to be slightly loose and uneven. Overlap the strips slightly for that authentic bandaged appearance.
- Place the wrapped hot dogs on the baking sheet, leaving about an inch of space between each one. They won’t spread much, but they need a little breathing room for even browning.
- Brush with melted butter. Using your pastry brush, lightly coat each mummy with melted butter. This is what gives them that beautiful golden color. Don’t skip this step—I did once, and they came out pale and sad-looking.
- Bake for 12-15 minutes, or until the dough is golden brown and the hot dogs are heated through. The exact time depends on your oven and how thick your dough strips are. Start checking at the 12-minute mark. The mummies should look puffed up and slightly crispy on the edges.
- Let them cool for 2-3 minutes on the baking sheet. This is crucial—the hot dogs are piping hot, and you don’t want anyone burning their mouth. Plus, the dough needs a moment to set so it doesn’t fall apart when you add the eyes.
- Add the eyes. Using a toothpick or the tip of a knife, dab a small dot of yellow mustard where the eyes should go. For a spookier look, make the dots uneven or slightly smeared. If you’re using ketchup for blood effects, add a tiny drop near the “mouth” area.
Sensory cue: When they’re done, the kitchen should smell like buttery, toasty bread with that unmistakable hot dog aroma. The mummies should be golden brown with slightly darker edges where the dough overlaps. If they’re pale, give them another 2 minutes in the oven.
Cooking Tips & Techniques
I’ve made these mummy bites at least a dozen times now, and I’ve collected some hard-won wisdom along the way.
Keep the dough cold. Warm crescent roll dough turns into a sticky, unmanageable mess. If your kitchen is warm, pop the dough in the fridge for 10 minutes before you start cutting. I learned this lesson on a particularly hot October afternoon when the dough basically melted in my hands. Not fun.
Don’t over-wrap. I made the mistake of using too many dough strips on my first batch, and the mummies came out more like dough balls with hot dog centers. Two to three strips per hot dog is plenty. You want to see glimpses of the hot dog peeking through—that’s what makes them look like mummies.
Space them out. I once crowded all twelve mummies onto one baking sheet, and they baked into each other, creating a giant mummy blob. They still tasted fine, but presentation-wise? Not my finest moment. Give them at least an inch of space.
Test for doneness. The dough should be golden brown and sound hollow when you tap it. If the dough is still soft or doughy-looking, they need more time. Every oven runs differently, so trust your eyes over the timer.
Multitasking strategy: While the mummies are baking, set up a dipping station with ketchup, mustard, and maybe some ranch dressing. This keeps the chaos contained and makes serving a breeze.
Variations & Adaptations
Over the years, I’ve experimented with different versions of these mummy bites, and here are my favorites:
- Cheesy Mummies: Before wrapping the hot dog, cut a slit lengthwise and stuff it with a thin strip of cheddar or mozzarella cheese. The cheese oozes out during baking, giving the mummies a gooey, delicious surprise. My kids beg for these every year.
- Spicy Mummies: Use spicy jalapeño hot dogs or brush the dough with a mixture of melted butter and hot sauce before baking. The heat cuts through the buttery richness perfectly. I tried this for a grown-up Halloween party, and they disappeared faster than the regular ones.
- Veggie Mummies: Swap the hot dogs for plant-based veggie dogs. I’ve used both MorningStar and Field Roast brands with great results. Just note that veggie dogs tend to be a bit softer, so handle them gently when wrapping.
- Pigs in a Blanket Style: Instead of wrapping individual hot dogs, cut them into thirds and wrap each piece with a small strip of dough. These bite-sized versions are perfect for little hands and disappear in seconds at parties.
- Sweet Mummies: For a dessert twist, replace the hot dogs with cooked cocktail sausages and drizzle with a honey-mustard glaze after baking. Okay, that’s not really a dessert, but it’s delicious. For actual sweets, try wrapping chocolate-dipped bananas in dough strips and baking for a treat.
Dietary adaptations: For a low-carb version, use cheese wraps or thinly sliced deli meat instead of crescent roll dough. I haven’t tested this extensively, but a friend with diabetes swears by it.
Serving & Storage Suggestions
These mummy bites are best served warm, right out of the oven. The contrast between the flaky, buttery dough and the juicy hot dog is at its peak when they’re fresh. Arrange them on a platter with a small bowl of mustard for dipping, and watch them vanish.
For a full Halloween spread, pair them with:
- Spiderweb dip (cream cheese with black olive spiders on top)
- Witch’s brew punch (lime sherbet floating in lemonade)
- Ghost-shaped sugar cookies for dessert
Storage: If you have leftovers (unlikely, but possible), store them in an airtight container in the refrigerator for up to 3 days. The dough will soften slightly, but they’re still tasty. To reheat, pop them in a 350°F oven for 5-7 minutes until warmed through. The microwave works in a pinch, but the dough will be soggy.
Freezer instructions: You can freeze the unbaked mummies! Wrap them individually in plastic wrap, then place in a freezer bag. When you’re ready to bake, add 2-3 minutes to the baking time. I’ve done this for last-minute playdates, and it’s a lifesaver.
Flavor development note: These don’t really get better with age—they’re definitely a fresh-out-of-the-oven kind of snack. But they’re so quick to make that you can easily whip up a batch on demand.
Nutritional Information & Benefits
Let’s be honest—these are a treat, not a health food. But here’s what you’re looking at per serving (one mummy bite):
- Calories: ~180
- Protein: 7g
- Carbohydrates: 14g
- Fat: 11g
- Sodium: 480mg
Hot dogs are a decent source of protein, and the crescent roll dough provides quick energy. If you’re concerned about sodium, look for low-sodium hot dogs or turkey dogs. For a slightly healthier version, use whole-wheat crescent roll dough and nitrate-free hot dogs.
Allergen note: This recipe contains wheat (gluten) and dairy (butter). For gluten-free or dairy-free options, see the variations section above.
From a wellness perspective, I think it’s okay to have fun with food sometimes. Halloween is one night a year, and these mummy bites bring so much joy to kids and adults alike. Balance is key—enjoy them as part of a festive celebration, and don’t stress about the numbers.
Conclusion
These mummy hot dog bites have become a Halloween tradition in my house, and I hope they become one in yours too. They’re proof that you don’t need fancy ingredients or complicated techniques to create something memorable. A package of hot dogs, a can of crescent rolls, and a little imagination—that’s all it takes.
I love how customizable these are. You can make them cheesy, spicy, or keep them classic. You can involve the kids in wrapping the dough (fair warning: it gets messy, but that’s half the fun). And when you see those little mustard eyes staring up from the platter, you’ll know you’ve created something special.
So go ahead—give these a try for your next Halloween party, or even just for a fun weeknight dinner. And when you do, come back and let me know how they turned out! Did your kids love them? Did you try a crazy variation? I’d love to hear about it in the comments below. Happy Halloween, and happy cooking!
Frequently Asked Questions
Can I make these mummy hot dog bites ahead of time?
Absolutely! You can assemble them up to 24 hours in advance and keep them covered in the refrigerator. Just bake them right before serving for the best texture. If you’re really planning ahead, freeze them unbaked for up to a month.
What can I use instead of crescent roll dough?
Puff pastry works beautifully—just cut it into thin strips the same way. You can also use refrigerated pizza dough or even homemade pie crust. Each option gives a slightly different texture, but they all taste great.
How do I get the mustard eyes to stay put?
Make sure the mummies have cooled for at least 2-3 minutes before adding the eyes. If the dough is too hot, the mustard will just melt and run off. For a more stable option, use tiny dots of cream cheese or sour cream instead.
Can I use cocktail sausages instead of hot dogs?
Yes, and they make perfect bite-sized mummies! Just cut your crescent roll strips smaller to match the size of the sausages. Reduce the baking time by 2-3 minutes since they’re smaller.
My dough keeps tearing when I wrap it—what am I doing wrong?
This usually happens when the dough is too warm. Pop it in the fridge for 10 minutes to firm up. Also, make sure your knife or pizza cutter is sharp—dull blades will drag and tear the dough instead of cutting cleanly.
Pin This Recipe!
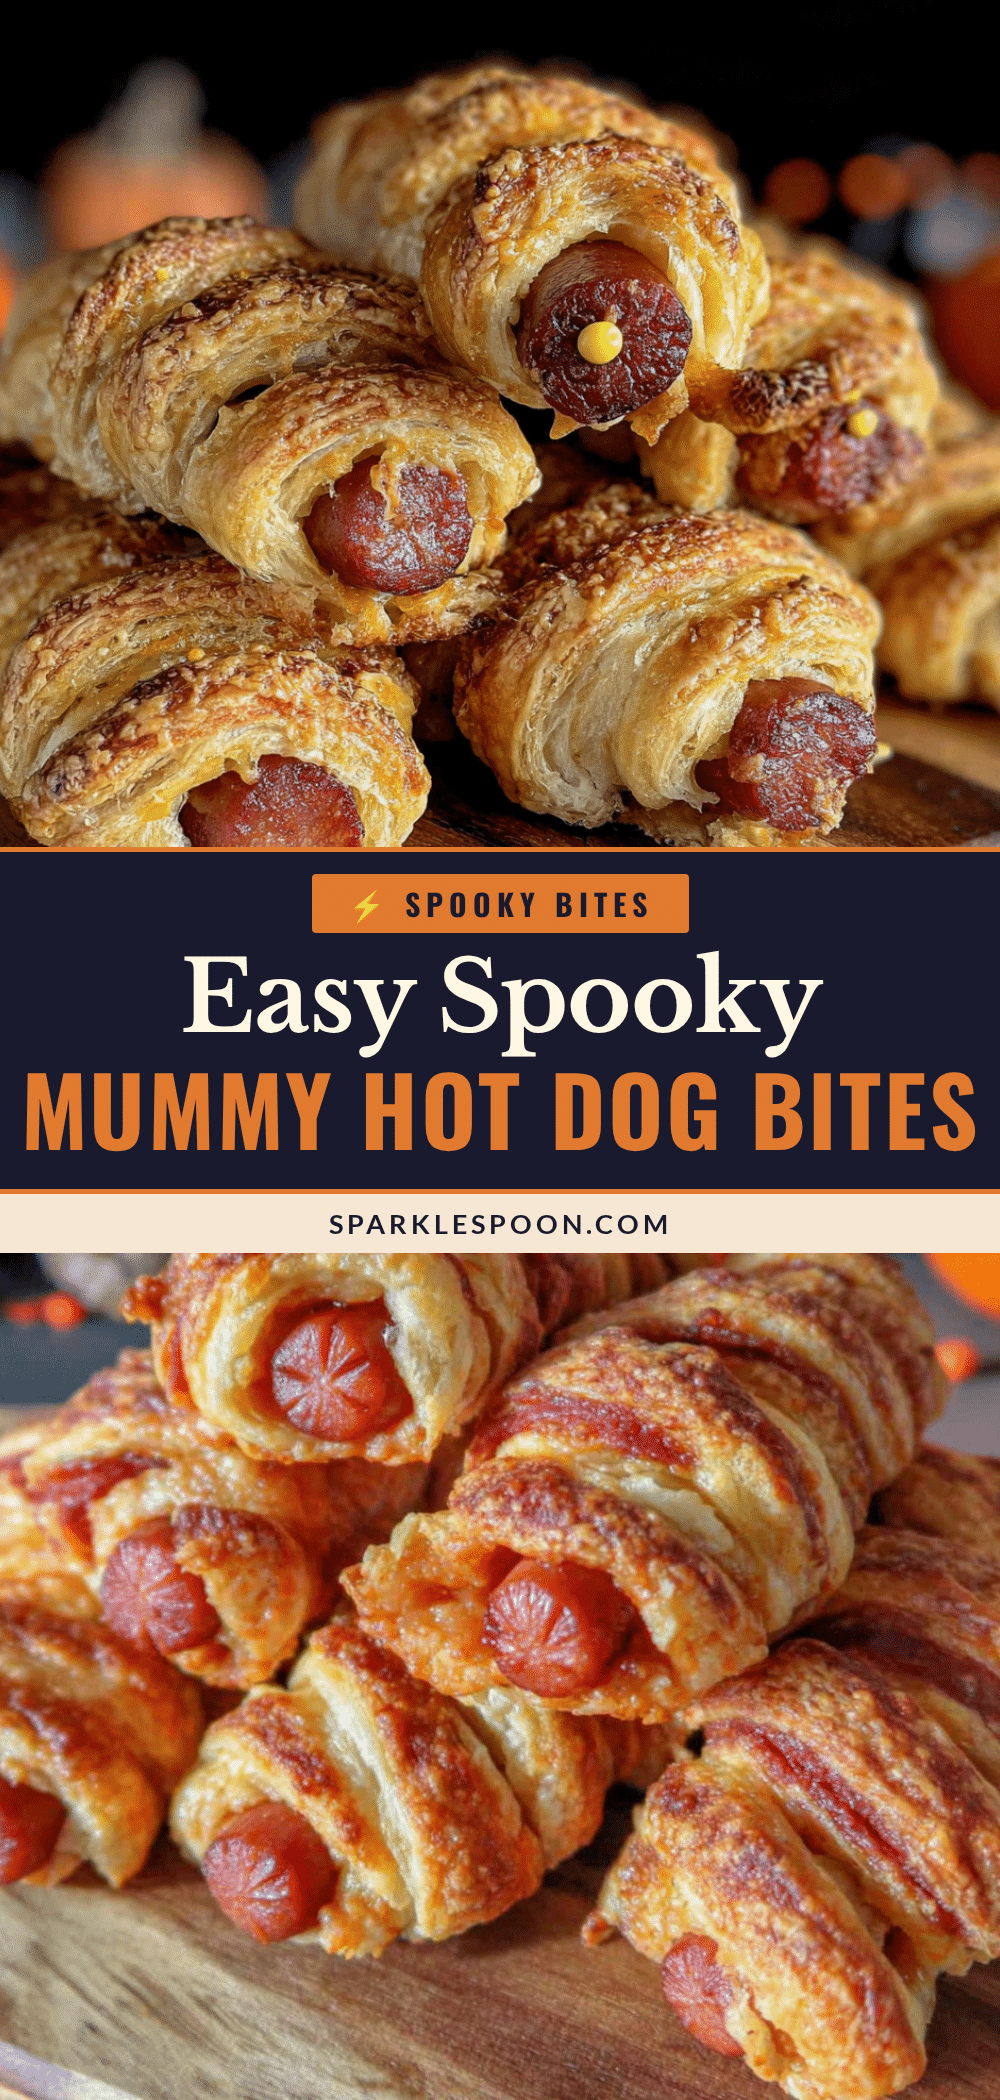
Best Easy Mummy Hot Dog Bites for a Spooky Halloween Party

These mummy hot dog bites are a quick and easy Halloween snack made with hot dogs and crescent roll dough, wrapped to look like little mummies. Perfect for parties, they’re ready in under 25 minutes and always a crowd-pleaser.
- Prep Time: 10 minutes
- Cook Time: 15 minutes
- Total Time: 25 minutes
- Yield: 8 servings 1x
- Category: Appetizer
- Cuisine: American
Ingredients
- 8 hot dogs (standard size)
- 1 can (8 rolls) refrigerated crescent roll dough
- Yellow mustard (for eyes)
- Ketchup (optional, for blood effects)
- 1 tablespoon butter, melted
- Sesame seeds or poppy seeds (optional, for texture)
Instructions
- Preheat your oven to 375°F (190°C). Line a baking sheet with parchment paper.
- Unroll the crescent roll dough onto a clean cutting board. Press the perforated seams together gently to create one solid sheet.
- Cut the dough lengthwise into 8-10 thin strips, about 1/4 inch wide.
- Pat the hot dogs dry with a paper towel.
- Wrap one strip of dough around each hot dog, starting at one end and working to the other, leaving a small gap near the top for the face. Overlap strips slightly for a bandaged look.
- Place the wrapped hot dogs on the baking sheet, leaving about an inch of space between each.
- Brush each mummy with melted butter.
- Bake for 12-15 minutes, until the dough is golden brown and the hot dogs are heated through.
- Let cool for 2-3 minutes on the baking sheet.
- Using a toothpick or knife tip, dab small dots of yellow mustard for eyes. Optionally, add a tiny drop of ketchup for blood effects.
Notes
Keep the dough cold for easier handling. Don’t over-wrap—2-3 strips per hot dog is plenty. For best texture, serve warm. Leftovers can be stored in an airtight container in the refrigerator for up to 3 days. Reheat in a 350°F oven for 5-7 minutes. Unbaked mummies can be frozen for up to a month.
Nutrition
- Serving Size: 1 mummy bite
- Calories: 180
- Sugar: 3
- Sodium: 480
- Fat: 11
- Saturated Fat: 4
- Carbohydrates: 14
- Protein: 7
Keywords: Halloween, hot dog bites, mummy, party snack, crescent roll, easy, kid-friendly



