Love this? Save it for later!
Share the inspiration with your friends
I was standing in line at the hardware store—of all places—holding a new showerhead and trying to remember if I needed plumber’s tape when the woman behind me started talking about cinnamon rolls. Not just any cinnamon rolls, she specified, but pumpkin cinnamon rolls with a maple glaze that she’d perfected over thirty years of autumns. She was maybe seventy, wearing a flannel shirt with a tiny embroidered pumpkin on the collar, and she had the confident air of someone who has never once been wrong about baking.
“You look like someone who could use a good roll,” she said, and honestly, she wasn’t wrong. I’d been having one of those weeks where nothing went quite right—burned toast, a missed appointment, a cracked mug that I refused to throw away. She pulled a folded index card from her wallet, the edges soft and worn like old fabric, and handed it over. “The secret,” she told me, “is not to overthink the pumpkin. Let it be what it is.”
Her name was Margaret, and I never saw her again. But that card? I’ve made these rolls maybe a dozen times since that afternoon. They’re the kind of recipe that makes you slow down—the dough is forgiving, the smell fills your whole house, and that maple glaze seeps into every warm crevice like it was meant to be there. Maybe you’ve had one of those recipe encounters that felt almost accidental. This one changed my fall baking forever.
Why You’ll Love This Recipe
These pumpkin cinnamon rolls are the real deal. They’re soft, fluffy, and packed with just enough pumpkin flavor to feel festive without being overpowering. I’ve tested this recipe more times than I care to admit—some batches were too dense, others too sweet, and one memorable disaster where I forgot the yeast entirely (flat, sad little discs). But this version? It’s the one I keep coming back to.
- Quick & Easy: The dough comes together in about 20 minutes of active work. Total time from start to warm roll in your mouth is around 2 hours—fast for yeast rolls.
- Simple Ingredients: Canned pumpkin, pantry spices, and basic baking staples. No weird specialty items required.
- Perfect for Fall Mornings: Great for Thanksgiving brunch, cozy weekend breakfasts, or when you just want your kitchen to smell like autumn incarnate.
- Crowd-Pleaser: I brought these to a neighbor’s potluck and three people asked for the recipe before I’d even sat down.
- Unbelievably Delicious: The combination of tender pumpkin dough, brown sugar filling, and that maple glaze creates something that tastes like a hug in carbohydrate form.
What makes these different from other pumpkin rolls? It’s the moisture balance. Too much pumpkin makes dough gummy—I learned that the hard way. This recipe uses just enough pumpkin purée to add flavor and tenderness without turning your rolls into glue. The maple glaze isn’t a thick icing; it’s a thin, pourable drizzle that soaks into the rolls and makes every bite better. Honestly, I’ve made these for people who swore they didn’t like pumpkin, and they went back for seconds.
What Ingredients You Will Need
This recipe uses simple, wholesome ingredients to deliver that cozy fall flavor without any fuss. Most of these are pantry staples, which makes these rolls perfect for spontaneous baking urges.
For the Dough
- 3 ½ cups (440g) all-purpose flour — plus more for dusting. I use King Arthur Flour for consistent results.
- ¼ cup (50g) granulated sugar
- 2 ¼ teaspoons (1 packet) active dry yeast — make sure it’s fresh. Old yeast is the number one reason rolls don’t rise.
- 1 teaspoon salt
- 1 teaspoon pumpkin pie spice — store-bought is fine, or make your own with cinnamon, nutmeg, ginger, and cloves.
- ½ cup (120ml) whole milk — warmed to about 110°F. Too hot kills the yeast; too cold and it won’t activate.
- ¼ cup (60g) unsalted butter — melted and slightly cooled.
- ½ cup (120g) pumpkin purée — not pumpkin pie filling. Make sure it’s 100% pumpkin.
- 1 large egg — room temperature.
- 1 teaspoon vanilla extract
For the Filling
- ½ cup (100g) packed brown sugar — light or dark both work. Dark gives deeper molasses flavor.
- 2 tablespoons (30g) unsalted butter — softened.
- 1 tablespoon ground cinnamon
- ½ teaspoon ground nutmeg — freshly grated if you have it.
- ¼ teaspoon ground ginger
For the Maple Glaze
- 1 cup (120g) powdered sugar — sifted if it’s lumpy.
- 3 tablespoons pure maple syrup — not pancake syrup. The real stuff makes a difference here.
- 1-2 tablespoons whole milk or cream — to adjust consistency.
- ¼ teaspoon vanilla extract
Equipment Needed
Nothing too fancy here. You’ll need a large mixing bowl—glass or ceramic works great. A stand mixer with a dough hook makes kneading easier, but you can absolutely do it by hand if you want a little arm workout. I’ve done both, and honestly, hand-kneading gives me a weird sense of accomplishment.
You’ll also need a 9×13-inch baking dish—glass or metal both work. If you only have round pans, you can use two 9-inch rounds. A rolling pin is essential; I use a simple wooden one that cost me twelve bucks. A clean kitchen towel or plastic wrap for covering the dough while it rises. And a small saucepan for warming the milk.
Optional but helpful: a digital kitchen scale for accurate flour measurements (trust me, it makes a difference), an instant-read thermometer to check milk temperature, and parchment paper for easy cleanup. If you don’t have a stand mixer, you can knead by hand for about 8-10 minutes. Your arms will thank you later.
Preparation Method
Step 1: Activate the Yeast
Warm the milk to about 110°F—warm but not hot. Sprinkle the yeast and a pinch of sugar over the milk. Let it sit for 5-7 minutes until it gets foamy. If it doesn’t foam, your yeast might be dead. I’ve had this happen and it’s disappointing, so check your expiration date.
Step 2: Make the Dough
In a large bowl, whisk together the flour, remaining sugar, salt, and pumpkin pie spice. In a separate bowl, mix the pumpkin purée, melted butter, egg, and vanilla. Pour the yeast mixture and the pumpkin mixture into the dry ingredients. Stir until a shaggy dough forms.
Turn the dough onto a floured surface and knead for 6-8 minutes if by hand, or use the dough hook on medium speed for 4-5 minutes. The dough should be smooth and slightly tacky but not sticky. Add a tablespoon of flour at a time if needed.
Step 3: First Rise
Place the dough in a lightly greased bowl, cover with a clean towel, and let it rise in a warm spot for about 1 hour, or until doubled in size. I usually put mine in the microwave (not turned on) with a cup of hot water. It’s cozy in there.
Step 4: Make the Filling
While the dough rises, mix the brown sugar, cinnamon, nutmeg, and ginger in a small bowl. Set aside. Let the butter soften at room temperature.
Step 5: Shape the Rolls
Punch down the risen dough and turn it onto a lightly floured surface. Roll it into a rectangle about 12×16 inches. Spread the softened butter evenly over the dough, leaving a ½-inch border. Sprinkle the brown sugar mixture over the butter.
Starting from the long edge, roll the dough tightly into a log. Pinch the seam to seal. Using a sharp knife or unflavored dental floss, cut the log into 12 equal pieces. Place them in a greased 9×13-inch baking dish, cut side up.
Step 6: Second Rise
Cover the rolls with a towel and let them rise for 30-45 minutes, until puffy and touching each other. They should look happy and crowded.
Step 7: Bake
Preheat your oven to 350°F (175°C). Bake the rolls for 20-25 minutes, until golden brown on top. The center should feel set, and a thermometer inserted into the center roll should read about 190°F. Let them cool in the pan for 5-10 minutes.
Step 8: Make the Glaze
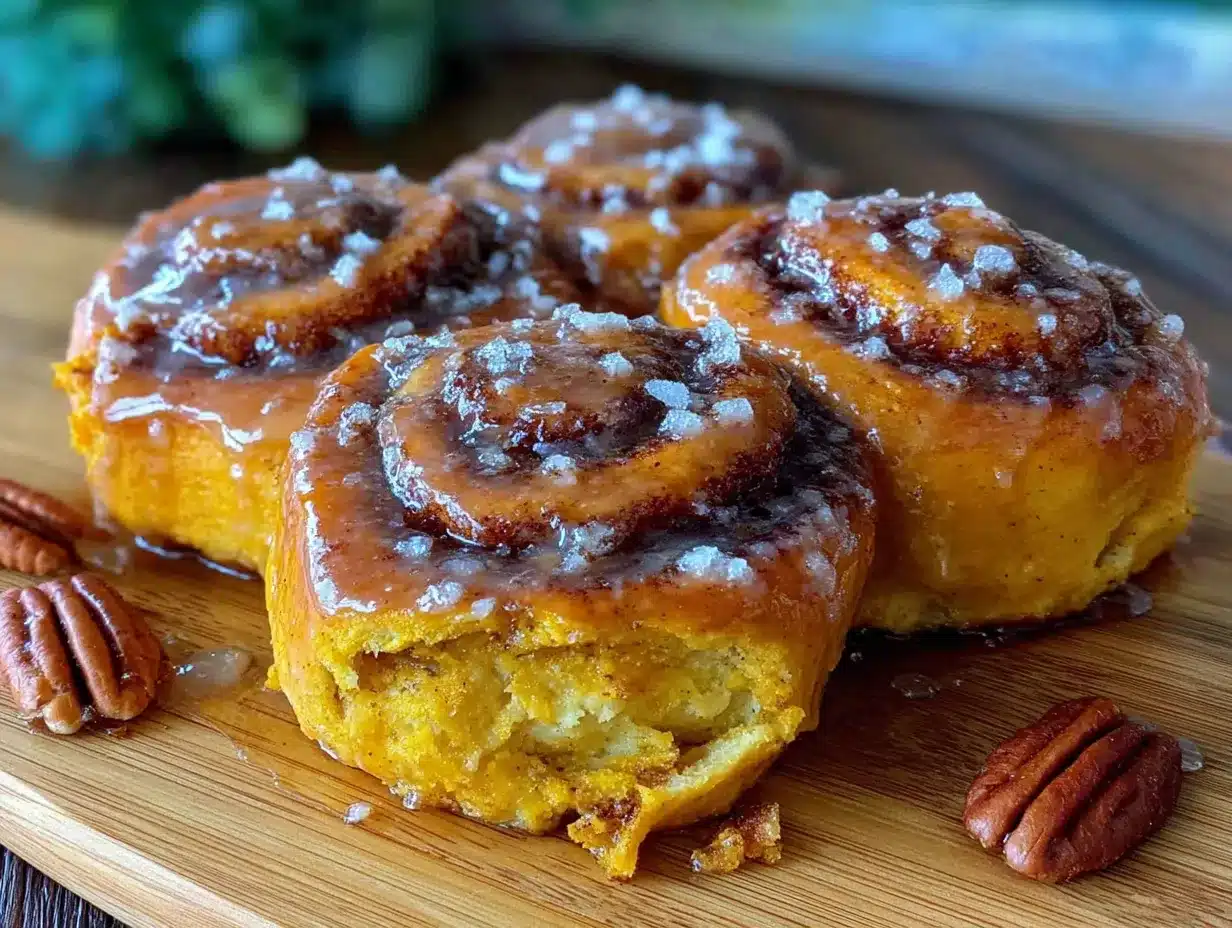
Whisk together the powdered sugar, maple syrup, vanilla, and enough milk to reach a pourable consistency. Drizzle over the warm rolls. The glaze will melt slightly into the crevices—this is a good thing.
Cooking Tips & Techniques
I’ve made enough mistakes with cinnamon rolls to fill a small notebook. Here’s what I’ve learned. First, don’t skip the second rise. I tried rushing it once because I was hungry, and the rolls came out dense and sad. Give them that time to puff up.
If your dough feels too sticky, resist the urge to add too much flour. A little stickiness is normal for enriched doughs. Instead, oil your hands and work surface lightly. The dough will become less sticky as you knead.
For clean cuts, use unflavored dental floss. Slide it under the log, cross the ends over the top, and pull. It makes perfect slices without squishing the dough. I learned this from a baking blog years ago and it changed my life.
Watch your oven temperature. Every oven runs differently. If your rolls are browning too fast on top but aren’t done in the center, tent them with foil for the last 5 minutes. If they’re taking longer than 25 minutes, your oven might run cool.
Don’t over-bake. The rolls will continue to cook slightly from residual heat after you pull them out. I’ve pulled them when they’re just barely golden and they’ve been perfect. Over-baked rolls are dry rolls, and nobody wants that.
Variations & Adaptations
This recipe is surprisingly flexible. Here are some ways I’ve adapted it over the years.
- Gluten-Free Option: Substitute a 1:1 gluten-free flour blend. The dough will be a bit more fragile, so handle it gently. Bake time may increase by 2-3 minutes.
- Dairy-Free Version: Use oat or almond milk in place of whole milk, and vegan butter in the dough and filling. The glaze works well with oat milk too.
- Pumpkin Spice Variation: Add ¼ teaspoon ground cloves and a pinch of cardamom to the filling for extra warmth.
- Nutty Twist: Sprinkle ½ cup chopped pecans or walnuts over the filling before rolling. Adds great texture.
- Overnight Method: After the second rise, cover the dish tightly with plastic wrap and refrigerate overnight. In the morning, let them sit at room temperature for 30 minutes while the oven preheats, then bake as directed.
I once tried a version with chocolate chips mixed into the filling. It was… interesting. Not bad, but definitely more dessert than breakfast. If you’re feeling adventurous, go for it—just use mini chips so they distribute evenly.
Serving & Storage Suggestions
These rolls are best served warm, about 10-15 minutes after they come out of the oven. The glaze will be slightly melty and the rolls will be pillowy soft. I like to serve them on a big wooden board with extra maple syrup on the side for drizzling.
They pair beautifully with a hot cup of coffee, spiced chai, or cold milk. If you’re feeling fancy, serve them alongside scrambled eggs and bacon for a full breakfast spread. For dessert, a scoop of vanilla ice cream on top is surprisingly good—the warm rolls and cold ice cream thing works.
Storage: Keep leftover rolls in an airtight container at room temperature for up to 2 days. After that, they’ll start to dry out. To reheat, microwave individual rolls for 15-20 seconds, or warm the whole pan in a 300°F oven for 10 minutes. The glaze might soak in a bit, but they’ll still be delicious.
Freezing: You can freeze unbaked rolls after the second rise. Place the dish in the freezer until solid, then transfer the rolls to a freezer bag. To bake, thaw overnight in the fridge, let them come to room temperature for 30 minutes, then bake as directed. Baked rolls can also be frozen for up to a month.
Honestly, these rolls get better after a day. The flavors meld together, and the glaze sinks into every nook. I’ve been known to eat them cold straight from the container at 10 PM. No regrets.
Nutritional Information & Benefits
Let’s be real—these are not health food. But they do have some redeeming qualities. Pumpkin is packed with vitamin A and fiber, and the cinnamon may help with blood sugar regulation. The maple syrup provides trace minerals like zinc and manganese. That said, these are a treat, and that’s okay.
Per roll (approximate values): Calories: 320 | Fat: 9g | Carbohydrates: 56g | Protein: 5g | Fiber: 2g | Sugar: 28g
If you’re looking to lighten things up, you can reduce the sugar in the filling by a tablespoon or two, or use a sugar substitute in the glaze. But honestly? I think some recipes deserve to be enjoyed in their full glory. These rolls are one of them.
Conclusion
These cozy pumpkin cinnamon rolls with maple glaze are the kind of recipe that makes fall feel like a warm blanket. They’re forgiving enough for beginner bakers, impressive enough for holiday mornings, and delicious enough to become a yearly tradition. Margaret from the hardware store was right—sometimes the best recipes come from the most unexpected places.
I hope you make these and love them as much as I do. Maybe you’ll tweak the spices, add some nuts, or double the glaze (I won’t judge). Whatever you do, let me know how they turn out. Drop a comment below or tag me in your photos—I genuinely love seeing your baking adventures. Until next time, happy baking, and may your kitchen always smell like pumpkin and maple.
Frequently Asked Questions
Can I use fresh pumpkin instead of canned?
Yes, but you’ll need to roast and puree it first, then drain off any excess liquid. Fresh pumpkin has more water than canned, so your dough might need a little extra flour.
Why didn’t my rolls rise?
Most likely culprit is old yeast or milk that was too hot. Check your yeast expiration date and use a thermometer for the milk. If the milk feels hot to your wrist, it’s probably too hot.
Can I make these without a stand mixer?
Absolutely. Mix the dough with a wooden spoon until it comes together, then knead by hand on a floured surface for 8-10 minutes. It’s a great arm workout.
How do I know when the rolls are fully baked?
The tops should be golden brown, and the center should feel set when you gently press it. An instant-read thermometer inserted into the center roll should read 190°F.
Can I skip the maple glaze?
You can, but you’ll miss out. The maple flavor complements the pumpkin beautifully. If you really want to skip it, a simple cream cheese frosting would also work well.
Pin This Recipe!
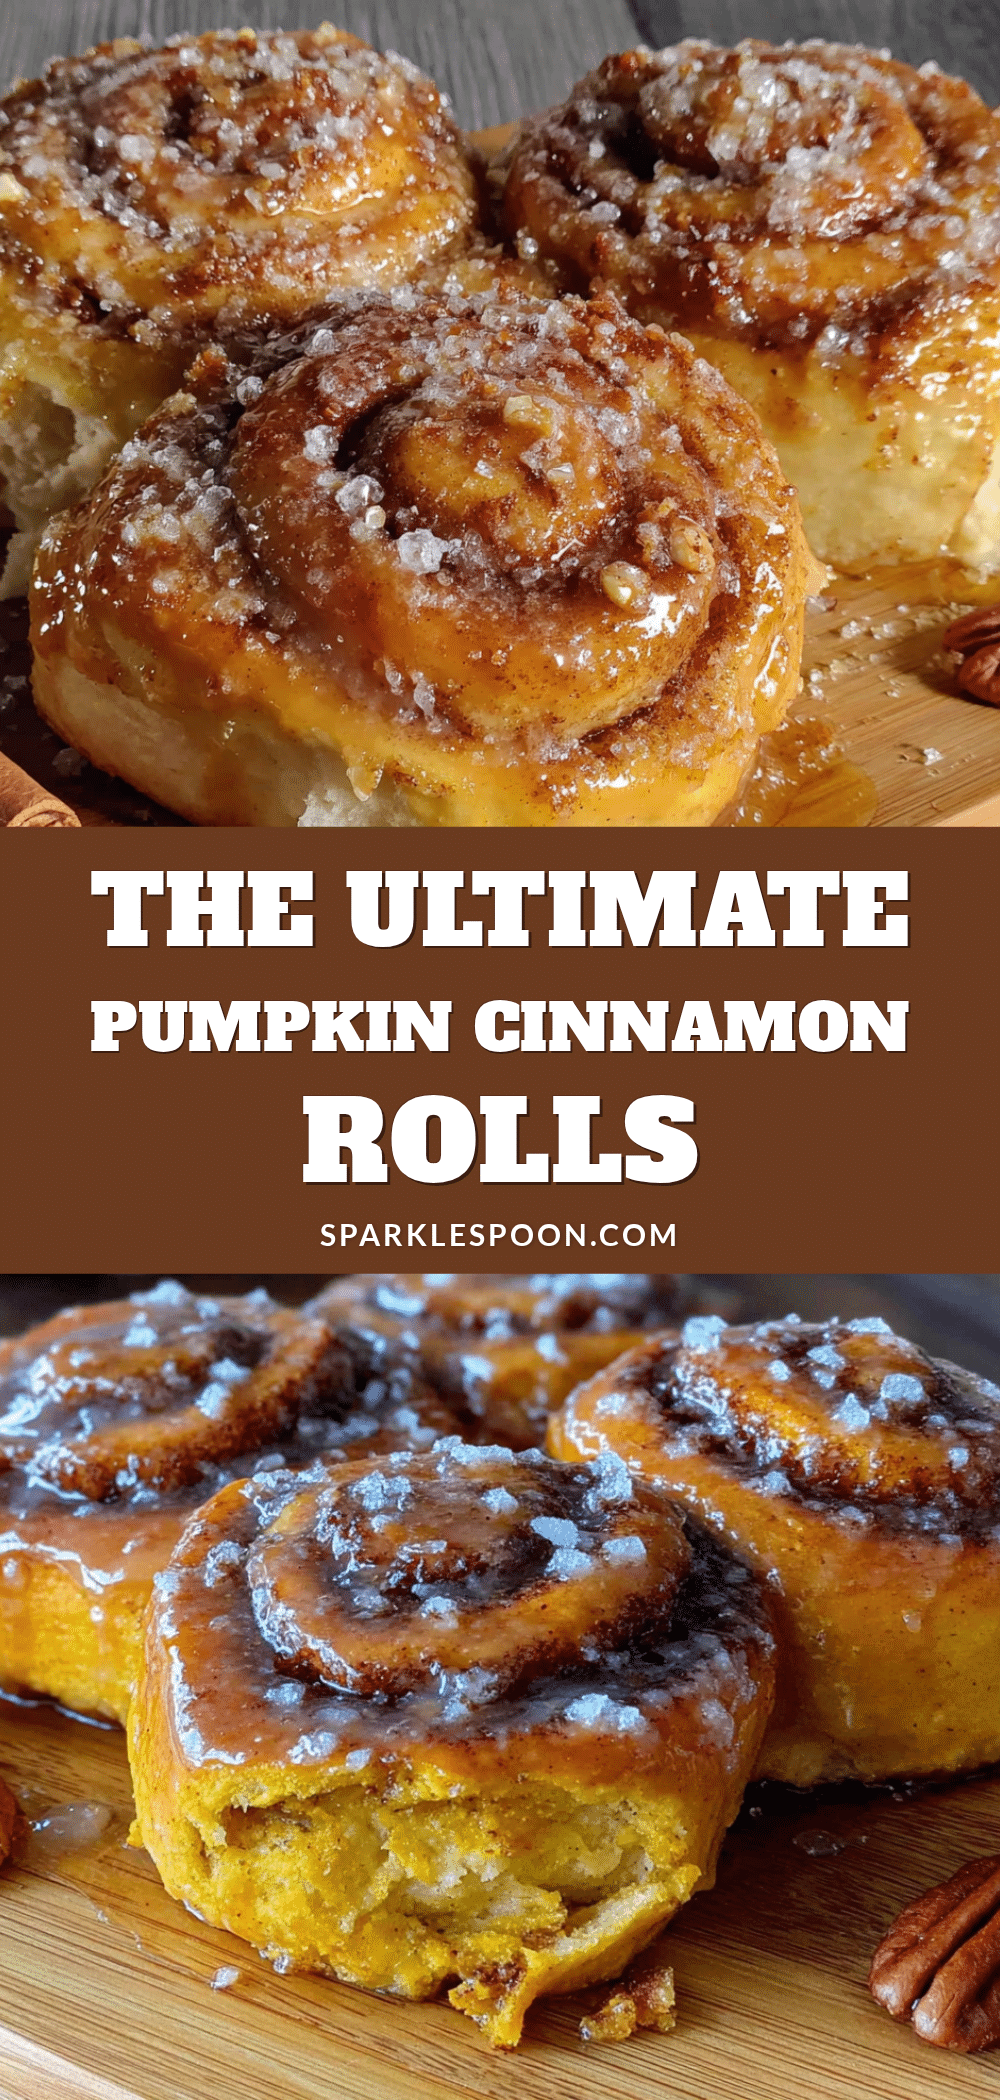
Cozy Pumpkin Cinnamon Rolls with Easy Maple Glaze
Soft, fluffy pumpkin cinnamon rolls with a brown sugar filling and a thin maple glaze that soaks into every bite. Perfect for fall mornings, Thanksgiving brunch, or when you want your kitchen to smell like autumn.
- Prep Time: 20 minutes
- Cook Time: 25 minutes
- Total Time: 2 hours
- Yield: 12 servings 1x
- Category: Breakfast
- Cuisine: American
Ingredients
- 3 ½ cups (440g) all-purpose flour, plus more for dusting
- ¼ cup (50g) granulated sugar
- 2 ¼ teaspoons (1 packet) active dry yeast
- 1 teaspoon salt
- 1 teaspoon pumpkin pie spice
- ½ cup (120ml) whole milk, warmed to 110°F
- ¼ cup (60g) unsalted butter, melted and slightly cooled
- ½ cup (120g) pumpkin purée (not pumpkin pie filling)
- 1 large egg, room temperature
- 1 teaspoon vanilla extract
- ½ cup (100g) packed brown sugar (light or dark)
- 2 tablespoons (30g) unsalted butter, softened
- 1 tablespoon ground cinnamon
- ½ teaspoon ground nutmeg
- ¼ teaspoon ground ginger
- 1 cup (120g) powdered sugar, sifted
- 3 tablespoons pure maple syrup
- 1–2 tablespoons whole milk or cream
- ¼ teaspoon vanilla extract
Instructions
- Warm the milk to about 110°F. Sprinkle the yeast and a pinch of sugar over the milk. Let it sit for 5-7 minutes until foamy.
- In a large bowl, whisk together the flour, remaining sugar, salt, and pumpkin pie spice. In a separate bowl, mix the pumpkin purée, melted butter, egg, and vanilla. Pour the yeast mixture and pumpkin mixture into the dry ingredients. Stir until a shaggy dough forms.
- Turn the dough onto a floured surface and knead for 6-8 minutes by hand, or use a dough hook on medium speed for 4-5 minutes, until smooth and slightly tacky.
- Place the dough in a lightly greased bowl, cover with a clean towel, and let it rise in a warm spot for about 1 hour, or until doubled in size.
- While the dough rises, mix the brown sugar, cinnamon, nutmeg, and ginger in a small bowl. Set aside. Let the butter soften at room temperature.
- Punch down the risen dough and roll it into a 12×16-inch rectangle. Spread the softened butter evenly over the dough, leaving a ½-inch border. Sprinkle the brown sugar mixture over the butter.
- Starting from the long edge, roll the dough tightly into a log. Pinch the seam to seal. Cut the log into 12 equal pieces and place them in a greased 9×13-inch baking dish, cut side up.
- Cover the rolls with a towel and let them rise for 30-45 minutes, until puffy and touching each other.
- Preheat the oven to 350°F (175°C). Bake the rolls for 20-25 minutes, until golden brown on top and the center reaches 190°F. Let cool in the pan for 5-10 minutes.
- Whisk together the powdered sugar, maple syrup, vanilla, and enough milk to reach a pourable consistency. Drizzle over the warm rolls.
Notes
Don’t skip the second rise. If dough feels sticky, oil your hands instead of adding too much flour. For clean cuts, use unflavored dental floss. Watch oven temperature and tent with foil if browning too fast. Rolls are best served warm. Store leftovers in an airtight container at room temperature for up to 2 days. Freeze unbaked rolls after second rise for up to a month.
Nutrition
- Serving Size: 1 roll
- Calories: 320
- Sugar: 28
- Sodium: 210
- Fat: 9
- Saturated Fat: 5
- Carbohydrates: 56
- Fiber: 2
- Protein: 5
Keywords: pumpkin cinnamon rolls, maple glaze, fall baking, yeast rolls, pumpkin spice, breakfast, brunch



