Love this? Save it for later!
Share the inspiration with your friends
There used to be a tiny, fiercely independent herb shop tucked between a dusty bookstore and a laundromat in my old neighborhood. The place smelled like a thousand different dried plants and the woman who ran it, a no-nonsense herbalist named Margot, made a fire cider that could wake the dead. When she retired and the shop closed, I felt a genuine pang of loss. I mean, I actually stood on the sidewalk and felt a little empty. After twelve tries—some of them truly undrinkable, like the one where I used too much pure horseradish and my eyes watered for an hour—I finally got it. This is that fire cider.
Honestly, the first batch I made after Margot’s shop vanished was a disaster. I threw everything in a jar without thinking about ratios. It tasted like angry vinegar with a grudge. But I was determined. I wanted that specific, sinus-clearing, warmth-in-your-chest feeling that her version gave you. It wasn’t just about getting well; it was about the ritual of it, the little shot of something potent that made you feel like you were doing something good for yourself. You know that feeling when you find a product that just *works* and then it’s gone? That was me.
This fire cider isn’t just a recipe. It’s a recreation of a memory, a little bottle of resilience. It has that perfect balance of spicy, sour, and sweet, and it’s the first thing I reach for when I feel a tickle in my throat or when the seasons start to change. Let me tell you, making it yourself is incredibly satisfying, and honestly, it tastes so much better than anything you can buy. Maybe you’ve been there, searching for a replacement for something that felt irreplaceable. This one is for you.
Why You’ll Love This Recipe
This isn’t just another wellness tonic you find on the internet. This recipe is the result of a very personal, very specific obsession. I’ve tested the ratios, the steep times, and the ingredient combinations so you don’t have to. It’s a recipe built on experience, not guesswork.
- Simple Ingredients: You don’t need a trip to a specialty store. Most of these ingredients are common kitchen staples or easy to find at your local grocery store. No fancy powders or hard-to-pronounce extracts here.
- Quick & Easy: The active prep time is maybe 15 minutes. The hardest part is waiting for it to steep. It’s a set-it-and-forget-it kind of recipe that rewards patience without demanding constant attention.
- Perfect for Cold & Flu Season: This is your first line of defense. When everyone around you is sniffling, a daily shot of this fire cider can make you feel like you’re actually doing something proactive. It’s my go-to for seasonal wellness.
- Unbelievably Potent: The flavor is a serious punch—spicy, tangy, and earthy all at once. It’s not for the faint of heart, but if you love bold, assertive flavors, you will absolutely love this. It’s comfort in a shot glass.
- Crowd-Pleaser (for the brave): I’ve brought bottles to family gatherings and watched people go from skeptical to asking for the recipe. It’s a conversation starter and a gift that people genuinely appreciate.
What sets this apart from other recipes is the balance. I found that using a mix of fresh and dried horseradish gives a deeper, more complex heat, and a touch of raw honey at the end smooths out the sharp edges without making it sweet. It’s not just another version of fire cider; it’s the version I chased for months to recreate, and it’s finally ready to share.
What Ingredients You Will Need
This recipe uses a handful of powerful, whole-food ingredients to create a tonic that is as effective as it is flavorful. Most of these are things you might already have in your pantry or garden.
- 1 medium organic onion, chopped – The base of the flavor. Onions are naturally antimicrobial and add a pungent, savory depth.
- 1 head of organic garlic, cloves peeled and crushed – The star of the show. Garlic is a powerhouse for immune support. I recommend using fresh, firm cloves for the best potency.
- 1 (3-inch) piece of fresh horseradish root, peeled and grated – This is where the heat comes from. Fresh horseradish is significantly more potent than the jarred stuff. Look for roots that are firm and not shriveled.
- 1 (2-inch) piece of fresh ginger root, peeled and grated – Adds a warm, zesty kick and helps with digestion. Ginger is also a fantastic anti-inflammatory.
- 1 (2-inch) piece of fresh turmeric root, peeled and grated – The golden beauty. Turmeric is a powerful antioxidant. It will stain everything it touches, so be careful! (You can use 1 teaspoon of dried turmeric powder in a pinch, but fresh is better).
- 1 jalapeño pepper, sliced (seeds included for extra heat) – Another layer of spice. You can use a serrano pepper for even more heat, or a bell pepper if you want a milder version.
- 1 lemon, sliced – Provides bright acidity and vitamin C. I use the whole slice, rind and all.
- 2 sprigs fresh rosemary – Adds an earthy, pine-like aroma and is known for its antimicrobial properties.
- 1 tablespoon black peppercorns – This isn’t just for flavor! Piperine in black pepper helps your body absorb the curcumin from the turmeric much more effectively.
- 1 teaspoon cayenne pepper flakes – For that final, lingering heat that clears your sinuses.
- Raw, unfiltered apple cider vinegar (enough to cover all ingredients) – The carrier. It must be raw and unfiltered to contain the “mother,” which is full of beneficial bacteria and enzymes. I prefer Bragg’s or a local brand.
- 2-3 tablespoons raw honey, or to taste – Added after steeping. Raw honey is a natural sweetener with its own immune-boosting properties. It tempers the fire without extinguishing it.
Equipment Needed
You don’t need a professional kitchen to make this. A few basic tools will get the job done perfectly.
- A 1-quart (or larger) glass jar with a tight-fitting lid: A wide-mouth Mason jar is perfect. Avoid using plastic, as the vinegar can leach chemicals over time.
- A cutting board and a sharp knife: For chopping the onion, garlic, and lemon.
- A vegetable peeler: For peeling the ginger, turmeric, and horseradish roots.
- A Microplane or fine grater: This is my favorite tool for grating the horseradish, ginger, and turmeric. It creates a fine pulp that releases maximum flavor. A box grater works too, but the Microplane is easier to clean.
- A measuring spoon and cup: For the peppercorns, cayenne, and honey.
- A small funnel: This makes pouring the vinegar into the jar much less messy. Trust me on this one.
- A fine-mesh strainer or cheesecloth: For straining the finished fire cider. I use a nut milk bag because it’s reusable and easy to clean, but a regular strainer lined with a coffee filter works just as well.
Preparation Method
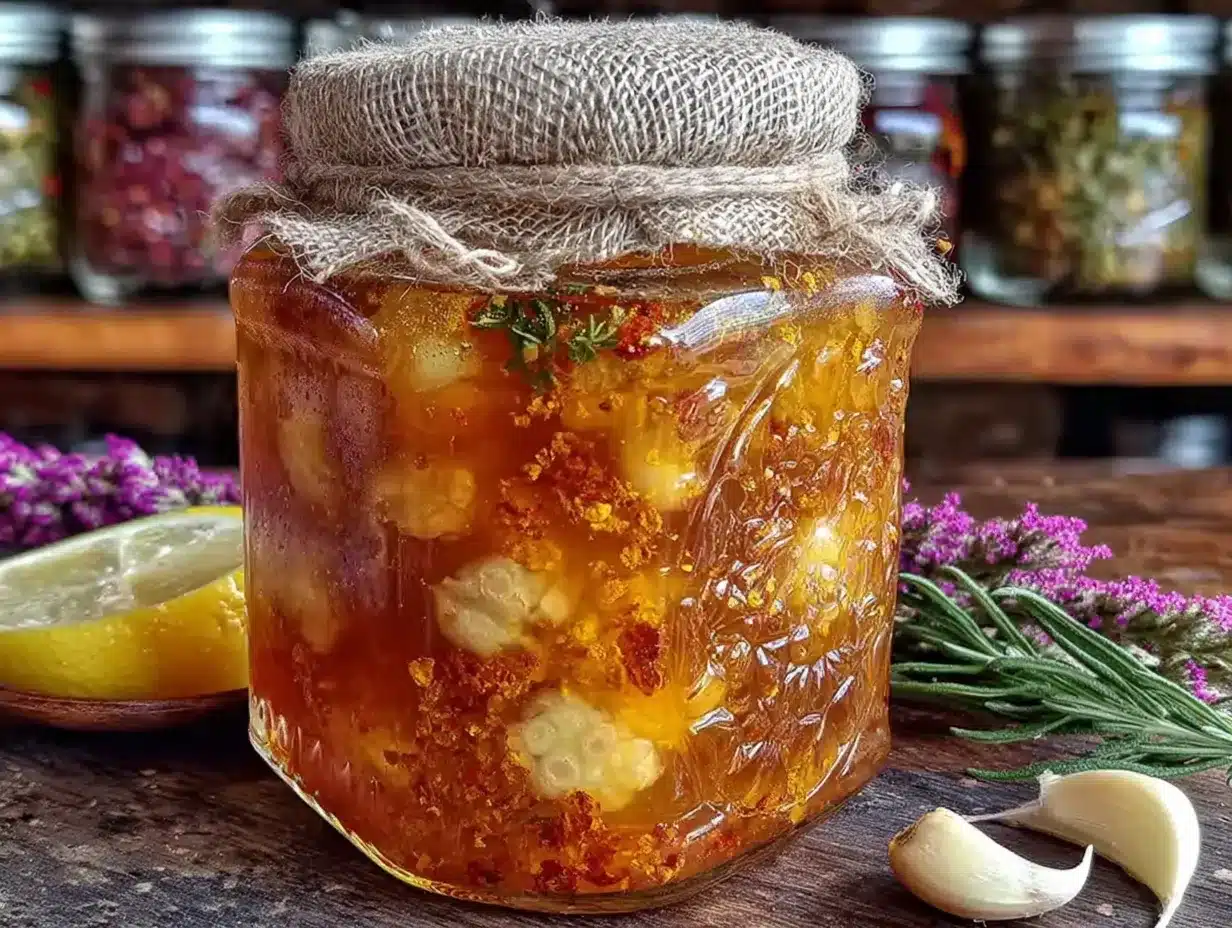
Making fire cider is more about assembly than actual cooking. The magic happens over time as the ingredients mingle in the vinegar. Here’s how to do it.
- Prepare the ingredients: Wash all your produce thoroughly. Roughly chop the onion. Peel and crush the garlic cloves. Slice the lemon into thin rounds. Grate the horseradish, ginger, and turmeric roots. Slice the jalapeño.
- Layer everything in the jar: This is where you can be a bit artistic. Start with the chopped onion at the bottom of your clean 1-quart jar. Add the crushed garlic, then the grated horseradish, ginger, and turmeric. Tuck in the lemon slices, jalapeño slices, and rosemary sprigs. Sprinkle in the black peppercorns and cayenne flakes. Don’t pack it down too tightly; you want the vinegar to be able to flow around everything.
- Pour in the vinegar: Using your funnel, pour the raw apple cider vinegar over the ingredients until they are completely submerged. Make sure there are no dry pockets of herbs or spices. The vinegar should cover everything by at least an inch.
- Seal and shake: Screw the lid on tightly. Give the jar a good, vigorous shake to mix everything together and release some of the air bubbles.
- The waiting game (steep): Label your jar with the date. Store it in a cool, dark place, like a pantry or a cupboard, for 4 to 6 weeks. This is the most important part. I know it’s hard to wait, but the flavor really develops over time. Give it a gentle shake every few days to redistribute the ingredients.
- Taste and strain: After 4 weeks, start tasting it. Use a clean spoon to take a small sip. It should be pungent, spicy, and sour. If you want it stronger, let it steep for another week or two. Once the flavor is to your liking, it’s time to strain it.
- Strain the solids: Place your fine-mesh strainer or cheesecloth over a large bowl or a clean pitcher. Pour the contents of the jar through the strainer. Use a spatula to press down on the solids to extract as much liquid as possible. Don’t throw the solids away! You can pulse them in a food processor with a little of the vinegar to make a spicy relish or add them to salad dressings.
- Sweeten to taste: Pour the strained liquid back into the clean jar or into a bottle. Add the raw honey, starting with 2 tablespoons. Stir or shake well to dissolve. Taste it again. Add more honey if you want it a little less fiery. The honey is your friend here; it balances the acidity and heat beautifully.
- Store and enjoy: Seal the bottle and store it in the refrigerator. It will keep for at least 6 months, though I have a feeling it won’t last that long!
Cooking Tips & Techniques
After those first few disastrous batches, I learned a few things the hard way. Here are my best tips for fire cider success.
- Don’t skimp on the quality of your vinegar. This is the backbone of the recipe. Using a cheap, distilled white vinegar will give you a harsh, one-dimensional result. The raw, unfiltered ACV is non-negotiable for the best flavor and the beneficial probiotics.
- Grate, don’t chop, the roots. I made the mistake of just slicing the ginger and turmeric in my first batch. The flavor was weak and took forever to infuse. Grating them into a pulp exposes so much more surface area to the vinegar, resulting in a much more potent and flavorful tonic in a shorter amount of time.
- Watch out for the turmeric stain! Seriously, wear an apron and be careful with your cutting board. Turmeric will turn everything a bright, cheerful yellow that is surprisingly permanent. A little baking soda paste can help remove stains from your hands and countertops.
- Use a weight to keep everything submerged. Sometimes, the ingredients float to the top, which can lead to mold. A small glass fermentation weight or a clean, food-safe plastic bag filled with a little brine (or water) can be placed on top of the ingredients to keep them under the vinegar line. I usually just give the jar a good shake every day, which seems to work fine.
- Be patient with the steep time. I know you’re excited. I was too. But a 2-week steep just doesn’t cut it. The flavor needs time to develop complexity. The 4-6 week mark is where the magic really happens. Mark it on your calendar and forget about it for a while.
Variations & Adaptations
Once you master the basic recipe, feel free to make it your own. This is where the fun begins.
- Milder Version: If you’re not a fan of intense heat, remove the seeds from the jalapeño and use only 1/2 teaspoon of cayenne flakes. You can also add a whole, sliced apple to the jar, which will add a gentle sweetness and help mellow the fire.
- Extra-Hot “Fire” Version: For the brave souls, double the amount of fresh horseradish and add a couple of dried habanero or ghost peppers to the mix. This version is not for the faint of heart, but it will absolutely clear your sinuses.
- Herbal Infusion: Add a few sprigs of fresh thyme, oregano, or sage along with the rosemary. These herbs are all fantastic for immune support and add a lovely, complex herbal note to the tonic. I once added a handful of fresh echinacea leaves from my garden, and it was wonderful.
- Sweet and Spicy: After straining, instead of just honey, try adding a tablespoon of pure maple syrup along with the honey. It adds a subtle, woodsy sweetness that pairs beautifully with the spice. It’s my favorite variation for the fall.
- Low-Sodium Option: While this recipe doesn’t call for salt, some people like to add a pinch. If you’re watching your sodium, just leave it out. The flavor is already incredibly bold without it.
Serving & Storage Suggestions
Fire cider is best enjoyed as a daily wellness shot, but there are other ways to use it too.
Serving: The most common way to take fire cider is as a shot. I take 1 to 2 tablespoons (a standard shot glass) first thing in the morning, especially during cold and flu season. It’s a wake-up call for your whole system. You can also mix it into a glass of warm water with a squeeze of lemon for a soothing tea. It works wonderfully as a base for a salad dressing—just whisk it with some olive oil and a touch of Dijon mustard. I’ve even added a splash to a bloody mary for an incredible, spicy kick!
Storage: Store your finished, sweetened fire cider in a clean glass jar or bottle with a tight-fitting lid in the refrigerator. The cold will help preserve it and keep the flavors bright. It will easily last for 6 months, if not longer. I’ve kept bottles in the back of my fridge for almost a year, and they were still perfectly good. The flavor can actually mellow and become more rounded over time.
Reheating (for tea): If you’re using it for a warm tea, just add your fire cider to a mug of hot (not boiling) water. Boiling water can destroy some of the beneficial enzymes from the raw vinegar and honey. Let the water cool for a minute before adding the tonic.
Nutritional Information & Benefits
While I’m not a doctor, the ingredients in this fire cider are packed with things that are known to be good for you. It’s like a little army of nutrients in a bottle.
This tonic is naturally low in calories and sugar (especially if you use a modest amount of honey). The primary benefits come from the individual ingredients. Garlic is a prebiotic and has been studied for its immune-modulating effects. Ginger and turmeric are powerful anti-inflammatories. The apple cider vinegar is known to aid digestion and help balance blood sugar levels. The honey provides a quick source of energy and has its own antimicrobial properties.
Dietary Considerations: This recipe is naturally gluten-free, dairy-free, and vegan (if you use maple syrup instead of honey). The main allergens to be aware of are the alliums (onion and garlic), which some people are sensitive to. It’s also very low in carbohydrates and sugar, making it a great option for low-carb and keto-friendly lifestyles.
I personally love that this is a proactive, whole-food approach to feeling good. It’s not a magic cure, but it’s a delicious and empowering ritual that makes me feel like I’m taking care of myself.
Conclusion
This homemade fire cider is more than just a recipe; it’s a little piece of resilience you can bottle yourself. It’s the result of a long chase to recreate a specific, beloved memory, and I’m so happy to finally share it with you. The process is simple, the ingredients are honest, and the result is a powerful, flavorful tonic that you can feel good about putting into your body.
Don’t be afraid to tweak it. Make it spicier, sweeter, or more herbal. The best version of this recipe is the one that fits your taste and your needs. I love that I can make a big batch at the start of fall and have it ready to go all winter long. It’s a comforting feeling, knowing I have a little bottle of fire on my fridge door.
I can’t wait to hear how yours turns out! Did you add anything fun to your jar? Do you have a favorite way to take it? Drop a comment below and let me know. And if you found this helpful, please share it with a friend who might need a little immune boost. Happy brewing!
Frequently Asked Questions
How long does homemade fire cider last?
When stored properly in the refrigerator, your fire cider will last for at least 6 months. The flavor may mellow and become more complex over time, but it will remain safe to consume as long as it smells and tastes good. The acidity of the vinegar is a natural preservative.
Can I use dried herbs instead of fresh ones?
Yes, you can! Dried herbs are more concentrated in flavor, so you’ll want to use about half the amount. For example, instead of fresh rosemary sprigs, use 1 tablespoon of dried rosemary. Dried turmeric and ginger powder can also be used in a pinch, but fresh roots will give you a much more vibrant and potent result.
Do I have to use raw apple cider vinegar with the ‘mother’?
For the best flavor and maximum health benefits, yes. The “mother” is the cloudy, stringy substance that contains beneficial bacteria and enzymes. Using a pasteurized, clear vinegar will result in a less complex flavor and you’ll miss out on the probiotic benefits. It will still be a good tasting spicy vinegar, but it won’t be the same.
Can I take fire cider every day?
Many people take a small daily dose (1-2 tablespoons) as a preventative wellness tonic, especially during cold and flu season. However, because it is very acidic and spicy, it’s best to start with a smaller amount to see how your body reacts. It’s always a good idea to listen to your body and consult with a healthcare professional if you have any concerns, especially if you have a sensitive stomach.
What can I do with the leftover solids after straining?
Don’t throw them away! The strained solids are still full of flavor and beneficial properties. You can pulse them in a food processor with a little bit of the fire cider to make a fantastic, spicy relish. It’s incredible on hot dogs, sausages, sandwiches, or stirred into soups and stews for an extra flavor kick. You can also add them to a compost pile.
Pin This Recipe!

Homemade Fire Cider: Immune Boosting Tonic Recipe
A potent, immune-boosting tonic made with raw apple cider vinegar, horseradish, ginger, turmeric, garlic, and honey. This recipe recreates a beloved herbalist’s version with the perfect balance of spicy, sour, and sweet.
- Prep Time: 15 minutes
- Cook Time: 0 minutes
- Total Time: 4-6 weeks (steeping time) + 15 minutes active prep
- Yield: Approximately 3 cups (24 servings of 2 tablespoons each) 1x
- Category: Tonic / Wellness
- Cuisine: American / Herbal
Ingredients
- 1 medium organic onion, chopped
- 1 head of organic garlic, cloves peeled and crushed
- 1 (3-inch) piece of fresh horseradish root, peeled and grated
- 1 (2-inch) piece of fresh ginger root, peeled and grated
- 1 (2-inch) piece of fresh turmeric root, peeled and grated
- 1 jalapeño pepper, sliced (seeds included for extra heat)
- 1 lemon, sliced
- 2 sprigs fresh rosemary
- 1 tablespoon black peppercorns
- 1 teaspoon cayenne pepper flakes
- Raw, unfiltered apple cider vinegar (enough to cover all ingredients)
- 2–3 tablespoons raw honey, or to taste
Instructions
- Wash all produce thoroughly. Roughly chop the onion. Peel and crush the garlic cloves. Slice the lemon into thin rounds. Grate the horseradish, ginger, and turmeric roots. Slice the jalapeño.
- Layer everything in a clean 1-quart glass jar. Start with the chopped onion at the bottom. Add the crushed garlic, then the grated horseradish, ginger, and turmeric. Tuck in the lemon slices, jalapeño slices, and rosemary sprigs. Sprinkle in the black peppercorns and cayenne flakes. Do not pack too tightly.
- Using a funnel, pour the raw apple cider vinegar over the ingredients until they are completely submerged, covering by at least an inch.
- Screw the lid on tightly. Give the jar a good, vigorous shake to mix everything together and release air bubbles.
- Label the jar with the date. Store in a cool, dark place (like a pantry) for 4 to 6 weeks. Give it a gentle shake every few days.
- After 4 weeks, start tasting it. Once the flavor is to your liking, strain the mixture through a fine-mesh strainer or cheesecloth into a large bowl or pitcher. Press down on the solids to extract as much liquid as possible.
- Pour the strained liquid back into a clean jar or bottle. Add the raw honey, starting with 2 tablespoons. Stir or shake well to dissolve. Taste and add more honey if desired.
- Seal the bottle and store in the refrigerator. It will keep for at least 6 months.
Notes
Use raw, unfiltered apple cider vinegar with the ‘mother’ for best flavor and probiotic benefits. Grate the roots (horseradish, ginger, turmeric) rather than chopping for a more potent infusion. Turmeric will stain surfaces and hands; wear an apron and use a baking soda paste to remove stains. Be patient with the steep time—4-6 weeks is ideal for full flavor development. The strained solids can be used to make a spicy relish or added to salad dressings.
Nutrition
- Serving Size: 2 tablespoons (1 sho
- Calories: 1520
- Sugar: 3
- Sodium: 5
- Carbohydrates: 4
Keywords: fire cider, immune booster, wellness tonic, apple cider vinegar, homemade, natural remedy, cold and flu, herbal tonic



