Love this? Save it for later!
Share the inspiration with your friends
There used to be a tiny coffee shop tucked behind the old post office in my town that made the most incredible grab-and-go lunch salads. When they closed their doors two summers ago—just a handwritten sign saying “Thanks for the memories”—I honestly felt a little lost. Those salads were my Tuesday ritual, the thing that got me through grading papers during my prep period. After about seven tries—some watery disasters and one particularly sad attempt with soggy croutons—I finally cracked the code. These Easy Make-Ahead Teacher Lunch Mason Jar Salads are my love letter to that little shop, and let me tell you, they’ve saved my lunch hour more times than I can count.
The magic is all in the layering. You know that feeling when you’re running late, you’ve got a mountain of worksheets to grade, and the last thing you want to do is assemble a sad desk salad? Yeah, I’ve been there. These jars are my little act of Sunday self-care. You pack them once, and for the next four days, lunch is solved. No wilted lettuce, no soggy toppings, just fresh, crunchy, delicious salads that taste like you actually put effort in. Honestly, my colleagues started asking for the recipe after they saw me pulling these out of the staff fridge.
The best part? They’re completely customizable. I’ve tested this method with everything from classic Caesar to Mediterranean chickpea, and it works every single time. The trick is understanding the physics of the jar—dressing on the bottom, hearty veggies in the middle, delicate greens on top. It sounds simple, but getting that ratio right took me a few tries. Maybe you’ve been there too, staring at a sad container of separated dressing and limp lettuce. These jars fix all of that. They’ve become my go-to for busy weeks, and I keep making them because they genuinely make my day a little easier.
Why You’ll Love This Recipe
Let’s be real—teacher lunch breaks are a chaotic sprint, not a leisurely meal. You need something that’s ready when you are, and these mason jar salads deliver. As someone who’s tested this method through countless busy weeks and even packed them for road trips, I can tell you they hold up beautifully. Here’s why they’ve become a staple in my kitchen:
- Quick & Easy: Assemble five jars in about 20 minutes on a Sunday, and you’re set for the entire work week. No morning scramble, no decision fatigue.
- Simple Ingredients: You probably already have most of this in your fridge and pantry. I’m talking basic salad staples like cherry tomatoes, cucumbers, and your favorite protein.
- Perfect for Busy Weeks: Whether you’re a teacher, a remote worker, or just someone who hates making lunch daily, these jars are a lifesaver. They’re also great for picnics and meal prep.
- Crowd-Pleaser: I’ve made these for friends and family, and everyone loves the freshness. Even my picky-eater nephew asked for the recipe.
- Unbelievably Delicious: The texture is what gets me every time. Crisp greens, juicy veggies, and perfectly dressed layers—it’s next-level comfort food that feels indulgent but is actually healthy.
What makes this recipe different from the dozens of other mason jar salad tutorials out there? It’s the precise layering order and the use of a barrier ingredient—like hearty beans or grains—that keeps your greens from getting soggy. This isn’t just another version; it’s the one I’ve perfected after months of trial and error. It’s comfort food reimagined—healthier, faster, but with the same soul-soothing satisfaction of a good lunch.
What Ingredients You Will Need
This recipe uses simple, wholesome ingredients to deliver bold flavor and satisfying texture without the fuss. Most of these are pantry staples or easy to find at any grocery store. The key is choosing ingredients that hold up well over a few days in the fridge.
- For the Dressing (base layer):
- Your favorite salad dressing (about 2-3 tablespoons per jar)—I recommend a vinaigrette or creamy dressing like ranch or Caesar (they act as a moisture barrier)
- Fresh lemon juice (optional, adds brightness and helps prevent browning of some veggies)
- For the Hearty Vegetables & Protein (middle layer):
- Cooked protein: grilled chicken, chickpeas, hard-boiled eggs, or tofu (about 1/2 cup per jar)
- Cherry tomatoes, halved (they release less moisture than sliced tomatoes)
- Cucumbers, diced (I recommend English cucumbers—they’re less watery)
- Bell peppers, diced (adds crunch and color)
- Red onion, thinly sliced (soak in cold water for 10 minutes to mellow the bite)
- Corn kernels (canned or grilled, drained well)
- Black beans or kidney beans (rinsed and drained)
- For the Grains or Seeds (optional barrier layer):
- Cooked quinoa, farro, or brown rice (about 1/4 cup per jar—this acts as a second moisture barrier)
- Sunflower seeds or pumpkin seeds (adds crunch)
- For the Greens (top layer):
- Mixed greens, spinach, or romaine lettuce (about 1-2 cups per jar, packed loosely)
- Fresh herbs like parsley or basil (optional, adds flavor)
- For the Toppings (add just before eating):
- Croutons, nuts, or seeds (keep them separate to stay crunchy)
- Shredded cheese like cheddar or feta (optional)
- Avocado slices (add right before eating to prevent browning)
Ingredient Selection Tips: I prefer using a thick dressing like a creamy Caesar or a classic balsamic vinaigrette. For the greens, sturdy options like kale or romaine hold up better than delicate butter lettuce. If you’re using chickpeas, I recommend the brand Biona for their firm texture. For a low-carb option, skip the grains and add extra protein or seeds.
Equipment Needed
You don’t need much to make these salads, which is part of their charm. Here’s what I use:
- Wide-mouth mason jars (pint or quart size): I prefer quart jars for a full meal-sized salad. Wide mouths make layering and eating easier. You can find them at any grocery store or online.
- Cutting board and sharp knife: For prepping all your veggies. A good knife makes the job faster and safer.
- Measuring cups and spoons: For portioning out dressing and ingredients. I use a set of stainless steel ones.
- Small bowl or jar for mixing dressing: If you’re making your own dressing, a small whisk or a jam jar works perfectly.
- Funnel (optional but helpful): For getting ingredients into the jar without making a mess. I bought a cheap plastic one from the dollar store.
- Labels or masking tape: To mark the date and contents on each jar. I use a permanent marker on the lid.
Alternative Options: If you don’t have mason jars, any airtight glass or plastic container works. The key is a tight seal. I’ve also used old pasta sauce jars in a pinch—just make sure they’re clean and dry.
Preparation Method
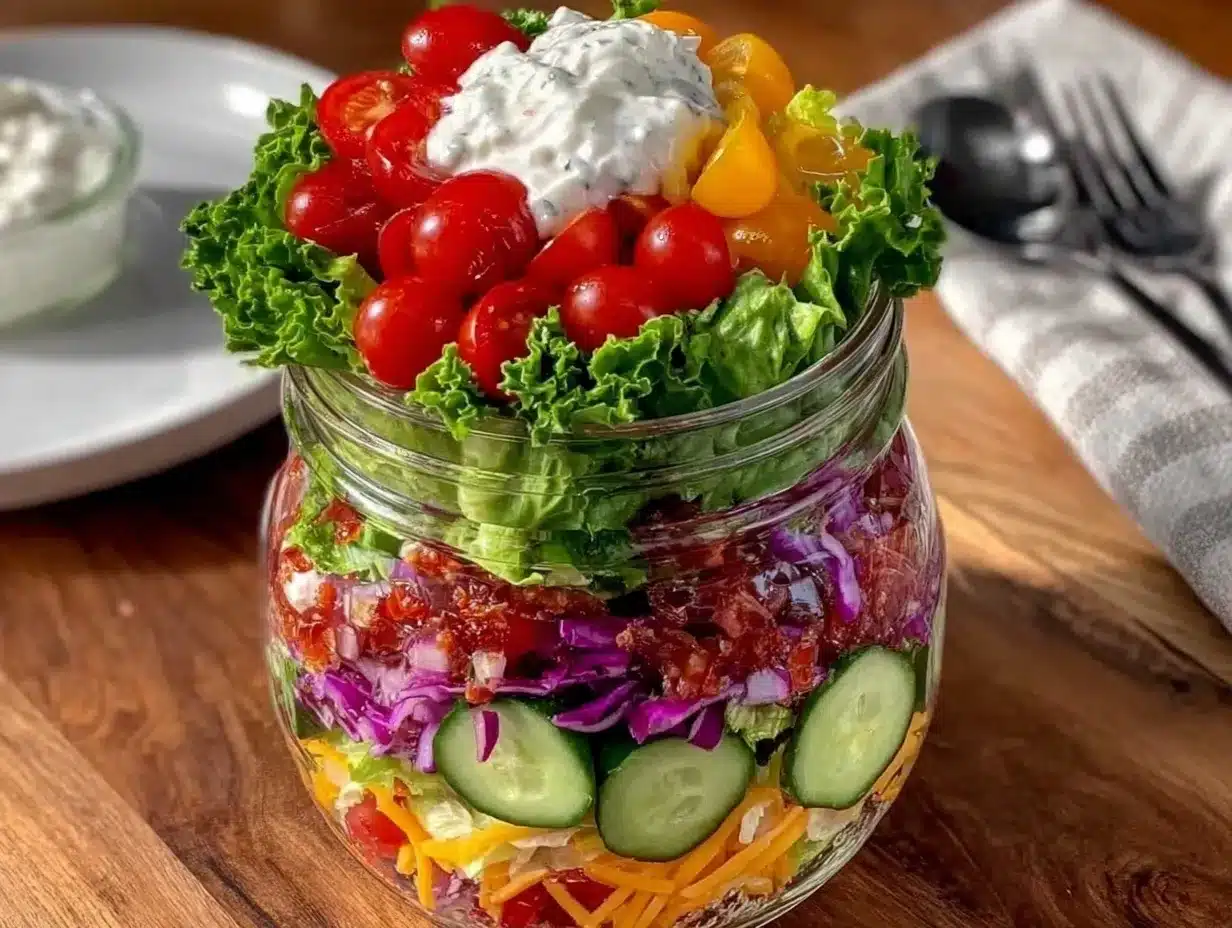
Follow these steps exactly, and you’ll have perfect salads for the week. The order is non-negotiable for keeping everything fresh.
- Prep your ingredients (15 minutes): Wash and dry all your vegetables thoroughly. Chop your protein, dice the cucumbers and bell peppers, halve the cherry tomatoes, and thinly slice the red onion. If you’re using canned beans or corn, rinse and drain them well. Pat everything dry with a paper towel—excess moisture is the enemy of crisp salads.
- Make your dressing (5 minutes): If you’re making a homemade dressing, whisk together your ingredients in a small bowl or shake them in a jar. For a simple vinaigrette, I use 3 parts olive oil to 1 part vinegar, a pinch of salt, and a squeeze of lemon. Store in the fridge if not using immediately.
- Layer 1: Dressing (2 minutes): Spoon 2-3 tablespoons of dressing into the bottom of each clean, dry mason jar. This creates a moisture barrier and ensures your greens stay crisp. Don’t skimp here—the dressing needs to coat the bottom generously.
- Layer 2: Hearty vegetables and protein (5 minutes): Add your hardiest ingredients on top of the dressing. This includes your protein (chicken, chickpeas, eggs), cherry tomatoes, cucumbers, bell peppers, and red onion. These ingredients can sit in the dressing without getting soggy. Pack them down gently.
- Layer 3: Grains or seeds (optional, 2 minutes): If using, add a layer of cooked quinoa, farro, or brown rice. This acts as a second barrier to protect your greens. Sprinkle in some sunflower seeds or pumpkin seeds for extra crunch.
- Layer 4: Greens (3 minutes): Loosely pack your greens on top. Don’t press them down—you want them to stay fluffy and crisp. Fill the jar to the top, leaving a little room for the lid. The greens should be the last thing before the lid.
- Seal and store (1 minute): Screw the lids on tightly. Label each jar with the date and contents. Store in the refrigerator for up to 5 days. Pro tip: Keep toppings like croutons, nuts, seeds, cheese, and avocado separate and add them just before eating.
- To serve (1 minute): When you’re ready to eat, simply dump the jar contents into a bowl (or eat directly from the jar). The dressing will coat everything evenly. Add your crunchy toppings and enjoy!
Sensory cues: At step 4, you should see the dressing pooling around the hearty ingredients. At step 6, the greens should feel dry and crisp to the touch. When you dump the jar to serve, the dressing should flow freely and coat everything without pooling at the bottom.
Cooking Tips & Techniques
After making these salads dozens of times, I’ve learned a few tricks that make all the difference. Here are my top tips:
- Dry your greens thoroughly: This is the number one rule. Use a salad spinner or pat them dry with a clean kitchen towel. Any moisture on the greens will make them wilt faster. I learned this the hard way after a batch of soggy spinach.
- Don’t skip the barrier layers: The dressing on the bottom and the hearty ingredients in the middle create a fortress for your greens. If you’re using a watery vegetable like cucumber, pat it dry first. I once forgot to drain my chickpeas, and the whole jar was a sad, watery mess.
- Keep crunchy toppings separate: Croutons, nuts, and seeds will get soft if stored in the jar. I keep them in a small baggie or container and add them right before eating. It takes an extra two seconds but makes a huge difference.
- Use a wide-mouth jar: Trust me on this. Narrow jars are frustrating to layer and even harder to eat from. Wide-mouth quart jars are perfect for a full meal.
- Label your jars: I use masking tape and a sharpie to write the date and contents. It helps me remember which jar has the spicy chicken and which has the Mediterranean chickpea version.
Common Mistake to Avoid: Overpacking the jar. You need a little air space at the top to allow the greens to stay fluffy. If you cram everything in, the greens will get crushed and soggy. Leave about an inch of space between the greens and the lid.
Variations & Adaptations
One of the best things about this recipe is how endlessly customizable it is. Here are some of my favorite variations:
- Mediterranean Chickpea: Swap the chicken for chickpeas, use a lemon-herb vinaigrette, and add Kalamata olives, feta cheese, and a handful of fresh parsley. I make this version when I’m craving something bright and tangy.
- Southwest Black Bean: Use black beans, corn, diced bell peppers, and a cilantro-lime dressing. Top with crushed tortilla chips right before eating. This one always gets rave reviews at potlucks.
- Low-Carb/Keto: Skip the grains and add extra protein like grilled chicken or hard-boiled eggs. Use a high-fat dressing like ranch or blue cheese. Add avocado slices when serving.
- Vegan: Use tofu or chickpeas as your protein, and choose a dairy-free dressing. Nutritional yeast can add a cheesy flavor without the dairy. I love this version with a simple tahini dressing.
- Seasonal Summer Berry: Add fresh strawberries, blueberries, and sliced almonds. Use a poppy seed dressing or a light balsamic vinaigrette. This is my go-to when berries are in season.
Dietary Adaptations: For a gluten-free version, use gluten-free grains like quinoa or skip them entirely. For nut allergies, replace nuts with seeds like sunflower or pumpkin seeds. The beauty of this recipe is that it’s a template—you can swap in whatever you have on hand.
Serving & Storage Suggestions
These salads are designed to be served cold, straight from the fridge. Here’s how to get the best experience:
- Serving Temperature: Enjoy them chilled. The contrast between the cold, crisp greens and the flavorful dressing is part of the magic. If you’re taking them to work, keep them in the fridge until lunchtime.
- Presentation: I like to dump the jar into a wide bowl to mix everything properly. The dressing coats every layer beautifully. If you’re eating directly from the jar, give it a good shake first.
- Complementary Dishes: These salads pair wonderfully with a warm bowl of soup or a crusty piece of bread. For a heartier meal, serve alongside grilled chicken or a quinoa patty.
- Storage: Store sealed jars in the refrigerator for up to 5 days. The dressing will stay at the bottom, and the greens will remain crisp on top. Do not freeze—the texture will be ruined.
- Reheating: These salads are meant to be eaten cold. If you want a warm element, add grilled chicken or roasted vegetables that have been heated separately.
Flavor Development: Interestingly, the flavors meld together beautifully after a day or two. The dressing seeps into the hearty vegetables, making them even more flavorful. I actually prefer the salads on day two or three for this reason.
Nutritional Information & Benefits
These mason jar salads are not just convenient—they’re also packed with nutrients. Here’s a rough estimate for a standard jar with chicken, mixed greens, and a vinaigrette:
- Calories: Approximately 350-450 per jar (depending on toppings and dressing)
- Protein: 25-30 grams (from chicken or chickpeas)
- Fiber: 8-12 grams (from vegetables and grains)
- Healthy Fats: 15-20 grams (from olive oil and seeds)
Health Benefits: The combination of fresh vegetables provides a wide range of vitamins and antioxidants. Leafy greens are rich in vitamin K and folate, while colorful veggies like bell peppers and tomatoes offer vitamin C and lycopene. The protein and healthy fats keep you full and satisfied, making this a balanced meal.
Dietary Considerations: This recipe is naturally gluten-free if you skip the croutons and use gluten-free grains. It’s also easy to make dairy-free by omitting cheese. For a low-carb option, reduce or omit the grains. Always check your dressing labels for hidden sugars or allergens.
From a wellness perspective, I love that these salads help me eat more vegetables without any effort. They’re a simple way to prioritize nutrition during a busy week.
Conclusion
These Easy Make-Ahead Teacher Lunch Mason Jar Salads have honestly changed my lunch game. They’re simple, customizable, and genuinely delicious. Whether you’re a teacher surviving on a 20-minute lunch break, a busy parent, or just someone who wants to eat better without the daily hassle, these jars are your answer. The layering method is foolproof, and once you get the hang of it, you’ll never go back to sad desk salads again.
I love that this recipe is less about strict rules and more about a flexible template. Use what you have, swap in seasonal ingredients, and make it your own. That’s the beauty of cooking—it’s personal. So go ahead, grab some jars, and give it a try. I promise you’ll thank yourself on Wednesday morning when lunch is already packed and waiting.
I’d love to hear how your salads turn out! Drop a comment below with your favorite combination, or share your creation on Pinterest. Don’t forget to tag me so I can see your beautiful jars. Happy prepping, friends!
Frequently Asked Questions
How long do mason jar salads last in the fridge?
They last up to 5 days when stored properly with the dressing on the bottom and greens on top. The key is keeping everything dry and sealed tightly.
Can I use any type of jar?
Yes, any airtight glass or plastic container works. Wide-mouth mason jars are ideal because they’re easy to layer and eat from, but old pasta sauce jars or meal prep containers are great alternatives.
Do I need to wash the greens before assembling?
Yes, but dry them thoroughly. Use a salad spinner or pat them dry with a clean towel. Wet greens will wilt and become soggy within a day or two.
Can I add avocado to the jar?
It’s best to add avocado right before eating to prevent browning. Slice it fresh and toss it in when you’re ready to enjoy your salad.
What’s the best dressing to use?
Thicker dressings like ranch, Caesar, or a classic vinaigrette work best. They create a good moisture barrier. Avoid watery dressings that can seep into the greens.
Pin This Recipe!
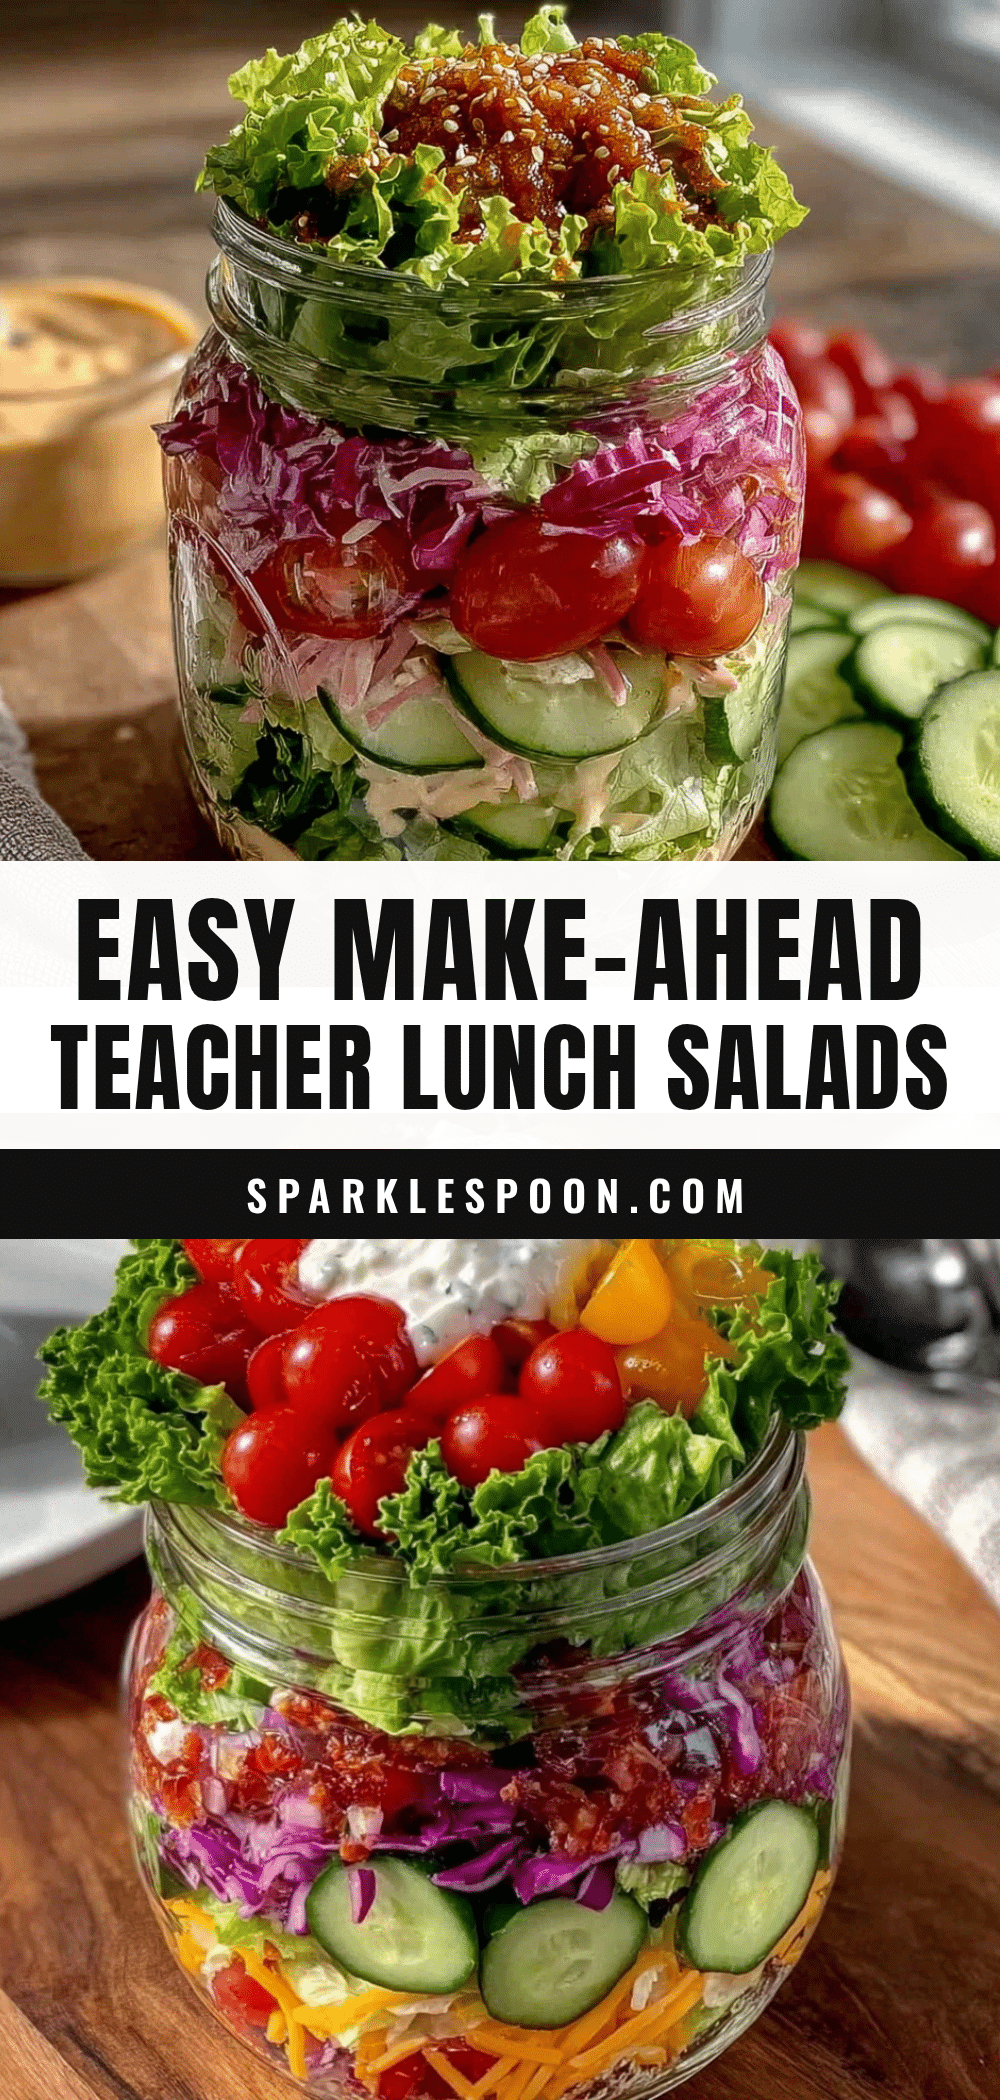
Easy Make-Ahead Teacher Lunch Mason Jar Salads
These Easy Make-Ahead Teacher Lunch Mason Jar Salads are a lifesaver for busy weeks. With a foolproof layering method, they stay fresh for up to 5 days, giving you a quick, healthy, and delicious lunch ready to grab and go.
- Prep Time: 20 minutes
- Cook Time: 0 minutes
- Total Time: 20 minutes
- Yield: 5 servings
- Category: Main Course
- Cuisine: American
Ingredients
- Your favorite salad dressing (about 2-3 tablespoons per jar)
- Fresh lemon juice (optional)
- Cooked protein: grilled chicken, chickpeas, hard-boiled eggs, or tofu (about 1/2 cup per jar)
- Cherry tomatoes, halved
- Cucumbers, diced (English cucumbers recommended)
- Bell peppers, diced
- Red onion, thinly sliced
- Corn kernels (canned or grilled, drained well)
- Black beans or kidney beans (rinsed and drained)
- Cooked quinoa, farro, or brown rice (about 1/4 cup per jar, optional)
- Sunflower seeds or pumpkin seeds (optional)
- Mixed greens, spinach, or romaine lettuce (about 1-2 cups per jar)
- Fresh herbs like parsley or basil (optional)
- Croutons, nuts, or seeds (for topping, added just before eating)
- Shredded cheese like cheddar or feta (optional)
- Avocado slices (added just before eating)
Instructions
- Prep your ingredients: Wash and dry all vegetables thoroughly. Chop protein, dice cucumbers and bell peppers, halve cherry tomatoes, and thinly slice red onion. Rinse and drain canned beans or corn. Pat everything dry with a paper towel.
- Make your dressing: If making homemade dressing, whisk together ingredients in a small bowl or shake in a jar. For a simple vinaigrette, use 3 parts olive oil to 1 part vinegar, a pinch of salt, and a squeeze of lemon.
- Layer 1 – Dressing: Spoon 2-3 tablespoons of dressing into the bottom of each clean, dry mason jar.
- Layer 2 – Hearty vegetables and protein: Add hardiest ingredients on top of dressing: protein, cherry tomatoes, cucumbers, bell peppers, and red onion. Pack down gently.
- Layer 3 – Grains or seeds (optional): Add a layer of cooked quinoa, farro, or brown rice. Sprinkle in sunflower seeds or pumpkin seeds for extra crunch.
- Layer 4 – Greens: Loosely pack greens on top. Do not press down. Fill jar to the top, leaving a little room for the lid.
- Seal and store: Screw lids on tightly. Label each jar with date and contents. Store in refrigerator for up to 5 days. Keep toppings like croutons, nuts, seeds, cheese, and avocado separate and add just before eating.
- To serve: Dump jar contents into a bowl or eat directly from jar. Add crunchy toppings and enjoy.
Notes
The key to success is the layering order: dressing on the bottom, hearty veggies and protein in the middle, and delicate greens on top. Dry all ingredients thoroughly to prevent sogginess. Keep crunchy toppings separate and add just before eating. For best results, use wide-mouth jars and leave about an inch of space at the top for the greens to stay fluffy.
Nutrition
- Serving Size: 1 jar
- Calories: 350450
- Sugar: 58
- Sodium: 400600
- Fat: 1520
- Saturated Fat: 24
- Carbohydrates: 2535
- Fiber: 812
- Protein: 2530
Keywords: mason jar salads, make-ahead lunch, teacher lunch, meal prep, healthy lunch, easy lunch, grab-and-go salad



