Love this? Save it for later!
Share the inspiration with your friends
My neighbor Sarah wasn’t trying to impress me. I’d stopped by to return a tupperware container and the smell of something cool and fresh hit me before I even got past her screen door. She was standing at her kitchen counter, tossing pasta and chopped veggies in a big bowl with one hand while helping her son find his library book with the other. Completely unfazed. Like she was just breathing air.
“Oh, that’s just lunch prep,” she said when I asked what she was making. Just lunch prep. As if the perfectly dressed, colorful, kid-approved cold pasta salad she was throwing together in under five minutes was nothing special. I stood there watching her for a minute—honestly, I think I was a little jealous of how effortless she made it look. Her son, who I’ve seen turn his nose up at everything from mac and cheese to pizza, was already sneaking bites straight from the bowl.
I went home that afternoon and tried to recreate it. The first attempt was okay. The second was better. By the third, I had it down—and I’ve been making this easy 5-minute cold pasta salad for school lunches ever since. It’s become my secret weapon for busy mornings when the clock is ticking and I need something that actually tastes good, stays fresh in a lunchbox, and doesn’t require me to turn on the stove at 7 AM. Maybe you’ve been there—standing in front of the fridge at 7:15 wondering how you’re going to pack something halfway decent before the bus arrives. This pasta salad is the answer you didn’t know you needed.
Why You’ll Love This Recipe
Let me tell you why this cold pasta salad has earned a permanent spot in my weekly rotation. I’ve tested it through three school years, two picky eaters, and one very skeptical husband who thought cold pasta for lunch sounded weird. Spoiler alert: he was wrong.
- Quick & Easy: It literally comes together in 5 minutes. I’m not exaggerating. If you have leftover pasta or grab a box of fresh tortellini, you’re basically done before the coffee finishes brewing.
- Simple Ingredients: You don’t need to make a special trip to some fancy grocery store. Everything is probably in your fridge and pantry right now. I mean that.
- Perfect for School Lunches: It holds up beautifully in a lunchbox. No sogginess. No weird textures. It actually tastes better after sitting for a few hours, which is magic for packed lunches.
- Crowd-Pleaser: My kids ask for this. Their friends ask for this. Even my neighbor’s son—the picky one—requests it when he comes over.
- Unbelievably Delicious: The dressing soaks into the pasta just enough, the veggies stay crunchy, and every bite has this perfect balance of tangy and savory. It’s comfort food that doesn’t weigh you down.
What makes this different from every other pasta salad recipe out there? It’s the dressing-to-pasta ratio. Most recipes drown the pasta or leave it dry. I spent weeks tweaking the measurements until I got that perfect coating—enough to flavor every piece without making it soggy by lunchtime. Plus, the combination of a simple vinaigrette with fresh veggies creates a texture that’s both satisfying and refreshing. This isn’t just another version of cold pasta salad. It’s the version you’ll actually make on a Tuesday morning when you’re half asleep.
This recipe is the kind that makes you close your eyes after the first bite. It’s lunchbox comfort food reimagined—faster, fresher, and with the same soul-soothing satisfaction as a warm meal. Perfect for impressing your kids without any stress, or turning a chaotic school morning into something manageable.
What Ingredients You Will Need
This recipe uses simple, everyday ingredients to deliver big flavor without any fuss. Most of these are pantry staples or regular fridge items, so you can probably make this right now without a shopping trip.
For the Pasta Salad
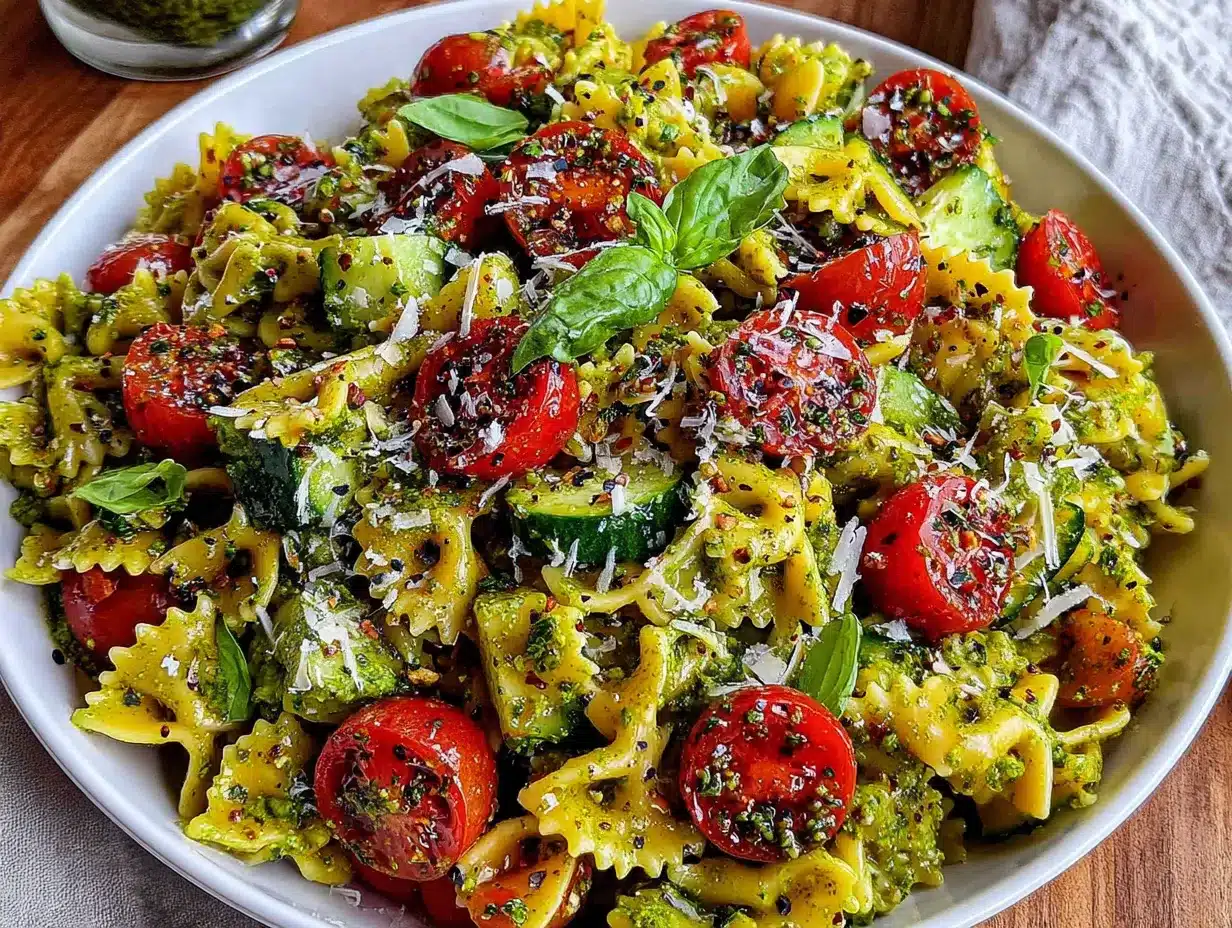
- Pasta, 3 cups cooked (about 2 cups dry) – I recommend rotini, fusilli, or bowtie pasta because the shapes hold the dressing well. Use whatever you have on hand though. Gluten-free pasta works great here too.
- Cucumber, 1 medium – diced into small bite-sized pieces. I prefer English cucumbers because they have fewer seeds and stay crunchier. No need to peel them.
- Cherry tomatoes, 1 cup – halved or quartered depending on size. Grape tomatoes work just as well.
- Bell pepper, 1/2 cup – diced. Any color works, but orange or yellow adds nice sweetness. Red is my personal favorite for color contrast.
- Black olives, 1/2 cup – sliced. You can use canned or jarred. I like Lindsay brand for consistent flavor.
- Feta cheese, 1/2 cup – crumbled. Block feta you crumble yourself tastes way better than pre-crumbled, honestly. If you’re dairy-free, skip it or use a vegan alternative.
- Fresh parsley, 2 tablespoons – chopped. Optional but adds a fresh pop of flavor. Dried herbs work in a pinch.
For the Dressing
- Olive oil, 1/4 cup – extra virgin if you have it. It adds a nice fruity note to the dressing.
- Red wine vinegar, 2 tablespoons – this gives the tangy kick. White wine vinegar or apple cider vinegar work too.
- Lemon juice, 1 tablespoon – freshly squeezed is best, but bottled works in a pinch.
- Dijon mustard, 1 teaspoon – helps emulsify the dressing and adds a little zing. Yellow mustard works if that’s what you’ve got.
- Garlic powder, 1/2 teaspoon – not fresh garlic here, since raw garlic can be overpowering in a cold salad. Garlic powder gives a milder, more balanced flavor.
- Dried oregano, 1/2 teaspoon – Italian seasoning works as a substitute.
- Salt, 1/2 teaspoon – or to taste. I use fine sea salt.
- Black pepper, 1/4 teaspoon – freshly ground if possible.
One thing I’ve learned through trial and error: the quality of your olive oil really matters here. Since the dressing is simple, a good extra virgin olive oil makes the whole salad taste noticeably better. I personally use California Olive Ranch for everyday cooking. Also, if you’re making this for school lunches, consider skipping the olives if your kids aren’t fans—I’ve found that some kids love them and others will pick every single one out.
Equipment Needed
You don’t need much for this recipe, which is part of the beauty. Here’s what you’ll need:
- Large mixing bowl – big enough to toss everything without spilling. I use a 4-quart bowl.
- Cutting board and knife – for dicing veggies. Any sharp chef’s knife works.
- Measuring cups and spoons – for the dressing ingredients. I have a set of magnetic ones that stay together in my drawer.
- Small bowl or jar – for whisking or shaking the dressing. A mason jar works perfectly—just screw the lid on and shake.
- Whisk or fork – for mixing the dressing if you’re not using a jar.
- Colander – only if you’re cooking fresh pasta. If using leftover pasta, skip it.
- Storage containers – for packing individual servings. I love glass containers with snap lids for school lunches.
If you don’t have a large mixing bowl, a large pot works in a pinch. I’ve made this in a Dutch oven before when my good bowl was in the sink. Not ideal, but it got the job done. Also, if you’re using a jar for the dressing, make sure the lid is screwed on tight before shaking—I learned that one the hard way.
Preparation Method
This is where the magic happens. Follow these steps and you’ll have lunch ready in no time.
Step 1: Cook the Pasta (if using fresh)
Bring a large pot of salted water to a boil. Add your pasta and cook according to package directions until al dente. For rotini, that’s usually about 8-10 minutes. Drain in a colander and rinse with cold water to stop the cooking process. This is important—rinsing also removes excess starch that can make the salad gummy. Let it drain well while you prep the veggies. If you’re using leftover pasta, skip this step and just make sure it’s at room temperature.
Step 2: Prep the Vegetables
While the pasta is cooking or draining, dice your cucumber, halve the cherry tomatoes, chop the bell pepper, and slice the olives if they’re not pre-sliced. Try to keep the pieces roughly the same size—about 1/2 inch—so every bite has a little bit of everything. I usually chop the cucumber first because it’s the largest, then use the same knife for the peppers. No need to wash between veggies unless you’re being extra careful about cross-contamination.
Step 3: Make the Dressing
In a small bowl or mason jar, combine the olive oil, red wine vinegar, lemon juice, Dijon mustard, garlic powder, dried oregano, salt, and black pepper. Whisk vigorously until the mustard is fully incorporated and the dressing looks slightly thickened. If using a jar, screw the lid on tight and shake for about 15 seconds. Taste it and adjust the salt or acid if needed. I like mine with a little extra lemon juice for brightness.
Step 4: Assemble the Salad
In your large mixing bowl, combine the cooled pasta, diced cucumber, halved tomatoes, chopped bell pepper, sliced olives, and crumbled feta. Pour the dressing over the top. Toss gently with a large spoon or spatula until everything is evenly coated. You want every piece of pasta and every veggie to have a little shine from the dressing. Be careful not to overmix—you don’t want to break up the feta too much.
Step 5: Taste and Adjust
Take a small bite and check the seasoning. Does it need more salt? A little more vinegar? This is your chance to fix it before it goes into lunchboxes. I often add an extra pinch of salt and a crack of black pepper at this stage. If the salad seems dry, drizzle in another tablespoon of olive oil and toss again.
Step 6: Portion and Store
Divide the pasta salad into individual lunch containers. I use about 1 to 1.5 cups per serving for school lunches. Sprinkle a little extra fresh parsley on top if you’re feeling fancy. Seal the containers and refrigerate until ready to pack. The salad will keep well for up to 4 days, so you can make a big batch on Sunday and portion it out for the week.
Pro tip: If you’re packing this for a school lunch that won’t be eaten for a few hours, consider adding a small ice pack to the lunchbox. It keeps everything crisp and refreshing. Also, if your kids like a little crunch, pack a small bag of croutons or sunflower seeds separately and let them add it at lunchtime.
Cooking Tips & Techniques
Over the years, I’ve made every mistake you can imagine with cold pasta salad. Here’s what I’ve learned so you don’t have to repeat my failures.
Don’t overcook the pasta. This is the number one mistake. Mushy pasta in a cold salad is just sad. Cook it al dente—firm to the bite—because it will continue to absorb some dressing as it sits. If it’s already soft coming out of the pot, it’ll be a mess by lunchtime. Set a timer, seriously.
Rinse with cold water. I know some pasta purists say never rinse pasta, but for cold salads, it’s essential. Rinsing stops the cooking immediately and removes surface starch that would make the salad sticky. Just make sure you drain it really well afterward. Nobody wants watery pasta salad.
Season the pasta while it’s warm. Here’s a trick I picked up from a chef friend: toss the warm, drained pasta with a pinch of salt and a drizzle of olive oil before adding it to the bowl. This seasons the pasta itself, not just the dressing. It makes a noticeable difference in the final flavor.
Let it chill before serving. This salad is best after at least 30 minutes in the fridge. The flavors need time to meld together. I’ve made the mistake of serving it immediately and it was just okay. After an hour in the fridge, it was incredible. The pasta absorbs the dressing, the veggies release a little moisture, and everything comes together beautifully.
Dress lightly at first. You can always add more dressing, but you can’t take it away. Start with about three-quarters of the dressing, toss, then add more if needed. This prevents a soggy salad and lets you control the final texture.
Layer ingredients strategically. If you’re making this ahead of time for the week, store the dressing separately and toss it with the pasta and veggies right before packing. This keeps everything fresher longer. I learned this after three days of progressively soggier salads. Now I keep a jar of dressing in the fridge and mix as needed.
Variations & Adaptations
One of the best things about this recipe is how flexible it is. Here are some variations I’ve tried and loved.
Protein-Packed Version
Add 1 cup of diced cooked chicken, cubed salami, or canned chickpeas (rinsed and drained) to make it a more filling meal. My kids love it with little cubes of ham. For a vegetarian option, add some cubed mozzarella or extra feta. I’ve also used leftover grilled chicken from dinner the night before—works perfectly.
Gluten-Free Adaptation
Use gluten-free pasta like chickpea or lentil pasta. These hold up really well in cold salads and add extra protein. Just be careful not to overcook them—gluten-free pasta can go from perfect to mushy very quickly. I like Banza brand for this recipe.
Dairy-Free Version
Skip the feta cheese or use a dairy-free alternative. The salad is still delicious without it. You can also add a tablespoon of nutritional yeast to the dressing for a cheesy flavor without the dairy. My dairy-sensitive niece loves this version.
Seasonal Variations
In summer, add fresh corn kernels cut off the cob and diced zucchini. In fall, try roasted butternut squash cubes and dried cranberries. In spring, add blanched asparagus pieces and fresh peas. The base recipe works year-round with whatever veggies are in season.
Italian-Inspired Twist
Add 1/2 cup of chopped pepperoni, some marinated artichoke hearts, and swap the feta for fresh mozzarella pearls. Use Italian dressing instead of the vinaigrette. This version is always a hit at potlucks.
I once made a version with leftover taco meat, black beans, corn, and a lime-cilantro dressing. It was completely different but just as good. Don’t be afraid to experiment—this recipe is forgiving.
Serving & Storage Suggestions
This cold pasta salad is incredibly versatile when it comes to serving. Here’s how to make the most of it.
Serving temperature: Serve it cold or at room temperature. Straight from the fridge is refreshing on a warm day. If you’re packing it for lunch, it’ll come to room temperature naturally by lunchtime, which is perfectly fine. I actually prefer it slightly chilled.
Presentation ideas: For a lunchbox, portion it into a colorful container with a separate small container of extra veggies or croutons on the side. For a picnic or potluck, serve it in a large glass bowl so the colorful layers show through. Garnish with a sprinkle of fresh parsley or a few extra feta crumbles on top.
What to serve with it: This salad pairs beautifully with grilled chicken, sandwiches, wraps, or even on its own as a light lunch. For school lunches, I pack it with some fruit, a yogurt tube, and a small treat. It’s also great alongside burgers or hot dogs at a summer cookout.
Storage instructions: Store in an airtight container in the refrigerator for up to 4 days. The flavors actually get better on day two and three as they meld together. Do not freeze—the texture of the veggies and pasta will suffer significantly.
Reheating: Don’t. This is a cold salad. If you want it warm, you’re better off making a different recipe. That said, if you accidentally leave it out for more than 2 hours, toss it. Food safety first.
Flavor development: The salad will taste best after at least an hour in the fridge. The pasta absorbs the dressing, the veggies soften slightly, and everything becomes more cohesive. If you’re meal prepping for the week, I recommend making it the night before you plan to serve it.
Nutritional Information & Benefits
This pasta salad isn’t just convenient—it’s also pretty good for you. Here’s a rough breakdown per serving (about 1.5 cups).
| Nutrient | Amount per Serving |
|---|---|
| Calories | 320-350 |
| Total Fat | 15g |
| Saturated Fat | 4g |
| Carbohydrates | 38g |
| Fiber | 4g |
| Protein | 9g |
| Sodium | 450mg |
Health benefits: The olive oil provides healthy monounsaturated fats that are good for heart health. The colorful veggies deliver a range of vitamins and antioxidants—vitamin C from the bell peppers, lycopene from the tomatoes, and hydration from the cucumber. The feta adds calcium and protein. If you use whole wheat or legume-based pasta, you’ll get extra fiber and protein too.
Dietary considerations: This recipe is easily adaptable for gluten-free, dairy-free, and vegetarian diets. It’s naturally nut-free, which is great for school lunch policies. The sodium content can be reduced by using low-sodium olives and reducing the added salt.
My perspective: I love that this recipe lets me pack a lunch that’s both satisfying and nutritious without spending hours in the kitchen. It’s not about being perfect—it’s about making something that fuels your kids (and you) through a busy day. And honestly, it beats a cafeteria pizza any day.
Conclusion
This easy 5-minute cold pasta salad has truly been a game-changer in our house. It turned chaotic school mornings from a scramble into something almost peaceful. I mean that. Knowing I have a delicious, healthy lunch ready in the fridge takes so much pressure off the morning rush.
What I love most about this recipe is how it adapts to whatever you have on hand. Some weeks it’s loaded with cucumbers and tomatoes from the farmers market. Other weeks it’s built around leftover roasted veggies and whatever cheese is in the drawer. It always works. It always tastes good. And it always makes lunchtime feel a little special without any extra effort.
I really hope you give this recipe a try. Start with the basic version, then make it your own. Add your family’s favorite veggies. Swap in different cheeses. Play with the dressing until it tastes perfect to you. That’s the beauty of a simple recipe—it becomes yours.
I’d love to hear how it turns out! Drop a comment below and let me know what variations you tried. Did your kids love it? Did you add something unexpected? Share your wins and your experiments—I read every single comment. And if you snap a photo of your pasta salad, tag me on social media. There’s nothing better than seeing this recipe come to life in your kitchen.
Happy lunch packing, friend. You’ve got this.
Frequently Asked Questions
Can I make this pasta salad the night before?
Absolutely. In fact, it tastes even better the next day after the flavors have had time to meld. Just keep the dressing separate if you’re making it more than a day ahead, and toss everything together before packing. Store it in an airtight container in the fridge.
What’s the best pasta shape for cold pasta salad?
Short, sturdy shapes with nooks and crannies work best. Rotini, fusilli, bowtie, and penne are all excellent choices. The ridges and curves catch the dressing and veggies, so every bite is flavorful. Avoid long pasta like spaghetti or angel hair—it doesn’t hold up as well in a cold salad.
How long does this pasta salad last in the fridge?
It stays fresh for up to 4 days when stored in an airtight container. The veggies will soften slightly over time, but the flavor continues to develop. I find it’s best between day 1 and day 3. After that, the cucumbers can get a little watery.
Can I add protein to make it a complete meal?
Yes! Diced cooked chicken, cubed ham, salami, canned chickpeas, or hard-boiled eggs all work beautifully. Add about 1 cup of protein to the recipe. If you’re packing it for school lunch, the protein makes it more filling and balanced.
My kids are picky eaters. Can I customize this for them?
Definitely. Start with just pasta, a mild dressing, and one or two veggies they already like. You can gradually introduce new ingredients over time. Some kids prefer it without olives or with extra cheese. The beauty of this recipe is that it’s completely customizable to your family’s tastes.
Pin This Recipe!
Easy 5-Minute Cold Pasta Salad for Quick School Lunches
This easy 5-minute cold pasta salad is the perfect solution for busy school mornings. Made with simple ingredients like rotini pasta, fresh veggies, and a tangy vinaigrette, it’s a crowd-pleaser that stays fresh in lunchboxes and tastes even better after sitting for a few hours.
- Prep Time: 5 minutes
- Cook Time: 10 minutes
- Total Time: 15 minutes
- Yield: 4 servings 1x
- Category: Main Course
- Cuisine: American
Ingredients
- 3 cups cooked pasta (about 2 cups dry, such as rotini, fusilli, or bowtie)
- 1 medium cucumber, diced
- 1 cup cherry tomatoes, halved or quartered
- 1/2 cup bell pepper, diced (any color)
- 1/2 cup black olives, sliced
- 1/2 cup feta cheese, crumbled
- 2 tablespoons fresh parsley, chopped (optional)
- 1/4 cup olive oil (extra virgin preferred)
- 2 tablespoons red wine vinegar
- 1 tablespoon lemon juice (freshly squeezed preferred)
- 1 teaspoon Dijon mustard
- 1/2 teaspoon garlic powder
- 1/2 teaspoon dried oregano
- 1/2 teaspoon salt (fine sea salt preferred)
- 1/4 teaspoon black pepper (freshly ground preferred)
Instructions
- Cook the pasta: Bring a large pot of salted water to a boil. Add pasta and cook according to package directions until al dente (about 8-10 minutes for rotini). Drain in a colander and rinse with cold water to stop cooking and remove excess starch. Let drain well.
- Prep the vegetables: While pasta cooks or drains, dice the cucumber, halve the cherry tomatoes, chop the bell pepper, and slice the olives if not pre-sliced. Keep pieces about 1/2 inch for even bites.
- Make the dressing: In a small bowl or mason jar, combine olive oil, red wine vinegar, lemon juice, Dijon mustard, garlic powder, dried oregano, salt, and black pepper. Whisk vigorously or shake in a jar for about 15 seconds until emulsified. Taste and adjust seasoning if needed.
- Assemble the salad: In a large mixing bowl, combine cooled pasta, diced cucumber, halved tomatoes, chopped bell pepper, sliced olives, and crumbled feta. Pour dressing over the top and toss gently with a large spoon or spatula until evenly coated.
- Taste and adjust: Take a small bite and check seasoning. Add more salt, pepper, or a splash of vinegar if needed. If salad seems dry, drizzle in another tablespoon of olive oil and toss again.
- Portion and store: Divide into individual lunch containers (about 1 to 1.5 cups per serving). Sprinkle extra fresh parsley on top if desired. Seal containers and refrigerate. Salad keeps well for up to 4 days.
Notes
For best flavor, let the salad chill for at least 30 minutes before serving. The flavors meld and improve over time. If making ahead for the week, store dressing separately and toss before packing to keep veggies crisp. Add a small ice pack to lunchboxes to keep salad fresh. For extra crunch, pack croutons or sunflower seeds separately. Don’t overcook pasta—cook al dente as it will absorb dressing. Rinse pasta with cold water to stop cooking and remove starch. Season warm pasta with a pinch of salt and olive oil before adding to salad. Start with 3/4 of dressing and add more as needed to avoid sogginess.
Nutrition
- Serving Size: 1.5 cups
- Calories: 335
- Sugar: 4
- Sodium: 450
- Fat: 15
- Saturated Fat: 4
- Carbohydrates: 38
- Fiber: 4
- Protein: 9
Keywords: cold pasta salad, school lunch, quick lunch, easy pasta salad, kid-friendly, meal prep, 5-minute recipe



