Love this? Save it for later!
Share the inspiration with your friends
Introduction
“The power went out halfway through Sunday lunch, and there I was, staring at a half-roasted chicken wondering what to do next. Honestly, I was already imagining soggy sandwiches and disappointed faces. But something unexpected happened—the chicken came out so juicy and flavorful, it became my go-to batch roast chicken sandwich meat recipe.”
I never thought a simple roast chicken could turn into perfect sandwich meat, but after that blackout mishap, I started experimenting with roasting bigger batches to slice thin for all kinds of sandwiches. You know that feeling when you pull apart a sandwich and the meat is so tender it practically melts in your mouth? That’s exactly what I chased with this recipe.
Maybe you’ve been there—rushing to make lunch, wanting something satisfying but quick, and craving that homemade touch without the fuss. This juicy batch roast chicken sandwich meat recipe is just that: easy, versatile, and packed with moist, tender chicken every time. Let me tell you, it’s changed the way I do lunch prep forever.
Why You’ll Love This Recipe
- Quick & Easy: Comes together in under 90 minutes, perfect for busy weeknights or last-minute meal prep.
- Simple Ingredients: No fancy grocery trips needed; most are pantry staples or easy finds at any market.
- Perfect for Lunchboxes: Ideal for sandwiches, wraps, or even salad toppers—versatile enough to keep lunches exciting.
- Crowd-Pleaser: Always gets rave reviews from kids and adults alike, with juicy, flavorful meat that’s never dry.
- Unbelievably Delicious: The slow roasting and seasoning technique locks in moisture and flavor, making each bite memorable.
This isn’t just another roast chicken recipe. The secret lies in roasting a whole batch at once, slicing it thinly, and seasoning it just right to keep every slice juicy. I recommend trying it with a crusty sourdough or your favorite sandwich bread for a texture contrast that’s simply irresistible. It’s comfort food that’s practical, delicious, and perfect for anyone who loves homemade sandwiches but hates dry meat.
What Ingredients You Will Need
This recipe uses simple, wholesome ingredients to deliver bold flavor and satisfying texture without the fuss. Most are pantry staples, so you likely already have everything on hand.
- Whole chicken (about 4-5 pounds / 1.8-2.3 kg): Choose an organic or free-range bird if possible for the best flavor.
- Olive oil (3 tablespoons): High quality extra virgin olive oil adds richness and helps the skin crisp up nicely.
- Salt (1 ½ teaspoons): Use kosher salt for even seasoning; it’s key to drawing out moisture and enhancing flavor.
- Black pepper (1 teaspoon, freshly ground): Adds a subtle heat and depth.
- Garlic powder (1 teaspoon): Boosts savory notes without overpowering.
- Onion powder (1 teaspoon): Adds a gentle sweetness and complexity.
- Smoked paprika (1 teaspoon): Optional but highly recommended for a smoky aroma and color.
- Fresh herbs (2 tablespoons chopped rosemary and thyme): Or 1 tablespoon dried, these herbs brighten and freshen the roast.
- Lemon (1, halved): To stuff inside the cavity for a subtle citrus fragrance.
- Chicken broth or water (½ cup / 120 ml): Added to the roasting pan to keep the meat moist during cooking.
Substitution tips: If you prefer a dairy-free or paleo option, this recipe is naturally compliant. For a gluten-free sandwich meat, pair with your favorite gluten-free bread or lettuce wraps. I typically use McCormick spices—they’re reliable and potent, but feel free to use fresh garlic minced instead of powder for a punchier flavor.
Equipment Needed
- Roasting pan or large oven-safe skillet: I like using a heavy-duty roasting pan with a rack to allow airflow under the chicken, which helps crisp the skin evenly.
- Meat thermometer: Crucial for checking internal temperature to avoid overcooking and drying out the meat.
- Sharp carving knife: For slicing the roasted chicken thinly and uniformly—makes all the difference in sandwich texture.
- Cutting board: Preferably large and sturdy to handle the whole chicken safely.
- Kitchen twine: Helpful for tying legs if you want a tighter roast, but optional.
If you don’t have a meat thermometer, no worries—just watch for clear juices and a golden skin, but investing in one will make your cooking more foolproof. I’ve tried roasting in cast iron skillets and even disposable aluminum pans; both work well, but the pan with a rack wins for best texture.
Preparation Method
- Preheat your oven to 425°F (220°C): This high heat jump-starts the crisping process. Plan about 15 minutes for preheating.
- Prepare the chicken: Remove any giblets from the cavity and pat the chicken dry with paper towels. Dry skin means crispier roast.
- Season the chicken: Rub olive oil all over the chicken, including under the skin where you can reach. Mix salt, black pepper, garlic powder, onion powder, smoked paprika, and chopped herbs in a small bowl and sprinkle evenly over the chicken. Don’t be shy—season inside the cavity too.
- Stuff the lemon halves inside the cavity: This adds brightness and helps keep the meat moist.
- Place the chicken breast-side up on the roasting rack: Pour ½ cup chicken broth or water into the pan to create steam during cooking, which helps retain juiciness.
- Roast the chicken: Cook at 425°F (220°C) for 15 minutes, then reduce heat to 375°F (190°C) and roast for another 45-55 minutes, or until the internal temperature reaches 165°F (74°C) in the thickest part of the thigh.
- Rest the chicken: Remove from the oven and let it rest for 15 minutes before carving. This resting time lets the juices redistribute, making the meat tender and juicy.
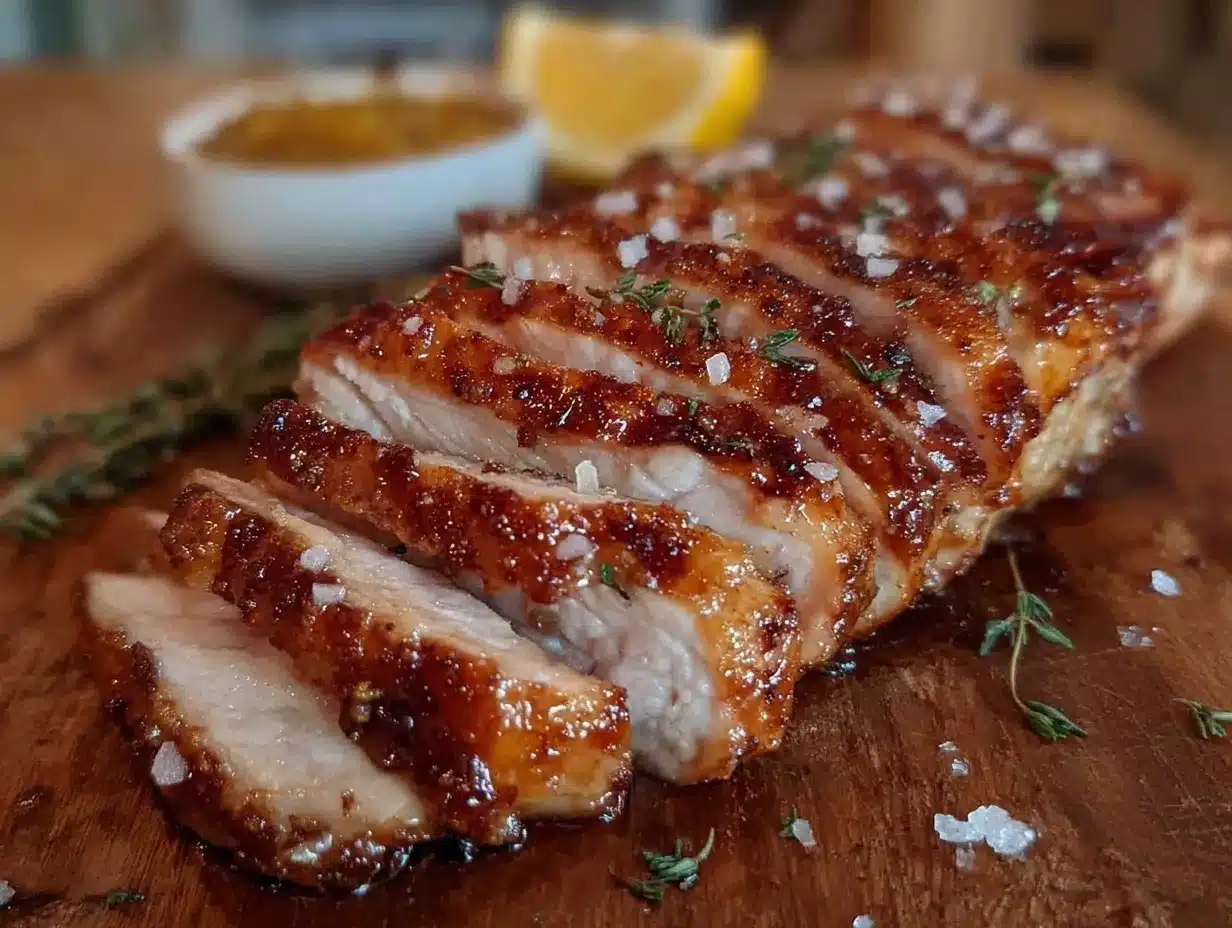
- Carve the chicken: Use your sharp knife to slice the meat as thinly as possible for sandwiches. Save the crispy skin for topping or snacking.
Pro tip: If the chicken starts to brown too quickly, loosely tent with foil to prevent burning. You want that golden skin, but not charred spots. When slicing, cut against the grain for the most tender bites. Honestly, resting the meat is one of those steps that feels easy to skip but makes all the difference—trust me on this one.
Cooking Tips & Techniques
Roasting a whole chicken can seem intimidating, but a few tricks make all the difference. First, drying the skin is key to crispiness—moisture is the enemy here. I usually pat the chicken dry twice: once when unpacking, and again right before seasoning.
Another tip is to avoid overcrowding the pan. Air circulation around the chicken helps cook it evenly and crisps the skin. If you don’t have a rack, placing the chicken on a bed of chopped veggies like carrots and celery works as a natural rack and adds flavor to your pan juices.
Don’t rush the resting phase. I learned the hard way that slicing too soon leads to dry meat. Set a timer if you have to—those 15 minutes let the juices settle back in instead of spilling out on your cutting board.
Common mistake? Overcooking. Always check with a meat thermometer rather than relying on time alone. Even a few degrees over 165°F (74°C) can dry out your sandwich meat. And if you’re multitasking, set reminders to check the chicken to avoid that fate.
For consistent results, try seasoning the chicken the night before and refrigerating it uncovered. This dry brining step helps intensify flavor and gives the skin a head start on crisping.
Variations & Adaptations
- Herb & Citrus Twist: Swap rosemary and thyme for fresh tarragon and lemon zest for a bright, aromatic flavor perfect for spring sandwiches.
- Spicy Kick: Add cayenne pepper or smoked chipotle powder to the seasoning mix for a subtle heat that wakes up the palate.
- Gluten-Free Option: Use gluten-free sandwich bread or wrap the sliced chicken in large iceberg lettuce leaves for a crisp, low-carb alternative.
- Slow Cooker Version: If you prefer hands-off cooking, slow cook the whole chicken with the same seasonings on low for 6-7 hours, then chill and slice for sandwiches. The texture is different but still juicy and delicious.
- Personal Favorite: I once added a splash of apple cider vinegar to the roasting pan liquid, which gave a subtle tang and helped tenderize the meat even more. It’s worth a try if you like a little zing.
Serving & Storage Suggestions
This roast chicken sandwich meat tastes best served at room temperature or slightly chilled. For a classic sandwich, layer the sliced chicken with crisp lettuce, ripe tomato slices, and a smear of mayonnaise or mustard on your favorite bread.
Pair with sides like crunchy pickles, coleslaw, or a fresh green salad for a satisfying lunch. It also works beautifully in wraps or pita pockets with a dollop of tzatziki or hummus.
Store leftover sliced chicken in an airtight container in the refrigerator for up to 4 days. For longer storage, freeze the meat in portioned bags for up to 3 months. When reheating, avoid microwaving directly as it can dry out the meat—warm gently in a skillet with a splash of broth or eat cold for sandwiches.
Flavors deepen after a day in the fridge, so plan ahead if you can—the taste is even better the next day!
Nutritional Information & Benefits
Per serving (approx. 4 oz / 115 g of cooked chicken):
| Calories | 220 |
|---|---|
| Protein | 35 g |
| Fat | 8 g |
| Carbohydrates | 0 g |
Chicken is an excellent source of lean protein, important for muscle repair and energy. The herbs add antioxidants, and using olive oil provides healthy monounsaturated fats. This recipe is naturally gluten-free and low-carb, making it a versatile choice for many dietary needs. Just watch for added ingredients in your sandwich to keep it aligned with your goals.
Conclusion
This juicy batch roast chicken sandwich meat recipe is a simple, flavorful way to make lunch exciting again. Whether you’re meal prepping for the week or pulling together a quick meal, the moist, tender chicken slices make every sandwich something special.
Feel free to tweak the herbs, spices, or serving style to fit your taste—this recipe is forgiving and flexible, just like a good kitchen companion should be. Honestly, I keep coming back to this one because it’s reliable and delicious, no matter how many times I make it.
If you try it, let me know how it turns out or what variations you’ve loved. There’s nothing better than swapping tips with fellow sandwich lovers. Happy cooking and sandwich building!
Frequently Asked Questions
- Can I use chicken breasts instead of a whole chicken? Yes, but the whole chicken roasting method helps keep the meat juicier and more flavorful. If using breasts, be careful not to overcook them.
- How do I keep the sandwich meat juicy when reheating? Warm gently in a skillet with a splash of broth or eat cold. Avoid microwave reheating which can dry it out.
- Is this recipe freezer-friendly? Absolutely! Freeze sliced chicken in portions for up to 3 months and thaw in the fridge overnight before using.
- Can I make this recipe ahead for meal prep? Definitely. Roast the chicken, slice it, and store in the fridge for up to 4 days. The flavor actually improves after resting.
- What side dishes pair well with this sandwich meat? Try crunchy pickles, coleslaw, fresh green salads, or roasted veggies for a balanced meal.
Pin This Recipe!

Juicy Batch Roast Chicken Sandwich Meat Recipe Easy and Perfect for Lunch

A simple and flavorful roast chicken recipe perfect for making juicy, tender sandwich meat. Ideal for quick lunches, meal prep, and versatile sandwich options.
- Prep Time: 15 minutes
- Cook Time: 60-70 minutes
- Total Time: 75-85 minutes
- Yield: 6-8 servings
- Category: Main Course
- Cuisine: American
Ingredients
- Whole chicken (about 4-5 pounds / 1.8-2.3 kg)
- Olive oil (3 tablespoons)
- Salt (1 ½ teaspoons kosher salt)
- Black pepper (1 teaspoon, freshly ground)
- Garlic powder (1 teaspoon)
- Onion powder (1 teaspoon)
- Smoked paprika (1 teaspoon, optional)
- Fresh herbs (2 tablespoons chopped rosemary and thyme or 1 tablespoon dried)
- Lemon (1, halved)
- Chicken broth or water (½ cup / 120 ml)
Instructions
- Preheat your oven to 425°F (220°C).
- Remove any giblets from the cavity and pat the chicken dry with paper towels.
- Rub olive oil all over the chicken, including under the skin where possible.
- Mix salt, black pepper, garlic powder, onion powder, smoked paprika, and chopped herbs in a small bowl and sprinkle evenly over the chicken, including inside the cavity.
- Stuff the lemon halves inside the cavity.
- Place the chicken breast-side up on a roasting rack in a roasting pan. Pour ½ cup chicken broth or water into the pan.
- Roast at 425°F (220°C) for 15 minutes, then reduce heat to 375°F (190°C) and roast for another 45-55 minutes, or until the internal temperature reaches 165°F (74°C) in the thickest part of the thigh.
- Remove from oven and let rest for 15 minutes before carving.
- Slice the chicken thinly against the grain for sandwiches. Save crispy skin for topping or snacking.
Notes
Dry the chicken skin thoroughly before seasoning for crispiness. Use a meat thermometer to avoid overcooking. Rest the chicken for 15 minutes before slicing to keep meat juicy. Tent with foil if browning too quickly. Seasoning the chicken the night before and refrigerating uncovered enhances flavor and skin crispiness. Warm leftovers gently in a skillet with broth to avoid drying out.
Nutrition
- Serving Size: Approx. 4 oz (115 g)
- Calories: 220
- Fat: 8
- Protein: 35
Keywords: roast chicken, sandwich meat, juicy chicken, easy lunch recipe, batch cooking, meal prep, gluten-free, paleo, healthy chicken