Love this? Save it for later!
Share the inspiration with your friends
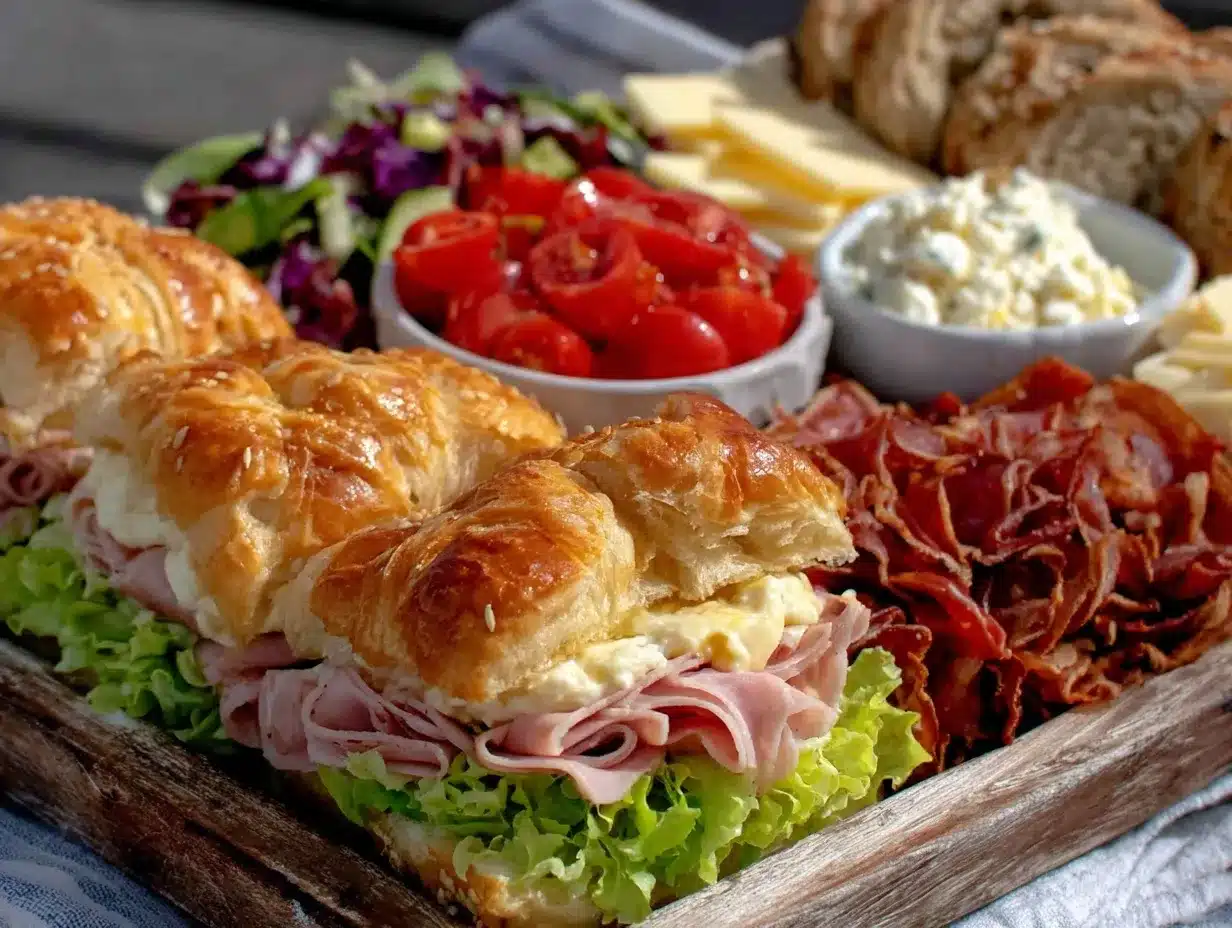
“Last Thursday afternoon, I found myself staring at a mountain of half-eaten lunches and a very grumpy six-year-old who refused to eat another soggy sandwich. Honestly, I was out of ideas and short on time. Then, on a whim, I pulled together a quick DIY sandwich bar with whatever was in the fridge. What started as a last-minute scramble turned into an unexpected hit—the kids piled their plates high, laughing over their creations, and even asked for seconds. That day, the easy DIY sandwich bar for kids became our new lunchtime lifesaver.
Let me tell you, it’s not just about making sandwiches; it’s about turning lunch into an interactive, colorful, and playful experience that kids actually look forward to. Maybe you’ve been there too—trying to juggle picky eaters, last-minute meal prep, and the need for something fresh and fun. This idea took the stress off my shoulders and gave my kids the freedom to build their own perfect sandwich masterpieces.
Setting up a sandwich bar might sound like a lot, but trust me, it’s surprisingly simple and endlessly adaptable. Whether you’ve got a tiny kitchen or limited ingredients, you can make this work. And honestly, there’s something about watching kids experiment with flavors and textures that makes the whole thing worth it. So, if you’re hunting for an easy, fresh, and fun lunch idea that turns meal prep into a game, this easy DIY sandwich bar for kids is about to become your go-to.
Why You’ll Love This Recipe
After testing dozens of lunch ideas with my own little crew and a few neighborhood kids, I can confidently say this DIY sandwich bar ticks all the boxes. It’s simple, fresh, and surprisingly quick to get together.
- Quick & Easy: The whole setup takes less than 15 minutes, making it perfect for busy school days or spontaneous get-togethers.
- Simple Ingredients: No need for fancy or hard-to-find items—most of these are pantry staples or everyday fridge finds.
- Perfect for Any Occasion: Whether it’s a casual lunch, a birthday party, or a weekend picnic, this sandwich bar fits right in.
- Crowd-Pleaser: Kids love the freedom to choose, and parents love the minimal mess and fuss.
- Unbelievably Delicious: The combination of fresh veggies, quality bread, and tasty spreads means every bite is satisfying and fun.
What sets this DIY sandwich bar apart is the little twists I’ve added from my own kitchen experiments. For example, swapping out regular mayo for herbed Greek yogurt makes the sandwiches creamy but lighter, and offering mini pita pockets alongside classic bread gives the kids a fun choice. Honestly, it’s the mix of textures and colors that keeps everyone coming back for more. This isn’t just another sandwich; it’s a hands-on lunch that brings smiles and happy tummies.
What Ingredients You Will Need
This easy DIY sandwich bar for kids uses simple, wholesome ingredients to deliver bold flavor and a satisfying texture without the fuss. Most of these are things you probably have on hand already, and you can swap in your favorites or what’s seasonal.
- Breads & Bases:
- Whole wheat sandwich bread (soft and sturdy for little hands)
- Mini pita pockets (great for stuffing and less crumbly)
- Wraps or tortillas (cut into smaller rounds for variety)
- Proteins:
- Deli turkey slices (look for low-sodium, nitrate-free options like Applegate)
- Ham or chicken breast slices
- Hard-boiled eggs, sliced or mashed (adds creaminess)
- Hummus (classic or roasted red pepper for a mild, kid-friendly flavor)
- Cheese slices or shredded cheddar (mild varieties work best)
- Veggies & Fresh Add-ons:
- Thinly sliced cucumbers (crisp and refreshing)
- Cherry tomatoes, halved (adds bursts of sweetness)
- Shredded carrots (a touch of crunch and color)
- Leafy greens like baby spinach or butter lettuce (mild and tender)
- Avocado slices or guacamole (creamy and nutritious)
- Spreads & Condiments:
- Mayonnaise or herbed Greek yogurt (for a lighter twist)
- Mustard (mild yellow or honey mustard for sweetness)
- Peanut butter (for a sweet-savory option, check for allergies)
- Jam or fruit preserves (strawberry or grape for a fun flavor combo)
- Extras & Garnishes:
- Pickle slices or relish (optional but adds zing)
- Sunflower seeds or pumpkin seeds (a crunchy surprise)
- Olives, sliced (for more adventurous eaters)
Seasonal swaps are easy too—try fresh basil or cilantro in warmer months, or roasted red peppers when you want something a little smoky. If you need gluten-free options, I’ve had great luck with gluten-free sandwich bread or lettuce wraps as a base. For dairy-free diets, swapping cheese for avocado and using dairy-free spreads works just fine.
Equipment Needed
- A few shallow bowls or small plates for organizing ingredients — I like using colorful ones to make the bar visually appealing.
- A butter knife or spreader for mayo, peanut butter, and jams — kid-safe ones with rounded tips work best.
- Cutting board and sharp knife for slicing veggies, cheese, and meats.
- Small tongs or spoons for handling ingredients — keeps things tidy and germ-free.
- Optional: sandwich cutters or cookie cutters to make fun shapes if you want to jazz things up.
If you don’t have a fancy sandwich cutter, no worries—my kids love the rustic, uneven shapes anyway. Also, a good set of small bowls can be found cheaply at most stores, and they really help keep the sandwich bar organized and inviting.
Preparation Method
- Prep the ingredients: Start by washing and slicing all the veggies. For example, thinly slice cucumbers and cherry tomatoes in half. Shred the carrots and wash the leafy greens thoroughly. This should take about 10 minutes.
- Prepare proteins and spreads: Lay out your deli meats in neat stacks and slice any cheese needed. Hard-boiled eggs should be peeled and sliced or mashed lightly. Place hummus and other spreads in small bowls with spreaders. This step takes around 5 minutes.
- Arrange the sandwich bar: On a large table or counter, set out the breads and bases first. Then place each ingredient in separate bowls or plates—grouping similar items together helps kids navigate the choices. This is the fun part and takes about 5 minutes.
- Invite the kids to build: Encourage your little ones to create their sandwiches however they like. Remind them to use a spread, add protein, veggies, and any extras. Offering guidance on balance and flavor combinations works well for beginners.
- Clean as you go: Keep a damp cloth handy for any spills or crumbs. Kids might get enthusiastic, and that’s part of the fun!
Pro tip: If you want to prep ahead, chop veggies and protein the night before and cover with plastic wrap. Assemble the bar just before lunch to keep bread fresh. Also, watching out for soggy sandwiches is key—encourage spreading condiments thinly to avoid sogginess.
Cooking Tips & Techniques
Even though this recipe isn’t about cooking per se, there are a few tricks I’ve picked up to make your DIY sandwich bar shine.
- Keep bread fresh: Use slightly stale or toasted bread if you want sturdier sandwiches that don’t fall apart. Wrapping the bread in a clean kitchen towel helps it stay soft but not soggy.
- Balance textures: Combining creamy spreads, crunchy veggies, and soft bread creates a satisfying bite every time. I learned the hard way that soggy cucumber slices can ruin a sandwich, so pat them dry before serving.
- Portion control: Offering small plates and modest ingredient amounts helps avoid waste and keeps things manageable for kids.
- Allergy awareness: Always double-check for allergies and provide safe alternatives like sunflower seed butter or dairy-free cheese.
- Engage kids in prep: Letting children help wash veggies or lay out ingredients makes them more excited to eat what they made.
I once forgot to slice the cheese ahead of time, and watching my impatient children try to tear it into pieces was a learning moment. Now I slice everything before setting up and save myself from chaos!
Variations & Adaptations
This easy DIY sandwich bar for kids is incredibly adaptable. Here are some favorite ways I’ve mixed things up:
- Vegetarian Version: Skip deli meats and load up on hummus, avocado, cheese, and an extra rainbow of veggies.
- Seasonal Twist: In summer, swap cucumber and tomatoes for grilled zucchini or fresh corn kernels. In fall, add roasted sweet potato slices or apple slices for sweetness.
- International Flair: Add ingredients like tzatziki, feta cheese, or sliced olives for a Mediterranean vibe, or swap regular bread for naan or flatbread.
- Gluten-free Adaptation: Use gluten-free bread or lettuce wraps instead of traditional bread.
- Personal Favorite: Once, I added a small bowl of salsa and a sprinkle of crushed tortilla chips—kids loved the unexpected crunch and zing.
Feel free to customize with whatever your kids enjoy or what you have on hand. The beauty of a sandwich bar is its flexibility and room for creativity.
Serving & Storage Suggestions
Serve the sandwich bar ingredients at room temperature for best flavor and texture. If you’re hosting a party or playdate, arrange the bar on a kid-friendly height table so everyone can reach easily.
Pair these sandwiches with fresh fruit slices, veggie sticks, or a simple soup for a balanced meal. For beverages, cold milk, juice, or infused water work well.
Leftovers can be stored in airtight containers in the refrigerator for up to two days. Keep breads wrapped separately to avoid sogginess. Reheat wraps or pita pockets gently in a toaster oven or microwave for a few seconds if desired.
One thing I’ve noticed is that flavors develop nicely if you let sandwiches sit for 10-15 minutes after assembling—especially if you included a spread like hummus or Greek yogurt. Just watch out for sogginess if you wait too long!
Nutritional Information & Benefits
This DIY sandwich bar offers a balanced mix of protein, fiber, healthy fats, and vitamins thanks to the fresh veggies and quality ingredients. For example, turkey provides lean protein, while avocado adds heart-healthy monounsaturated fats.
Estimates per serving (varies by choices):
- Calories: 300-400
- Protein: 15-20g
- Fiber: 4-6g
- Fat: 10-15g
- Carbohydrates: 30-40g
It’s naturally gluten-free if you swap the bread for gluten-free options, and you can keep it dairy-free by choosing plant-based spreads and skipping cheese. The fresh veggies provide antioxidants, fiber, and essential nutrients that support growing kids.
From a wellness perspective, I appreciate how this sandwich bar encourages mindful eating and portion control while letting children explore tastes and textures at their own pace. It’s a great way to sneak in extra veggies without a fuss!
Conclusion
If you’re looking for a lunch idea that’s easy, fresh, and actually fun for kids, this easy DIY sandwich bar for kids is a winner. It takes the pressure off you and hands the creativity to your little ones, turning mealtime into a playful adventure.
Feel free to mix and match ingredients based on your family’s favorites or what’s in season. I’ve found that this approach not only reduces food waste but also builds confidence and excitement around healthy eating.
Honestly, it’s one of those recipes that keeps me coming back because it’s simple, flexible, and always gets smiles around the table. I’d love to hear how you customize your sandwich bar or any fun twists you discover, so drop a comment below and share your stories!
Here’s to stress-free lunches and happy, satisfied kids!
Frequently Asked Questions
What are some kid-friendly sandwich fillings for picky eaters?
Mild-flavored options like turkey, cheese, hummus, and avocado tend to be hits. Keep veggies thinly sliced or shredded to make them less intimidating.
How do I keep the bread from getting soggy?
Spread condiments thinly and layer veggies between protein and bread to create a moisture barrier. Toasting the bread slightly can also help.
Can I prepare the sandwich bar ahead of time?
Yes! Prep and slice all ingredients the night before, store separately in airtight containers, and assemble the bar just before serving.
What if my child has food allergies?
Customize the sandwich bar with allergy-friendly options like sunflower seed butter instead of peanut butter, gluten-free bread, and dairy-free spreads.
How can I make the sandwich bar more exciting for kids?
Use cookie cutters to create fun sandwich shapes, offer colorful veggies, and include a variety of textures like crunchy seeds or creamy spreads to keep things interesting.
Pin This Recipe!
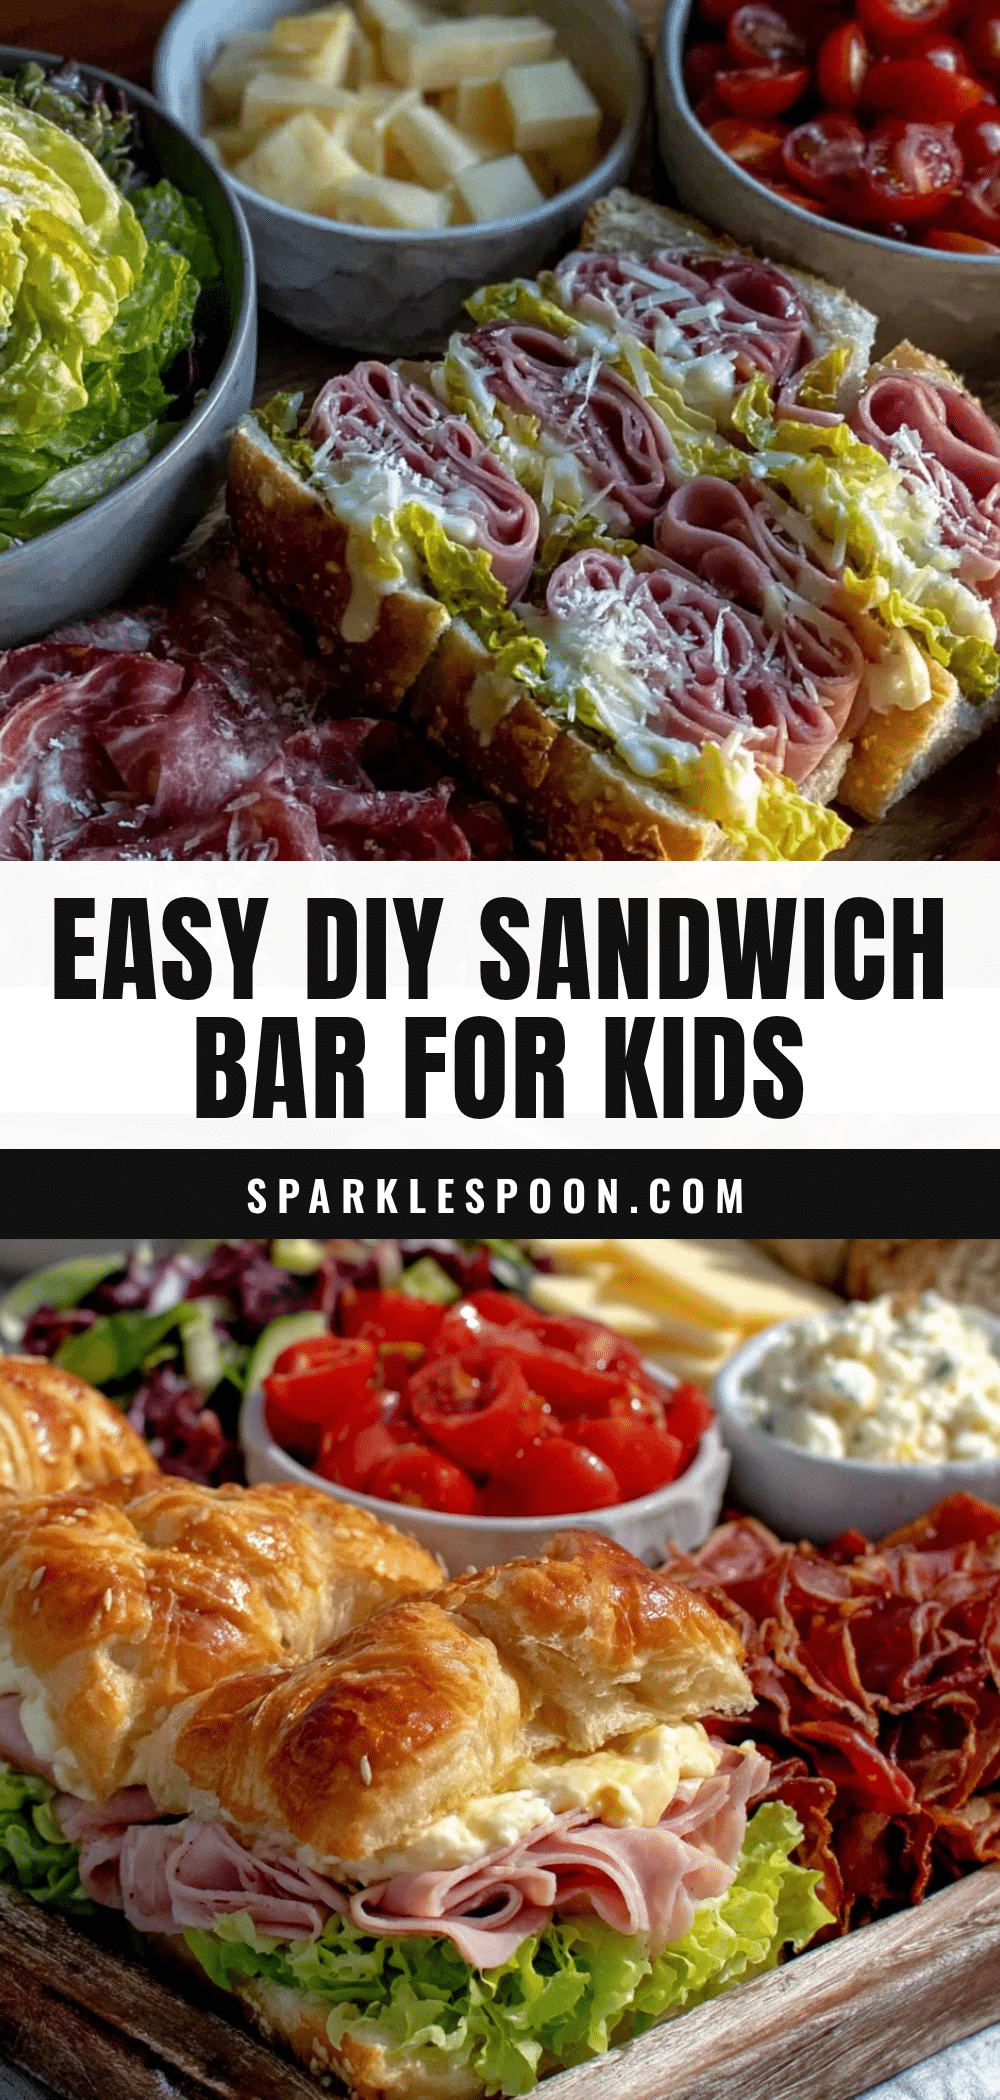
Easy DIY Sandwich Bar for Kids: 5 Fun Fresh Lunch Ideas

A quick and adaptable DIY sandwich bar that turns lunchtime into a fun, interactive experience for kids, using simple, fresh ingredients and minimal prep time.
- Prep Time: 15 minutes
- Cook Time: 0 minutes
- Total Time: 15 minutes
- Yield: 4 servings
- Category: Lunch
- Cuisine: American
Ingredients
- Whole wheat sandwich bread (soft and sturdy for little hands)
- Mini pita pockets
- Wraps or tortillas (cut into smaller rounds)
- Deli turkey slices (low-sodium, nitrate-free)
- Ham or chicken breast slices
- Hard-boiled eggs, sliced or mashed
- Hummus (classic or roasted red pepper)
- Cheese slices or shredded cheddar (mild varieties)
- Thinly sliced cucumbers
- Cherry tomatoes, halved
- Shredded carrots
- Leafy greens like baby spinach or butter lettuce
- Avocado slices or guacamole
- Mayonnaise or herbed Greek yogurt
- Mustard (mild yellow or honey mustard)
- Peanut butter (check for allergies)
- Jam or fruit preserves (strawberry or grape)
- Pickle slices or relish (optional)
- Sunflower seeds or pumpkin seeds
- Olives, sliced
Instructions
- Wash and slice all the veggies: thinly slice cucumbers and halve cherry tomatoes, shred carrots, and wash leafy greens thoroughly (about 10 minutes).
- Prepare proteins and spreads: lay out deli meats, slice cheese, peel and slice or mash hard-boiled eggs, and place hummus and other spreads in small bowls with spreaders (about 5 minutes).
- Arrange the sandwich bar: set out breads and bases on a large table or counter, then place each ingredient in separate bowls or plates grouped by type (about 5 minutes).
- Invite kids to build their own sandwiches, encouraging use of spreads, proteins, veggies, and extras, offering guidance on balance and flavor combinations.
- Keep a damp cloth handy for spills or crumbs and clean as you go.
Notes
Prep veggies and proteins the night before and cover with plastic wrap to save time. Spread condiments thinly to avoid soggy sandwiches. Use slightly stale or toasted bread for sturdier sandwiches. Encourage kids to help with prep to increase excitement. Offer allergy-friendly alternatives as needed.
Nutrition
- Serving Size: One assembled sandwi
- Calories: 350
- Sugar: 5
- Sodium: 400
- Fat: 12
- Saturated Fat: 3
- Carbohydrates: 35
- Fiber: 5
- Protein: 18
Keywords: DIY sandwich bar, kids lunch ideas, easy sandwich recipes, healthy kids lunch, interactive lunch, fresh sandwich bar, quick lunch for kids